
Corona Arch - Moab, UT
If you enjoy my blog, please consider signing up below to get email notifications of my latest posts. I will not share your email.
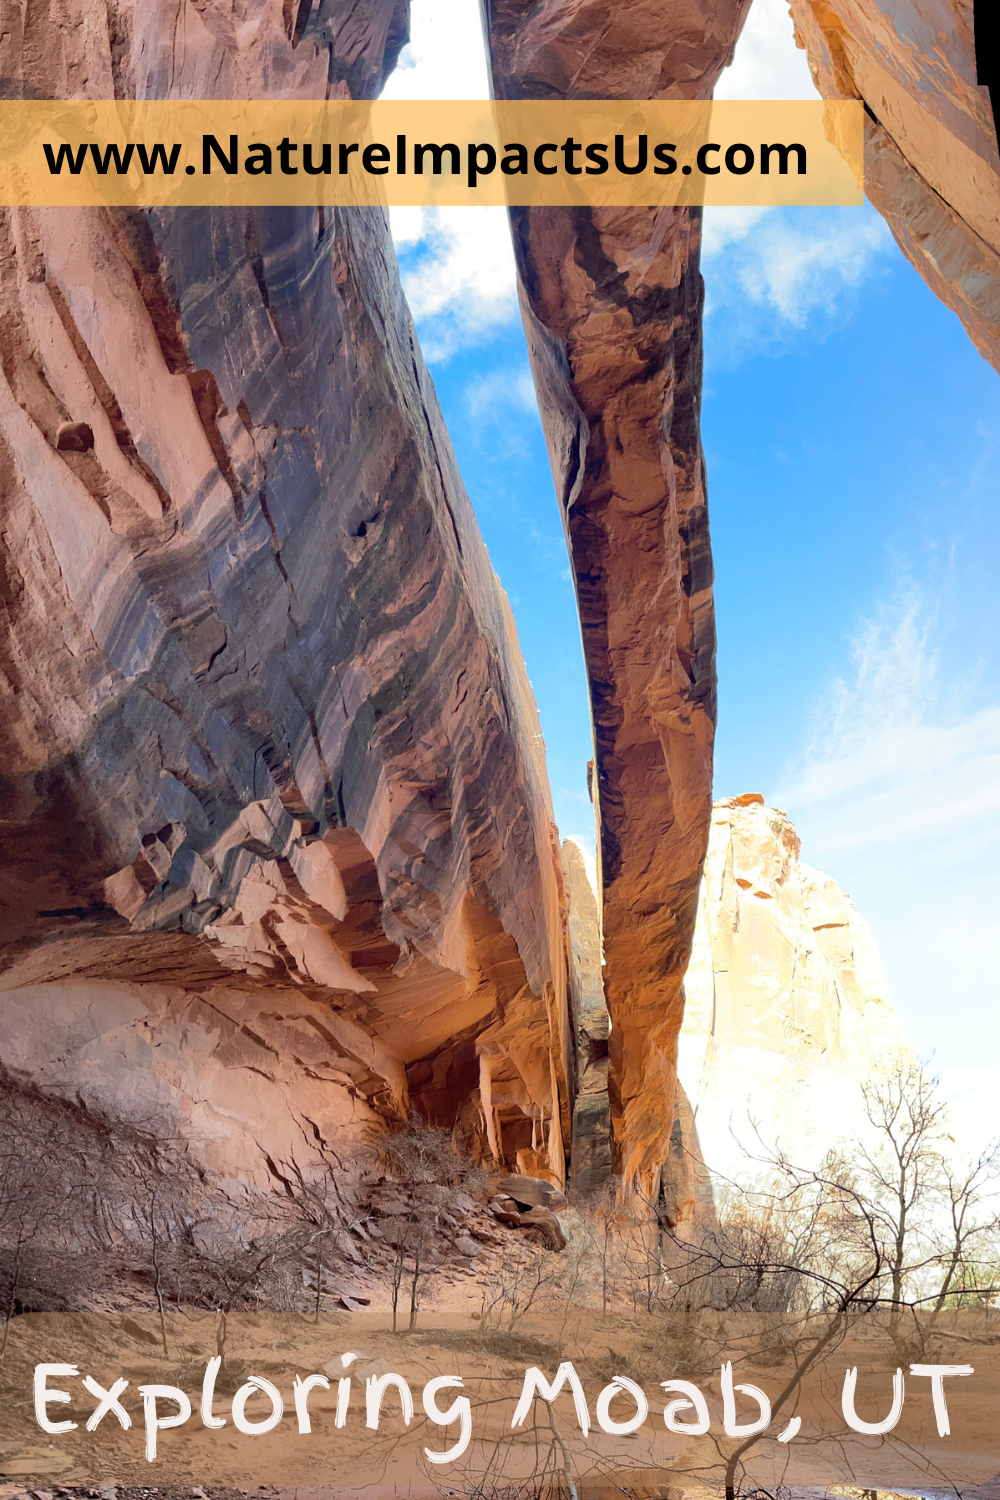
Morning Glory Arch - Moab, UT
Why Plan a Trip to Moab, UT?
Moab has endless amazing hiking options, great places to eat, lots of lodging choices, and extremely interesting people (both residents and tourists). The magical arches, majestic canyons, and humbling dinosaur tracks fascinate me. As of updating this post in April 2023, I’ve traveled to Moab six different times because it’s my favorite city in the United States to visit.
Five of our trips have been over Spring Breaks in the month of March, and I’ve traveled here as well once in October. I don’t know how hot the summers get, but I would assume, it’s a desert, so pretty hot. The trails are not covered in much vegetation, therefore, if you are traveling in the summer, expect the sun with the heat, bring 2 liters of water with you on hikes, and know your limits. Additionally, I’m not sure how much it snows in the winter, but I know it does snow, as I’ve seen it melting in March. I can attest to this being a fantastic Spring Break destination with kids of all ages. My youngest was 2 his first time here, and we’ve traveled here with multiple high school-aged exchange students, as well as with my parents. There are easy trails, hard trails, and tons of rocks to climb up, down, around, and through.

Tower Arch - Arches National Park
Where to Hike in Moab, UT?
Below is a proposed 6-day hiking itinerary that would allow you to spend 6 nights all in the same hotel or campsite in Moab, UT. The days are organized by color, and this itinerary is designed for those that love hiking and rock scrambling. I’ll indicate the difficulty of the trails, distance and elevation stats, as well as potential obstacles that may be tricky if mobility is a concern. At the end of this post, I’ve added some other destinations you may want to include on your Moab road trip, as the downside to visiting Moab is not having a major airport nearby. It takes some driving to get here. No worries though, there are many awesome places to explore in Utah to make your entire trip memorable.
I’m making an assumption on days 1 and 6 that you are driving into Moab from the North and leaving from the South. Obviously, this can be reversed, or you could drive in and out the same way.

Five Day Hiking Agenda for Moab
Day 1 - blue, Day 2 - orange, Day 3 - yellow, Day 4 - green, Day 5 - red, Day 6 - purple
Day 1 - Dinosaur Tracks and Kane Creek
Day 1 destinations are in the blue pins on the map above. These are non-crowded, shorter trails, assuming that you have been driving at least a few hours but still want to have some fun exploring a bit before finding supper and your hotel or campsite. There’s no need to feel like you need to rush through your first day. Take your time getting here, and just enjoy the journey.
Mill Canyon Dinosaur Tracks
0.40 miles / elevation gain - N/A
Easy boardwalk trail

Mill Canyon Dinosaur Track Trail - Just north of Moab
First stop - Dinosaur Tracks! As you are driving into Moab along US 191, before arriving in Moab, head to the Mill Canyon Dinosaur Track Trail. GoogleMaps will get you there. The roads are easy to drive on. I’ve tried exploring around Moab to find other tracks, and have almost gotten stuck in the sandy roads. Mill Canyon is extremely accessible in any type of vehicle.

Therapod footprints
As of visiting this site again in March 2023, there is a nice large parking lot, and the trail now goes along a board walk to preserve the dinosaur footprints. There are several different types of tracks made by different types of dinosaurs, and there are interpretive signs along the way explaining what is known about who left each footprint.

Signs explaining the dinosaur tracks at Mill Canyon
Kane Creek - Kane Springs Road
The next three stops are all along Kane Creek - Kane Springs Road. This road is steep and curvy. I think any car is probably fine along this road, but just emphasizing again, that there are places along this drive that are pretty steep. I was driving a rental truck, but high clearance is not needed for this road.

Kane Creek Map
Birthing Scene Rock
Mileage - A few steps from the parking pullout / elevation gain - N/A
A slight incline is needed to get down to the rock, but take your time and it’s pretty accessible.

Birthing Scene Petroglyphs - Moab, UT
The first stop on Kane Springs Road is the Birthing Scene. You can get to the right pullout using GoogleMaps. Once you park though, it’s not obvious where to go as there aren’t any signs. The rock is pretty big, and it’s down the hill from where you parked, in the valley. Walk a few steps along the road in the direction you came in from and it will be on your left, down below you. There is a small wooden fence around the rock to protect the petroglyphs.
Often when I look at petroglyphs I think the story could be just about anything. This one is pretty obvious though. It’s about a baby being born and taking the first steps of life.
Funnel Arch
0.4 mile out-and-back trail / elevation gain - 250ft
The trek to Funnel Arch involves a sketchy bit of rock scrambling, and some sense of trust that you know where you are going as the trail is not marked very well. If traveling with very young children or if mobility is concern, skip this hike and enjoy walking further along the next trail listed below instead. Also, skip this trail if the slickrock is wet or there is snow present.

Funnel Arch - Moab, UT
If you have stopped at the Birthing Stone Petroglyphs, likely you will have now lost cell service, and you won’t be able to enter a new destination into your GoogleMaps app. That’s ok, the pullout for Funnel Arch is literally just around the bend in the road. This pullout is going to be on your left. I have the map above to show you just how close these pullouts are to one another.

View of the Kane Canyon from the pullout
This is a really pretty canyon, and likely you will find it quiet as I don’t think the area is very well known. There was just one other group of hikers that were residents on the day we hiked.
Similar to the Birthing Stone, you won’t find any signs when you park. It’s just 0.2 miles to the arch, but you can’t see it from where you park. Walk essentially straight ahead of you, and go up into the hills this time (not down) There is going to be a very dramatic rock scramble to get up (shown below). Once you get up this section, it’s relatively easily although the uphill slope continues. Funnel Arch will be just slightly off on your right once you get up this section, and it’s not very long that you will walk before you will see it ahead of you.
Even though it’s just 0.2 miles to the trailhead, and 0.2 miles back, this is a difficult hike. My boys were 10 and 14 when we hiked. Honestly, I think kids as young as 6 or 7 are likely going to be able to handle this trail better than their parents. Younger than that though, I’m not sure I’d recommend this trail even though it’s short.
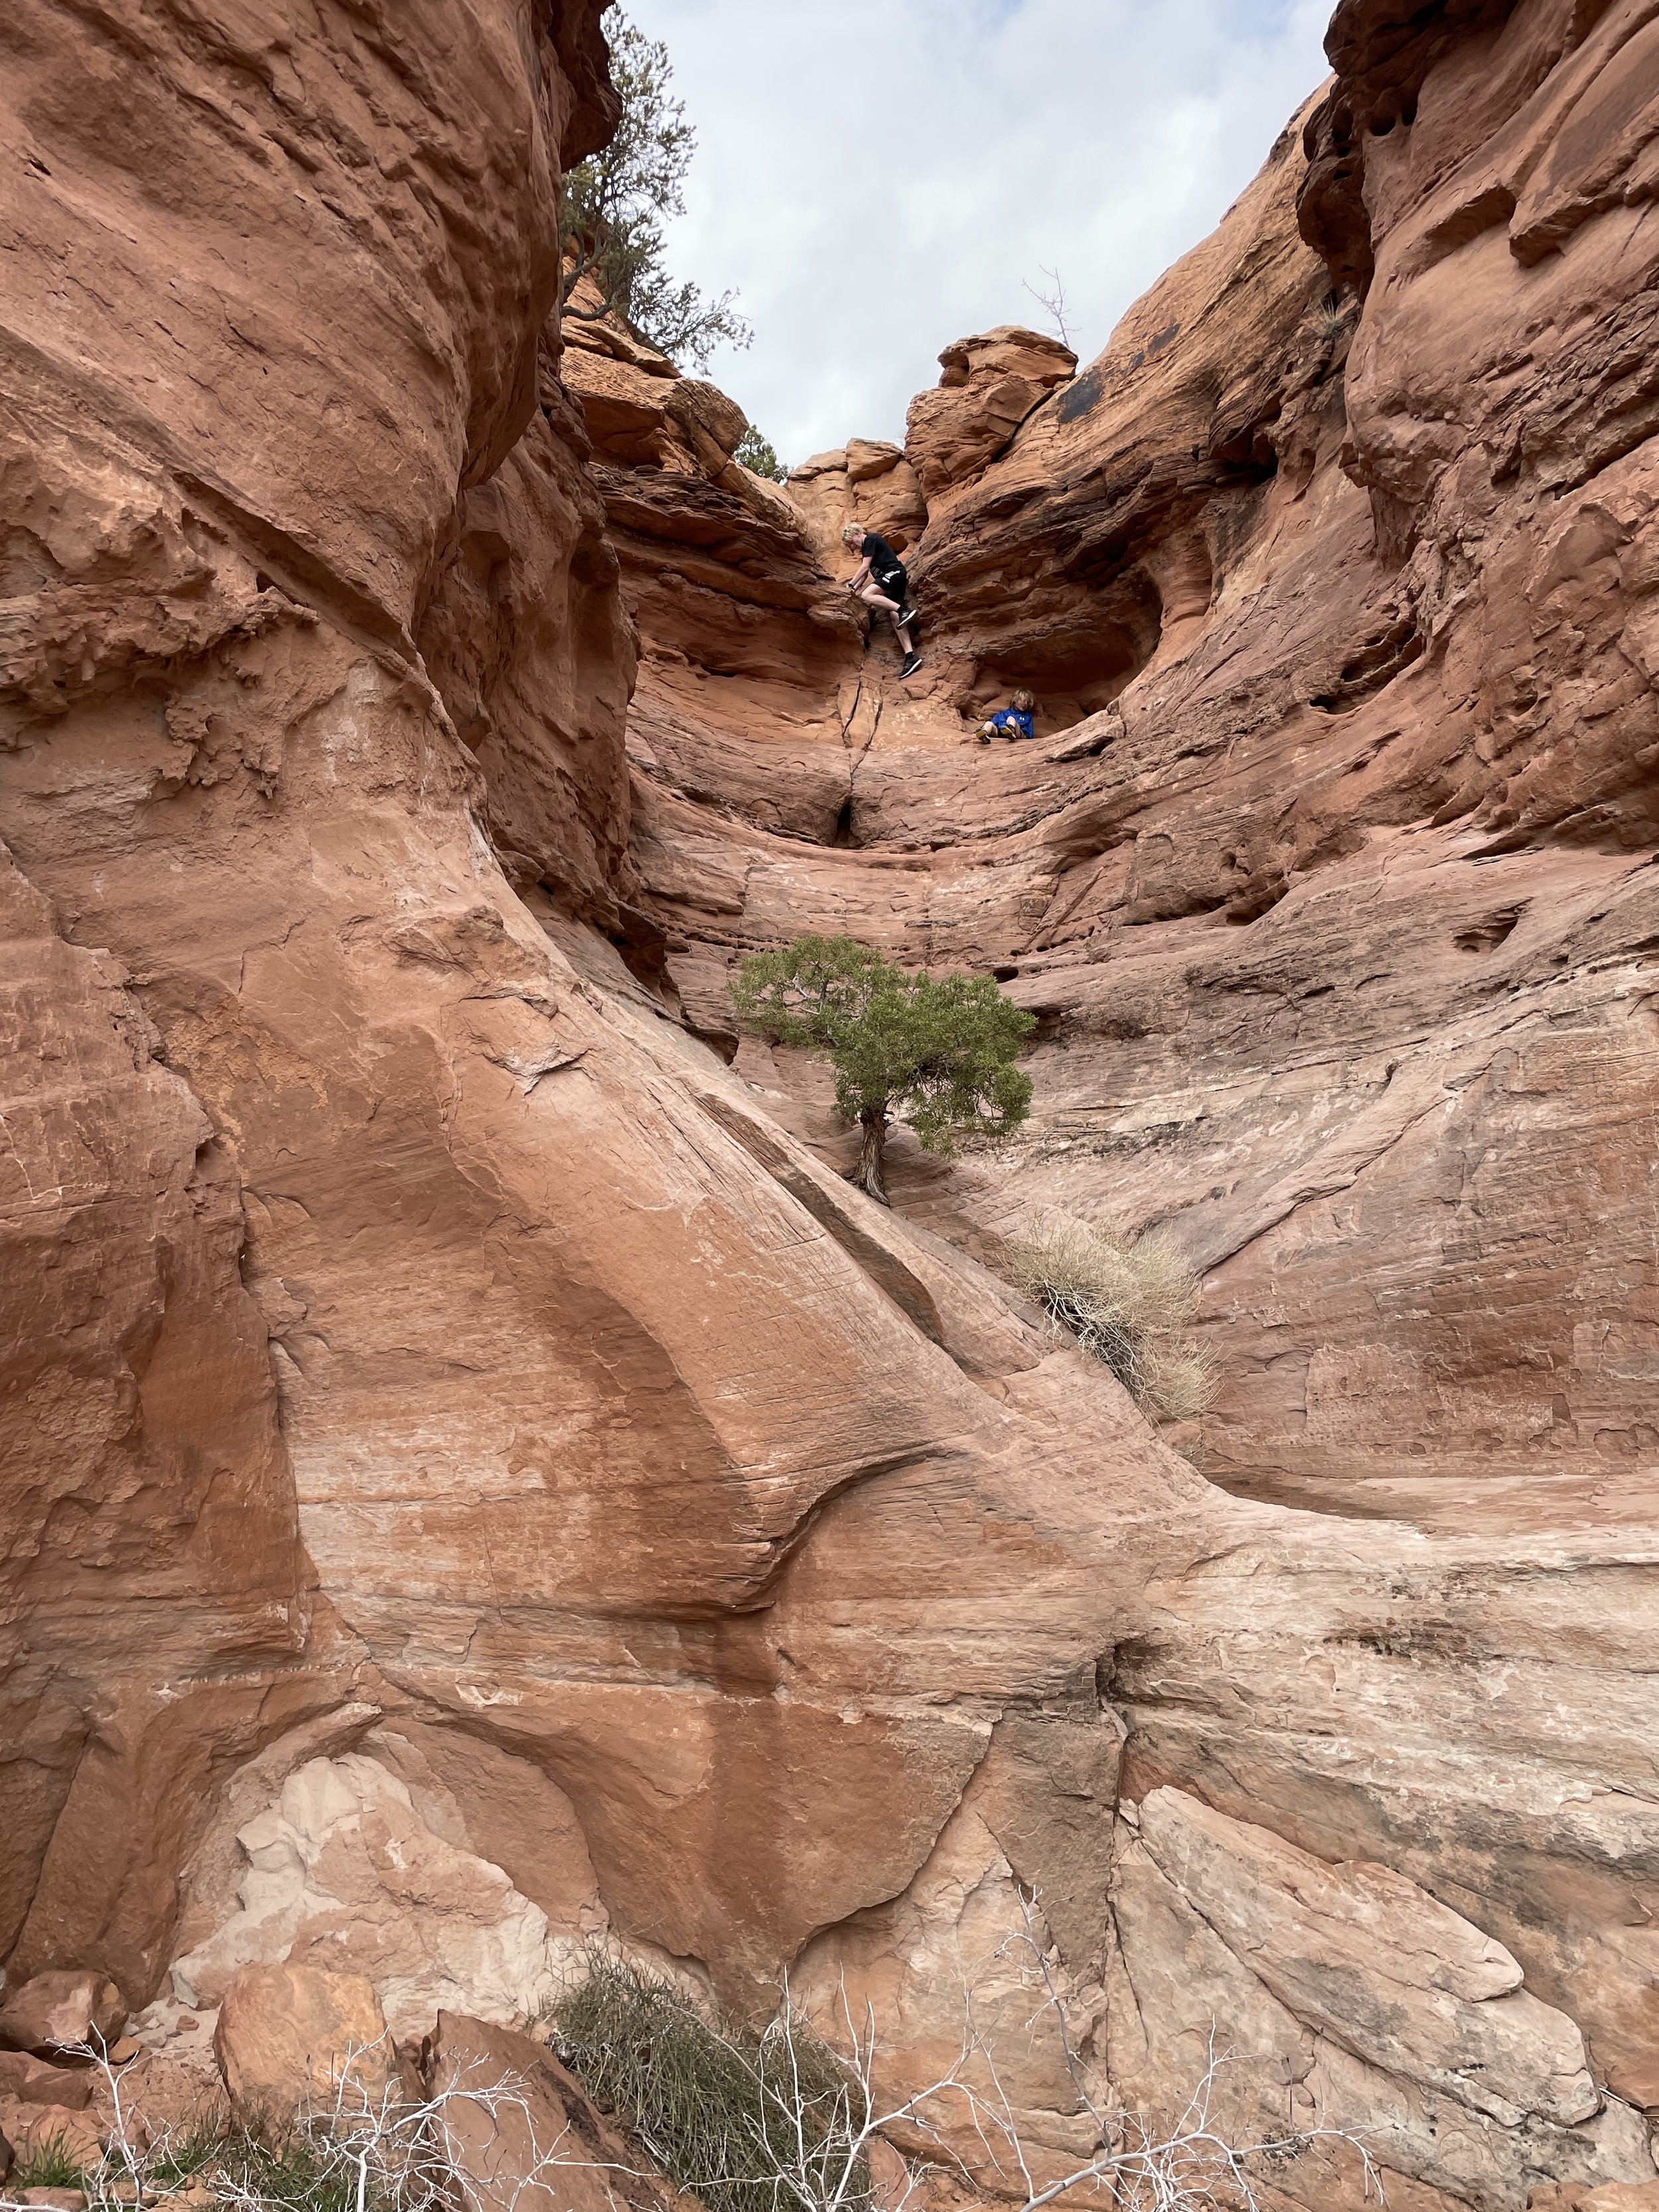
Funnel Arch requires a pretty dramatic rock scramble
Here’s Funnel Arch - a secret, huge arch, hidden outside of the National Park boundaries.

Funnel Arch - Moab, UT
It’s a short but pretty walk back to the trailhead.

Hiking back to the Funnel Arch Trailhead
Hunter Canyon
1 mile out-and-back trail / elevation gain - 100ft (to Hunter Arch)
4 mile out-and-back trail / elevation gain - 250 ft (Complete Hunter Canyon Trail)
This is an easy trail through a beautiful quiet canyon.

Hunter Arch - Moab, UT
Similar to the Funnel Arch Trailhead, if you’ve mapped a previous stop along Kane Spring Road, you’ve likely lost cell service and won’t be able to map your route to get to Hunter Canyon. I included the map above, so you can see where the trailhead is located in reference to Funnel Arch, but I don’t think you need it. Just keep driving along Kane Spring Road. The road will descend to the bottom of the canyon. The trailhead for Hunter Creek includes a campground, so it’s a large parking lot with a decently large sign. I don’t think you can miss it. It’s not a confusing place to find.
Hunter Canyon - Moab, UT
We hiked this trail simply to see Hunter Arch and then turned around. This resulted in just over a mile of hiking. If you want to travel all the way to the end of the Hunter Canyon Trail, it’s a total of 4 miles. This trail stays along the bottom of Hunter Canyon, so the elevation change is minimal, making this an easy hike, no matter how far you choose to go.

Hunter Canyon - This isn’t the arch - keep going
Moab can get rather crowded with tourists, but spoiler alert, there’s no one on this trail. I’d actually never heard of Hunter Canyon, Hunter Arch, or Kane Creek, until we finished hiking Morning Glory Bridge (keep reading below) and still had a lot of time left in the day. We talked with some avid hikers that lived in Moab, and they suggested Hunter Arch. What a beautiful canyon. Most likely, you're reading this itinerary thinking 6 days in one city is too much, and you’re looking for hikes to cut out of this list to shorten your time. This hike is probably the one that goes because you haven’t heard of it. But if you get tired of the crowds in Moab, I strongly suggest you come here to enjoy the quiet and let nature heal you - it is a vacation after all.

Hunter Canyon - Moab, UT
The trail follows alongside a quiet creek. The water was deep enough when we were here in March that it was consistently flowing, but we only heard it gurgling and rippling along when we stopped talking.

Trail to Hunter Arch passes under a rock tunnel
The trail goes under a small tunnel just before you will see Hunter Arch. Again, I can’t quite say enough about this hike. Had we had more time, I would have loved to keep hiking the entire trail.

Hunter Canyon - Moab UT
Hunter Arch will be up on your right. You can take a spur and scramble up as far as you’d like. It’s slickrock straight up, so if you want to go all the way up, you would be able to. This was far enough for me.

Hunter Arch
Day 2 - Arches National Park
Day 2 pins on the map are in orange.
Arches National Park does have a Timed-Entry Reservation System at certain times of the year (April - October as of updating this post in 2023). Please check into this on the Arches National Park website to see if you are traveling at a time when you need to apply for a reservation, and plan to get one early enough that can reserve a spot on the day(s) you plan to visit. The easiest way to do this is to figure out from the Park’s website how early you can reserve your spot, set an alarm for that day on your phone for 8:00am Mountain Time, and log in as soon as your alarm goes off.
I have a whole blog post dedicated to the hikes in Arches. Below is the link where you can get additional information on each trail.
The entrance to Arches can get busy. Plan to enter the park by 8:00 to avoid the longer lines.

Landscape Arch and Partition Arch
Good morning! It’s day 2, and you are in my favorite National Park! Start your day out with a hike to the longest arch in the world - Landscape Arch, which spans 290ft across. The trailhead starts at Devil’s Garden. Drive into the park and head all the way to the end of the road.
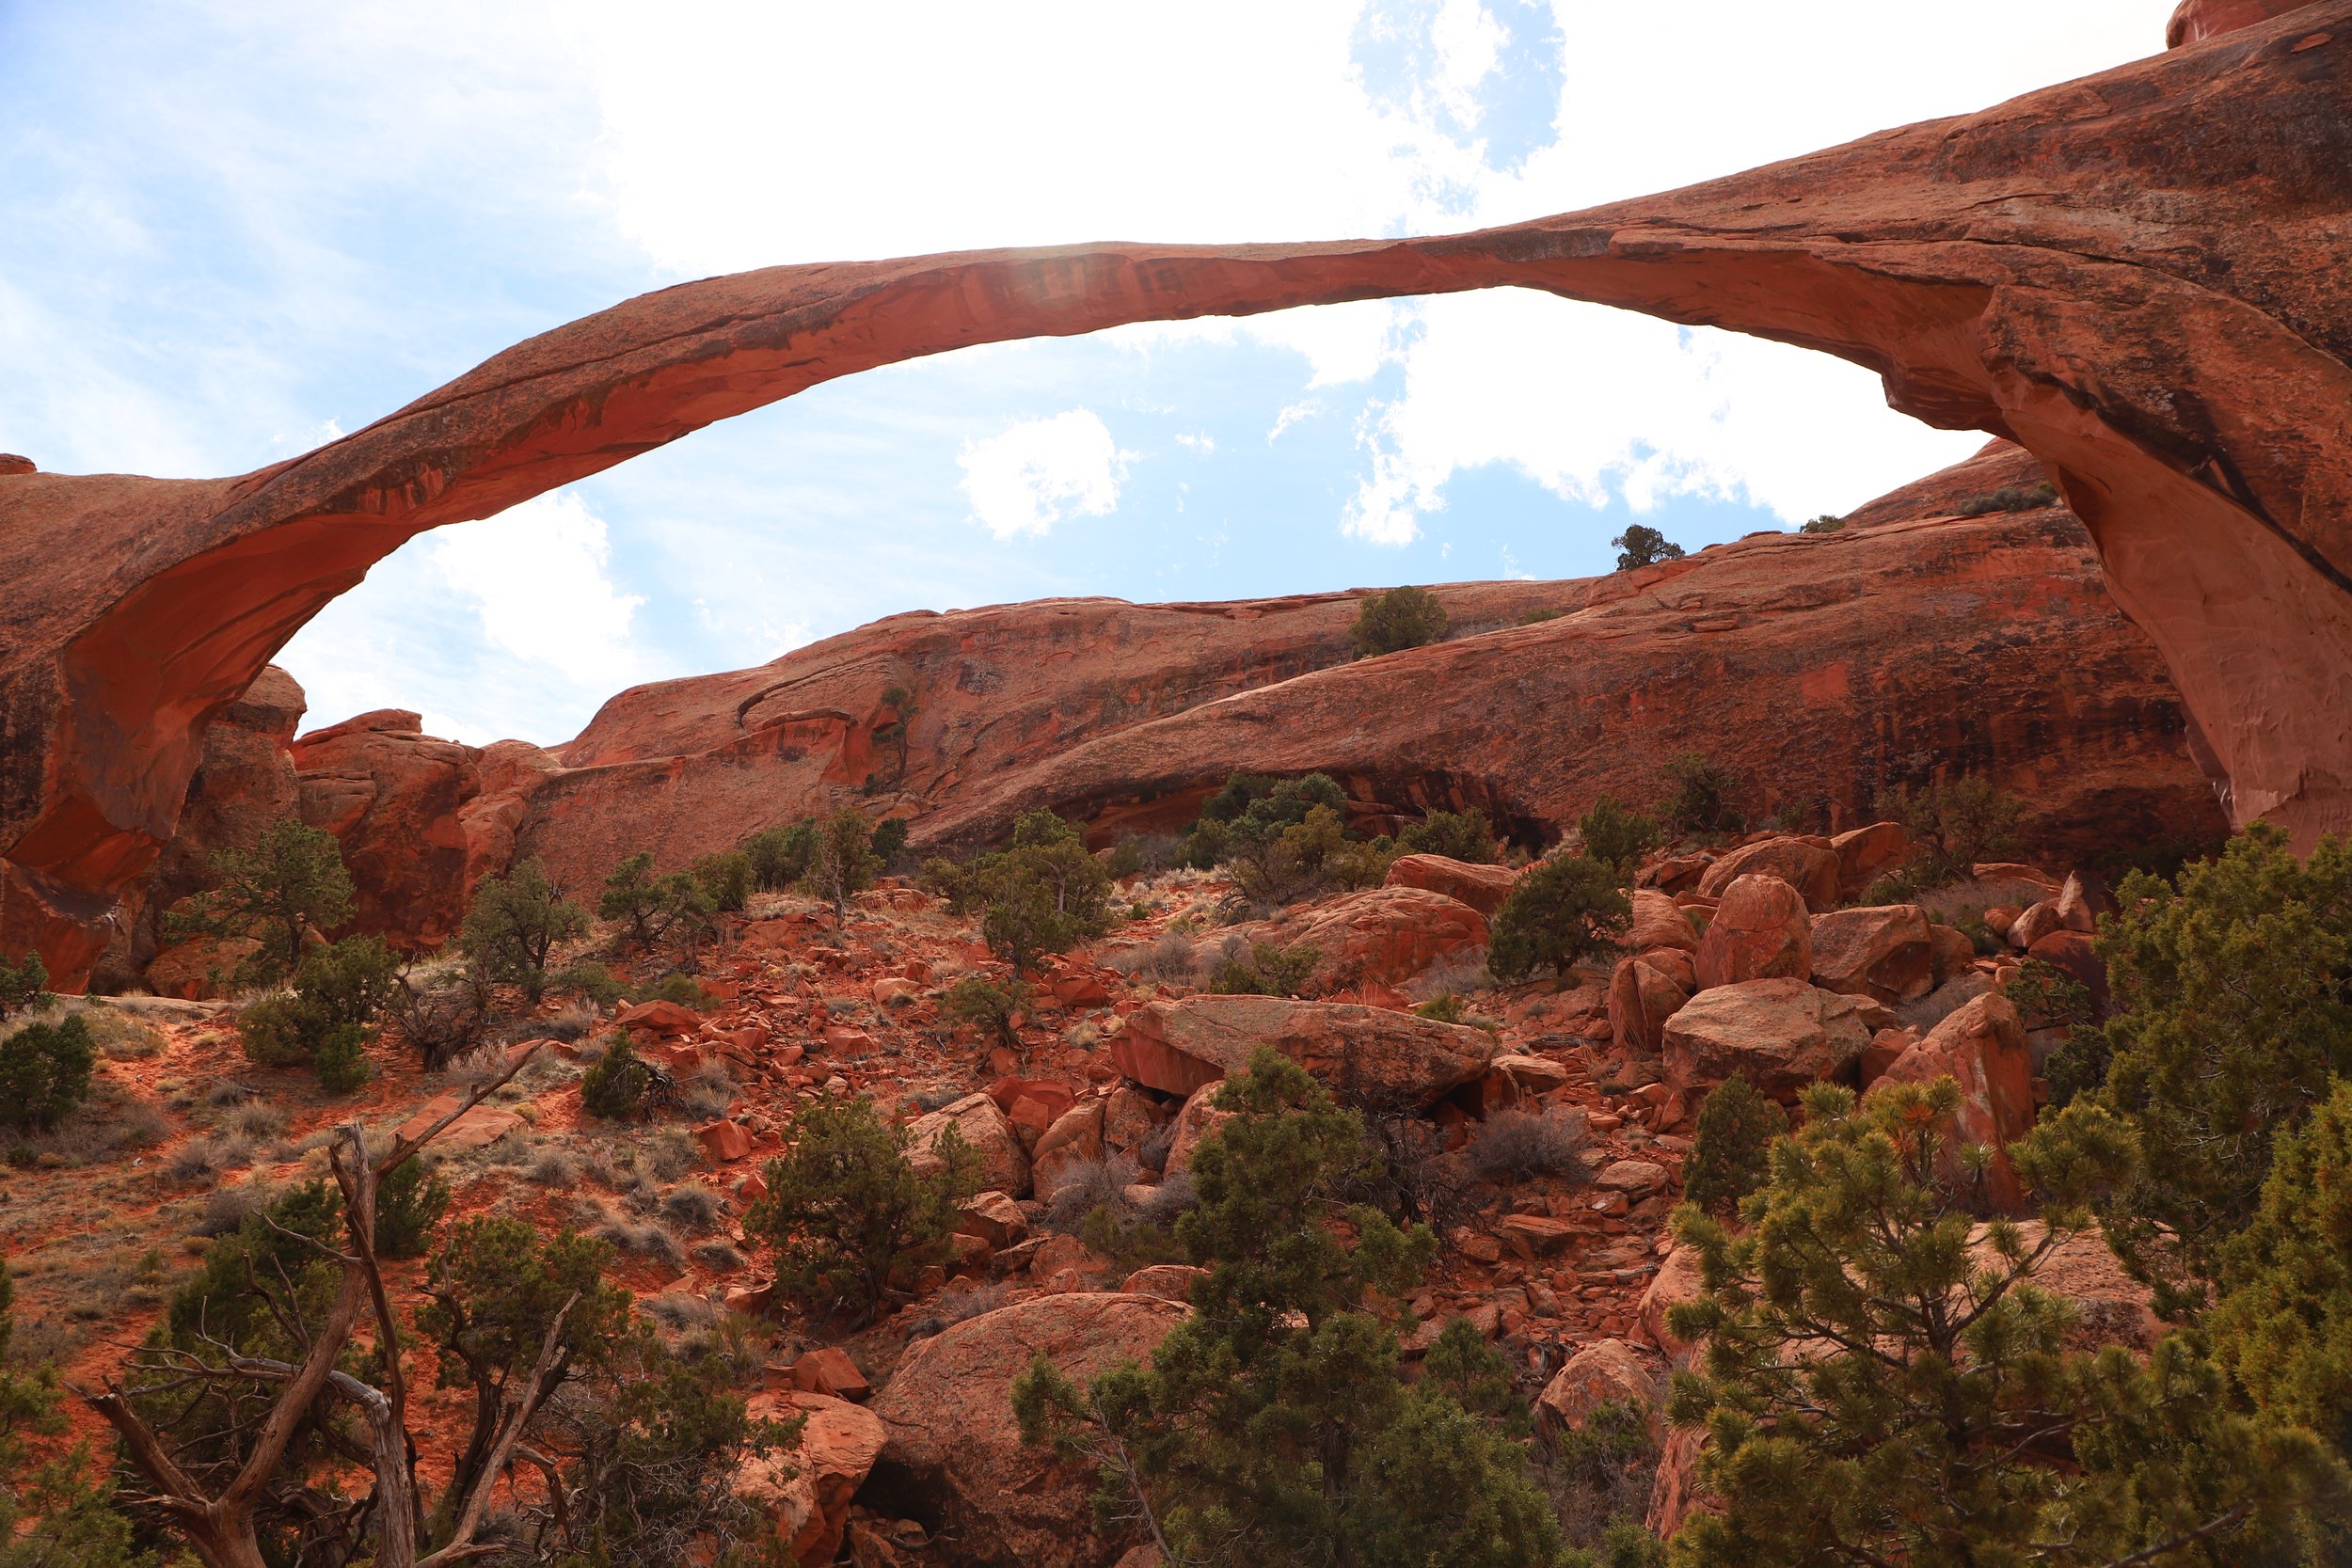
Landscape Arch - Arches National Park
If you turn around and head back to your car after Landscape Arch, your hike will be 1.8 miles with an elevation gain of 40ft. This is an easy hike. You can also see Tunnel Arch and Pine Tree Arch along the way. Reference my Arches post for more information
If you are up to hike a little bit further, my favorite arch in the National Park is the next one as you continue down the trail - Partition Arch (and when I say “down the trail” note that it’s a decent climb up the trail that you’ll need to plan for as this arch visible on the hillside to the right of Landscape Arch)

Partition Arch - Arches National Park
If you turn around and head back to your car after Partition Arch, your hike will be 2.8 miles with an elevation gain of 469ft. This is a moderate hike. There is one tight squeeze through a narrow spot in-between rocks to get there. Reference my Arches post for more information. This would be my recommended stop point if you want to keep going with the other hikes I have listed for the day.
If you decide you want to hike the entire Devils Garden Loop and see Double O Arch, with all spurs to arches - it’s a 7.9 mile loop with 650ft in elevation gain. I’m not sure how many miles you hike in a day, but if you choose to hike the whole thing, that might be your whole day. One note, in case you haven’t opened my Arches post, plan to hike the Devil’s Garden Loop counter clockwise and hit Partition Arch on your way back. There is a steep section of slickrock along the trail that is easier to hike up than down.

Double O Arch - Arches National Park
Tower Arch
2.60 miles / elevation gain - 525ft
This is a moderately difficult hike due to the elevation gain and the sandy trail. If you scramble all the way up to the arch, this becomes moderately difficult as it does require actual rock scrambling to get there, although the distance to do so is minimal.
The road out to Tower Arch is only passable when it’s dry. Check in with the Park Rangers at the Visitor Center to verify road conditions before you try driving out here. The split for the Tower Arch road is near the parking lot for Sand Dune Arch. I’d consider this trail as close to a “secret” as a hike can be in Arches National Park.
Reference my Arches post for more information.
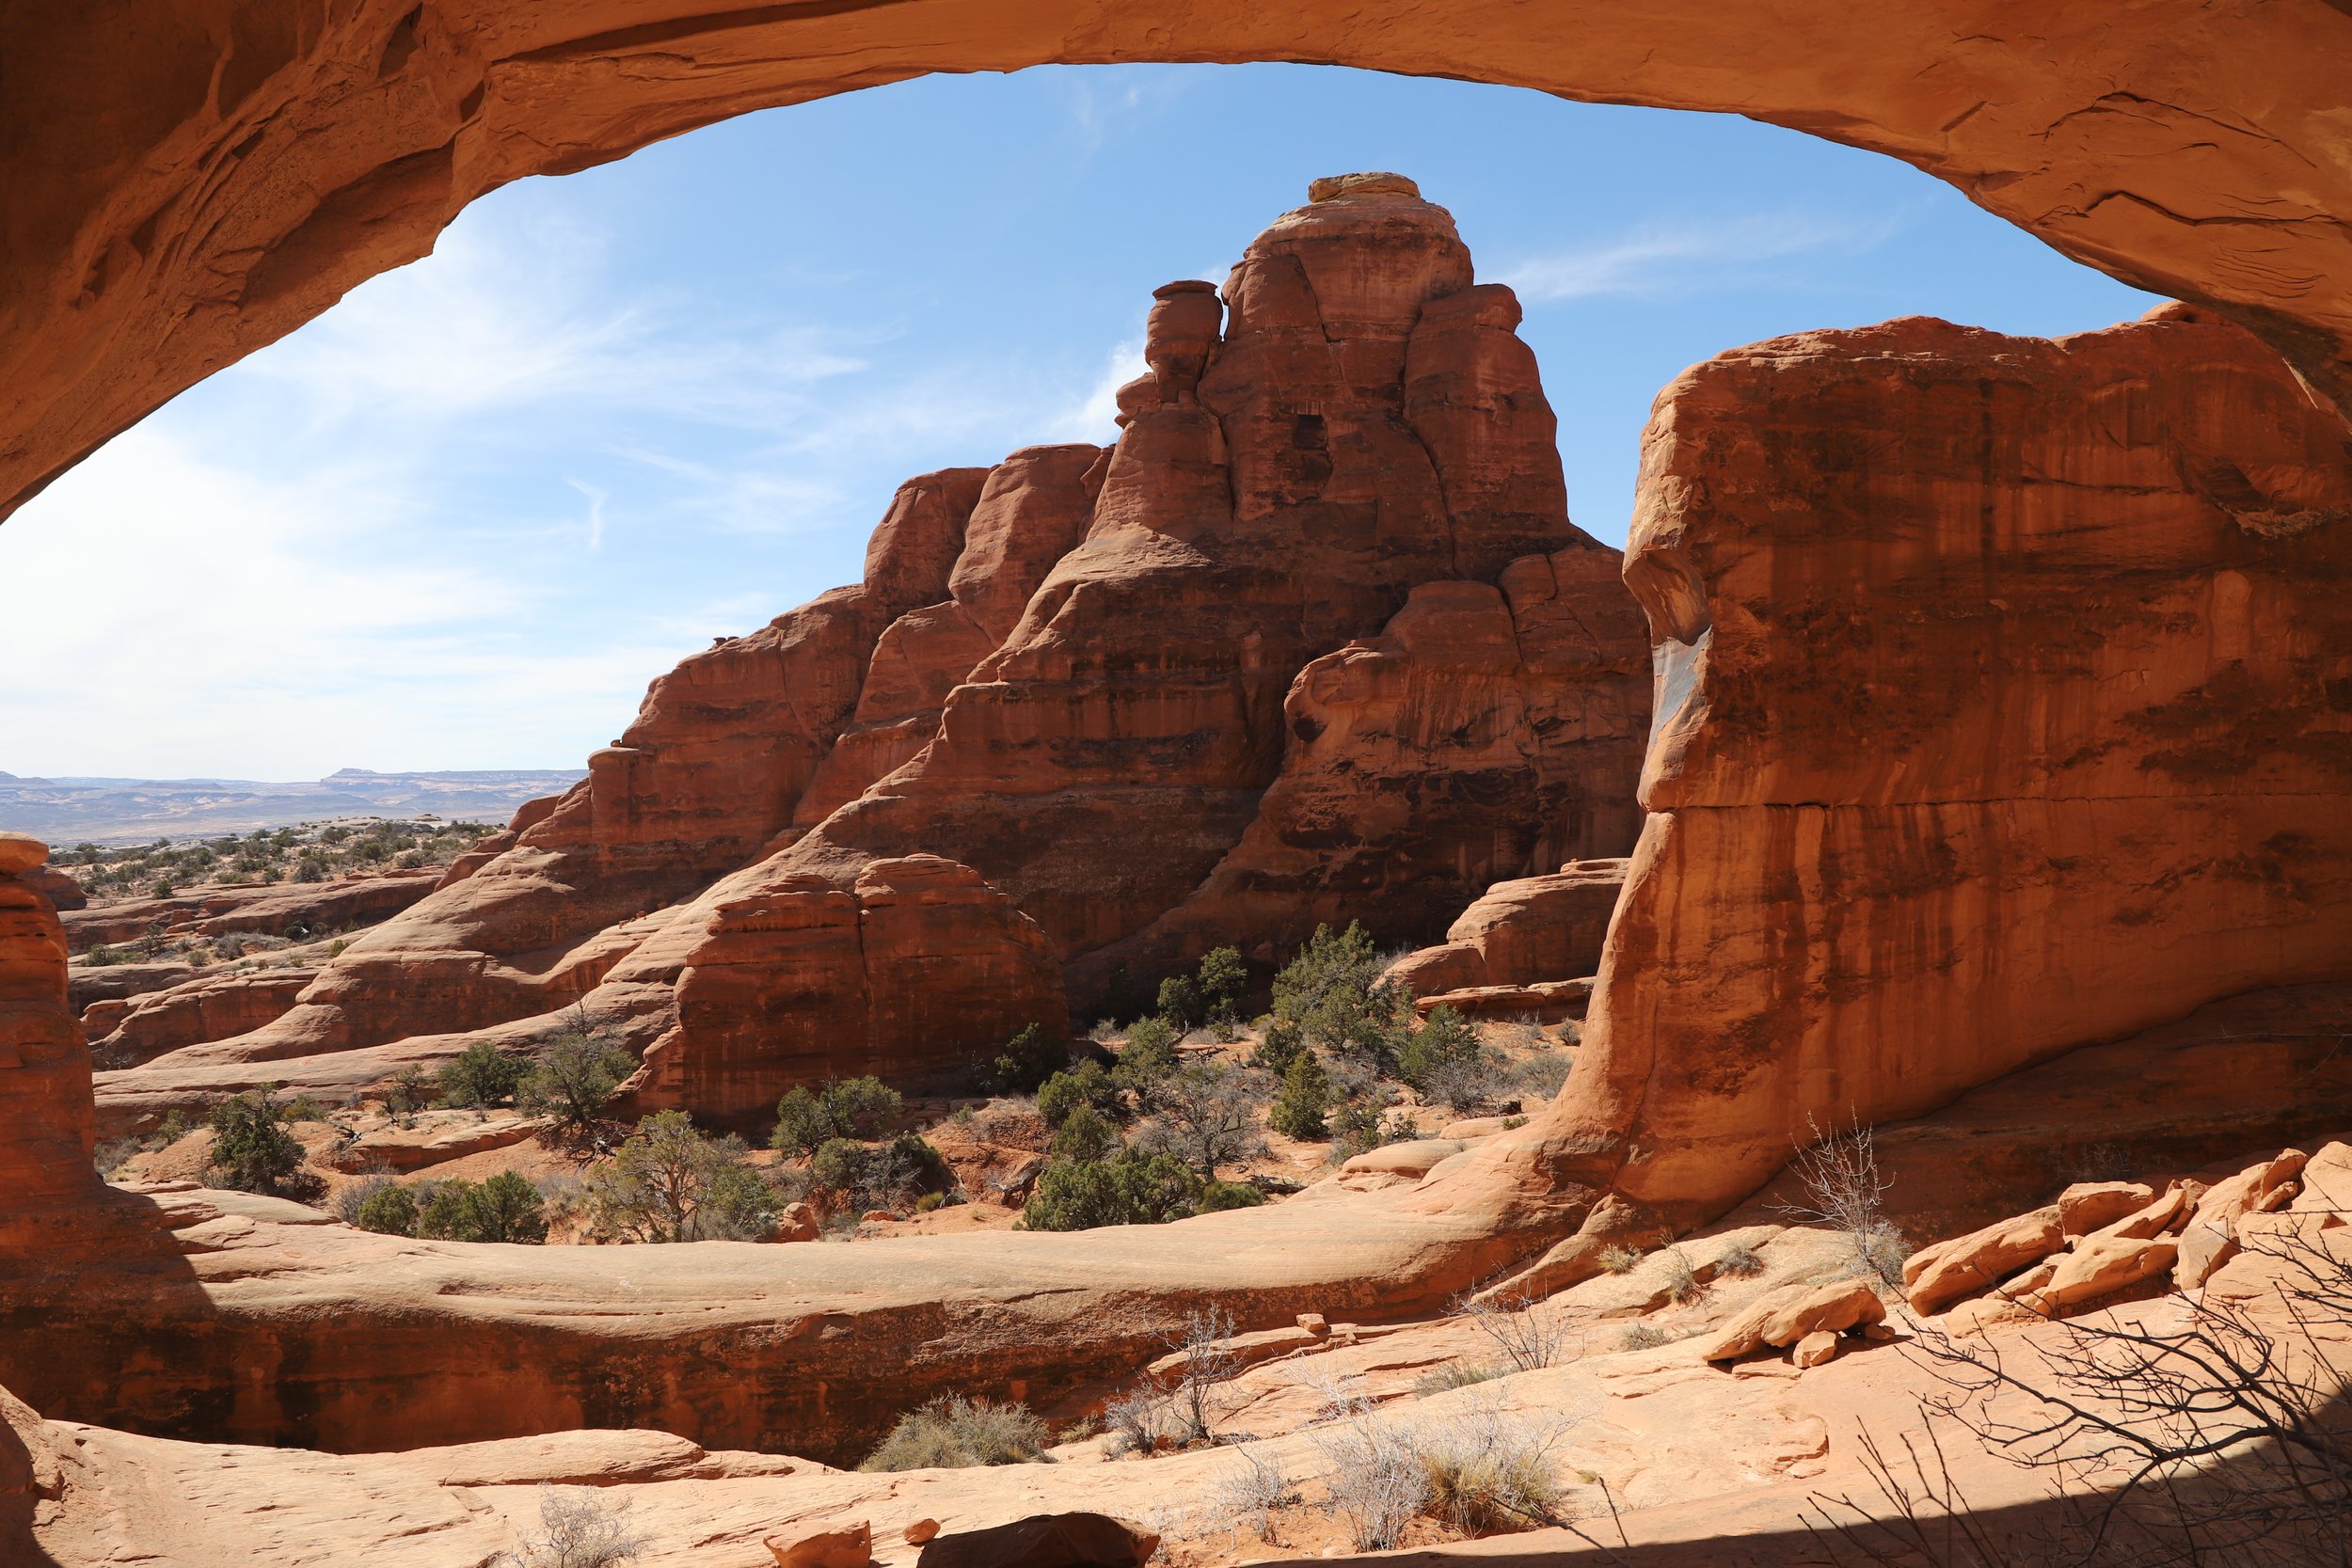
View from under Tower Arch - Arches National Park
The Windows Section
If you happened to hike the entire Devil’s Garden Loop, save these next hikes for Day 3.
The last two hikes can occur from the same parking spot with just a short distance of walking in-between.
Double Arch
0.50 miles / elevation gain - N/A unless you climb to the top of the arch base (~150ft)
This is an easy hike, unless you want to scramble up to the top for a picture at the base of the arch, in which case I’d rank this as moderately difficult due to the scramble up that’s needed. I did make it up successfully with a 2 year-old who had already fallen in love with rock climbing by this point in his life, so I wouldn’t put an age restriction on this hike.
Reference my Arches post for more information.

Double Arch - Arches National Park
North and South Windows and Turret Arch Loop
1.0 mile / elevation gain - 100ft
This is an easy hike the whole way, and potentially one that you may be thinking of dropping due to trying to squish a lot of miles into less days. My only caution will be that you will see pictures of these arches in your hotel room and in the restaurants in Moab, which may end up bugging you if you decide to skip out on them.
Reference my Arches post for more information.

Turret Arch - Arches National Park
Day 3 - Arches National Park
Day 3 pins on the map are in yellow.
My itinerary for Day 3 requires a special permit that you need to purchase beforehand. This is a separate fee than is required to enter Arches National Park, and I promise, it’s worth it.
To get a permit to Fiery Furnace, same as I recommended for the Timed Entry, check the Arches National Park website to see how early you can obtain it. Set an alarm for that day at 8:00am Mountain Time and purchase it when the alarm goes off.
Note: I’ve only travelled to Arches in March, since the Timed Entry System has been implemented, and Timed Entry was not required in March (as of 2023). I think though, that if you have a Fiery Furnace Permit, you do not need to also get a timed entry into the park. Double check the current requirements on the National Park website, and call if you aren’t sure with the information provided.
Back to Day 3: My advice for day 3 - It’s your vacation - sleep in. The busiest times to get into the park are mid-morning. Plan on missing the line. Sleep in, go shopping in Moab to find souvenirs, and hit the park entrance today after noon, when the line to get in has died down some.
Fiery Furnace
I’m going to list “N/A” for both the mileage and elevation gain in the Fiery Furnace as there isn’t a defined trail. You will start your day at the Visitor Center to pick up your permit and watch the video on protecting the land in this section of the park because it does not have a trail.
Plan to spend 2-3 hours, and maybe a hike of 2-ish miles. This is a moderately difficult hike, not due to elevation gain, but there are places that you need to squeeze, or climb up or down, with a slight amount of rock scrambling.
My sons were 10 and 14 when we hiked this part of the park, and I think it was one of the highlights of our Spring Break Trip. We did not have a map or a guide, we simply explored. There are small, subtle white arrows that you may find along the way, and they do highlight a potential loop you could travel.
Reference my Arches post for more information.

Fiery Furnace - Arches National Park
Delicate Arch
3.0 miles / 480ft elevation gain
I’m suggesting the hike to Delicate Arch towards the end of the day, so you have the opportunity to see it at sunset, if you wish. Just makes sure that you have flashlights or headlamps with you, so you can see the path on your way back if you stay out after dark.
The hike up Delicate Arch includes a steep incline along slickrock. If the rocks are wet or covered in snow, skip this hike as slickrock is very slippery when it’s wet. There’s no switchbacks on this trail - it’s straight up and down. If you have a good pair of shoes or hiking boots and dry rock, you’ll scale up the slickrock feeling a bit like a mountain goat.
The other thing to realize about this trail is that there is one section, just before you get to Delicate Arch, where the trail narrows and there’s a significant drop-off. The trail is still wide enough for two people to walk side-by-side, but there isn’t a railing or anything on the other side. If you are nervous about heights, this might not be the trail for you.
My last comment about this trail is that everyone hikes Delicate Arch. There’s going to be a lot of people along the entire trail, no matter what time of the day you plan your hike.
Reference my Arches post for more information.
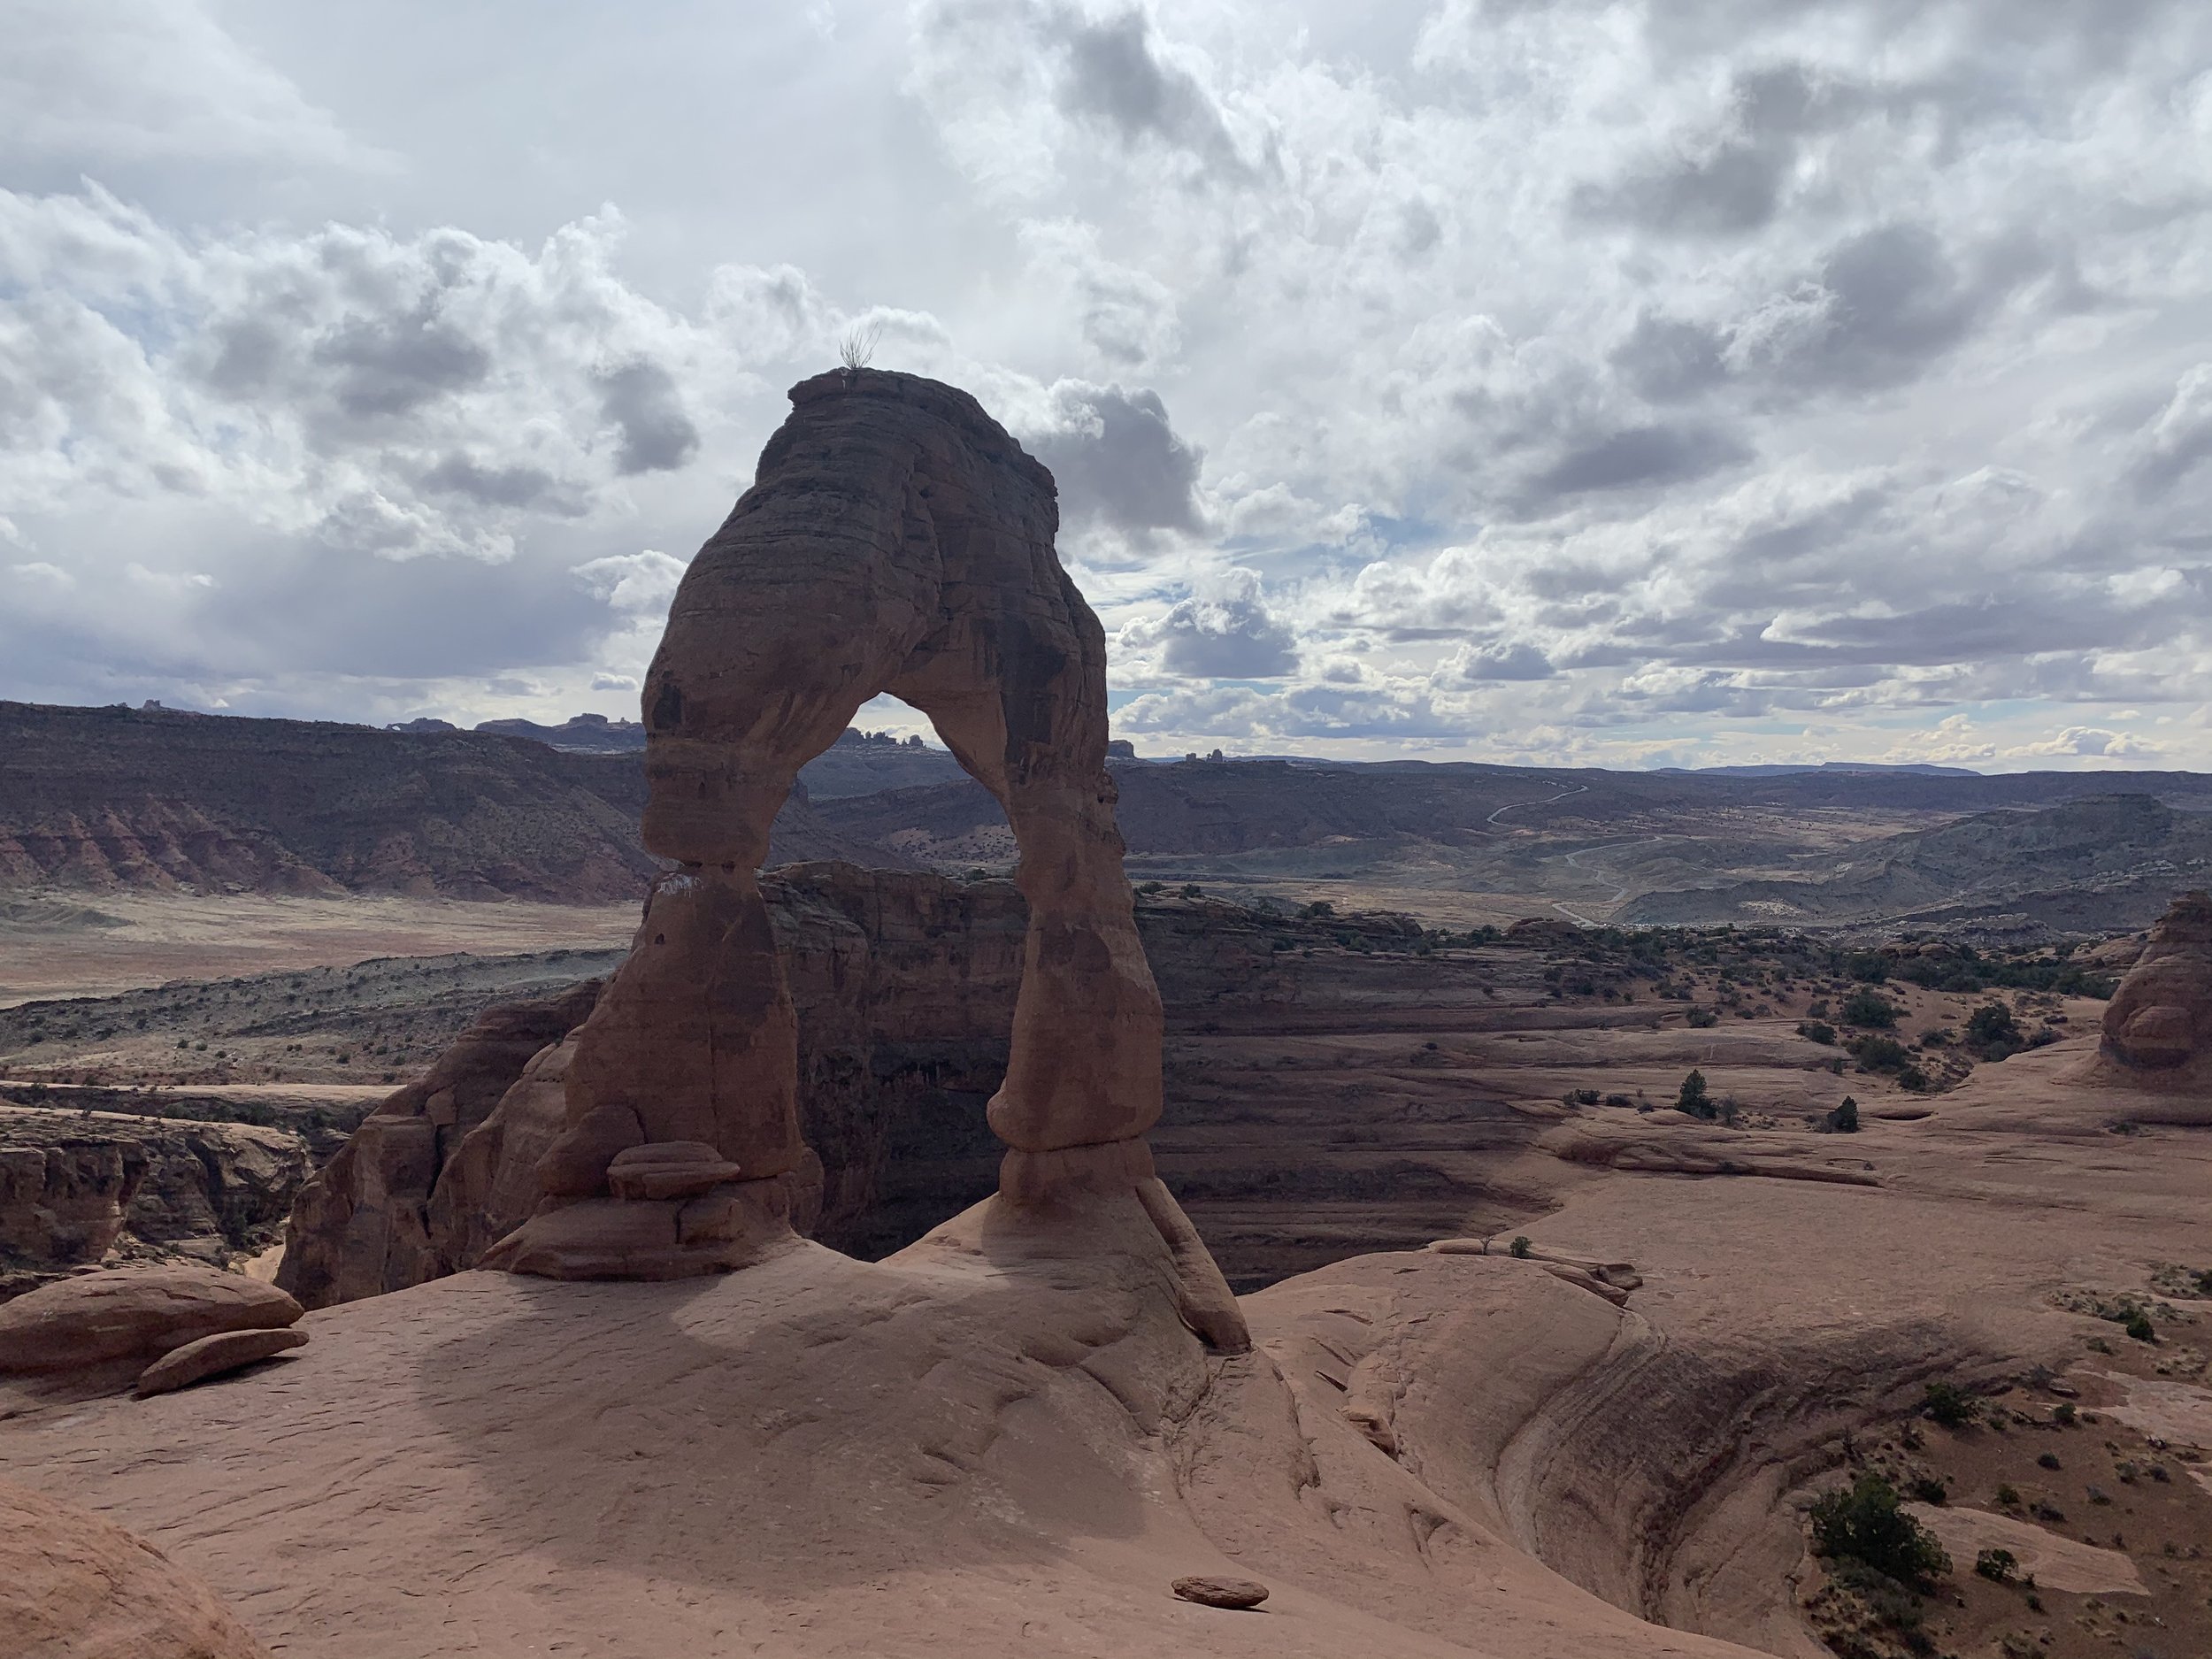
Delicate Arch - Arches National Park
Day 4 - Canyonlands, Dead Horse Point, and Corona Arch
Day 4 pins on the map are in green.
As of 2023, Canyonlands National Park does not yet have timed entry or any other reservation requirements. Additionally, it simply doesn’t seem as busy as Arches, though that may be because the park is so much bigger. I don’t think you need to rush in the morning to get to Canyonlands by any particular time.
Canyonlands is broken into three different districts, each with its own entrance, and there are no roads within the park the connect the districts. The Maze is only accessible with 4x4 vehicles, so I haven’t been able to visit this part of the park yet. Day 4 includes hikes from the Island of the Sky district, and Day 6 includes hikes from the Needles district.
I have a whole blog post dedicated to the hikes in Canyonlands. Below is the link where you can get additional information on each trail.

Island in the Sky
Most of Canyonlands Island in the Sky you can see from short walks, or directly from the pullouts. As you drive through the park, take time to stop at each of the pullouts to see the different sides of the canyons. In addition, I think there are two must-do hikes - Mesa Arch and Grand View Point Overlook. If you’d like additional hiking ideas, check out my Canyonlands Post.
Mesa Arch
0.5 mile loop / elevation gain - N/A
The loop hike to see Mesa Arch is very easy on flat ground. The arch is not visible from the parking lot, so this does require a small amount of walking to see the canyon through this unique view point.
Reference my Canyonlands post for more information.

Mesa Arch - Canyonlands (Island in the Sky)
Grand View Point Overlook
1.8 miles / 75ft elevation gain
Grand View Point Overlook is at the very end of the road, and provides a view of the canyons where the Green River joins the Colorado River. From the parking lot, there is a short, paved trail to a beautiful view point. Afterwards, the trail turns to a hard dirt-packed / rock surface trail with a slight amount of up and downs making this a more moderate trail if you’d like to explore additional views of the canyons.
Reference my Canyonlands post for more information.

Grand View Point Overlook - Canyonlands (Island in the Sky)
Before you leave Canyonlands, make sure you drive down the left fork when the road splits, so you can see the views of the Green River Canyon.
Dead Horse Point State Park
Before you head back towards Moab, I would suggest driving to Dead Horse Point State Park. You will turn right on Utah Route 313, and just follow the signs to the State Park. There is a small fee that you will need to pay as you are entering a UT State Park, which is separate from the National Parks.
Dead Horse Point Overlook
Keep driving through the park, all the way to the end. There is a large parking lot at the Dead Horse Point Overlook. There is a trail the goes along the rim. I hiked along it once on my first trip here in October 2000. The view doesn’t change too much along the hike, but it’s a beautiful view if you are looking for an easy hike. Just walk as far as you’d like and turn around. Or simply enjoy the view for a bit and save your steps for Corona Arch (see below).

Dead Horse Point Overlook - Dead Horse Point State Park
Potash Road
Although the views of the canyons are gorgeous in Island of the Sky and Dead Horse Point, the trails are simply not my favorite hikes in Moab. So to get your steps in for the day, I’m going to suggest that you head back towards Moab at this point. Once you get cell service again, type “Potash Road Dinosaur Tracks” into GoogleMaps. They are also known as the Poison Spider Dinosaur Tracks.
Potash Road Dinosaur Tracks
0.3 miles / 65ft elevation gain
I have looked and looked through my albums, but I can’t find pictures to share of hike to see these dinosaur tracks. I can still explain the trailhead and where to find the tracks though. First, I do want to compare these tracks with the above mentioned Mill Canyon Tracks. The Mill Canyon Tracks are much more dramatic, there’s more of them, they’re bigger, and deeper. But my next and last hiking suggestion for the day is Corona Arch, and it’s just a 5-minute drive, so if you are here anyway, you might as well find more dinosaur tracks because any dinosaur footprint is incredibly cool!
The trailhead will have pictures marking where to find the tracks, and the trail begins with the Longbow Arch Trail. Hang to the right when the Longbow Arch Trail splits left. The tracks are going to be on a boulder that takes just a bit of rock scrambling to get to right before the third switchback. I’m truly humbled when I look at the therapod footprints and am extremely thankful dinosaurs are not still alive.
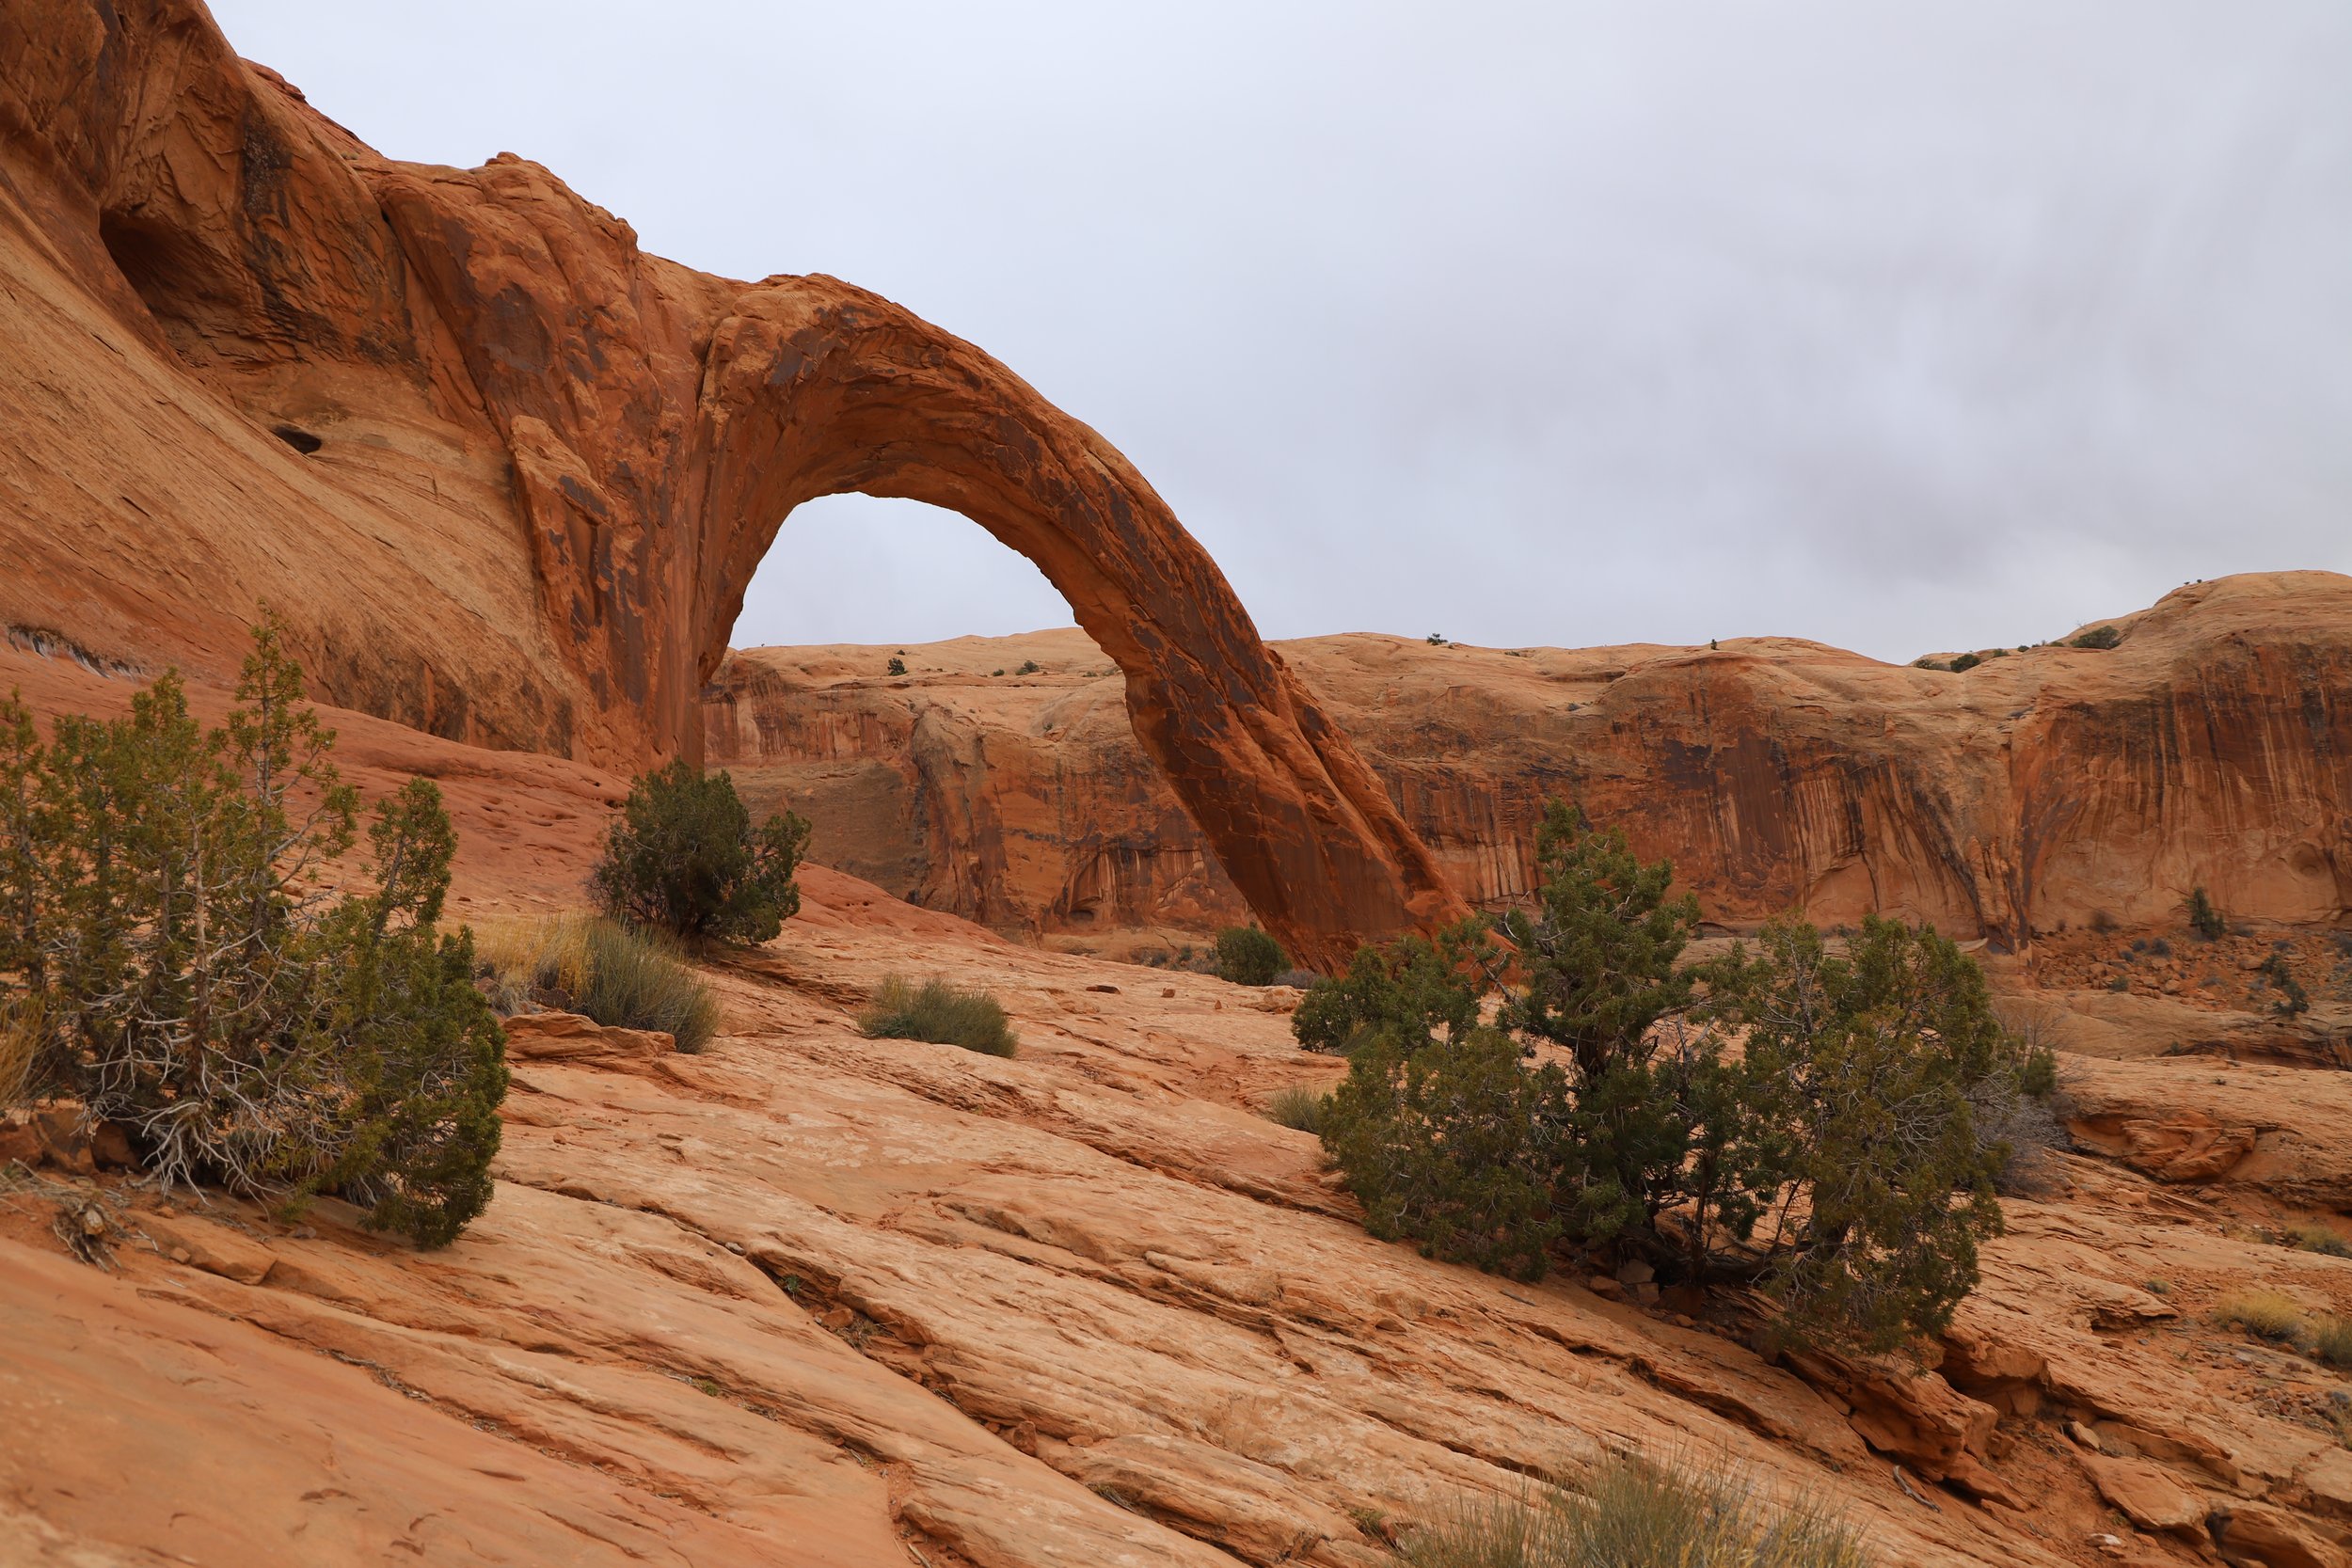
Corona Arch
2.41 miles / 460ft elevation gain

Corona Arch - Outside of Moab, UT
Corona Arch is also known as Little Rainbow Bridge. Although this arch is outside of National Parks and State Parks, it’s one of my favorite arches, and I love this trail. I’ve hiked it twice, in March 2016 and March 2021. This is a moderately difficult trail with both a short ladder and a small cable to navigate (pictures included below) in addition to a modest elevation gain and slickrock making up the last half of the trail.

Corona Arch brings you to the railroad tracks and then climbs up into the canyon
The switchbacks are all within the first half of the hike. Eventually, the trail opens up to this view of slickrock surfaces as far as you can see, and cairns will mark the rest of the way.

Corona Arch Trail
As I mentioned above, there is one short ladder than you will need to use on the hike.

Ladder on the Corona Arch Trail
And there is one steep section of slickrock to scale up, and happily there is a cable provided to assist you in this short section of the trail for some added stability.

Corona Arch cable
The first arch you will see is Pinto Arch. If you’d like to get closer, there is a spur trail that leads under this arch, although I have not explored it.
Pinto Arch - Outside of Moab, UT
And just to the right of Pinto Arch, you should see Corona Arch. It’s one of the bigger arches in Moab, and is quite impressive even at your first view of it. The trail to get there is really easy, so I would suggest hiking all the way to it, to feel how big it is from underneath.

Corona Arch
Neither of my hikes here were busy, granted no place was busy March 2021. Because this trail is outside of the National Parks, the only people that are going to be here are the ones that took some time before their trip to find out the cool places to hike. So that will naturally limit the people that ever find this arch. I highly recommend this trail!
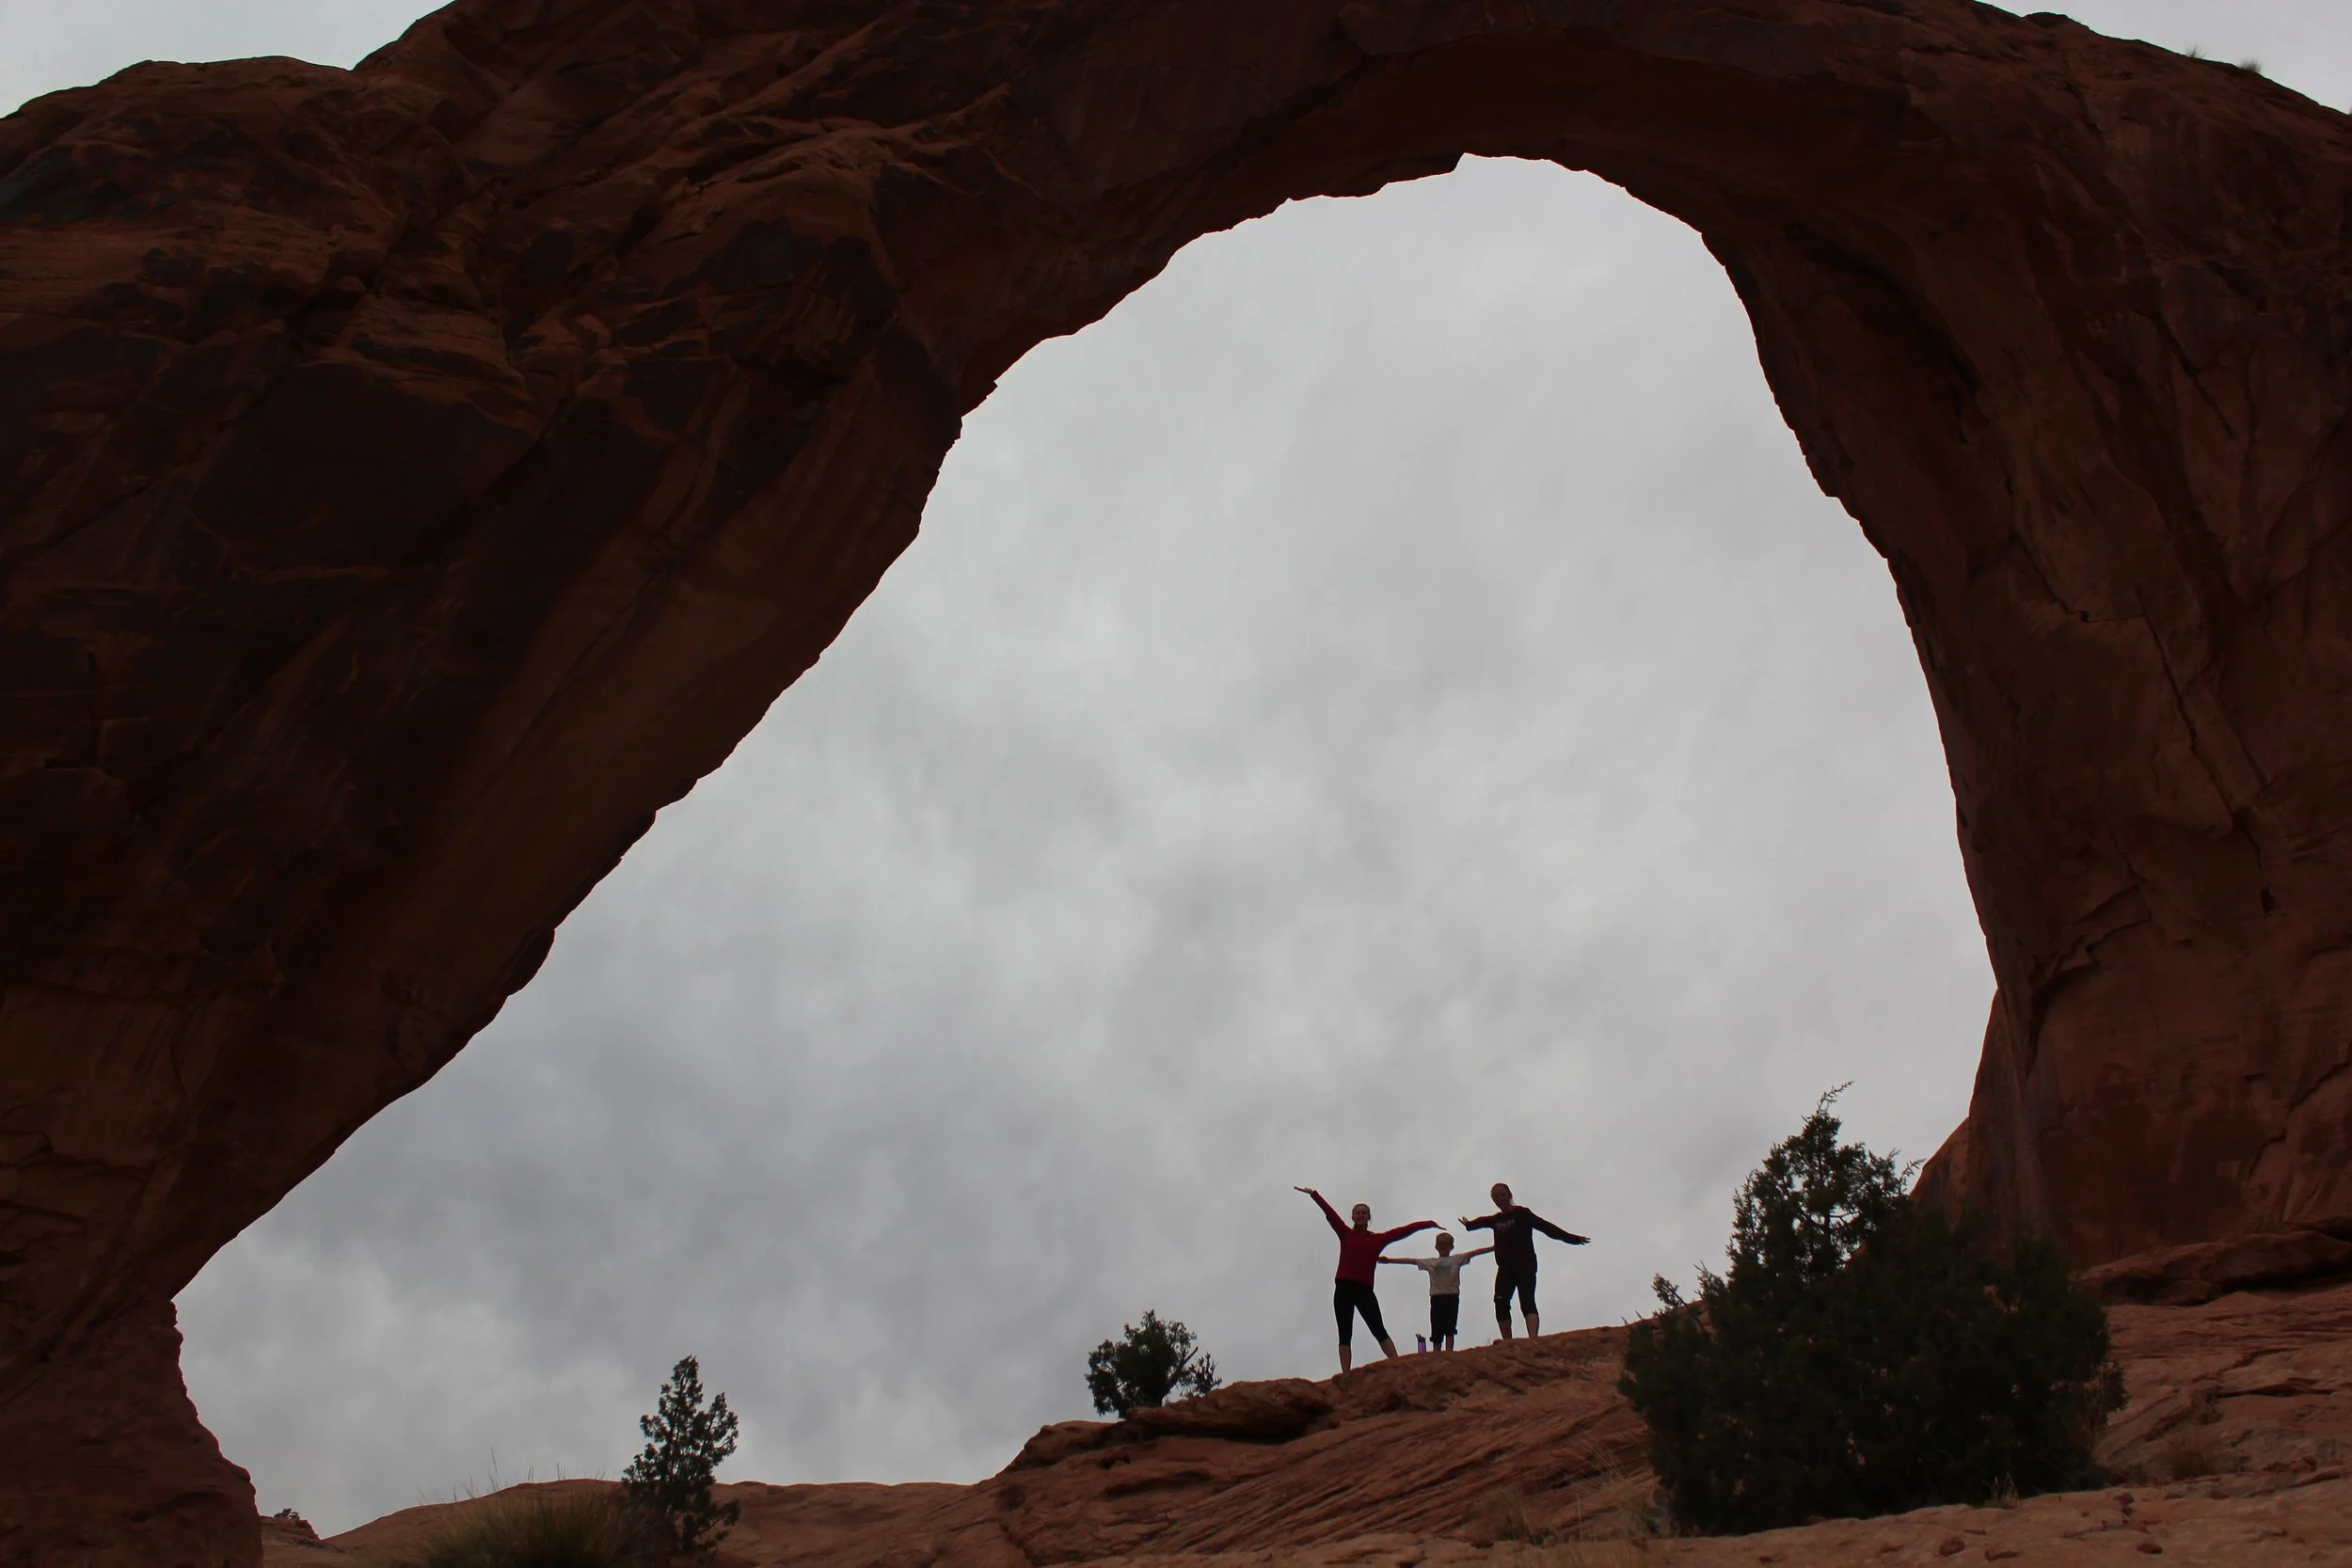
Corona Arch
Day 5 - Morning Glory Natural Bridge and Fisher Tower
Day 5 destinations are in the red pins on the map above. You will turn right off of US-191N as you leave Moab, onto UT-128E. The road follows the Colorado River. I don’t think there is a preferred order of which hike to do first. We hiked on a Saturday and saw a small amount of people on both hikes. We were the first people into the parking lot to hike to Morning Glory, and we had the bridge all to ourselves. If that’s the sort of hike you’d like, then that’s what I would suggest starting with, and arriving by 8:00 or 8:30.
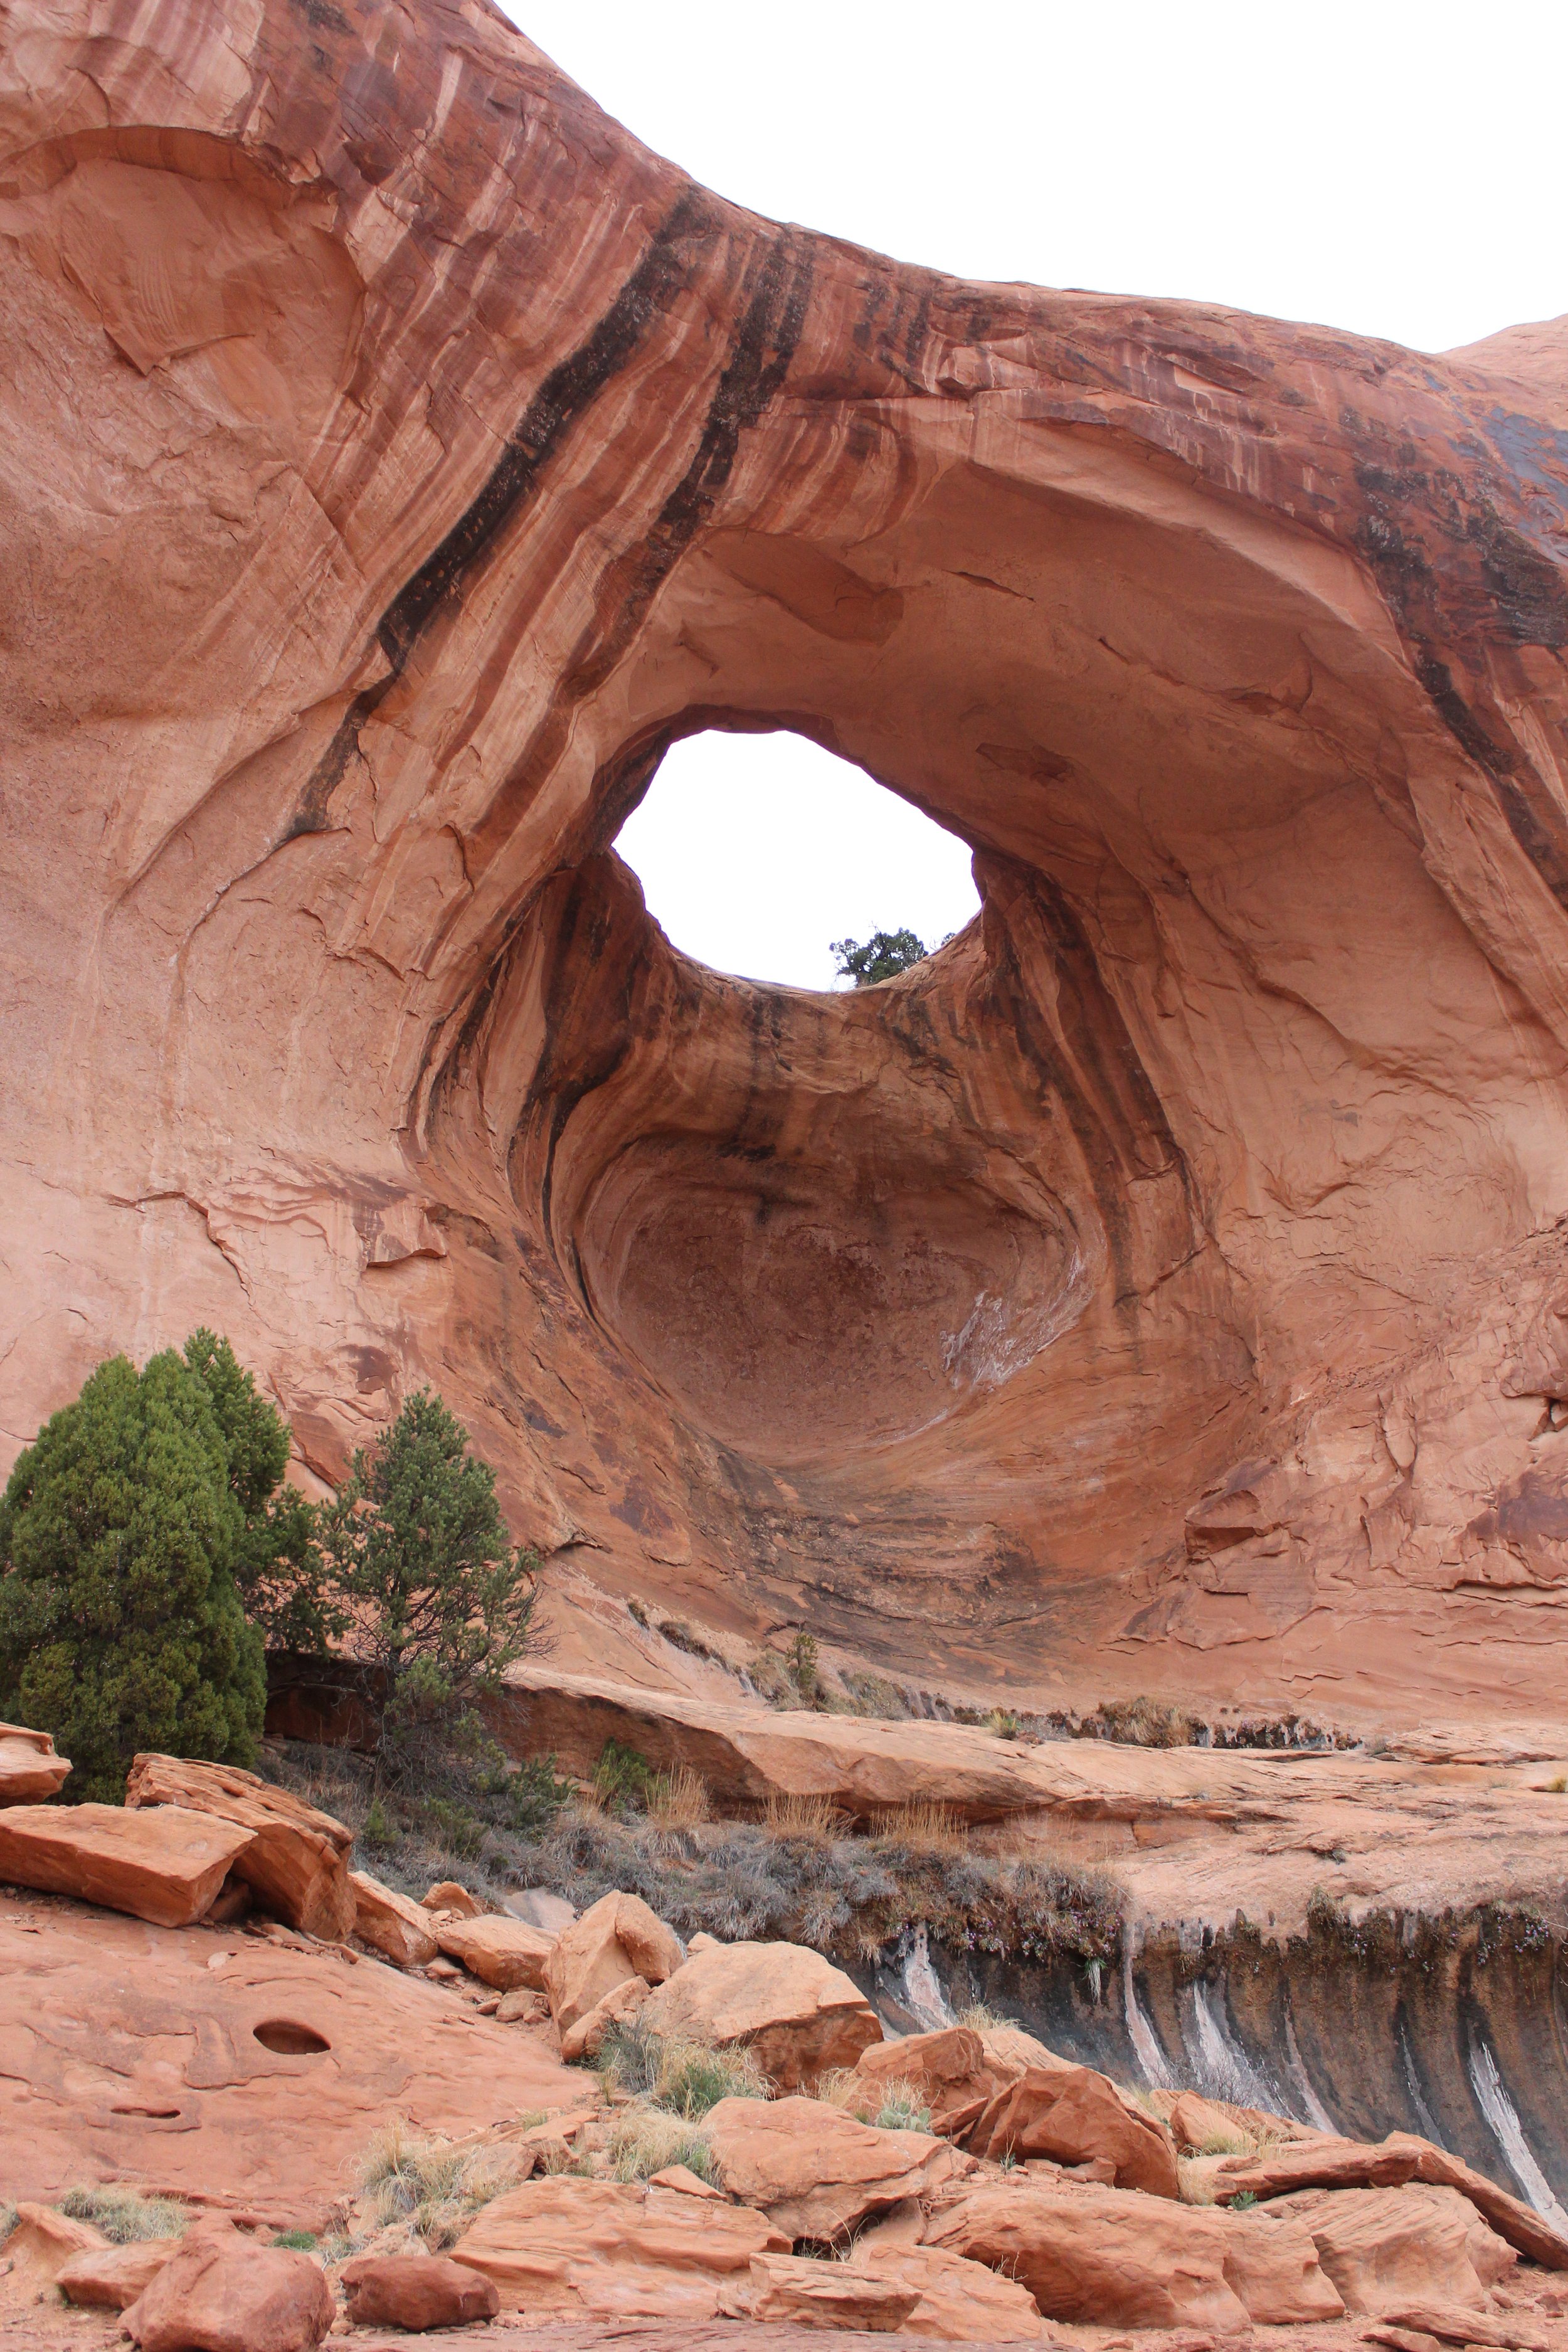
Morning Glory Natural Bridge
4.5 miles / 400ft elevation gain

Morning Glory Bridge Trailhead - Outside of Moab, UT
Finding the trailhead may be slightly difficult simply due to the multiple names. The bridge and canyon have recently been re-named. When you are searching for the trailhead in GoogleMaps, use “Grandstaff Canyon.” There’s a decently large paved parking lot.

This is the stream that requires multiple crossings. We hiked in March 2023 after a lot of snow and the previous day had rained. It still was easy to cross, but as always when hiking in a canyon, don’t get caught in a rainstorm.
The trail to the Morning Glory Bridge is moderate. I’d actually rank it easy if it weren’t for the water crossings, of which there are 12. There is plenty of stuff to step on (rocks and logs) to cross the water and we all stayed dry, but it does require some balancing as you walk across. The elevation gain is steady and hardly noticeable due to the low incline.
Below are a few examples of the water crossings that are required.

Plenty of stones to walk across without needing to jump

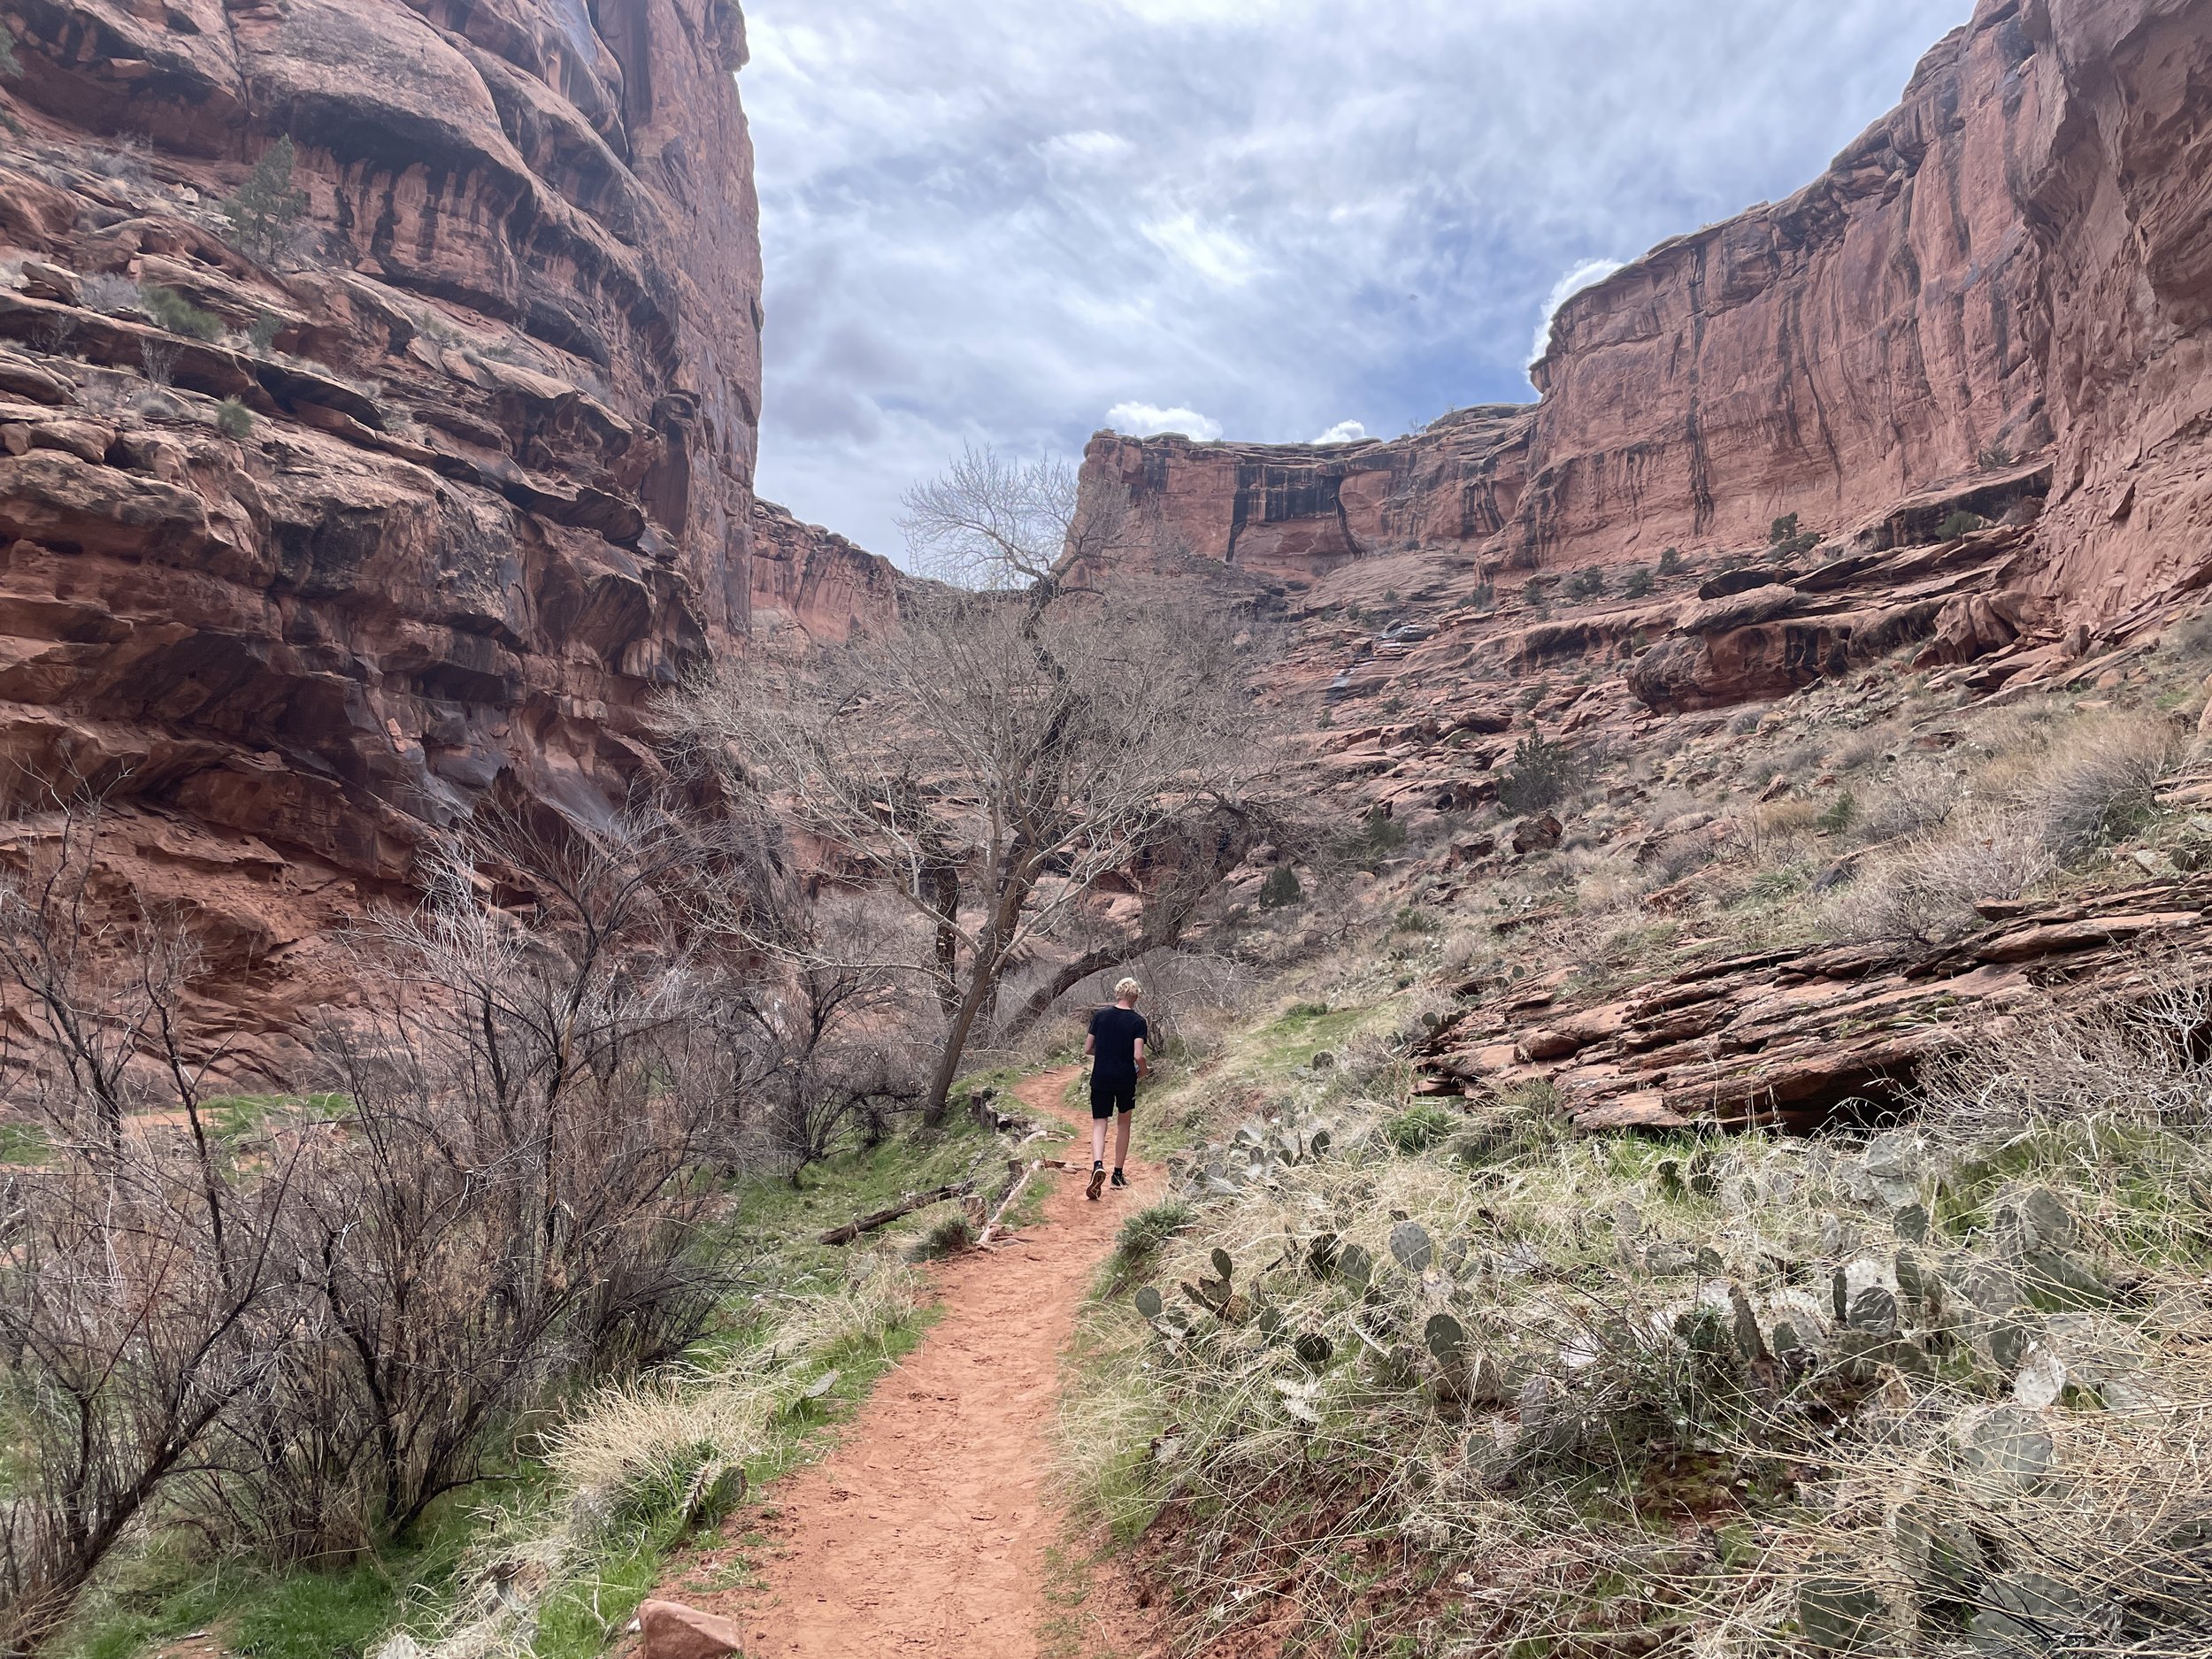
Trail to Morning Glory Bridge
I very much enjoyed this quiet canyon hike. There were several people we passed on our way back to the car, but we had this trail entirely to ourselves on the way to the bridge.

Hike to Morning Glory Bridge
Below is the first view of the Morning Glory Bridge in the back / shady area of the photo.

Morning Glory Bridge
Being a bridge versus an arch depends on the erosion. As such, it’s a little harder to get a good picture of the bridge unless you are actually underneath it.

Morning Glory Bridge
Morning Glory is the 5th largest arch (bridge) in the world at a span of 243ft.

Morning Glory Bridge
Fisher Towers
4.5 miles / 800ft elevation gain
The trailhead to Fisher Towers is easy to find, and the roads were very accessible. Just type “Fisher Towers Trailhead” into GoogleMaps, and that should get you here. From Morning Glory Bridge, you’ll just keep going up the Colorado River along UT-128E until you see the sign for the right-hand turn.

Fisher Towers Trailhead - Outside of Moab, UT
Fisher Towers is a moderate to strenuous trail due to the pretty constant uphill trek. The only potential mobility concern is one small ladder, otherwise the surface of this trail is pretty good, without any scrambling over slickrock required.

We were surprised at how much green there was in the desert - there was even grass growing just off of the trail. Clearly 2023 started off with a lot of rain and snow.
The Fisher Towers hike surprised me the most of my Moab hikes from what I’d read and images I’d seen compared to what it actually was. For some reason, I’d pictured this hike in a valley that followed nearby Onion Creek, and I thought the trail went down as much as it went up, and I imagined it was near the water.
The Fisher Towers trail is none of these things. It starts off midway up in the surrounding canyon, and it hugs the wall, and climbs up, up, and up. There are just a few moments on some switchbacks that it drops down for just a short distance. The hike does not go down towards the creek.

Fisher Towers - Outside of Moab, UT
It is a pretty hike though, with several different views of various rock formations along the way. Unfortunately for us, a cloud followed us as we were hiking, and about halfway up, it started to lightly rain on us for about an hour.

Fisher Towers - Outside of Moab, UT
The snow and clouds did give us some unique pictures of the desert.

On the rim out to the end of the Fisher Towers Trail
Towards the end of the trail, it turns to the right and follows a different rim, so you can look back and see a different perspective. If you hike Fisher Towers, I would recommend walking all the way to the trail end sign.

View from the end of the Fisher Towers Trail
This might have been the only day I’ve seen it rain in Moab in the six times I’ve visited. I suppose it was bound to happen sometime, despite being a desert Moab does get some precipitation. This was a safe trail to be on though in the rain as the trail surface is hard dirt rather than slickrock.

Nearing the end of the Fisher Towers Trail
Day 6 - Canyonlands - Needles
Day 6 pins on the map are in green.
This is likely an early morning in order to pack up your hotel or campsite, and it’s an hour and a half drive from Moab to the Canyonlands Needles Visitor Center. If you want to hike Chesler Park (which is a 10.7 mile trail), plan for 6-8 hours of hiking, and you’ll want to be back to your car before it gets dark (or pack flashlights and headlamps).
Ideas of where to spend your next evening are the Needles campground, Monticello, UT, or Monument Valley, AZ. Page, AZ is another great destination, but it’s unlikely you’ll have time to drive that far if you want to enjoy a longer hike in the Needles.
I have all of my information on Canyonlands National Park (including both Island in the Sky and the Needles) in the same guide, linked again below.

The Needles
As I mentioned earlier, my favorite places to hike in Canyonlands are all in the Needles district. If you are up for it, I’d suggest the entire Chesler Park Loop. If that’s too far, consider just hiking out to the slot canyon and back (approximately 6 miles total). And if that’s too far, just head out on the trail to see the Needles and enjoy as much of the trail as you are comfortable doing.
If you’d like to hike some shorter trails as well, Cave Spring and Pothole Point are great easy hikes.
Chesler Park Loop
10.7 miles / 1,378ft elevation gain

Slot Canyon within Chesler Park Loop - Canyonlands National Park (The Needles)
I know I’m promoting my posts maybe a bit excessively, but if you are going to hike the whole loop, read through the trail in more detail here. I have included a map, how to navigate through the loop, thoughts on where to turn around, etc.
If you are short on time in preparing for your trip, or you simply want to explore the trail on your own, then just head towards the Elephant Hill Trailhead at the end of the Needles Campground to start the trail. if you set GoogleMaps to “Chesler Park” it takes you along a 4x4 only road that you need a permit for.
Cave Spring
0.6 mile loop / elevation gain - 67ft
Cave Spring is a neat loop trail that visits an old Cowboy Camp and has some interesting handprint pictographs. The trail requires climbing two ladders, and assuming you want to go up the ladders and not down, hike the loop clockwise. For more information, see my above linked Canyonlands post.

Cave Spring Loop - Canyonlands (The Needles)
Pothole Point
0.6 mile loop / elevation gain - 30ft
Pothole Point is simple and easy trail out to water-filled potholes. The other interesting thing along this trail are some beautiful shaped boulders that you can climb around and explore through. Ditto on the links previously listed if you want more information.

Pothole Point - Canyonlands (The Needles)
Non-Hiking Options in Moab
Although my kids haven’t expressed interest yet in much more than hiking, there are lots of other outdoor things to do in Moab. Some ideas for you are:
Whitewater Rafting
Renting an ATV/UTV
4x4 off-roading tour on Hell’s Revenge
Mountain Biking
Rock Climbing
Using a Google Search should get you to the companies that you can pre-book tours with.
Hotels with Swimming Pools
If you happen to be traveling in Utah during winter and into early spring, finding a hotel with a functioning pool is hard. In 2016, it was extremely warm in March, and our hotel in Moab had a heated outdoor pool that we enjoyed. That’s not typical. You may search for a hotel that has an indoor pool, and there are a couple. We stayed at the Quality Suites this past March, which technically has an indoor pool. But there was no water in it, and it was under renovation. We’ve had similar experiences in Kanab and Torrey where the hotels even stated that they had year-round indoor pools, but they’ve either similarly been under construction or simply not heated, despite advertising the pool would be open. You might get lucky, but don’t expect to go swimming during Spring Break. We have had better luck though with the indoor hot tubs being open. I’m quite sure the outdoor pools are phenomenal in the summer months.
Other Potential Road Trip Stops
As I mentioned at the beginning, if there’s a disadvantage to spending a week in Moab, it’s the difficulty getting there. If you’ve got the money, you can fly directly into Moab, but if you are more like me and looking for that cheaper flying option, there isn’t a nearby major city. Your cheapest flight and rental car location is likely through Las Vegas, which is a 7-hour drive (one-way). Phoenix is just a half hour longer, but be cautious about the true pricing. You’re flight to Phoenix may be cheaper than Las Vegas, but there is a pretty hefty AZ tax on the car rentals that you might not see when you book your rental car online.
Denver is closer to Moab, with just under 6-hours of driving. If you are planning a trip in the fall, winter, or spring, consider that you will have to drive through the Rocky Mountains, and if there’s a snowstorm, you might not be able to make it through the mountain passes. Those mountains have messed up road trips from MN twice. Once we snuck through just as the storm started and we found a snow plow and just stayed behind it. The other time, it snowed 18” which obviously I could not drive through, and it resulted in a 8-hour detour to Albuquerque, NM, to go around the mountains. Flying over the Rockies is a better option in March.
Salt Lake City is your best airport to check. It’s only a 4-hour drive to Moab, so if you can snag cheap airfare, this is definitely your best option. One of our spring break trips this worked, and it was awesome! But the rest of the years it has been multiple-fold more expensive than Las Vegas. Cost versus Time - that balance looks different for everyone.
No matter what though, you’ve got some driving to do, which is just fine. Utah / Arizona / Nevada all have incredible places to hike along your adventure.
Here are some of my other posts of places to check out as stops along your trip, as well as some places I’ve loved, but just haven’t yet had a chance to write about:

Monument Valley - AZ
2. Page, AZ
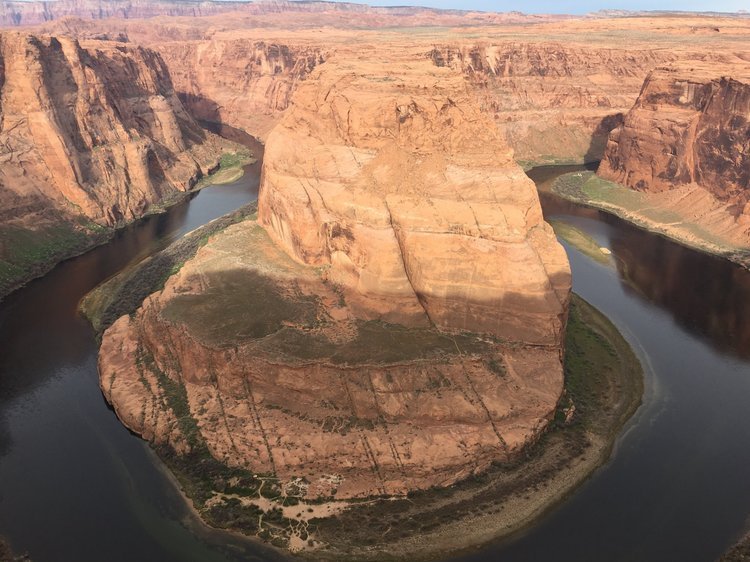
Horseshoe Bend - Page, AZ

Peek-a-boo and Spook Gulch Slot Canyons - Escalante, UT
4. Kanab, UT (no post yet, some elements are included in my Zion post)
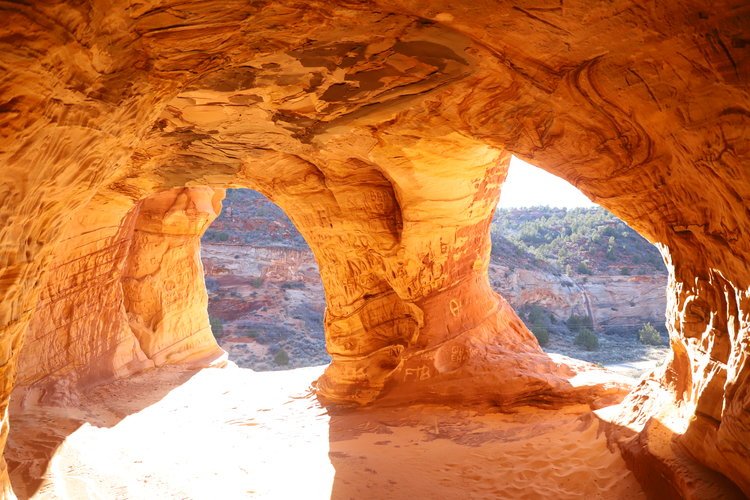
Moqui Caverns - Kanab, UT

Angel’s Landing - Zion National Park
6. St. George, UT (no post yet)

Snow Canyon State Park
7. Goblin Valley State Park (Currently included with Capitol Reef National Park post)

Goblin Valley State Park
8. Little Wild Horse and Bell Canyons (no post yet)

Little Wild Horse Canyon

Cohab Canyon - Capitol Reef National Park
10. Bryce Canyon (I’ve travelled here twice but am not yet done hiking this park, and I need one more trip to UT before I’m ready to write this post)

Bryce Canyon National Park

Fire Cave - Valley of Fire State Park

Calico Tanks - Red Rock Canyon

Gold Strike Hot Springs
Places to consider that are nearby but I haven’t had a chance to visit yet, so I can’t comment on a recommendation are:
Bears Ears National Monument
Natural Bridges National Monument
Share Your Favorite Hikes in the Comments
If I’ve missed a favorite hike in Moab, or if you have a favorite place to hike in a destination you could make on a road trip to Moab, please share it with me and others in the comments.
Other Hiking Options
If you are looking for more hiking suggestions, please check out my below map with additional posts linked to the pins (one last shameless plug for other amazing places I’ve visited)