Bulb mode photography is an advanced technique that records light and still objects for as long as the camera lens is open. To take advantage of this powerful mode, you will need a tripod to hold your camera steady and a remote shutter release to prevent camera shake. Shutter releases are unique to each camera manufacturer, so I recommend skipping the generic versions and buying the OEM (Original Equipment Manufacturer) version. You can run a quick Google search to find these OEM products for your camera brand.
Bulb Mode Lighting Conditions
Certain conditions must be met for bulb exposures to be practical. The primary condition is that the daylight or overall light in the picture must be low. This is required since the shutter will remain open for an extended period. If there is too much light, you will eventually have just all white as your image, which is, of course, no image. Hence, if you are outdoors, the best times to use the bulb setting on camera are sunset and nighttime or sunrise before the sun gets too high. Having complete control over the length of time the bulb shutter speed stays open with your shutter release requires experience and knowledge to have the capability of producing some fantastic photographs. In other words, you are the master of your result, and luck can play a role in your masterpiece. You can have the shutter open for seconds or minutes. However, you must think about your overall vision since all the principles of photography still apply.
Limit Light During Bulb Exposures
As a condition of bulb mode, low light requires you, as the photographer, to think about what adjustments must be made to get a good photograph exposure. Using our knowledge of what makes a good photograph, if we know the camera lens will be open for a long time, this means to take in less light, we’ll want to have a tiny opening or a high aperture. ISO speed is the other factor affecting how much light hits the lens. Considering we’ll want to have the lens open for a long time, a low ISO speed (good for photograph quality anyway) will be preferred for extended bulb mode images. With these two conditions in mind, we will have all the right conditions for some phenomenal bulb-mode images.
Bulb Mode Photography Requires Some Light
This may seem counterintuitive to the prior condition, but it isn’t. You will also require some light to record an actual image. If nothing gives off or reflects light when the lens is open, your image will come out black, and nothing will be recognizable. This is where setting your flash to Rear Sync or Second-curtain Sync for Canon cameras. In this mode, the flash will be fired right before the exposure finishes (shutter closes).
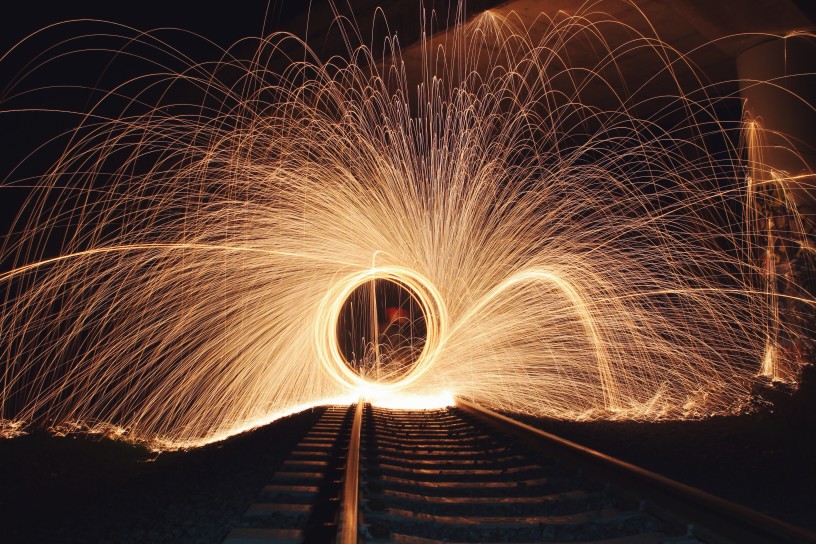
If you’ve ever seen those light streaks in a city skyline image (actually, check out some of those here in our bulb exposures gallery), they can only be created with bulb mode shutter speed. Creating a shallow depth of field is easy enough in a post-editing program; however, bulb-mode images aren’t created in image editing unless you are a phenomenal digital painter.
Bulb Mode Explained
So what is happening? There is a high aperture, so the camera records everything from near to far as sharply as possible. We set an ISO of 100 so we don’t get noise in the image and don’t make the camera sensitive to light, which will undoubtedly be required at sunset time. Then, we set the camera to BULB mode and press the shutter release button to keep it open for 35 seconds. During that 35 seconds, the image is captured, but so is any light that happens to move through the image.
It’s like a continuous video condensed to an image anywhere there is light or movement. The light streaks are the way they are because the objects with the light pass through and leave a light trail. You can see the streaks because the car is likely too dark to register on the prolonged capture (although it can certainly show up depending on how the image is recorded). The light, however, as it moves across the camera frame, creates a streak. The stronger the light, the larger the streak. So, each position the light is in gets recorded because the lens is open, and the final bulb mode image shows all the streak positions in one final image.
You can also think about a panning image or an image with movement. If you take a photo of something moving and keep your camera still, you will see a blur that implies the moving object’s motion. To create this blur, every position the moving object occupied while the lens was open was recorded based on how fast it was moved. To see this in action, take photos with your camera on a tripod, a slow shutter speed, and the subject walking or moving fast enough that motion blur will occur. You will see how it recorded the subject at different points while the lens was open. This is similar to how the light is recorded in a light streak image. However, since the light dominates the darkness of a car’s body, you can mostly see just the light streaks and rarely the vehicles.
This bulb mode phenomenon is more evident with light poles. You’ll notice a star shape based on how long the lens is open. So you may see a circular or oval light source, but light doesn’t stay still. It appears oval, but it scatters in different directions. I’m not a light theorist, but the light doesn’t just stay oval; hence, in bulb mode, when you have the shutter open for a prolonged time, all of these scatters from the light pole end up being visible as a star. You will see something similar happen in any light source. If you open bulb mode for a prolonged time, you can see how the light source travels during that period. If you open up bulb mode for more than a minute, you really get to see light scatter in multiple ways, still, in essence, shaped like a star.
Bulb Mode Photography – Recent Examples
So, let’s get back to bulb mode exposure basics and how I used the technique recently. At a beautiful waterfall, I recorded some standard images with reasonably high shutter speeds. I realized it was too early in the day (too much light) for slow shutter speeds, but I could also record some decent shots with fairly slow shutter speeds (although it is hard to see the smoothness blur in your camera). As I thought of how I could capture this epic waterfall, I thought using the bulb shooting mode could create some pretty epic images for this scene I was fortunate enough to witness. You can look at our home page to see how epic this waterfall scene was.

So, as the sun started to set, I knew it was time to get into action. You only have some time to capture epic shots during the golden hour, so I prepped everything and waited for the sun to descend. Once it was time to act, I used my tripod and shutter release to capture some great photos as the sun went down. As the sun sets, you notice in aperture priority mode that the chosen shutter speed decreases gradually because there is less and less light in the background, which requires the shutter to stay open longer. Of course, you still want to expose the image correctly, so it is good to use this first as a gauge for bulb mode and how long you should have the lens open to get a correctly exposed photo.
Once I got the shutter speed to over 30 seconds in aperture priority mode, I knew I could use bulb mode convincingly. This means that even if you overexpose, you’re only overexposing the parts of the image that have light (creating more scatter). Yet it will possibly give a better result by brightening the image to your liking, etc. It’s more of an art; you have to experiment with it to understand more of what I’m saying.
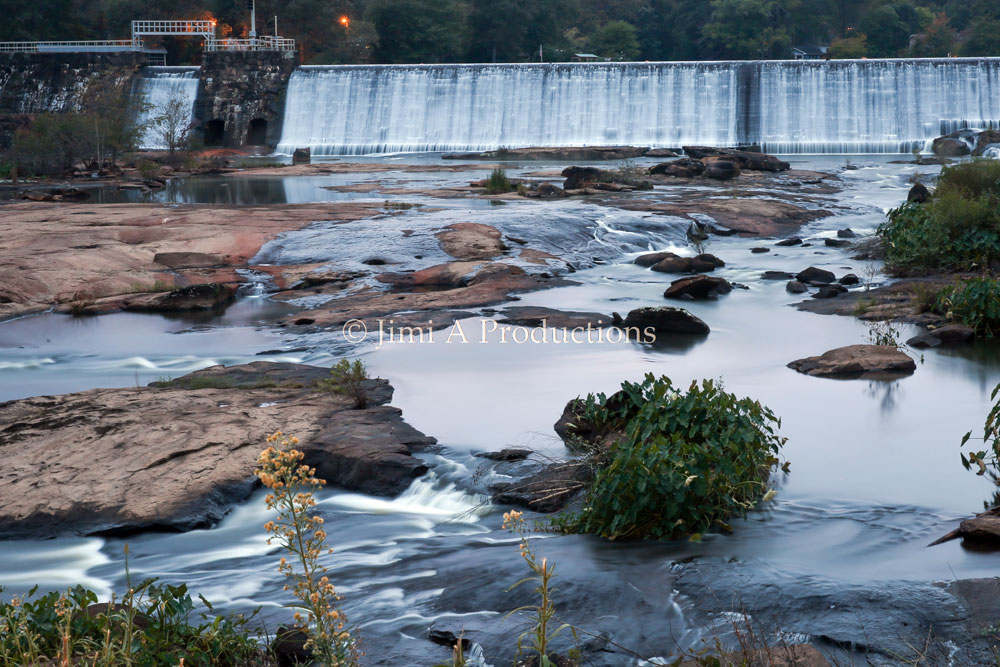
So, after a certain time (when it was dark enough), I moved on to strictly bulb mode. I randomly experimented with the time the shutter was held open. Sometimes, I would overexpose on purpose, and so forth. Of course, I took many pictures since most photographers don’t do this type of photography often. Here are some of the results. They seem pretty phenomenal, especially with the 85mm prime lens.
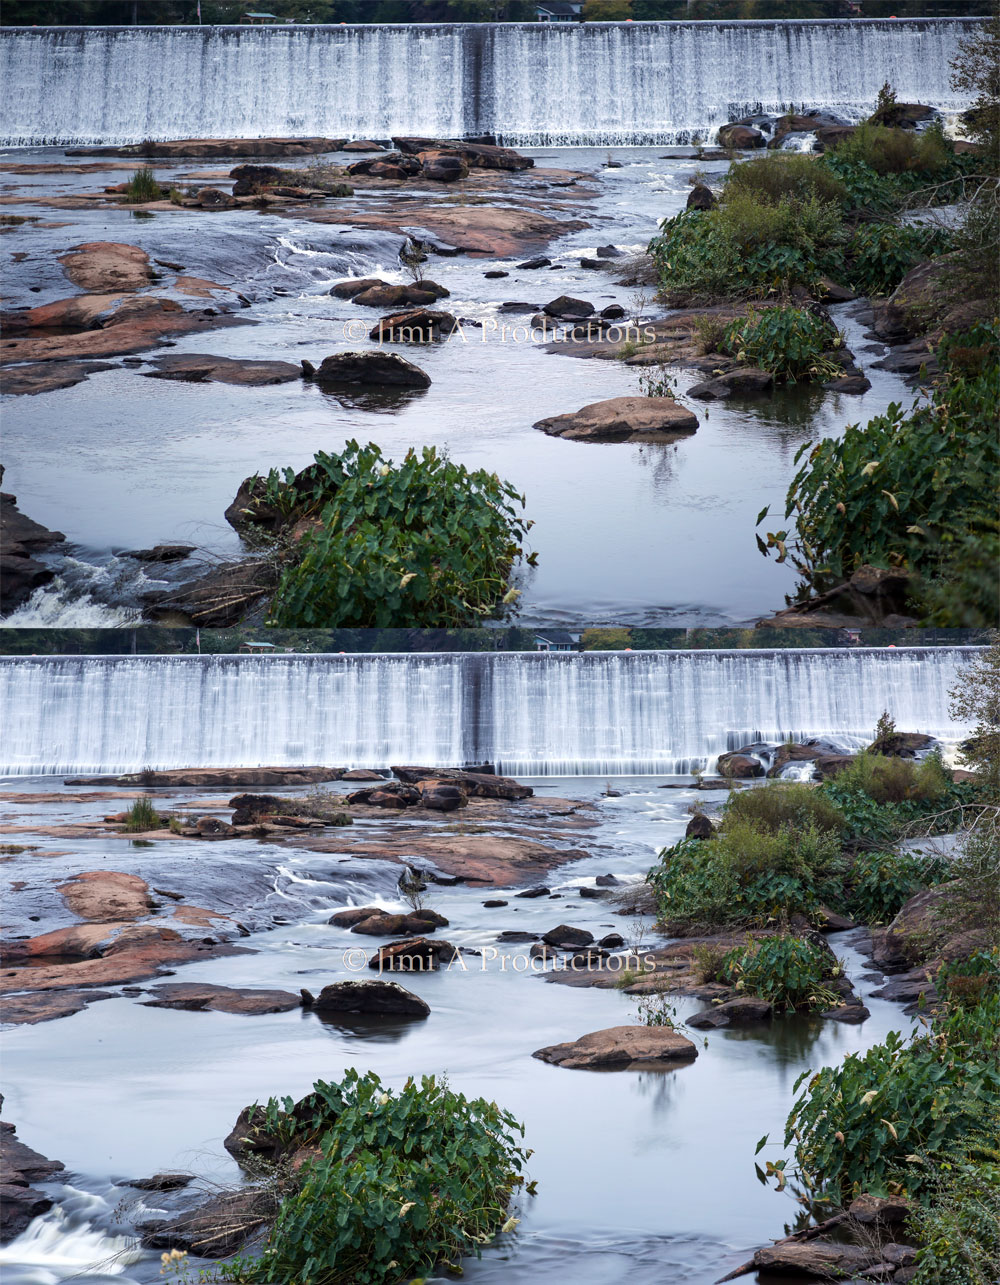
The images above do not require bulb mode, but for such an epic waterfall, you may as well bring out all the tools. Here’s a bulb-mode image of it, and you can see that it is not too much different from a slow shutter with aperture priority. However, keep in mind that you will need the same tools for a 3.2-second shot as you will for a one-minute shot.
Let me know what you think of the pictures, and if you have any questions, feel free to share them below. Hopefully, you will have a better idea of how to shoot in bulb mode successfully. Share your thoughts below.


