

Introduction: Spirograph Art


Today we'll be designing and creating Spirograph art using vector files from a program called SpiroJ. Creating vector files allows for a high degree of customization once the file has been exported, including cutting and engraving using many types of CNC machines. You can also easily generate templates for manual cutting if you have skill with woodworking tools.
Step 1: Creating the File Using SpiroJ


To start with, you can download SpiroJ from sourceforge. It comes as a zip file.
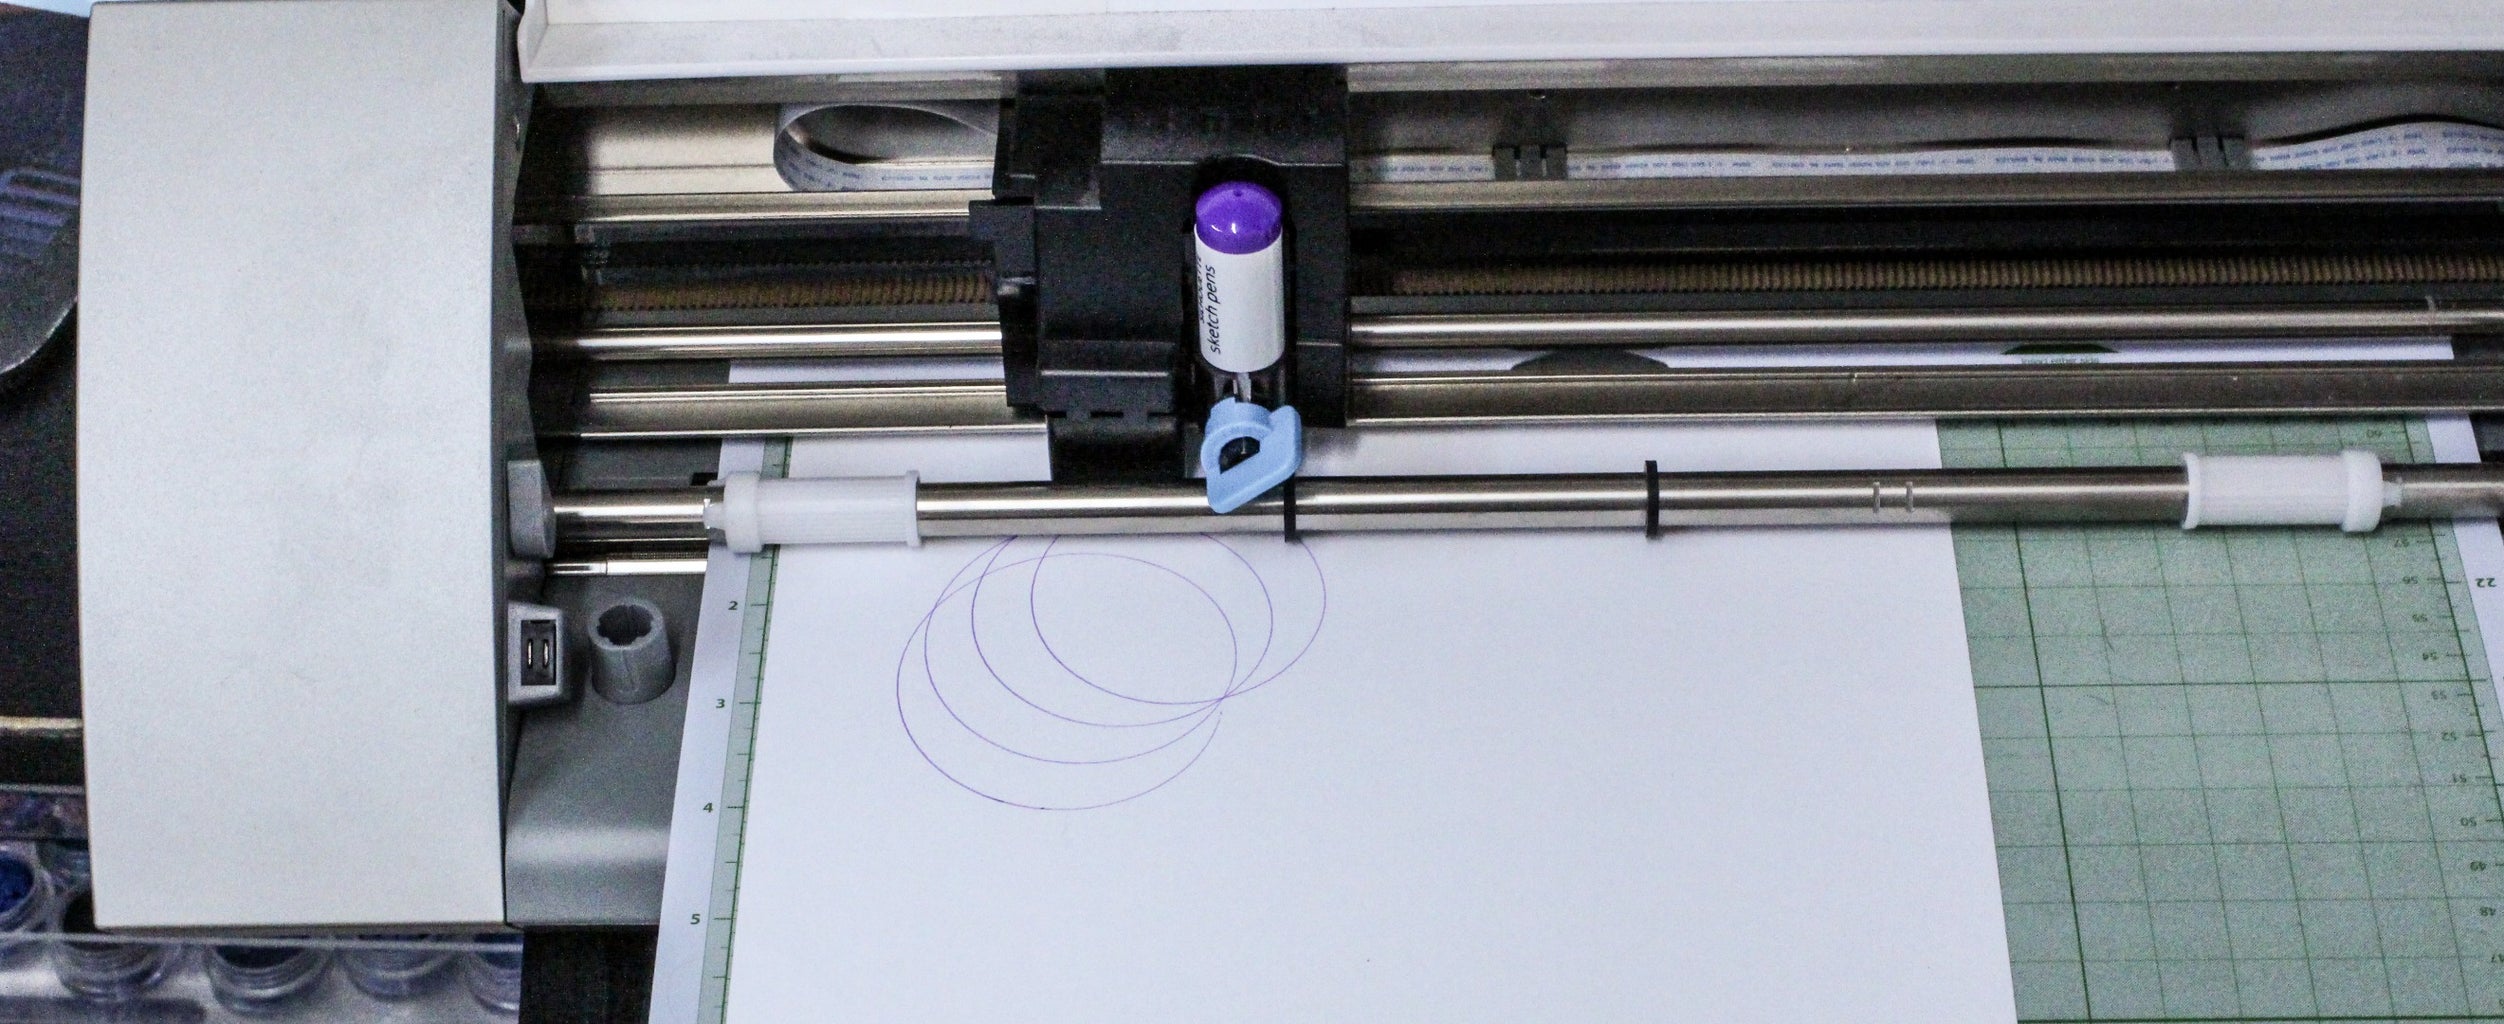
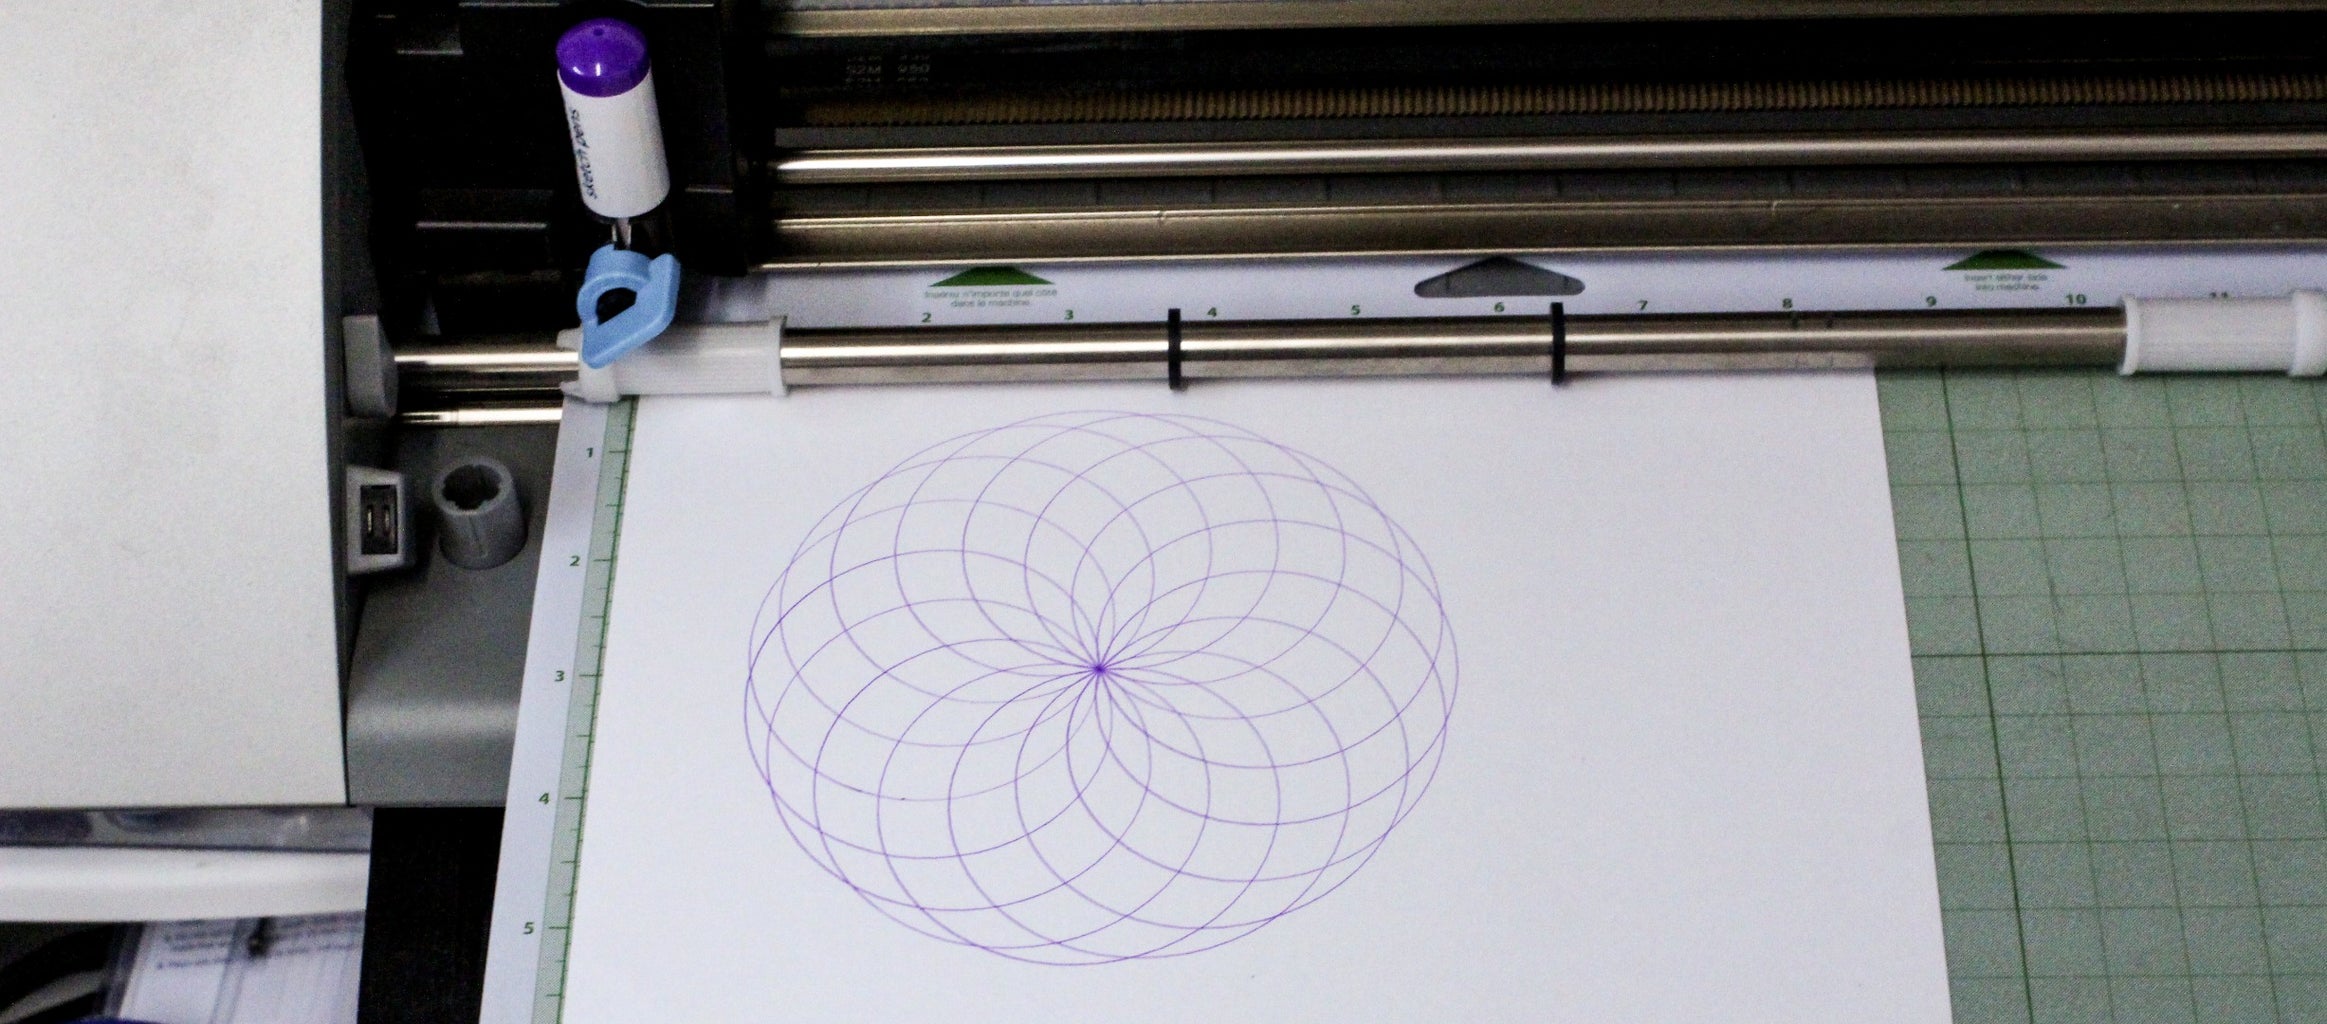
Now, open up SpiroJ and hit "New Design". The default design is Fixed: 50, Rolling: 50, and Radius: 6.
Using SpiroJ is the "creative" part of this process. I strongly encourage you to play around until you find a design you like. For now, we'll go over the controls:
The Ratio controls the central geometry. You'll notice, for example, that if your ratio is 6, you'll have a hexagon in the middle or sets of 6 pieces. Similarly, a ratio of 8 will create an octagon in the middle and sets of 8 pieces. Keep this in mind when you're designing: having a larger ratio will tend to make smaller pieces (relatively speaking).
The Fixed Radius is like the size of the outer hole on a standard siprograph. Making this number larger will bring the center "inwards" until it meets itself (inner=outer) then expand back outwards.
The Rolling Radius is like the size of the inner gear on a standard spirograph. Making this number larger will expand the center "outwards". Making this number smaller will bring the center "inwards" until it meets itself then expand back outwards.
Things can get non-geometric really quickly in the "advanced" area. That means things like ovaloid gears and really odd stuff. That's an area where you can play around until your heart's content.
Step 2: File Prep
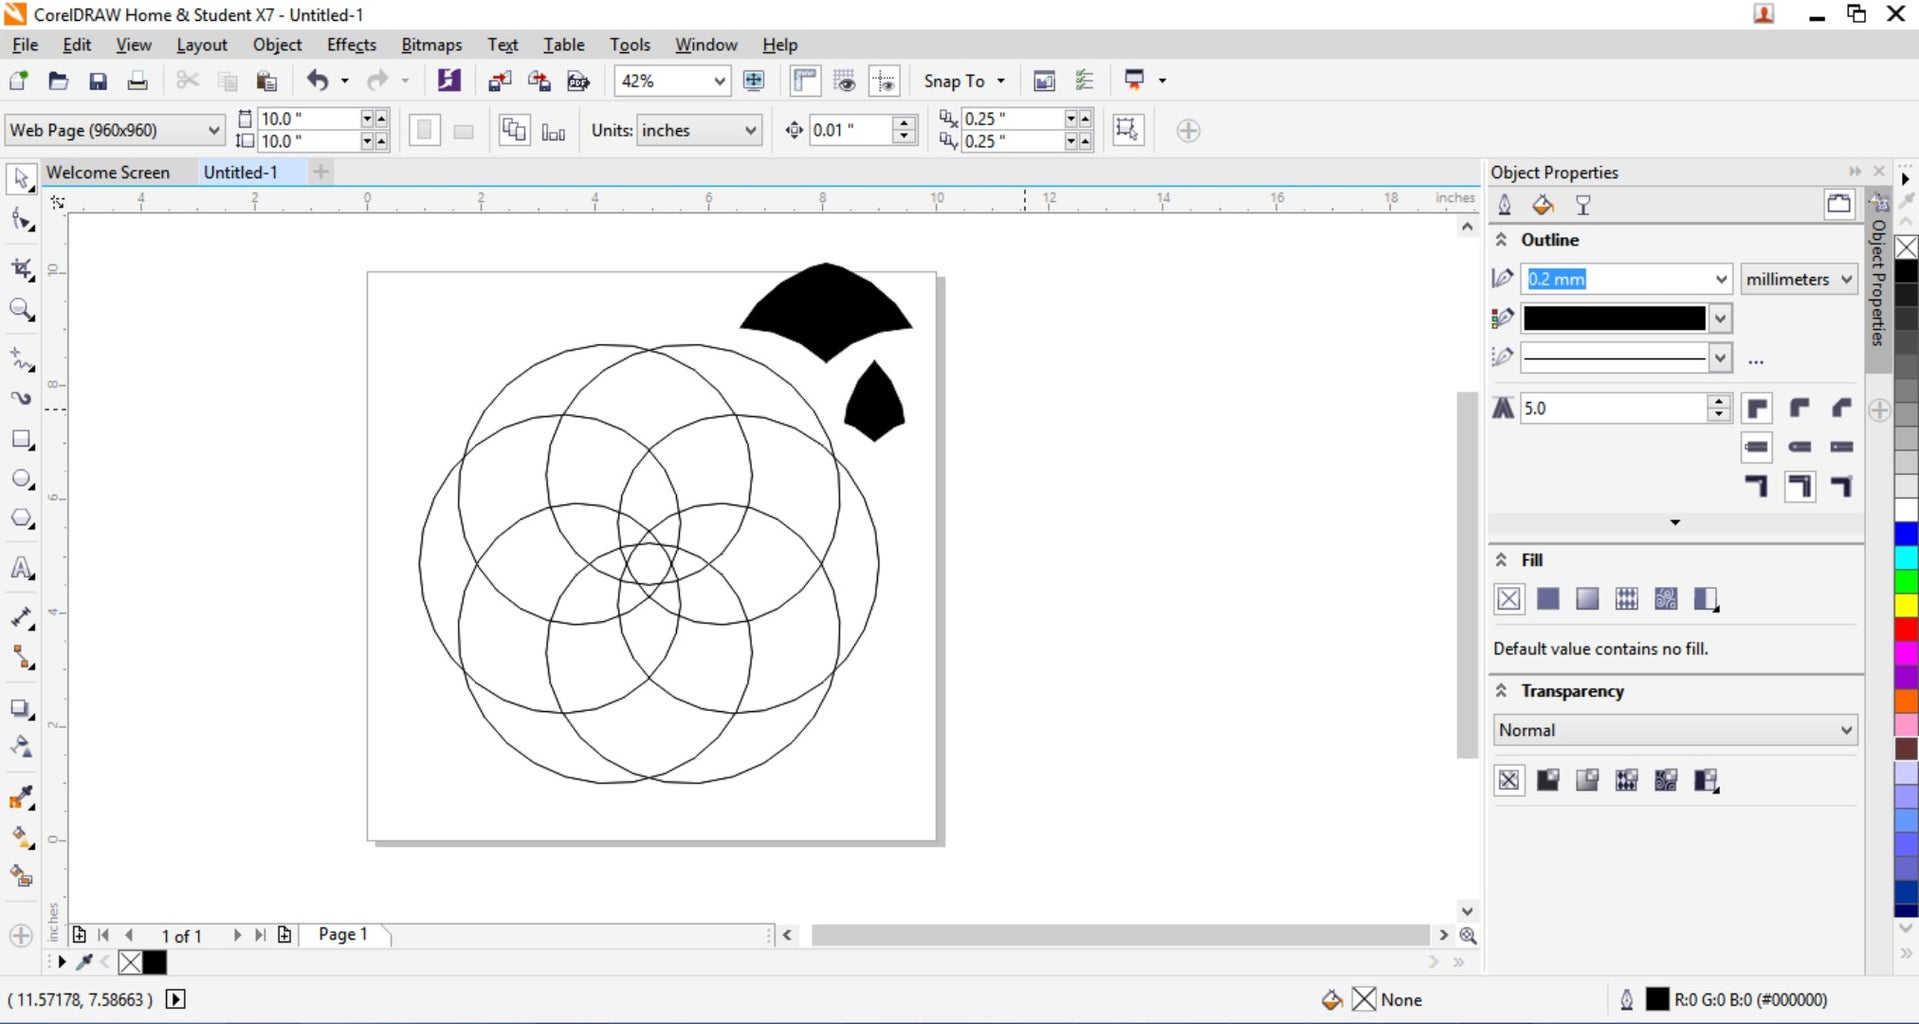

Now we can start preparing our file for either CNC or manual cutting. What's nice about SpiroJ is that it exports to common file formats. Personally, I use CorelDRAW so I use SVG (Scalable Vector Graphics) format.
Also, since it's a vector format, you can simply remove all of the color from the image and vector-cut your pieces out (or very thinly engrave them, if you're using a laser cutter). I was interested to see that the laser that I used basically drew a continuous loopy shape when I plugged the file in directly from SVG.
If your piece of wood isn't large enough to cut the entire design from at once (without really tiny pieces), or if you want to make templates from individual pieces, you'll need to find a way to separate out the shapes. In Corel, this means using the "Smart Fill" function. Just select the "Smart Fill" tool and click on an area. Corel will then duplicate that area as a discrete, filled shape.
Make sure that, before you do this, you have set your overall design to the actual size that you want it. This bit will be important in creating the frame to size later.
Step 3: Packing the Pieces


Now I'm going to switch over to talking about packing the pieces for two-tone cutting. It's nice, because SpiroJ automatically applies a "checkerboard" fill pattern from the start. Take the pieces of one color and pack them into a separate file, and the pieces of another color into a second separate file. I've included my files for your reference: a hexagon-based pattern in SVG, plus packing for a 24x3 piece of wood (pretty efficient) in SVG and Corel 14 formats.


Step 4: Test Cutting

I used a piece of basswood here for test cutting on the laser. Points of interest:
1) I made sure to position the wood close to the bottom of the bed so that the fume extractor wouldn't suck pieces away.
2) Even the smallest pieces are somewhat large for two reasons: to prevent them from being sucked away, and to make sure that I can still assemble them later.
3) The piece that's missing there just fell into the crumb tray, so I was able to recover it
4) I packed all pieces into this one. It was just a test, but I can always stain them later if I want to.
Step 5: Test Assembly

This is an important step to test the fit of your piece. I actually didn't do this step very well (I'm excited to get the final thing done). You want to test both the pieces and the frame, whereas I only tested the pieces. As a result, in my next version using the same files, the fit was a bit loose.
There's probably something you could do with these single-color pieces. Thoughts, anyone?
Step 6: Beauty!


Now we get to have fun! I used Bubinga for the dark pieces and another wood (possibly Yellowheart - I'm afraid I forget) for the light wood. Then I used Baltic Birch for the outer frame. Here, I noticed that the middle was fairly loose. What I need to do is either expand the center hexagon or the small triangle pieces that surround it.
I was also struck by how nice the piece looks at any stage of assembly. I particularly like the 4th "ring" with the large dark petals.
To make the frame, I used the outer 6 pieces from my original drawing. I used that Smart Fill tool then copied and pasted them as one group in position. There were therefore 6 "waste" pieces from the Baltic Birch.
Step 7: Processing the Result
Well, I'm familiar with finishing wood so this is a short step. To make the result "pop", you can mix some black acrylic paint with wood glue, and use it to glue the pieces together. I did not have much time with the laser cutter this time around, so I wasn't able to get a complete result from this step. It was also suggested to me that I use some Tung oil to give the pieces a nice, polished look.
Step 8: More Wood Options


When you're only engraving, you don't have to worry so much about little tiny pieces. For this step, I happened across some nice scrap wood. The spirograph that I generated was rather complicated, so I tried it two different ways:
1) The two shown together in one picture are done using "vector-cheating", where you use the vector function of the laser on low power and high speed, so it doesn't cut all the way through. The one on the right was a little bit too powerful, and the middle pattern was burnt away. The one on the left was try number 2, where I cut back the speed and power quite a bit
2) The single one is derived directly from the SVG file. All I did was darken the color (you can do this either in SpiroJ, with the color toolbar in the top-right corner, or using your favourite editing program). I also engraved it rather deeply, more so than I would have liked, and the middle pieces began to burn away a little bit
Step 9: Vinyl


For this one, I used the same pattern as I did for the wood. I commissioned my friend BH to cut this out of vinyl using a Silhouette vinyl plotter. For those wondering, you'll need to use a program like Inkscape to convert from SVG to DXF. I simply weeded out every other piece to get an attractive checkerboard.
To help out those who haven't done vinyl before, you can use Transfer Tape to transfer the design onto your boject of choice. In my case, that was a notebook that I use every day in class.
Step 10: More Silhouette


As it turns out, you can actually get marker attachments for your Silhouette machine (and pen holders, too). Unfortunately, I haven't figured out how to maintain the checkerboard colour pattern when importing into the Silhouette software (I believe you can trace the image and add yourself).
This actually turns out for the better. It's great fun to colour in the result (sadly, I only own a single pencil crayon and I suffer from hand cramps, so it will take a while to complete this one). I especially recommend using the "advanced" functions to create some unusual designs then giving them to a child to colour in.

Participated in the
Full Spectrum Laser Contest 2016


![Tim's Mechanical Spider Leg [LU9685-20CU]](https://content.instructables.com/FFB/5R4I/LVKZ6G6R/FFB5R4ILVKZ6G6R.png?auto=webp&crop=1.2%3A1&frame=1&width=306)


