

Introduction: Spirograph Art Cards


When I was a child one of my favorite toys was Kenner's Spirograph. The little gears going round and round fascinated me. The mathematically perfect hypocycloid that came to life on paper via these little gears boggled my mind. As an adult, I am still playing with this toy and have been using it over the years for creating various greeting cards and artwork.
Step 1: Materials


A spirograph set can be bought online or from any toy store. It may not be like this elaborate vintage set, but even a few gears will provide a variety of patterns that are fun. Some fine tip, felt markers will be a great way to start and other types of pens and pencils will work as well. Use any type of card stock or you can make your own blank cards.
Materials:
- spirograph
- felt markers of various colors
- card stock
Step 2: Draw Out Your Patterns
Use a black marker with various gears and radii to trace out your patterns. When overlaying patterns take care not to move the outer ring; it needs to stay centered.
Here are some suggestions on creating patterns:
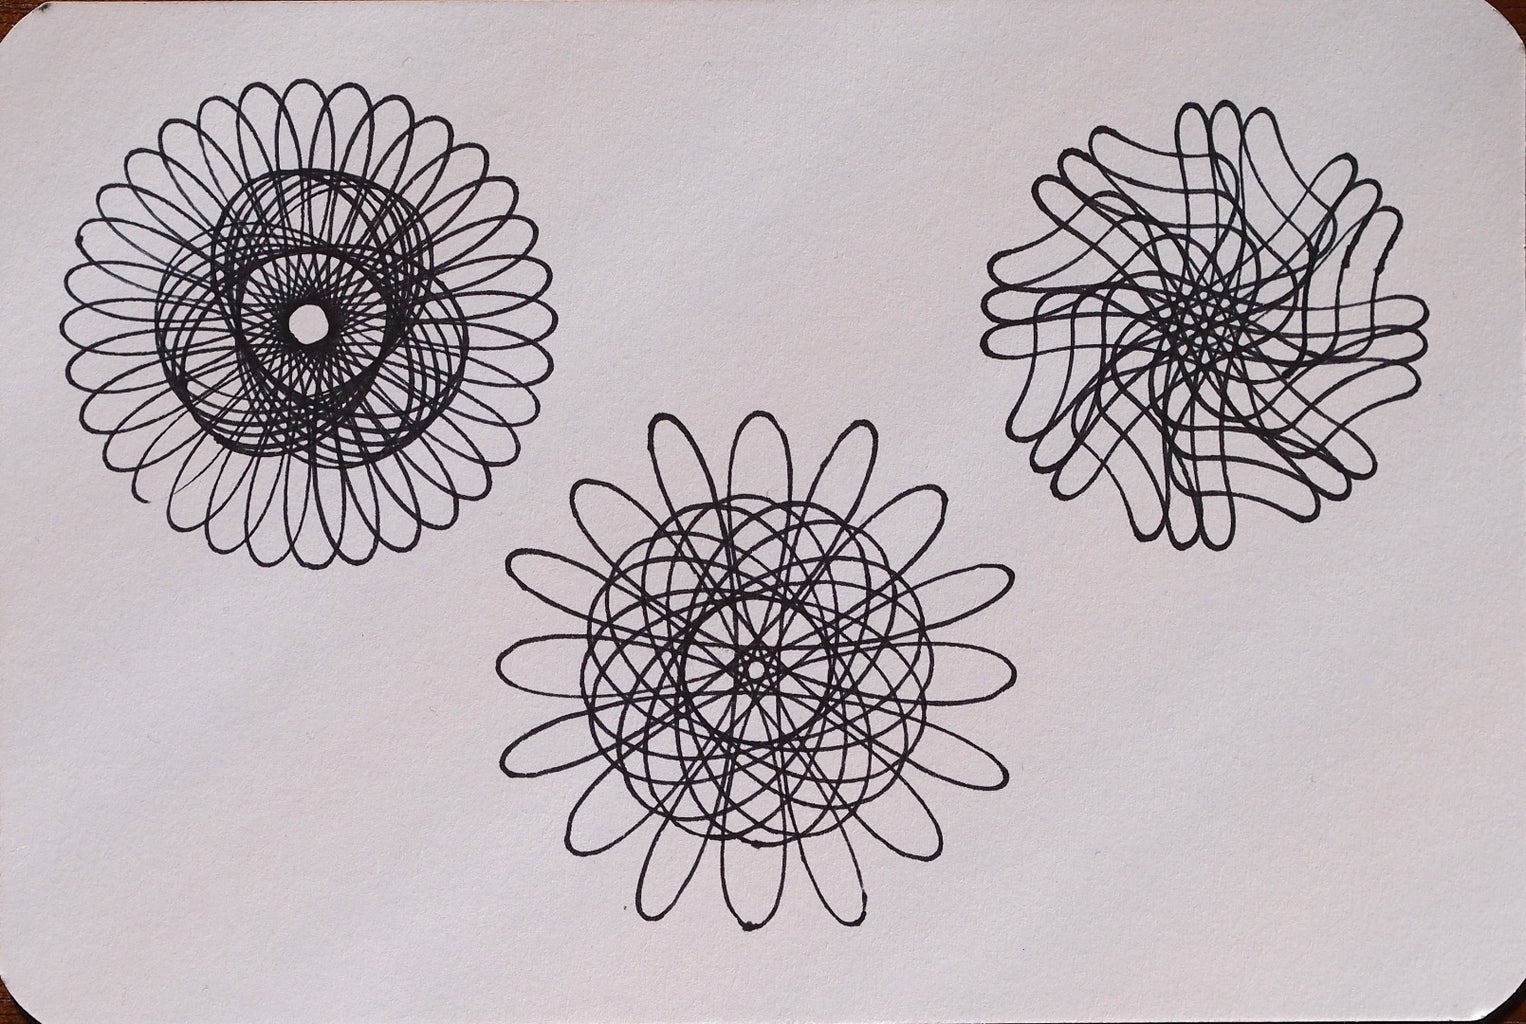
- For the pattern on the left, one gear was used. The most outer radius was used to create the flower pattern. Once completed, the pen was moved closed to the center of the gear to draw the second pattern. The Celtic knot look was created by leaving the second pattern about 2/3's unfinished
- The center flower was created using two gears. The first gear creates a flower with eight petals. Using it twice, creates the two different sizes of petals. The inner pattern was created using a gear with a slightly different ratio
- The spirograph on the right was created by using an egg shaped gear instead of a circular one. The odd shaped gear was used three times with three different points
Step 3: Color Them


There are two steps to coloring the patterns:
- Plan out with the black marker some negative space in the pattern by coloring in some shapes in black. The added black will make the spirograph more dramatic.
- Color in the rest by playing around with colors. The patterns will look fun either multicolored or monochrome.
Other colors can be used to draw contours and this gives the spirograph drawing a more translucent look. Sometimes color is used to create a lace-like texture and overlaying colors gives an interesting effect.
Step 4: Some Creative Ideas


Ordinarily, spirographs were used with a couple of colors to create patterns as suggested on this retro box. At one point the patterns reminded me of lace and stained glass windows so I started coloring them in or overlaying them. Using a black marker for outlines makes it easy to use the spirograph and color in later. Using lighter colors for contours works too and makes the drawing more translucent.
Some things to try:
- Try using different colors
- Draw out your spirograph with a black marker then color it in
- When you draw one spirograph, draw a few more over it with the same gear but different radius (the little holes inside the gears)
- Overlay two spirographs drawn with two different gears. The trick here is not to move the outer ring when swapping the gears
- Sometimes spirograph toys come with odd shaped gears. Those are usually the most fun but often require a little more skill, try them!
- Try using different pens or mediums. Some of these were created with watercolor!
- Embrace the happy mistake it can create some interesting, unrepeatable patterns

Participated in the
Three Ingredient Challenge


