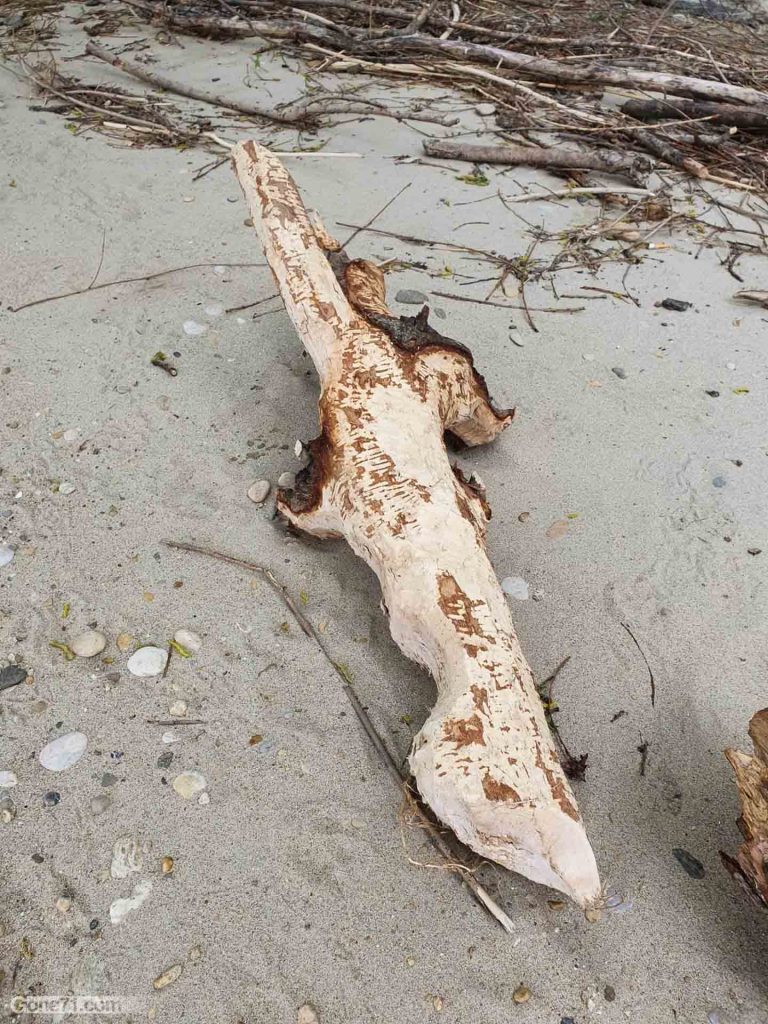
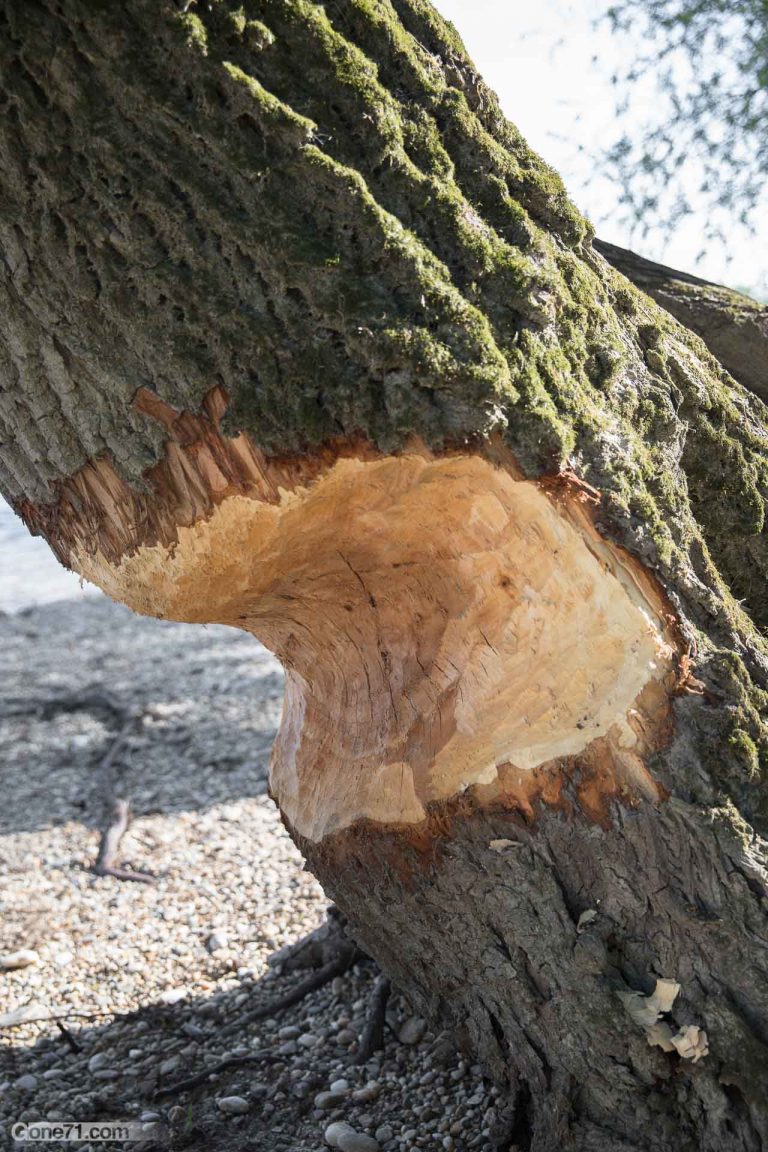
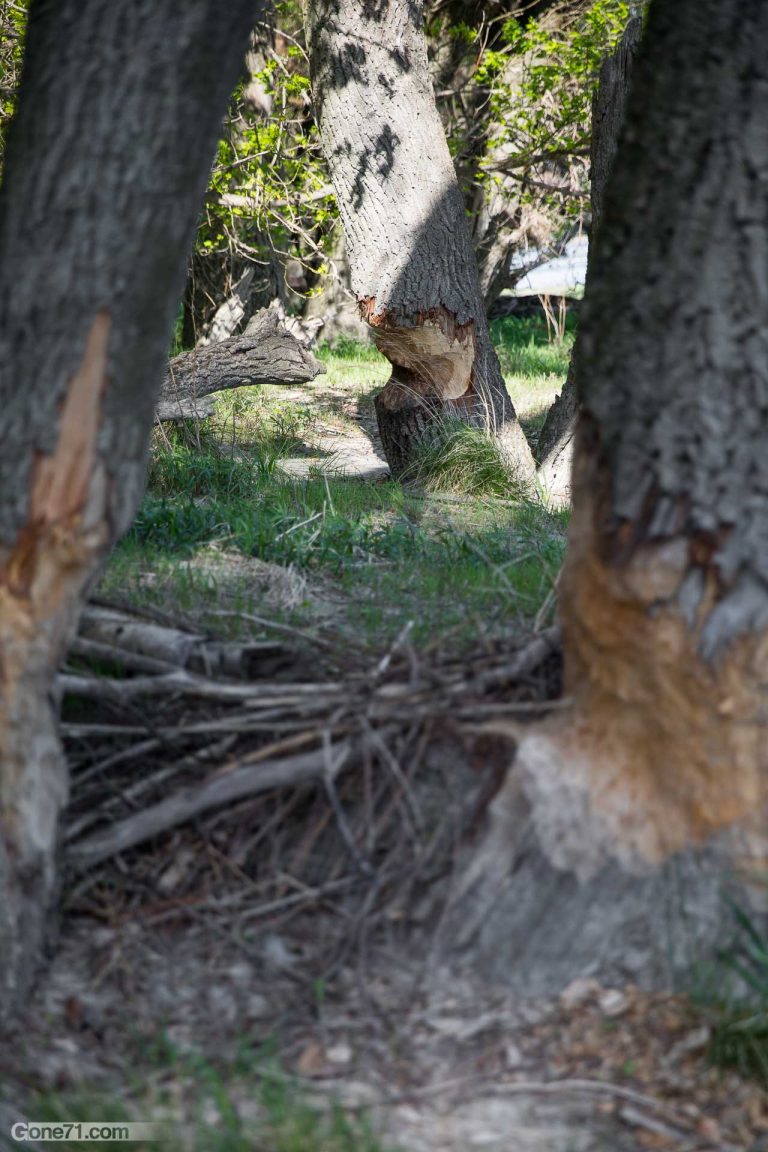
We try to live this simple philosophy in our everyday life. During my regular visits to the alluvial forests of my homeland, I have always been fascinated by the outrageous work that the beavers do there. Even the thickest tree is powerless against these furry carpenters. What remains is a landscape of felled trees and meticulously gnawed branches – the beaver chewed wood.
The peeled and mostly very smooth pieces of wood have always attracted me aesthetically. Not long ago, we were in need for a new loft bed for our daughter. On a recent morel foraging trip near our local riversystem we stumbled upon what seemed like a whole beaver town. The amount of felled trees and gnawed branches was incredible. Somehow I had the urge to use some of the wood in one of my projects and so the idea of using this type of wood for the loft bed project came up quickly. Without further ado we decided to collaborate with these elegant craftsmen.
The idea was to make some elements of the bed from trunks and branches that had already been pre-cut and gnawed by a beaver. For the beaver, this type of wood are leftovers like a chickenbone is for us (non vegetarian) humans.
Collecting wood
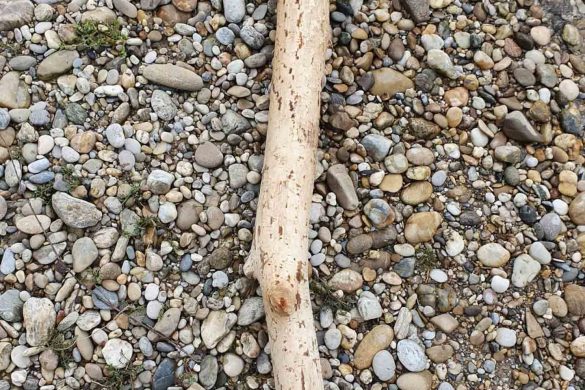
As a first step, I started looking for suitable pieces of wood. Since the bed was to stand alone, four large branches had to act as wooden legs. When choosing the wood, it is important to ensure that the trunks and branches are not too old or rotten. In addition, the wood should already be relatively dry so that it does not crack later.
In our case, the beavers mainly tampered with willows and poplars. Specifically, willow is a very soft type of wood and gneraly easy to work with. However, you have to be careful to choose the strength sufficiently so that the bed is also durable and stable. Depending on the season and the region, a canoe can be very helpful when gathering wood. It was dry season in our area and we were able to easily collect the wood without a boat.
When working with wild wood, it is important to note that there are usually no straight angles and edges. So if you want to try such a project, you should be prepared to improvise more often. All the twists and curves can be a bit challanging and often a certain element of trial and error is included to get things done.
When collecting the wood, I already had vague design ideas of what the bed should look like in the end. In addition to wild wood, I wanted to use classic posts and wooden slats so that the whole construction doesn’t look too rustic.
The bed frame for the mattress, the slatted frame, the handrail and the ladder should be made of planed wooden slats, the rest of beaver chewed wood. In addition to the bed legs, I also collected shorter parts for struts and smaller branches for fall protection. The original idea of using horizontal struts was soon ditched since I learned that those type of struts do not add much to the stability.
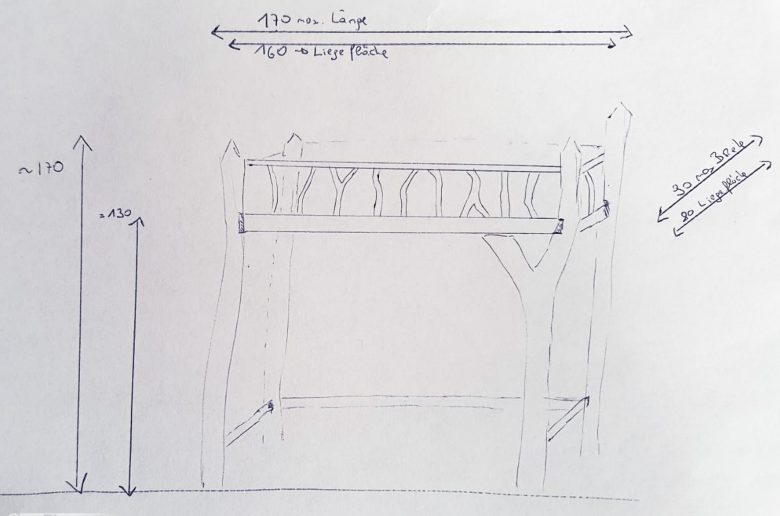
I am not a carpenter and such projects are usually very much improvisation for me. Of course, it took a little planning before the actual implementation started. The dimensions were calculated with 170x90cm (160x80cm matress), the lying surface should be at a height of 130cm. For the bed frame I used wooden posts in the dimension of 74x44mm.
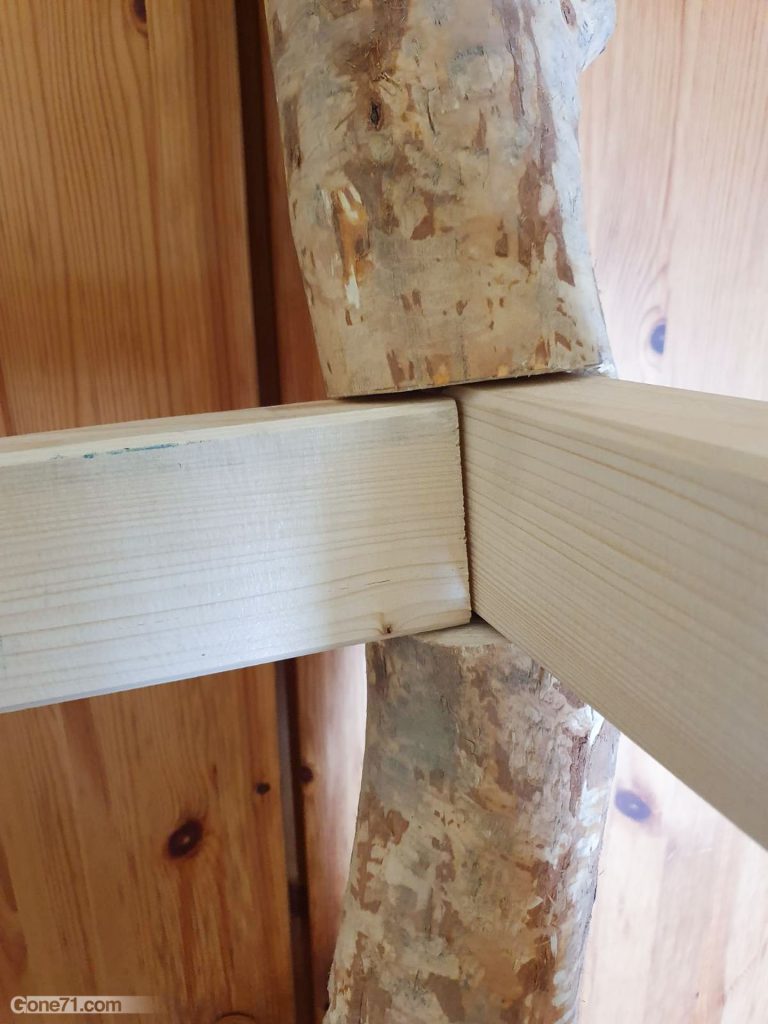
As a first step, I used a hammer and chisel to cut chamfers into the legs of the bed for the actual bedframe. That was the first test to see if my idea was even feasible – it was. So now it was getting serious. Here is a brief overview of the next steps that followed for the basic construction.
The beaver chew wood was roughly sanded with an angle grinder (80 grid) and then finely sanded by hand with 120 and 180 grid sanding paper. Depending on how smooth you want that surface to end up, this can take while.
I simply screwed the bed frame together as the corners in the chamfers are not visible. There are more elegant solutions to this and you can also work with dowels or more elegant wooden connections. In my case, however, the bed had to be easy and practical to assemble and disassemble.
Seeting up the basic construction
Then I inserted the frame into the chamfers of the beaver chewd wood legs and connected it with 250mm wood screws. Now the basic construction was done – however still very wobbly and squeaky.
To stabilze the whole construction, I gradually used diagonal braces. Since there are no exact angles on the surface of the bed legs, this is a process of trial and error to fit them in. In total I attached four diagonal braces, which made the whole construction very solid.
The handrail was also worked into the bed legs with a hammer and a chisel. Here I also had to feel my way around a bit, since there are no exact angles that you can use for orientation.
I constructed the fall protection from the thinner beaver-gnawed branches. I pre-drilled holes of the app. right size and then glued them into the handrail and the bed frame. They where all roughly between 20 and 30 mm and in some cases I had to slightly carve the ends to the right size.
To attach the slatted frame, I screwed and glued 3cm wide wooden slats into the frame, which serve as the support. But instead of slats I used three wide boards so that the look of the bed from “the cave” below is nicer.
The ladder
And then, of course, the ladder couldn’t be missing. Actually planned a little differently, I found a ladder from an old loft bed on an old pile of wood at home and decided to reuse it right away. Admittedly a somewhat convenient solution but also very economic. We use what we have, right?
As a last step, we made curtains from natural cotton and the ambitious piece aka ‘beaver castle’ was finished. In order to test the construction extensively, I naturally tried it myself first before sending up my daughther. The bed is very stable the way it is now and doesn’t wobble. Only time will tell how long it can withstand the nature of our very active child.
In any case, the anticipation of our daughther was great and the beaver castle was immediately taken over by our little princess (4 ½). I got to be (and I quote) “the best daddy in the whole world” – at least for 15 mintues ☺.