Top Tips to Improve Your Downward Dog
Top Tips to Improve Your Downward Dog
Downward Dog (Adho Mukha Svanasana) is one of the major, and most iconic yoga poses. If you haven’t already encountered it in class, you’ve no doubt seen it in magazines, on billboards or on Instagram.
When it all comes together, Adho Mukha Svanasana is an immensely satisfying pose which helps to release the backs of the legs, the chest, spine and arms whilst toning the chest, thighs and arms. It strengthens the bones and also helps with blood flow to the brain.
It’s also a pose that requires a certain amount of skill and flexibility to properly access.
Two of the most common reasons people struggle to get this pose right are stiff shoulders and hamstrings - the bane of many a desk worker’s life. When students first attempt this pose, it’s not unusual to see their spine curved, their legs bent and/or arms collapsing. Something like this.

One route to a decent Downward Dog is as follows.
Press your shoulders away from your hands
Lift your pelvis towards the ceiling
Press your spine into your (concave) back
Straighten the legs (with the heels still raised).
Then, finally, extend the heels down towards the floor
But we know that all of that is easier said than done when you’re still learning the ropes, so here are a few hacks and top tips to help you make some headway with this amazing pose.
1. Focus on one bit at a time
Keep your legs slightly bent and go up on your tiptoes. Press the shoulders strongly away from the hands and focus on the extension from the hands to the base of your back. Try to push the pelvis up towards the ceiling. Imagine you have a butcher’s hook in the back of your pants that’s raising your hips to the roof.
That should leave you looking something like this.

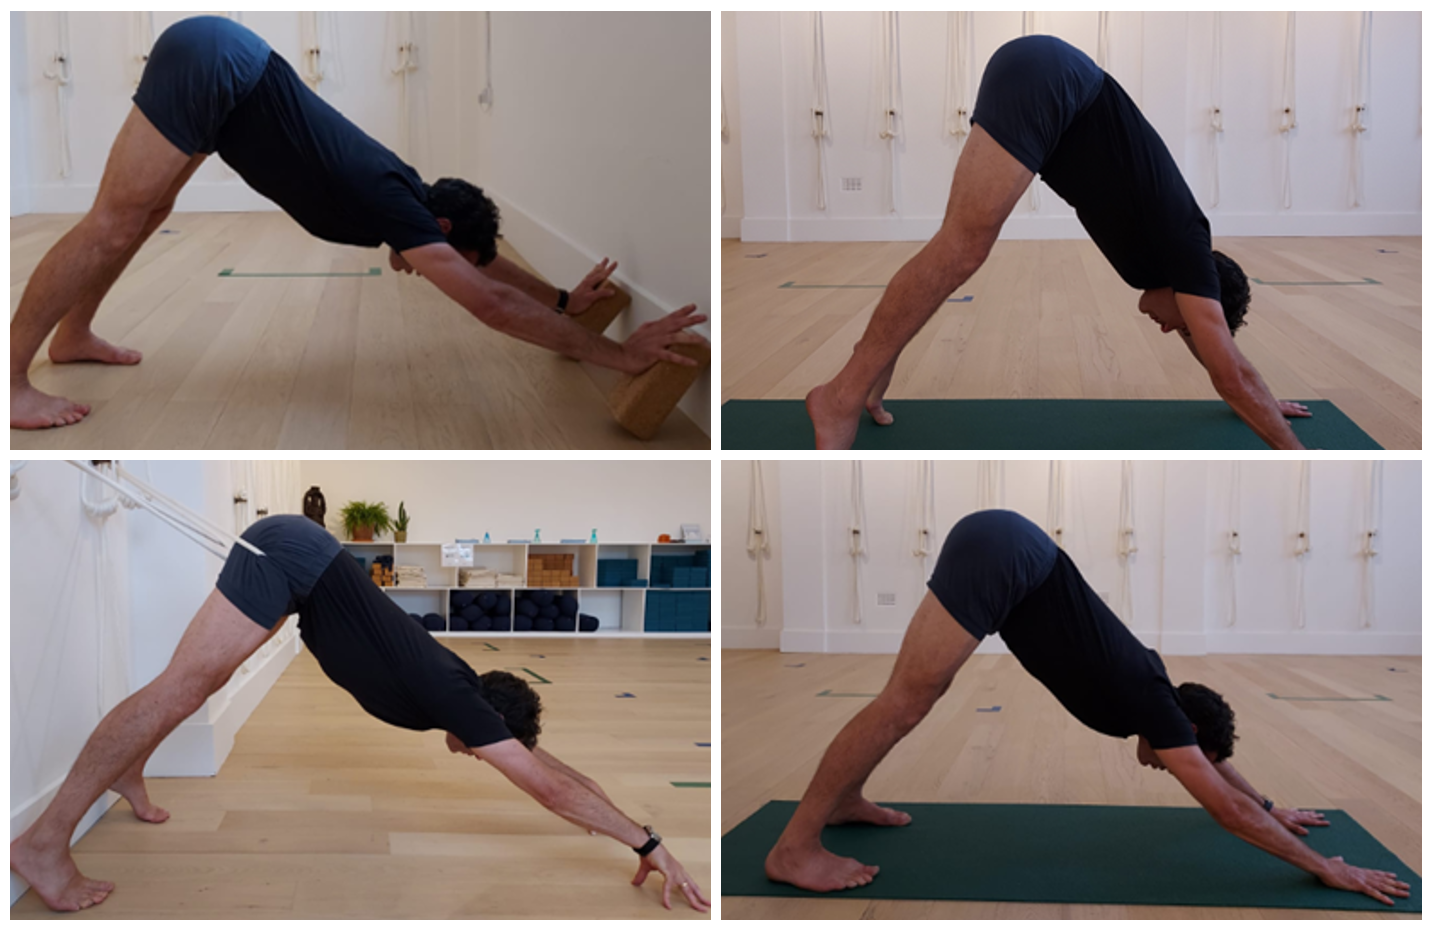
2. Use bricks against the wall
Pressing the spine into the back is difficult if the hamstrings and shoulders are stiff so try using two bricks placed diagonally against the wall. (See our previous blog post about the many virtues of the yoga brick.) With the extra height provided by the bricks, the shoulders are more mobile, and the legs and arms will feel longer. Remember to press the shoulders away from the hands to give lift, but now practise pressing the spine into the back. Imagine taking the armpits towards the shins. Squeeze the legs straight and press the heels towards the floor.

3. Get extra extension with ropes
If you’re in a studio where there are yoga ropes attached to the walls, stick around for a few minutes after class and try this out. Loop one rope around the top of the each thigh (this helps train the legs to rotate inwardly). Put the ropes as high up the legs as possible. Place the heels up the wall and lengthen the trunk as much as possible. Cup the hands, be up on the fingertips and stretch the arms and body as much as possible. Make sure to keep the thighs and kneecaps firm. This variation is particularly satisfying as it gives a real sensation of length in the spine. If you find the ropes dig in uncomfortably on the thighs, wrap a blanket around each leg.

Like all poses, Downward Dog takes practice but will come together if you persevere. If any of these top tips helps you get closer to the prize, let us know in the comments below.