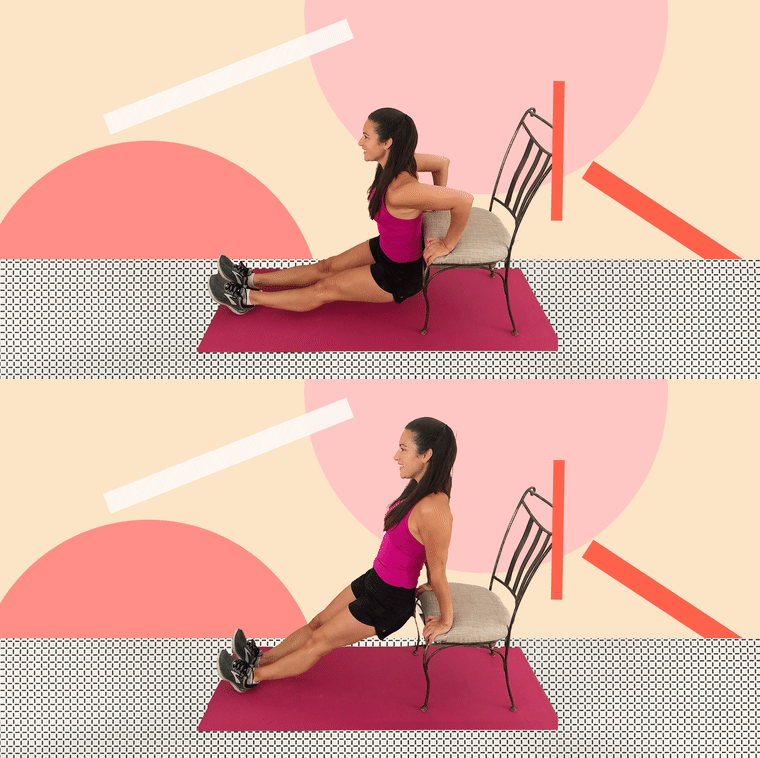
Tricep dips are my favorite tricep exercise because they require no equipment. All you need is an elevated surface, which can be a bench at a gym or a couch, chair or curb outside your house. (You can even perform them on the ground if you have no elevated surface at all.)
Tricep dips are the perfect move for anyone who wants to work on their arm and shoulder strength, while tightening the back of the arms. Plus, there are tons of variations, so you can find a way to perform them that matches your strength level.
Knowing how to do them correctly is important in ensuring you are working the right muscles and not putting strain on the neck or shoulders. It can be a bit tricky to master the correct form, but all it takes is some attention to detail.
What do tricep dips do for the body?
Tricep dips work the muscles in the upper arm, specifically the triceps, and are one of the best exercises for toning the arms. However, there’s more to the tricep dip than just improved arm strength. Dips also require core engagement since you’re lifting your hips off the ground.
Strong arms and core are essential for performing everyday activities that require any sort of lifting or pulling motion, and strengthening them helps to prevent injury and strain. Plus, strengthening the triceps will also tone the back of the arms, helping to work the common trouble spot we often refer to as "bat wings" that jiggles when you wave.
The common mistakes people make when doing tricep dips
When performing tricep dips on an elevated surface, there can be some confusion regarding the positioning of your shoulders, as well as the distance you’re supposed to dip. I find that a lot of my clients shrug their shoulders up towards their ears and dip their bodies down too low.
It’s also common for beginners to lean forward while dipping. Tricep dips are meant to work the triceps, and leaning forward changes the target muscle group from the triceps to the chest, changing the purpose of the move. Keep these tips in mind to make sure you steer clear of these common mistakes:
- Don’t let your shoulders creep up towards your ears. Pull your shoulder blades back and down, keeping your neck elongated.
- If your shoulders begin to feel strained, you’re dipping too low. Dip at a level that is comfortable for your shoulders. Aim to dip until you create a 90-degree angle at the elbow.
- Keep your torso straight, with your head pointed to the ceiling. If you find yourself leaning forward, engage your core and think about lowering your butt straight down to the ground on the descent and lifting your head to the ceiling as you rise back to the starting position.
How to do a modified tricep dip
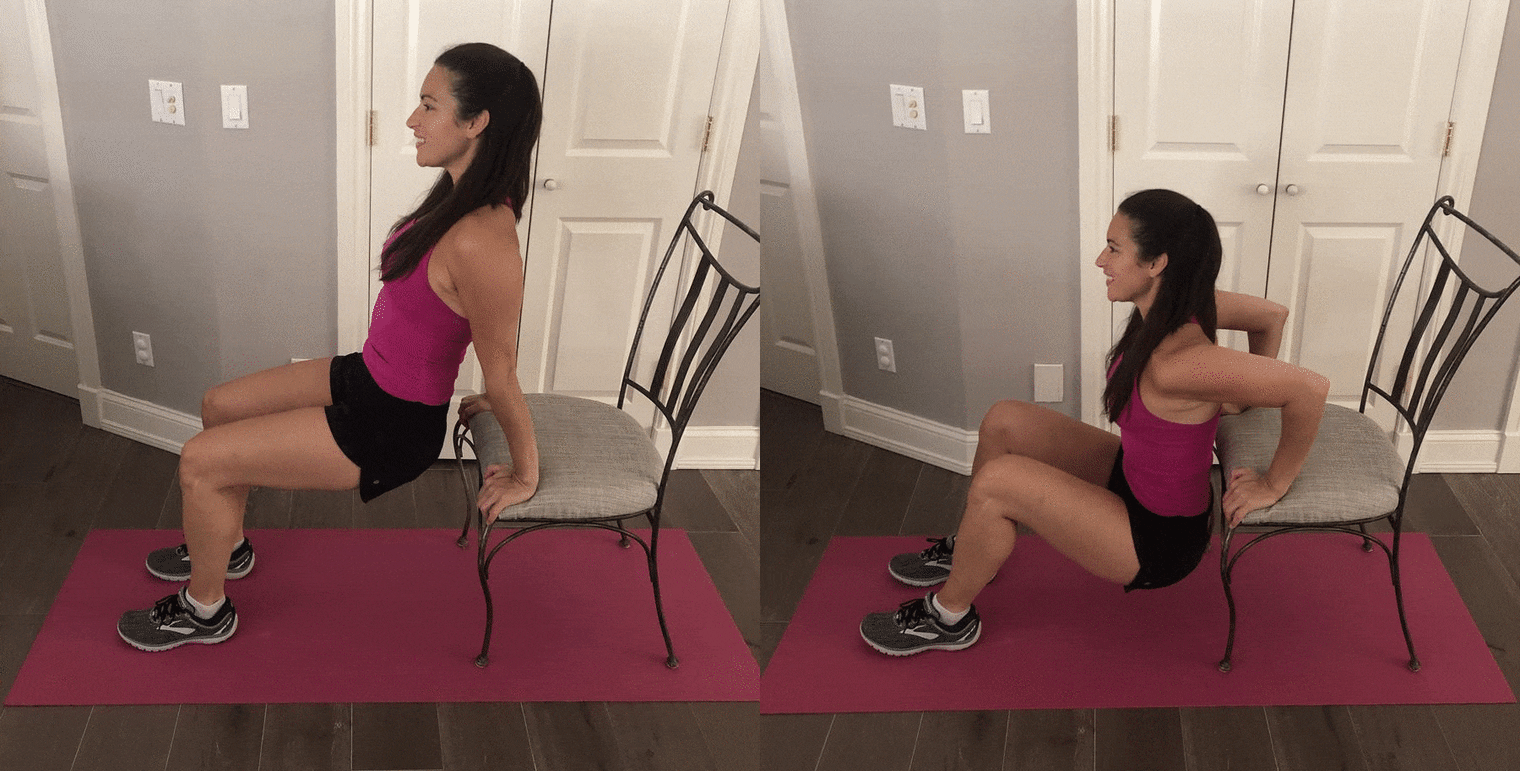
Tricep dips can place a lot of stress on your shoulders, making them difficult and sometimes painful. If you’re not ready to take on the full move, match your skill level with a modification.
There are two easy modifications you can make:
- Bend your knees. This allows you to support some of your weight with your legs, making the exercise easier on your arms. Although you’ll be decreasing the intensity, you’ll still be working on your upper-body strength and you can slowly inch your legs further from the body as you build strength.
- Decrease the distance you dip your body. The lower you dip, the more stress is placed on the shoulders. Decreasing the angle at the elbow will make it easier; instead of dropping to a 90-degree angle, lower halfway to a 45-degree angle instead.
How to perform a tricep dip correctly
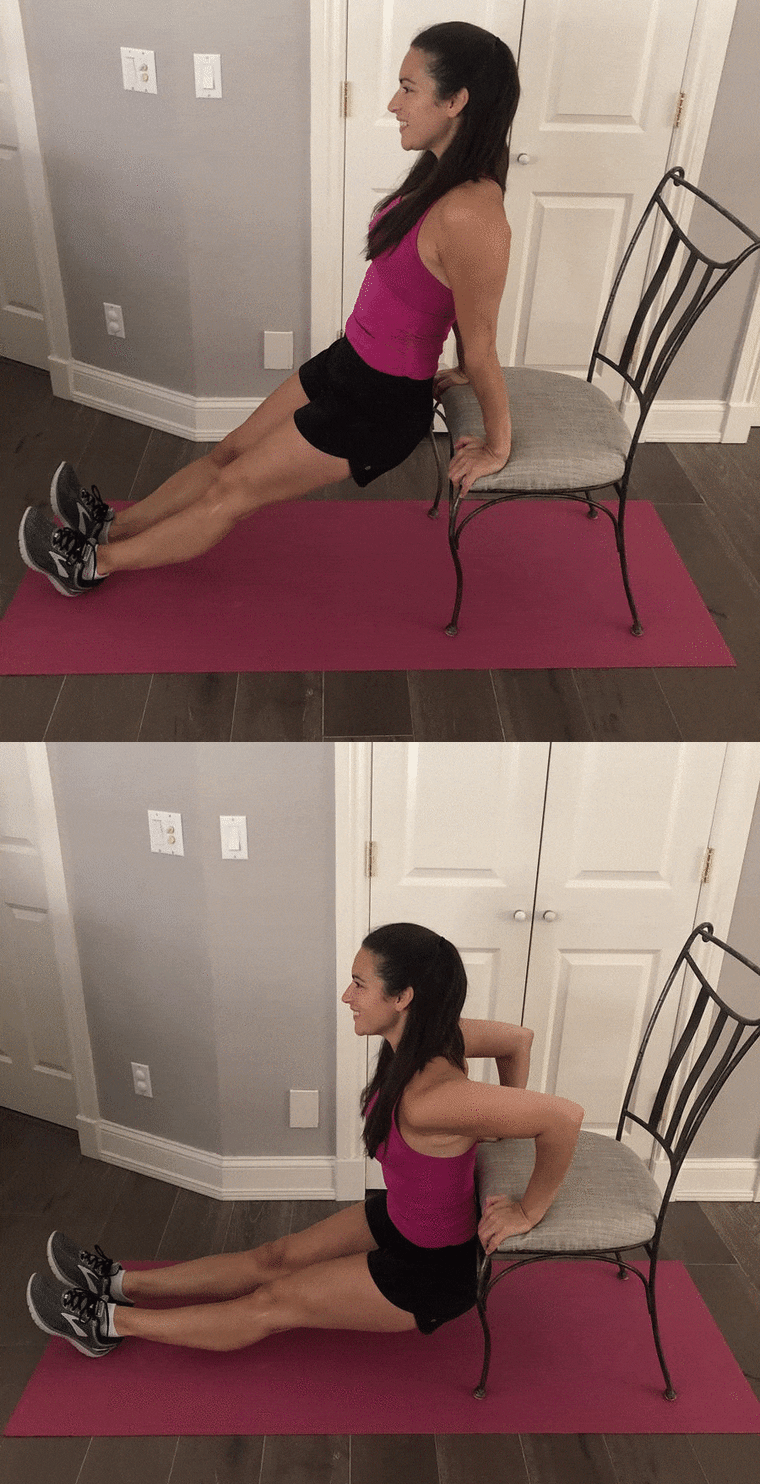
If you’re feeling confident about your upper body strength, you may be ready to try the tricep dip. Follow these step-by-step instructions, and if you feel like you’re still struggling after giving it a shot, return to the modified version.
- Find a steady chair and take a seat. Place your hands on the chair, on either side of your hips. Grip the front of the chair, with fingers pointed towards your feet.
- Straighten your legs out in front of you with your heels on the ground. Keep your upper body in a straight line with your head up towards the ceiling.
- Move your body forward slightly so that your butt is off the chair and you are relying on your arms to hold your body weight.
- Lower your body down, bending your elbows at an angle somewhere between 45 and 90 degrees.
- Push yourself up to the position you started in. Make sure to engage your core and use your triceps to move your body up and down.
4 exercises that will help you with the tricep dip
If you aren't quite ready to tackle the tricep dip, these other exercises will help you build the strength and mobility needed.
Tricep extensions
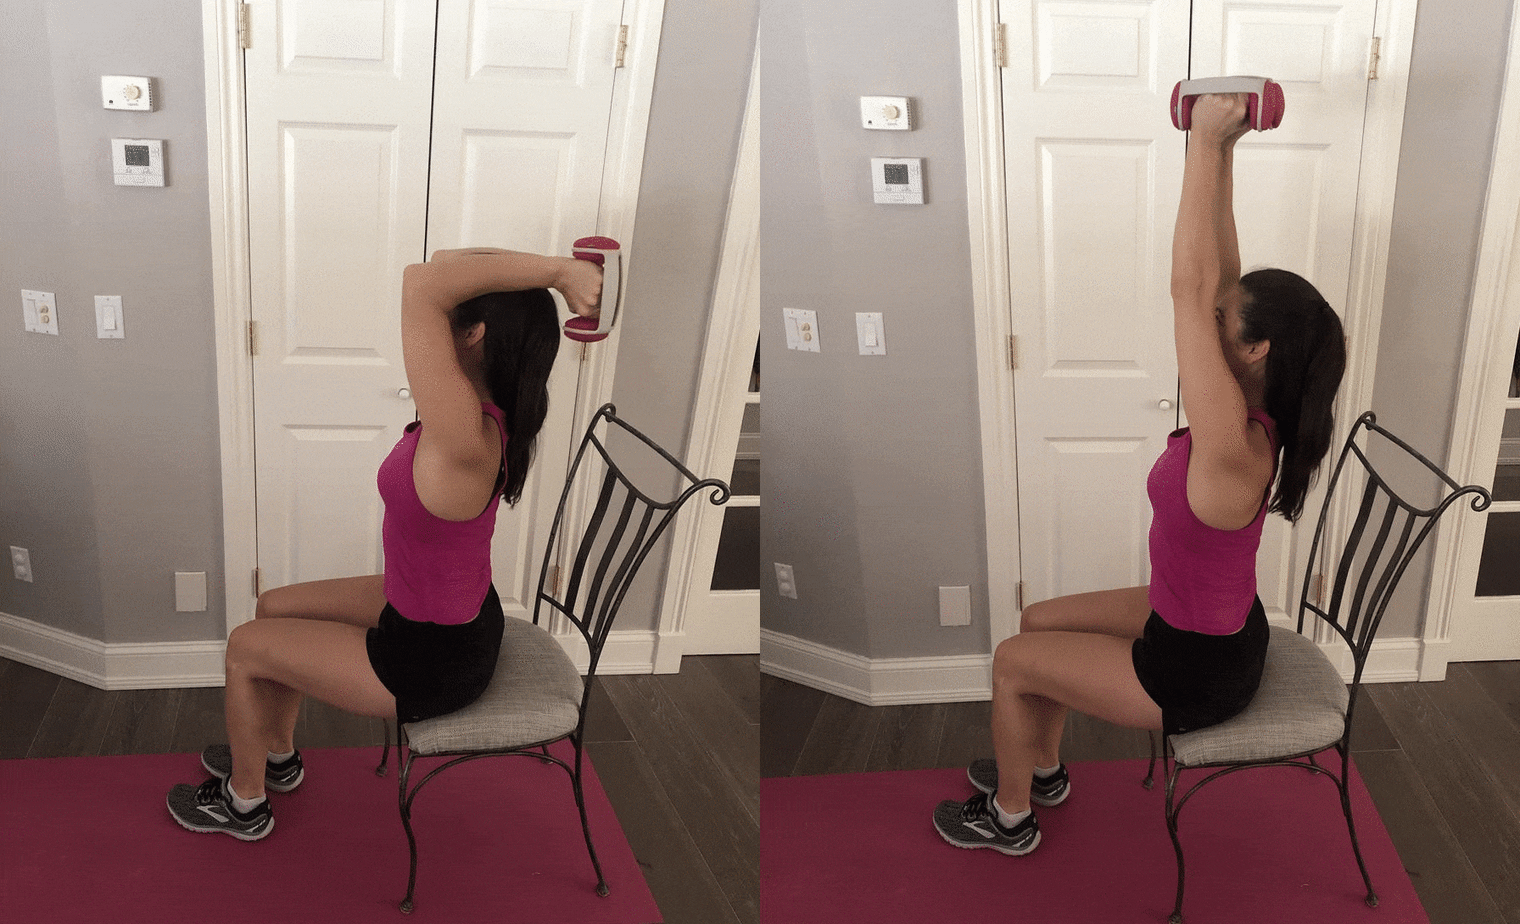
Find a comfortable seat and a weight that matches your strength level (I recommend starting off with a 5-pound dumbbell). While sitting down in a chair, hold the weight in both hands and reach it straight over your head. Keeping your arms still from the shoulder to the elbow, bend at the elbows, lowering the weight behind your head. Keeping your shoulders still, lift the weight back up so that your arms are straight overhead. Squeeze the back of the arms and maintain a strong core. Repeat 10 times.
Tricep kickback
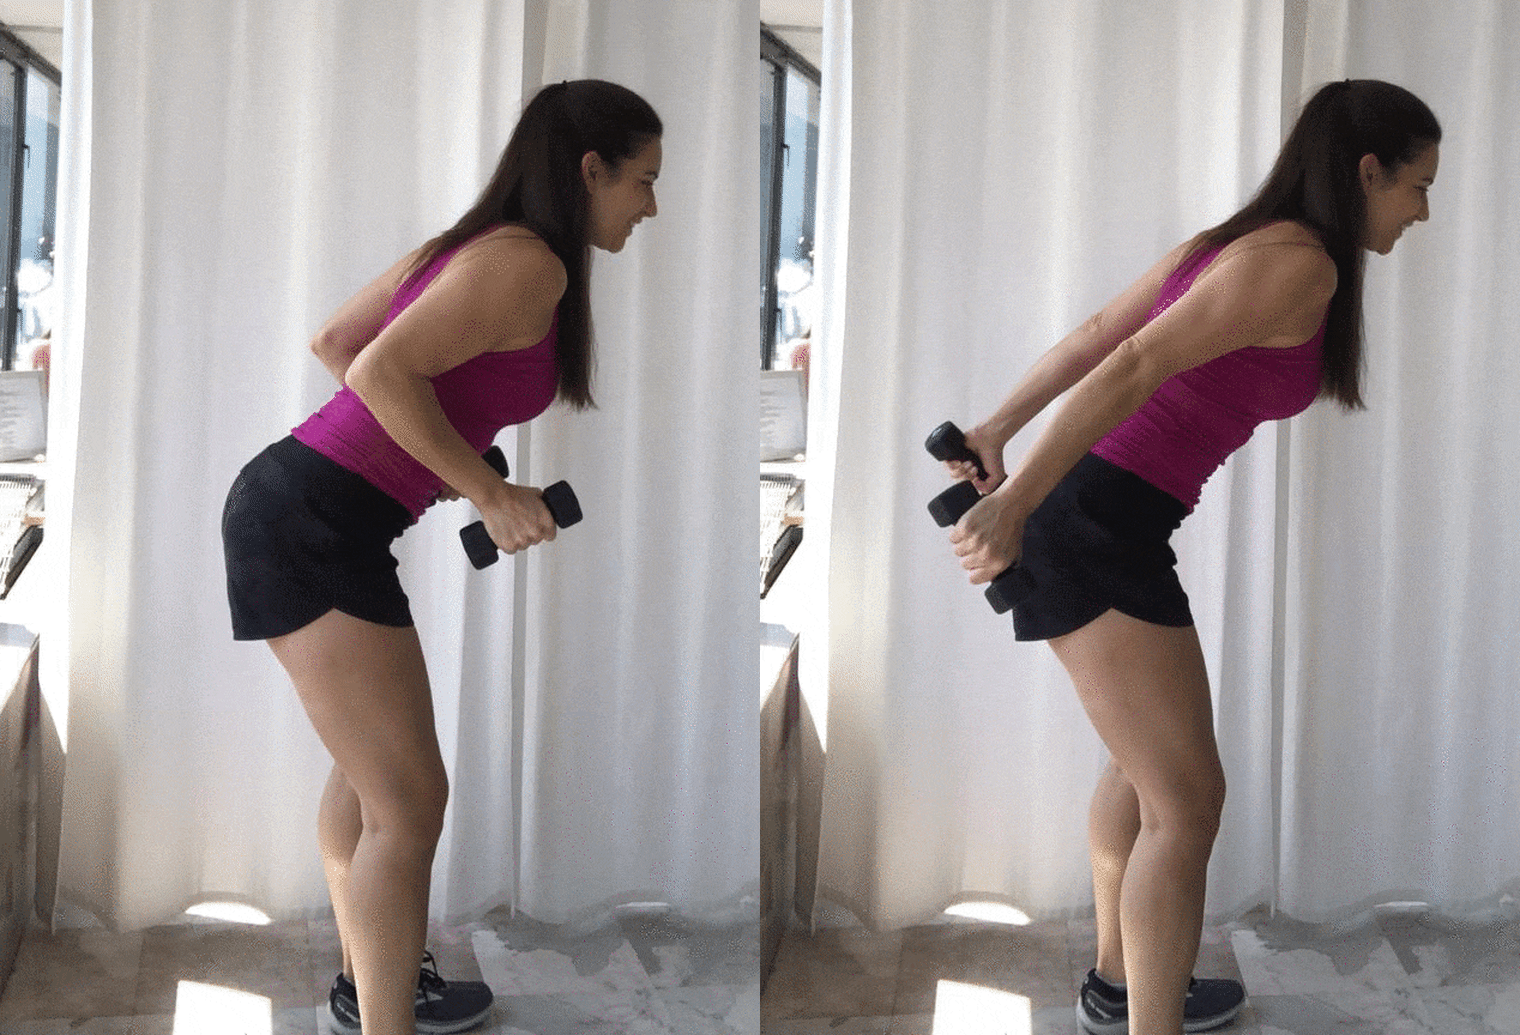
Stand holding one weight in each hand. Bend your knees slightly and hinge forward at the waist so that your upper body is at a diagonal. Pull the weights up to your chest with your elbows bent at a 90-degree angle and your upper arms glued to your sides. This is your starting position. Keeping your upper arms still, lift the weights towards the back of the room, straightening your arm. Squeeze the triceps at the top before returning the weights to the starting position. Repeat 10 times.
Tricep pushup or modified tricep pushup
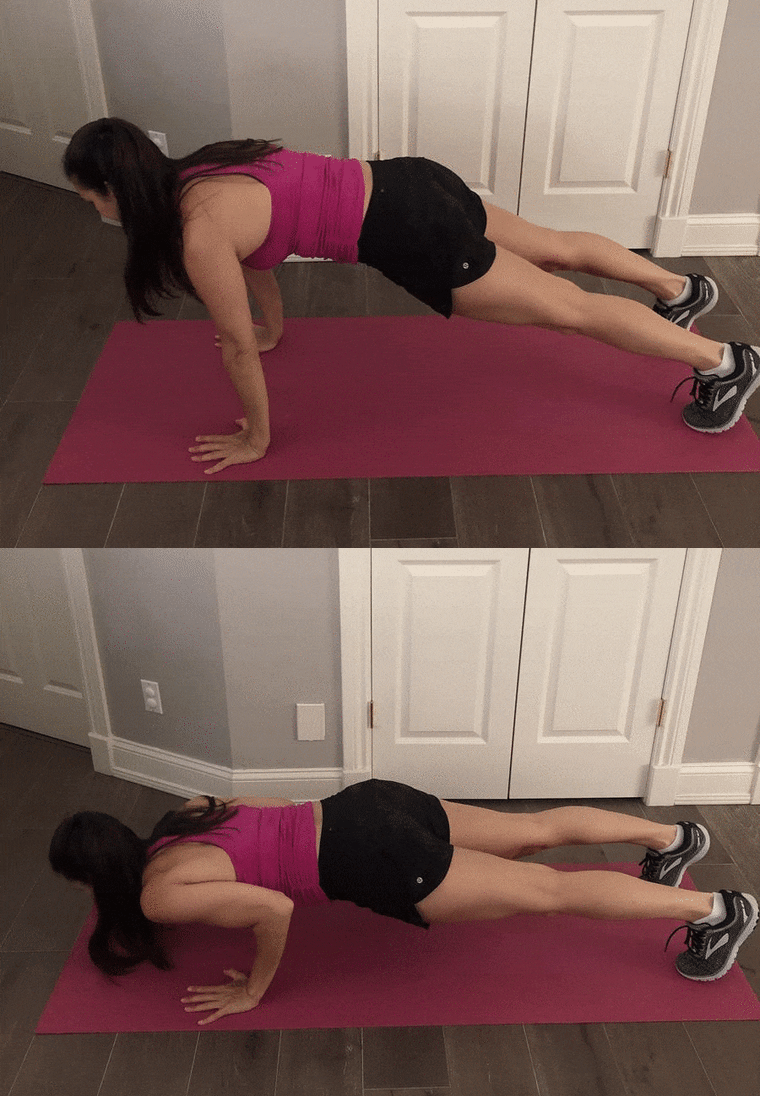
Push ups are a common upper-body workout. But when performed with elbows hugging into your sides, they target the triceps. Come into a plank position, with your hands flat on the floor and your legs straight out behind you. To lower your body, bend at the elbows keeping your arms hugged into the body, instead of bending the elbows out to the sides like you would in a traditional pushup. Push back up to the starting position. Repeat 10 times.
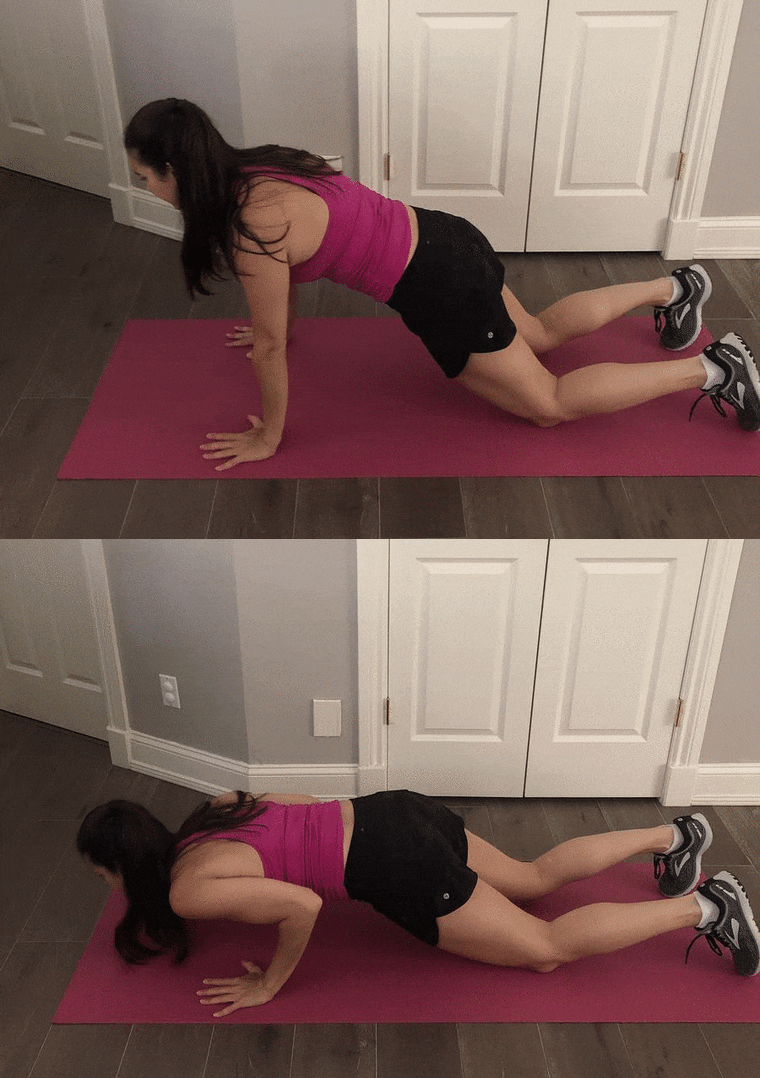
If you’re not comfortable performing full pushups, perform this move on your knees instead.
Tricep press
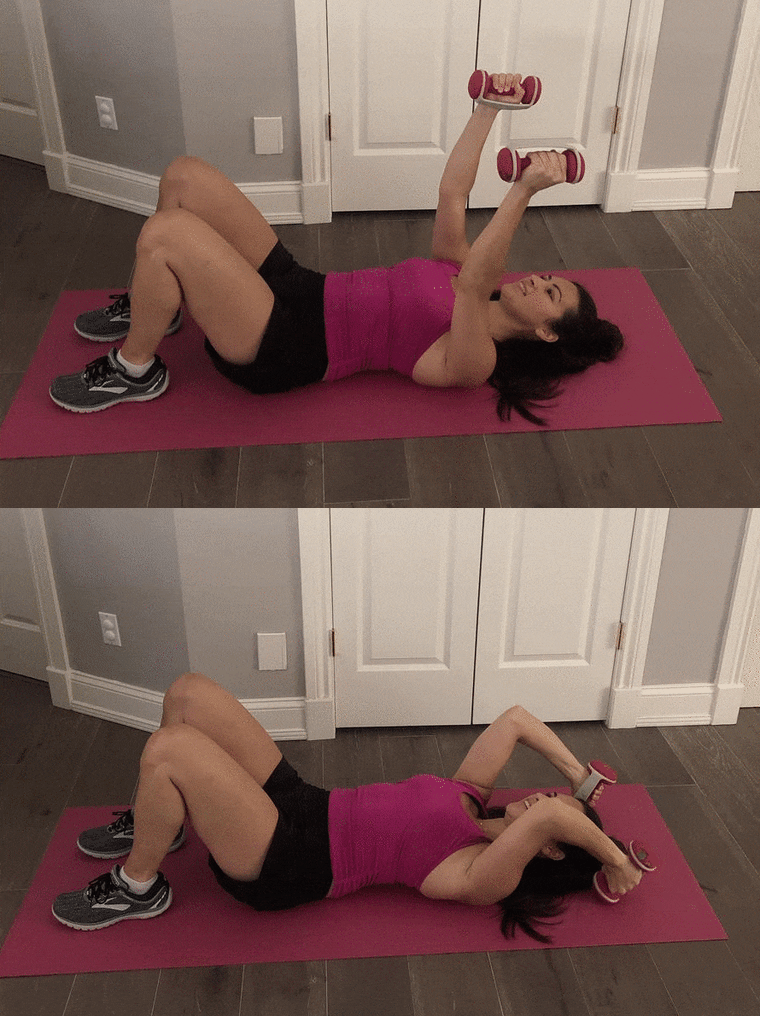
Lie on your back with your knees bent and your feet flat on the ground. With one weight in each hand, reach the arms straight up above your head. Then, holding the upper arms steady, bend at your elbows to lower the weights to either side of your head. Using your triceps, pull the weights back up to the starting position. Repeat 10 times.
