We may receive a commission when you use our affiliate links. However, this does not impact our recommendations.
 Curved lines in any project are both a blessing and a curse. They’re a blessing for the eye of the beholder, but a curse for the poor guy who has to make them.
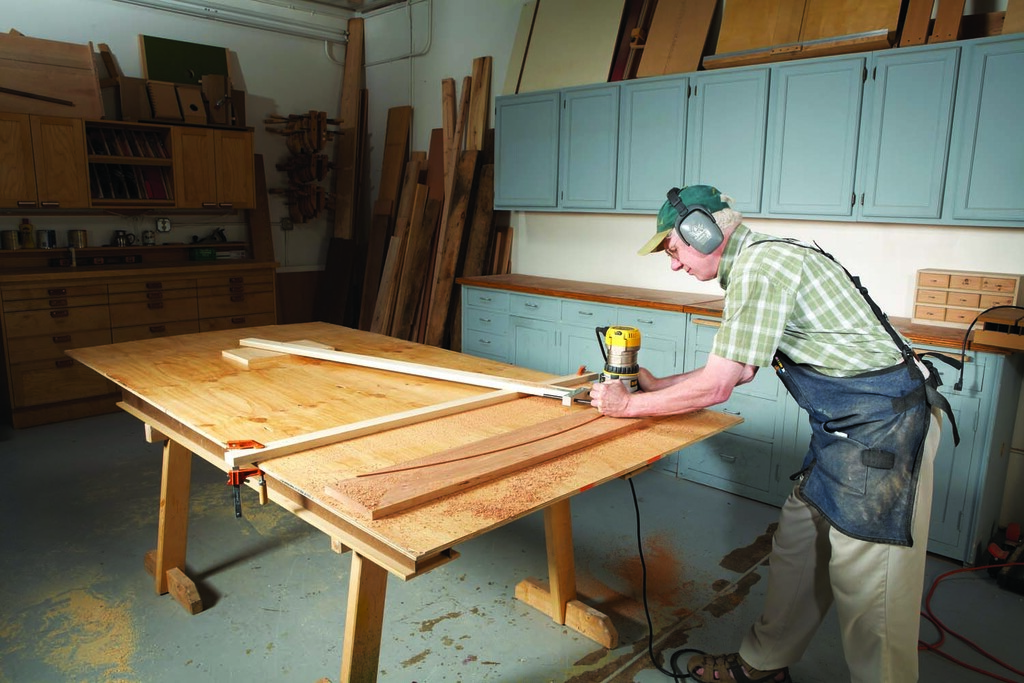
Executing a perfect, fair curve—particularly a large one—isn’t easy. If you cut one freehand, you’re often faced with hours of sanding to true it up. I build custom fireplace mantels, which often require a horizontal front board with an arc that follows the insert below. I can’t afford to use such a slow, inexact method, so I’ve adopted a much more efficient and precise approach using a router. The results are so good that I hardly have to sand at all.
Calculate the radius
An arc can be elliptical, oval or circular, or some combination of these three shapes. I’ll only deal with the simplest one—an arc that’s a segment of a circle. Using the equivalent of a giant trammel (a compass that uses a beam instead of two legs), it’s fairly easy to make with a router.
Let’s say you have a pretty good idea of how large the arc should be. You know how tall it will be (its rise) and how long it will be (its run). In order to set up the trammel, you’ll need to figure out the full size of the circle that defines the arc. And in order to use the trammel, you’ll need a method to pinpoint the circle’s center. No problem.
Using the measurements of your arc’s rise and run, calculating the circle’s radius is a simple math problem (see How to Calculate the Radius of An Arc,” page XX). Once you know the radius, it’s pretty easy to find the circle’s center—but we’ll deal with that later.
Although your arc may not be very large, the circle that it’s based on might be huge. In this article, I’ll be routing an arc with a rise of only 4″. From endpoint to endpoint, its run is 42″. Doing the math, I’ll need to rout an arc with a radius of 57-1/8″—almost 5′! My method will work for making an arc of virtually any size, but it’s particularly well-suited for big ones like this.
Make the arm
To rout the arc, you’ll be mounting your router on the end of a long arm. Making the arm is very simple—it’s just a straight piece of wood. Once you’re done with the job, there’s no need to hang on to the piece; you can just put it back in your woodpile.
So how do you connect the arm to the router? I use a very simple system that should work with any router that accepts a fence. You don’t need the fence itself; you just need the rods or bars that the fence slides on—the parts that slip through the router’s base. (If you don’t have these parts, you’ll probably be able to find or make substitutes.) To connect the rods to the arm, you’ll be making a wooden device that clamps around the rods (Fig 01).
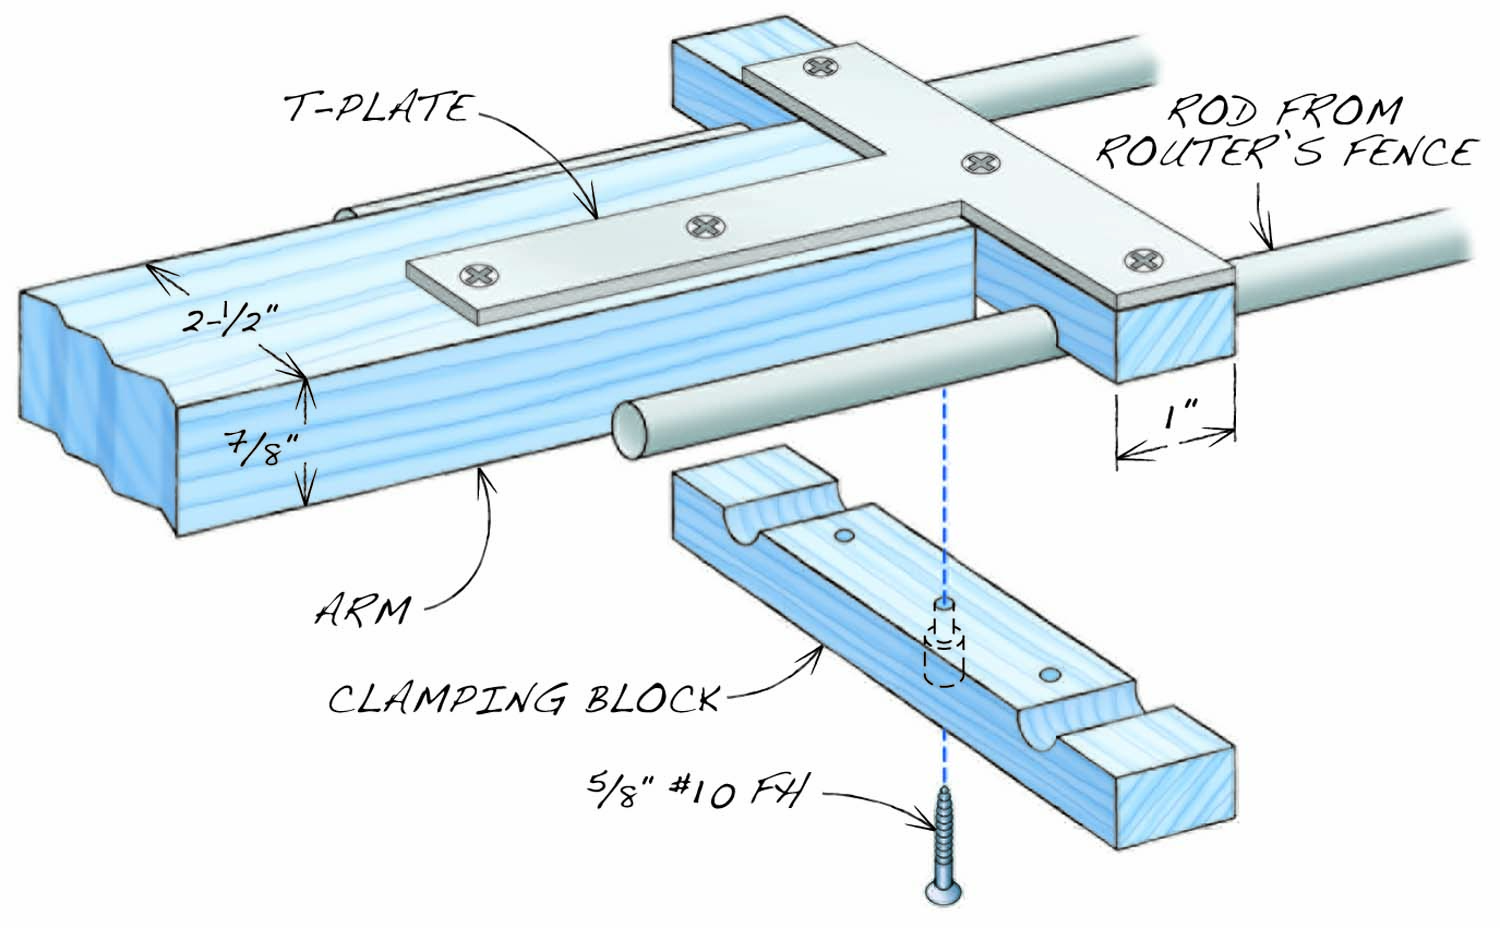
You’ll have to adjust the dimensions of this clamping device to suit your router, of course. Both parts of the clamp are the same thickness, so it’s easier to make, and that thickness is a critical measurement.
Why? The bottom of the clamp must be even with the bottom of the router, or slightly above it, so the clamp doesn’t bump into your workpiece (Fig. 02). 
To determine the thickness of the clamp’s parts, measure the distance from the center of the rods to the base of the router. Subtract 1/32″ or so from this measurement, then mill the clamp’s parts to this dimension.
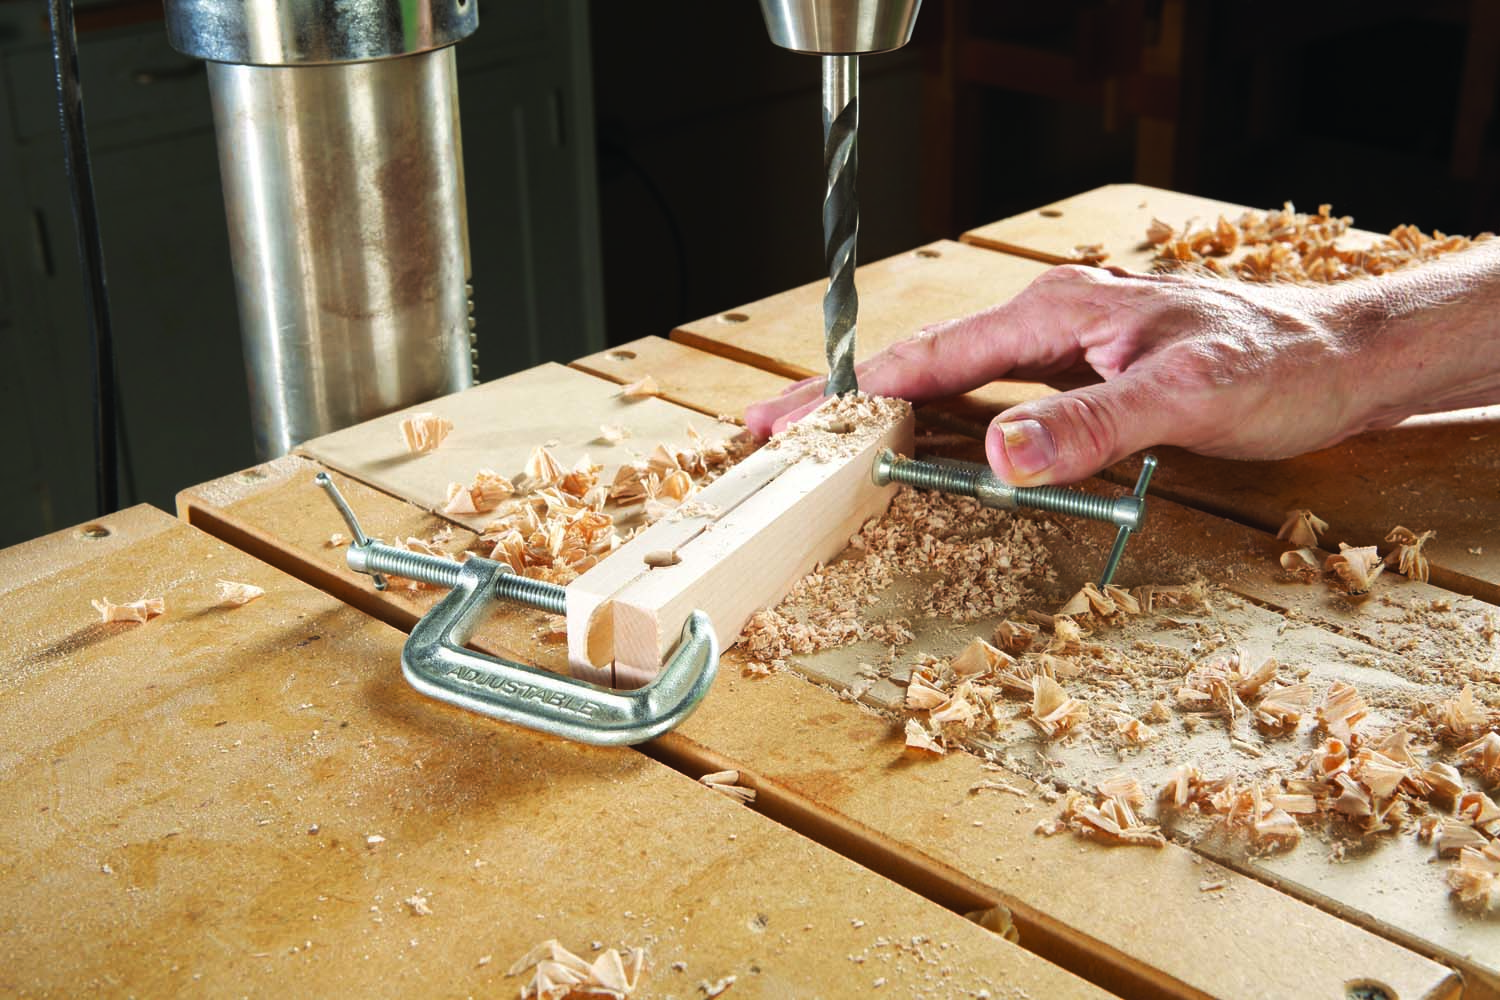
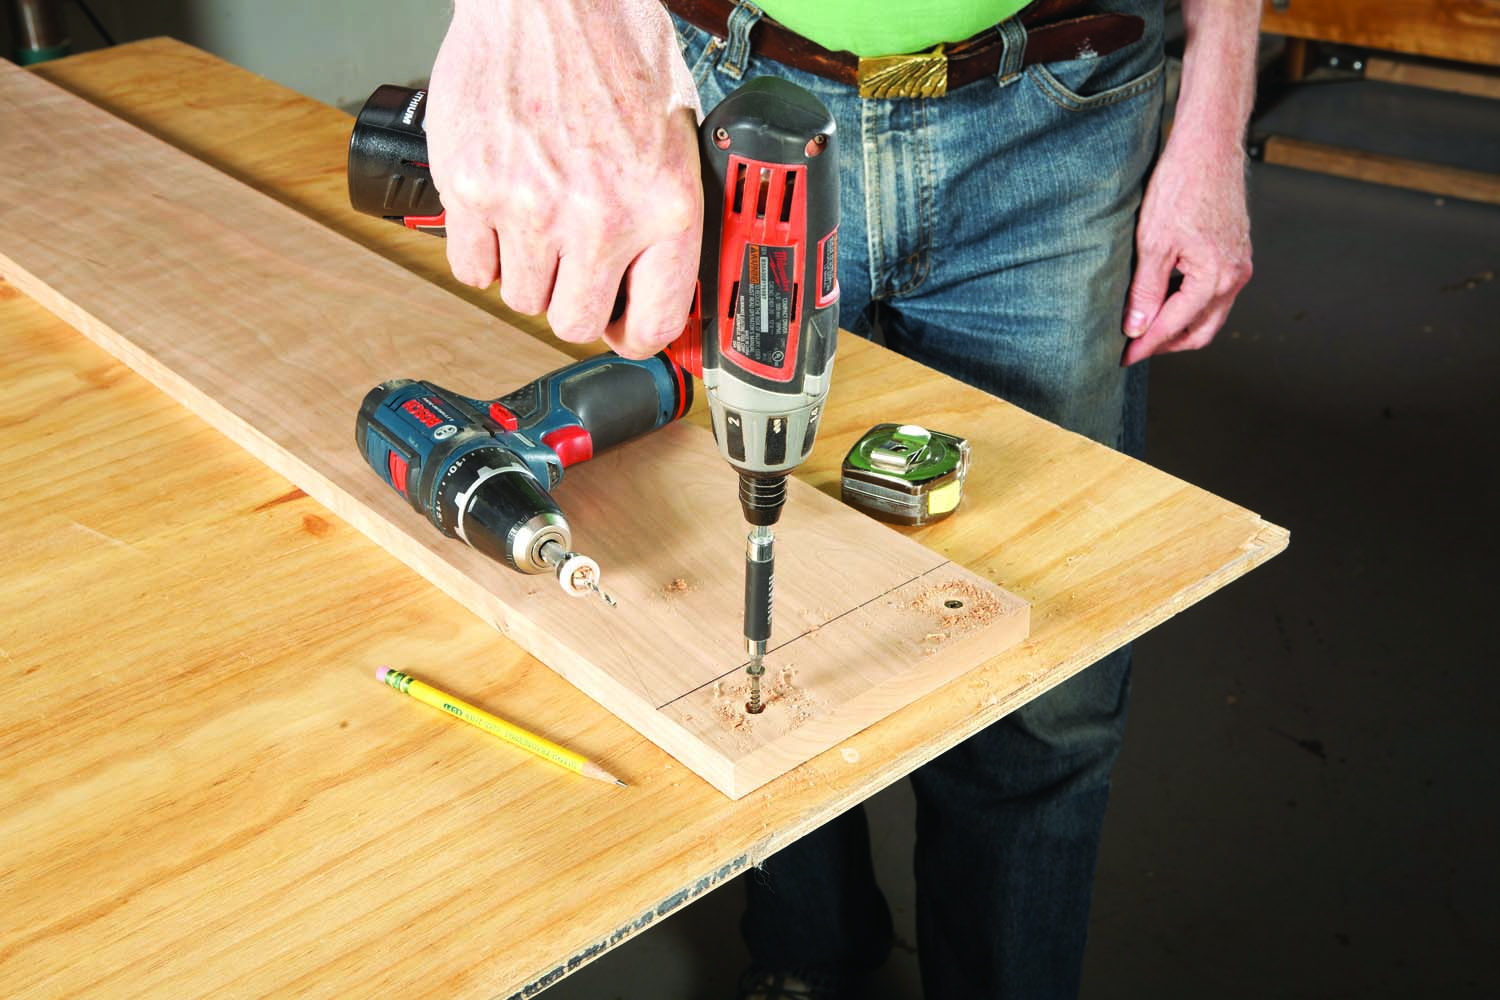
1. Start by making a pair of blocks that will clamp onto the rods for your router’s fence. Place two 1/16″ spacers between the blocks, then drill holes the same size as the rods.
The two halves of the clamp must firmly grip the rods when you tighten the clamp’s screws. The best way to ensure this is to insert spacers between the halves when you clamp them together in order to drill the holes for the rods (Photo 1). (I made my spacers from a craft stick, similar to a tongue depressor, but any piece of wood will do.) These holes should be the same diameter as the rods—not smaller or larger. When you’re done, test the holding power of the clamp by fastening it to the rods (Photo 2).
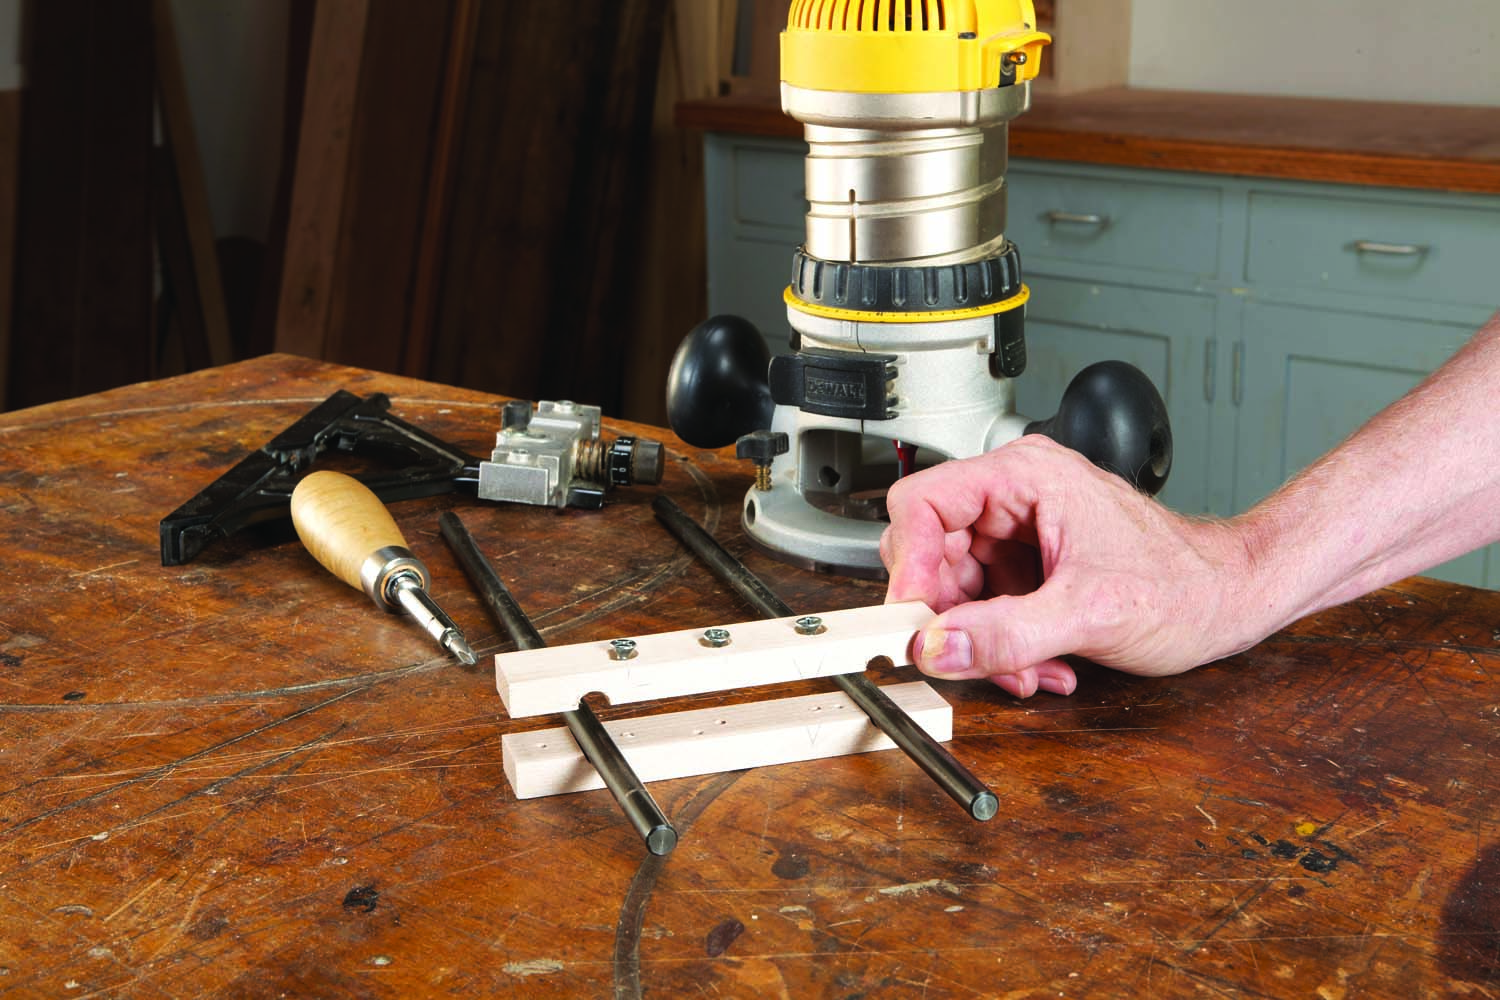
2. Fasten the clamping blocks onto the rods. You won’t need the fence—you ¬-can set it aside.
Next, fasten a T-plate to the top of the clamp. The exact position of the T-plate doesn’t matter—I offset it so that its screws didn’t run into the rods or clamping screws. Make the arm from a stout piece of wood (you don’t want this part to flex when you’re routing). Mine is 7/8″ x 2-1/2″. Cut it the same length as the arc’s radius, more or less, then drill a hole for the pin that the arm will pivot on (Fig. 02). This hole should be perpendicular, so use a drill press. Position the hole about 4″ from one end of the arm. I used a 6d nail for the pivot pin, which required a hole 3/32″ dia. Fasten the T-plate to the arm (Photo 3).
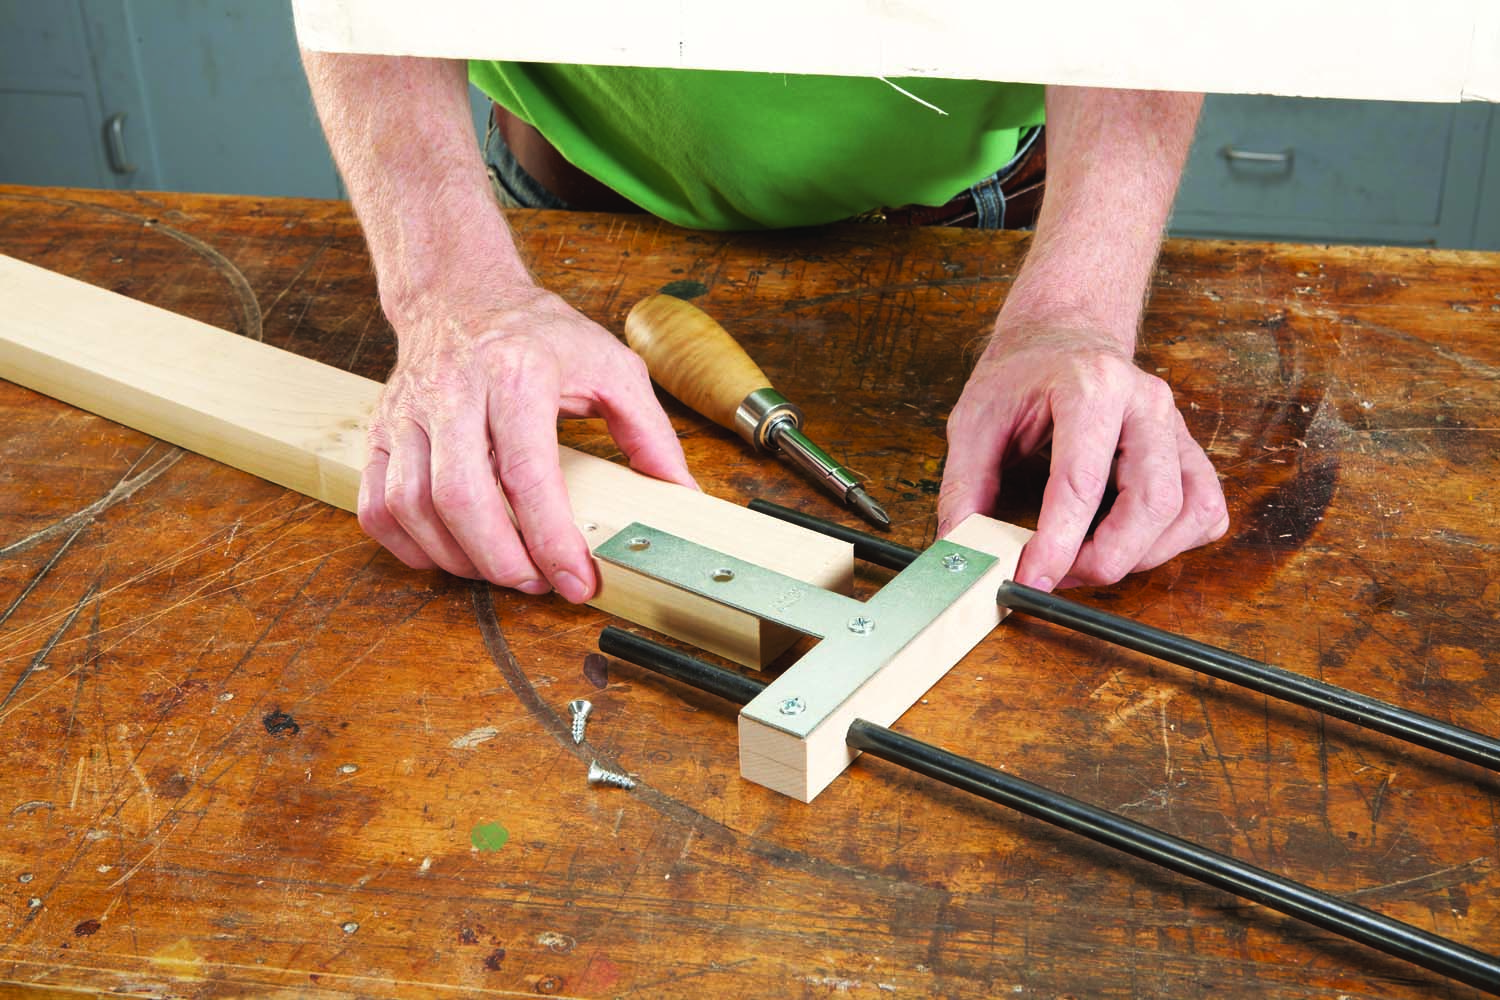
3. Make a stout arm that’s about the same length as the radius of the arc you’ll rout. Fasten the arm to the clamping blocks with a T-plate.
Adjust the arm
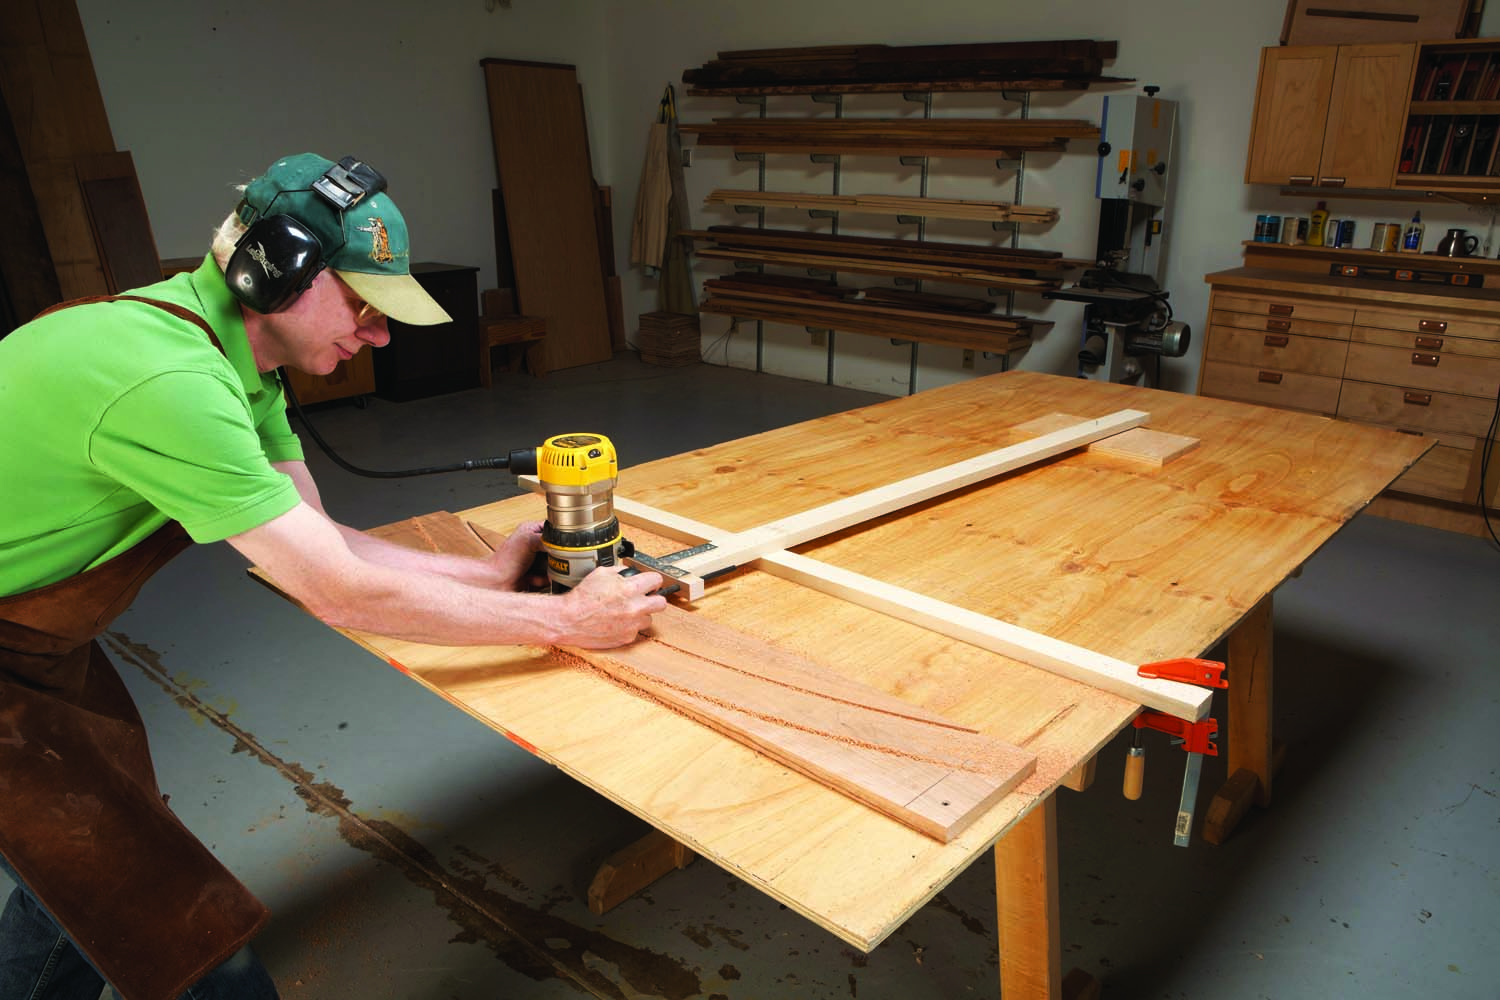
Before you set up the router, you’ll need to come up with some method of anchoring your workpiece so it can’t move. You’ll also have to lock down a second board, which will act as a pivot point. Let’s call that the “pivot block.” Depending on the radius of your arc, these two pieces might be quite far from each other—my arc requires them to be 5′ apart.
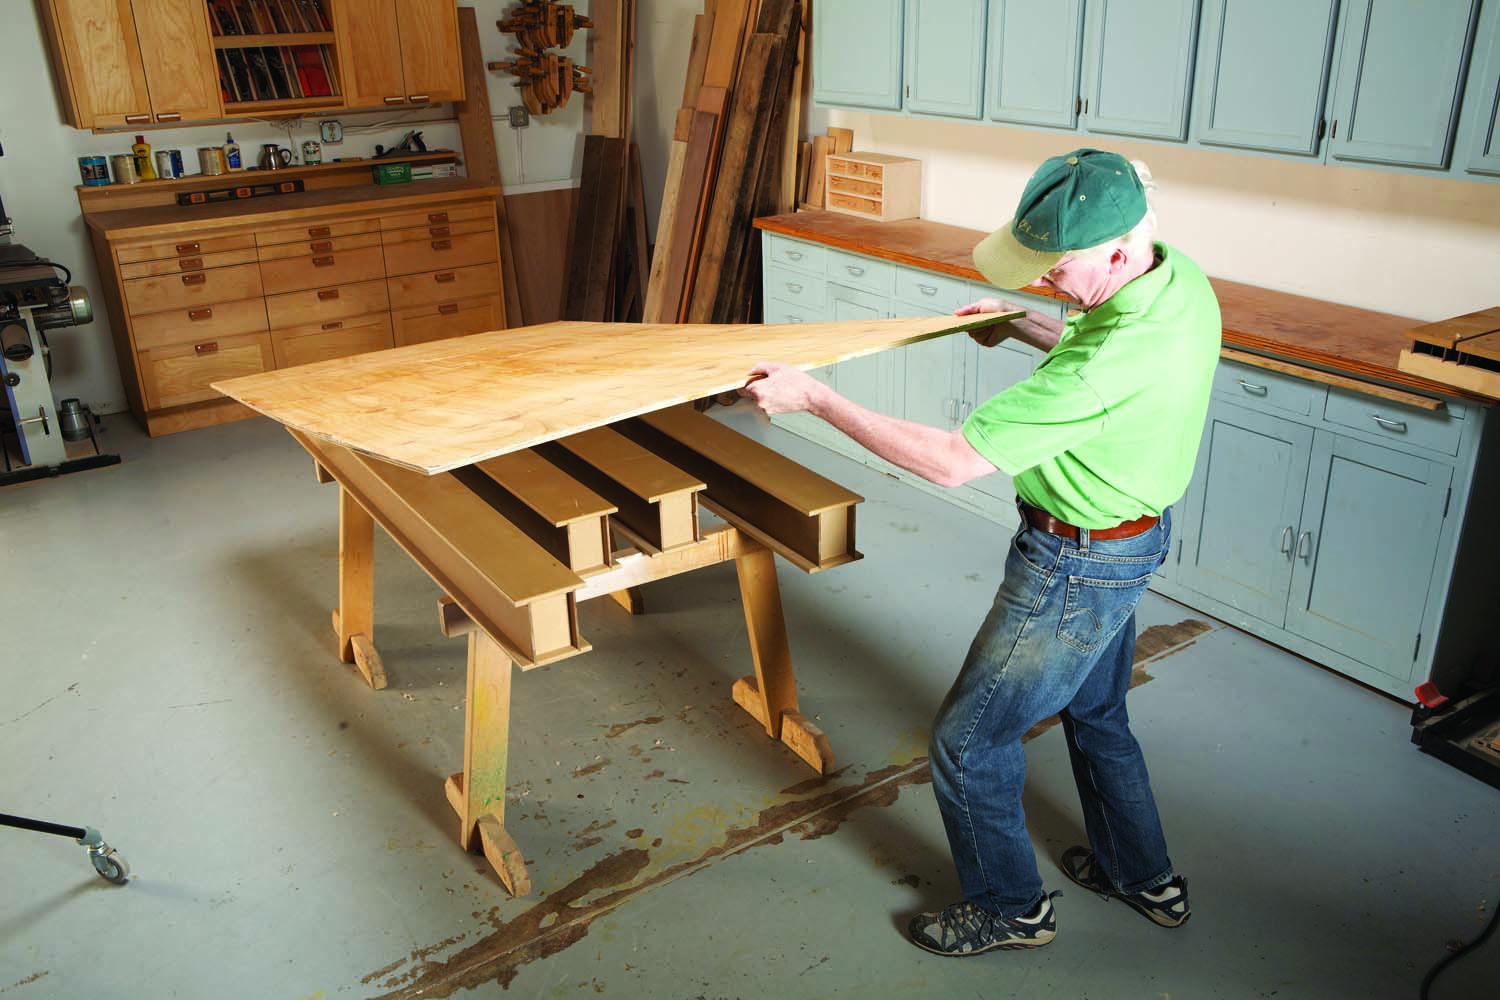
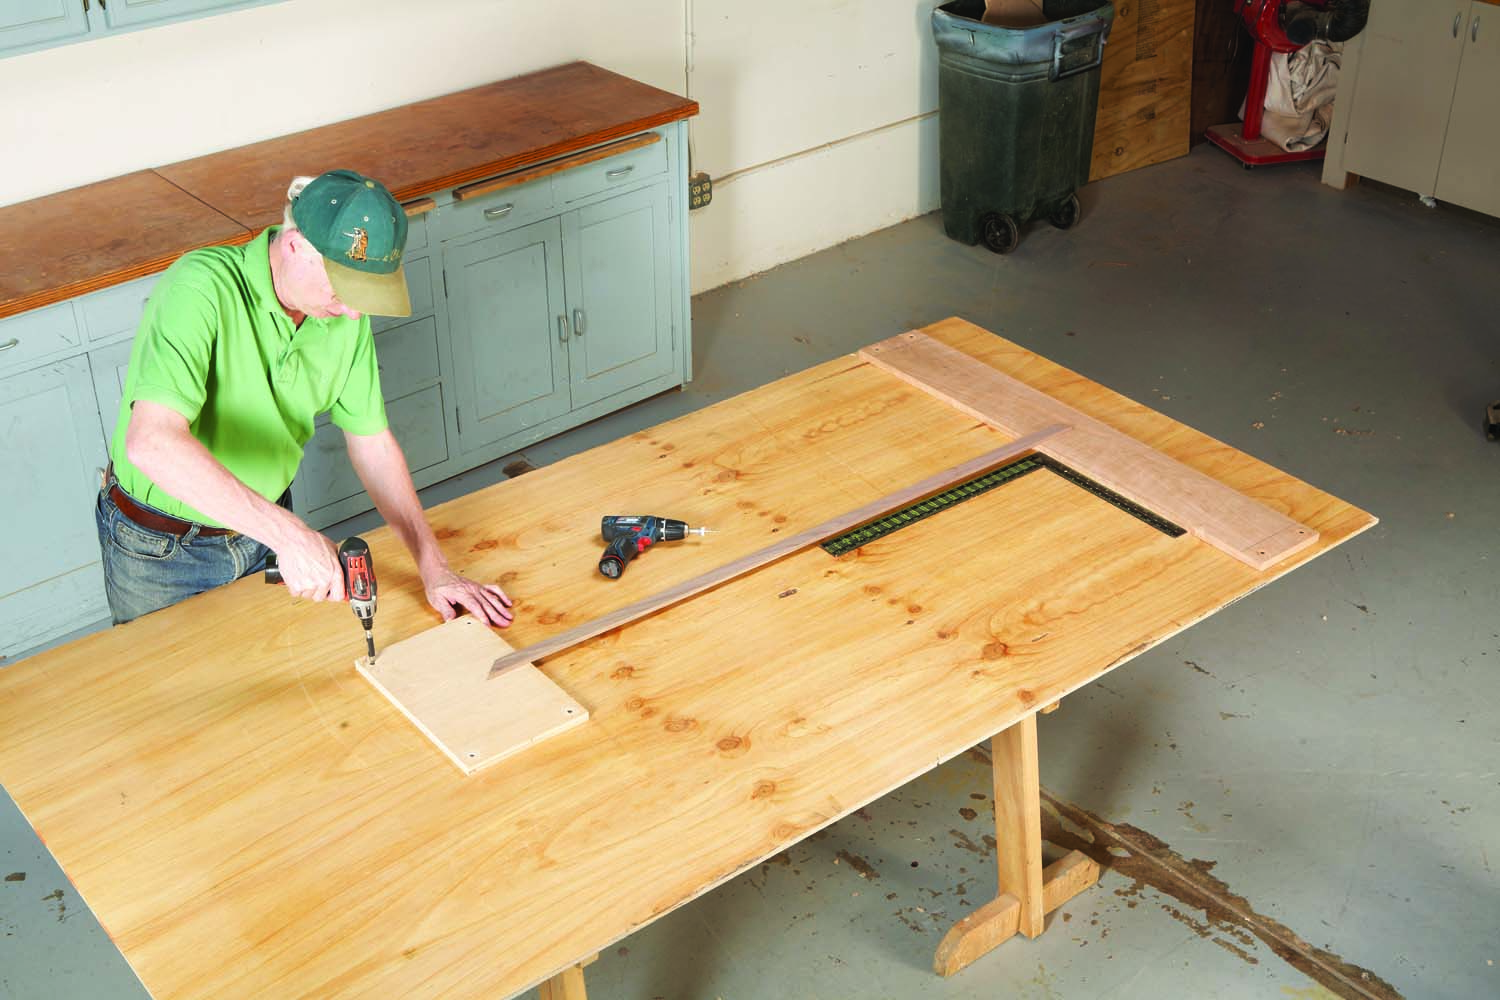
4. Assemble a plywood platform for routing the arc. The plywood shouldn’t droop—you may need to support it with 2x4s or beams.
My workbench isn’t large enough for this arrangement, so I set up a platform on sawhorses, using a ratty sheet of plywood (Photo 4). Screwing the workpiece and pivot block to the plywood guarantees that they won’t move relative to one another. It might be possible for you to fasten these pieces to your floor, but the platform method puts everything at a comfortable working height.

5. Mark the endpoints of the arc on your workpiece.
Cut your workpiece about 4″ extra long, then mark the endpoints of the arc, leaving extra space at both ends of the board (Photo 5). Fasten the board to the plywood, countersinking the screws (Photo 6).
6. Fasten the workpiece to the plywood. Allow about 2″ of waste on both ends of the board to provide room for the screws.
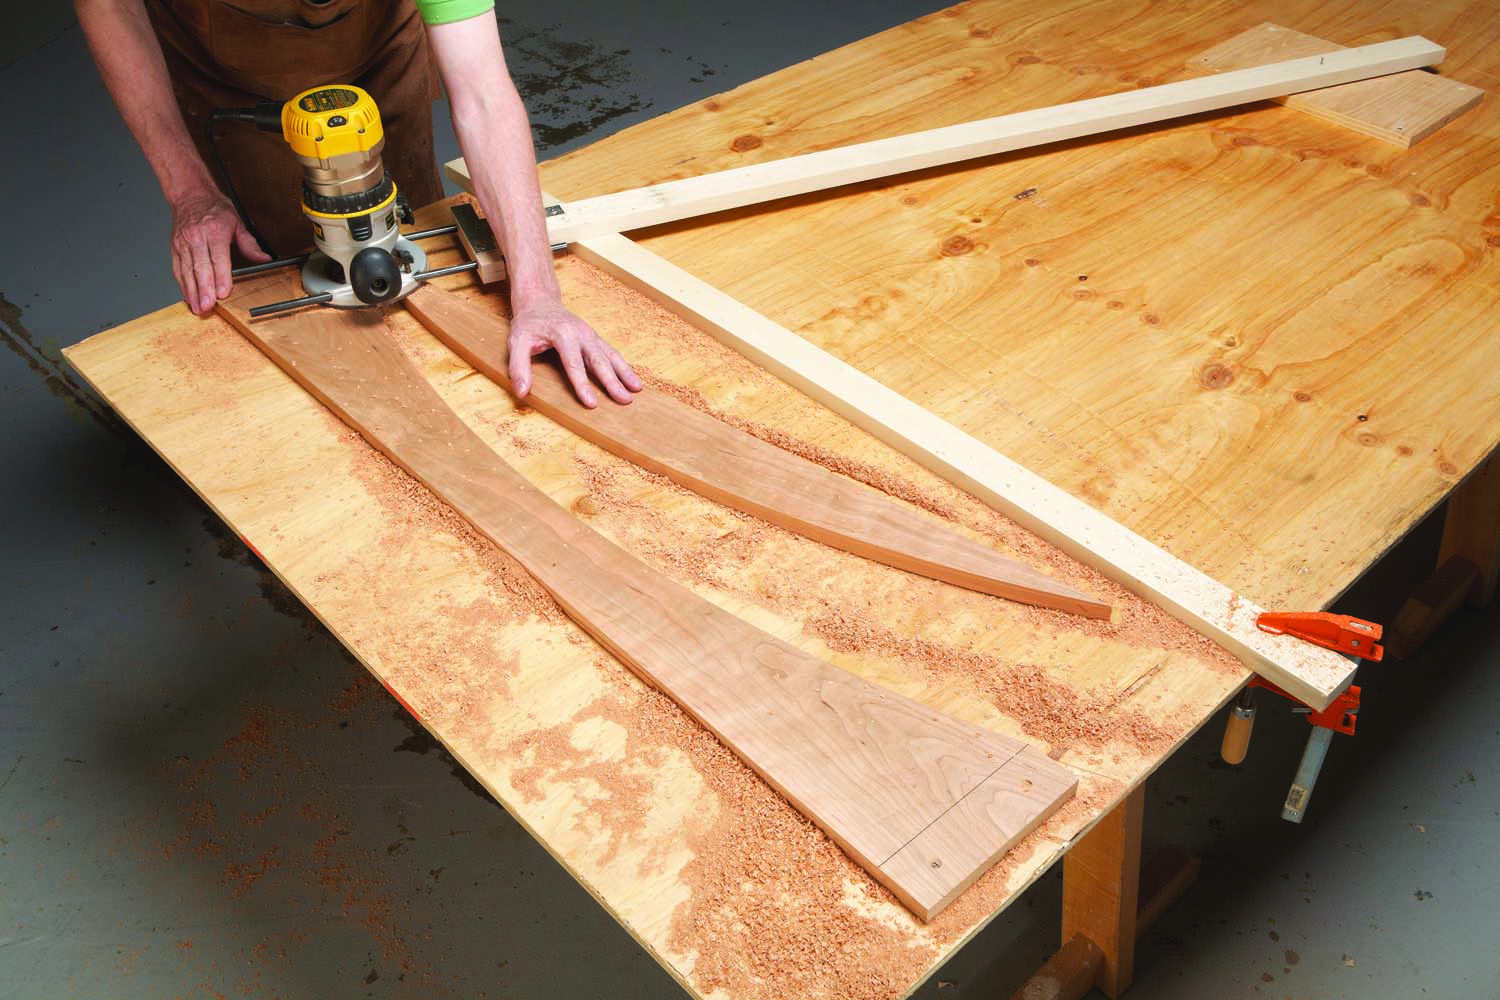
7. Cut two sticks that are the exact length of your arc’s radius. For precise measurements later on, miter their ends.
Next, cut two sticks the exact length of the arc’s radius (Photo 7). Both ends of each stick should be mitered. Cut a piece of scrap for the pivot block—it should be the same thickness as your workpiece and about 8″ square. Use one of the sticks to position the pivot block (close is good enough), then fasten the block to the plywood (Photo 8).
8. Fasten a block to the plywood to serve as a pivot point for routing the arc. Use one of the radius sticks to position the block—close is good enough.
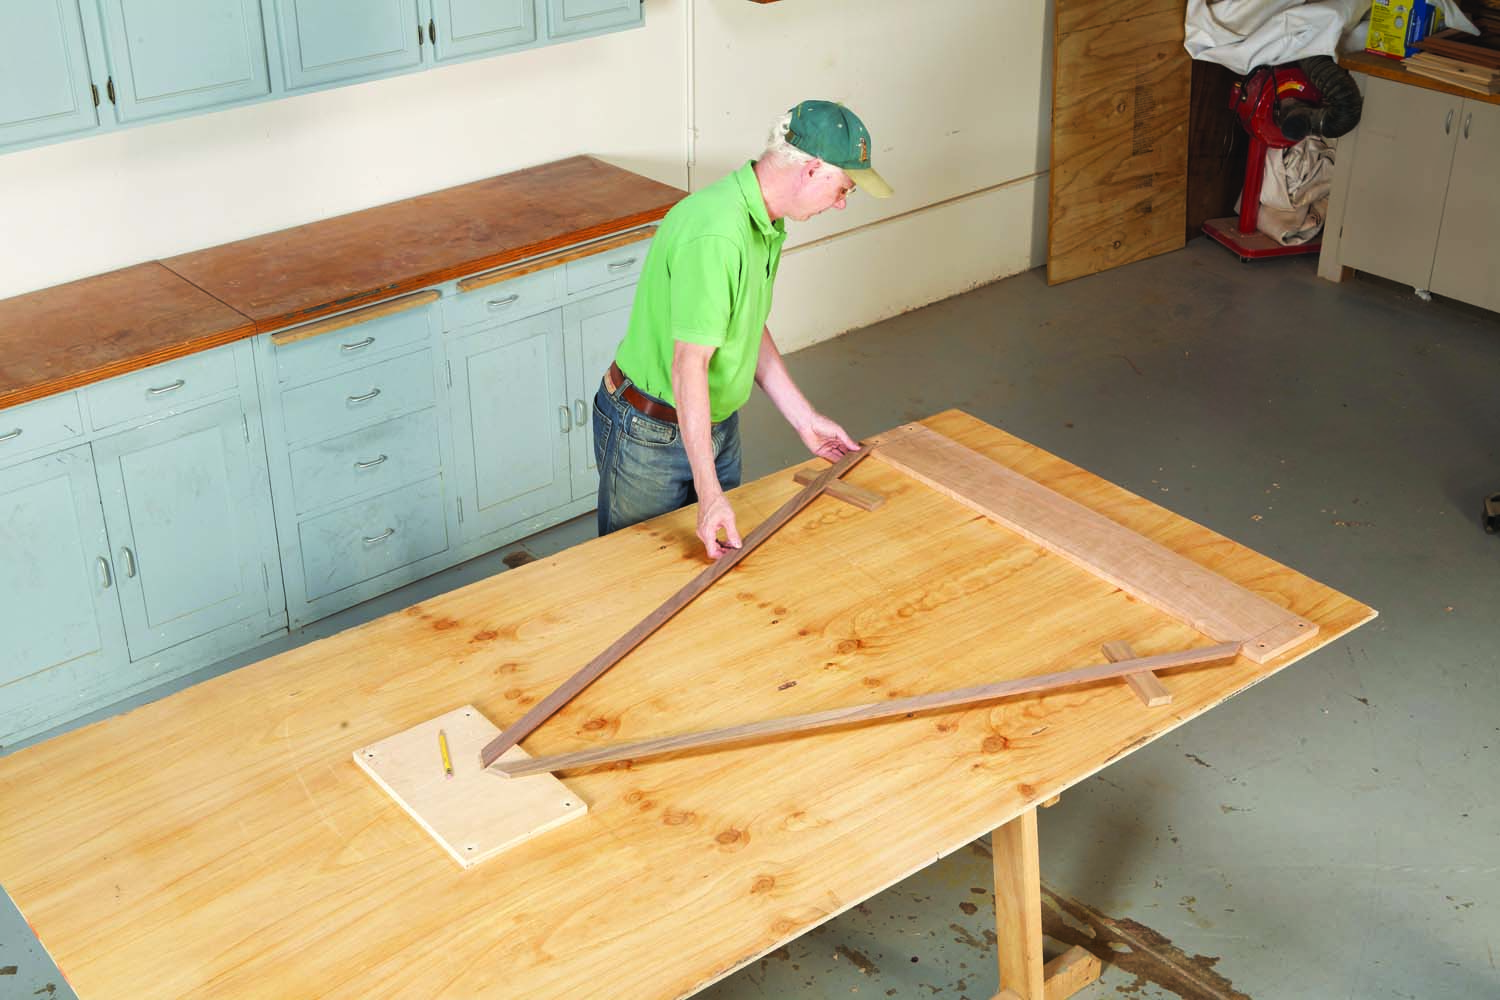
9. Locate the center of the arc. First, place the radius sticks on the endpoints of the arc. Support each stick with a block that’s the same thickness as the workpiece.
Use the two sticks to locate the center of the arc (Photo 9). Trace around the pivot-block ends of both sticks (Photo 10).
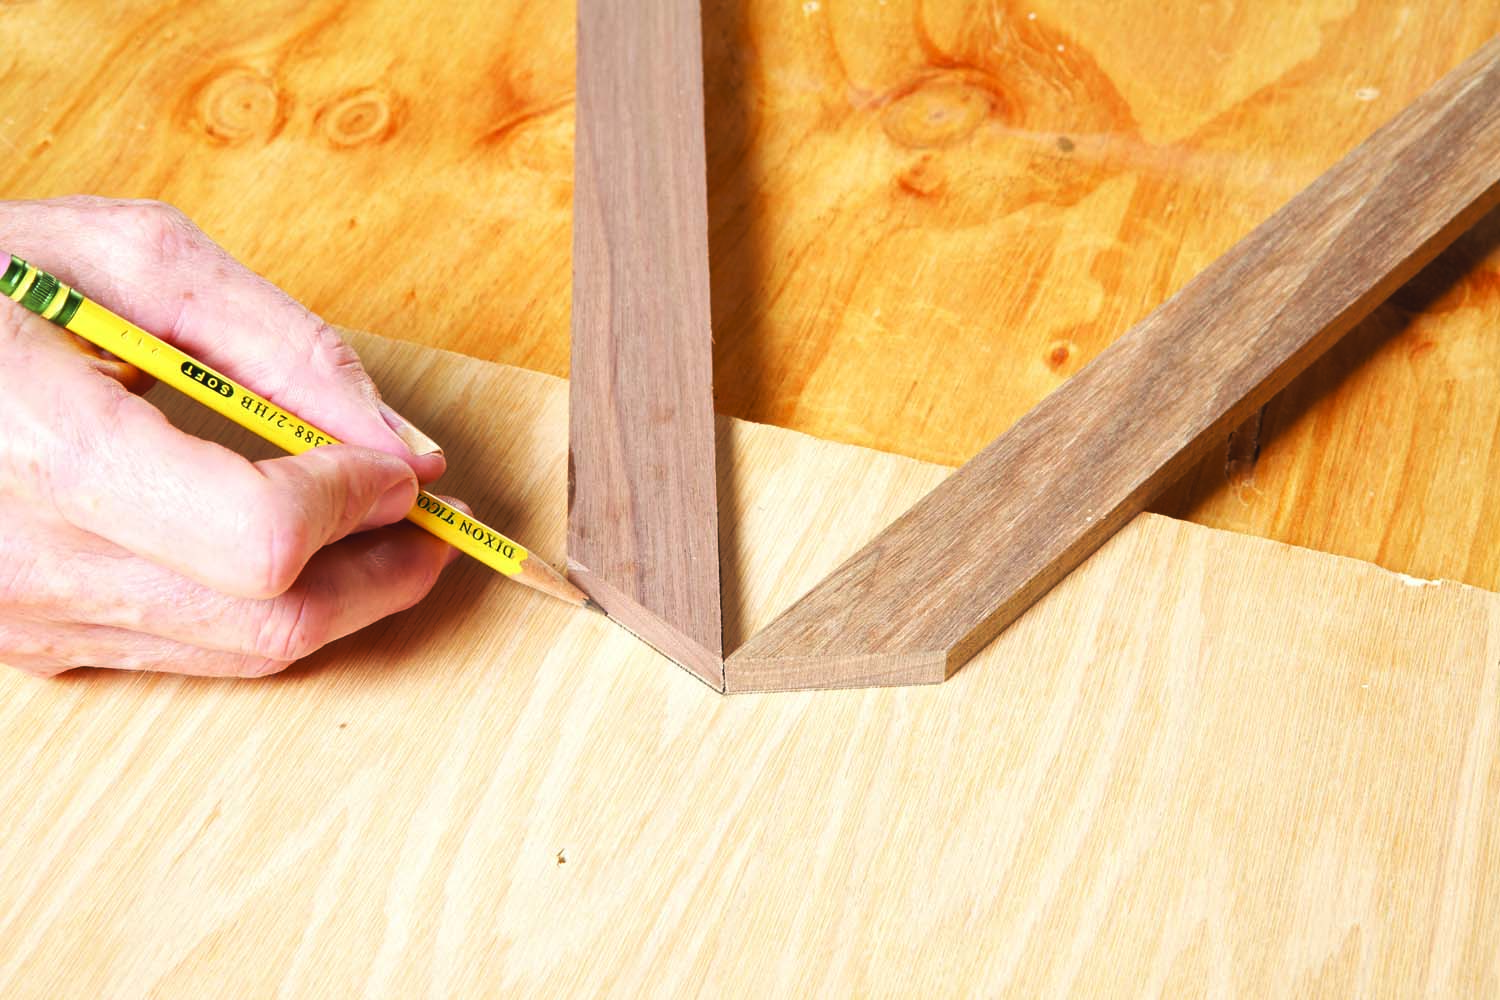
10. Position the other ends of the sticks so that their points meet. Trace around the miters.
Drill a hole in the block for the pivot pin (Photo 11).
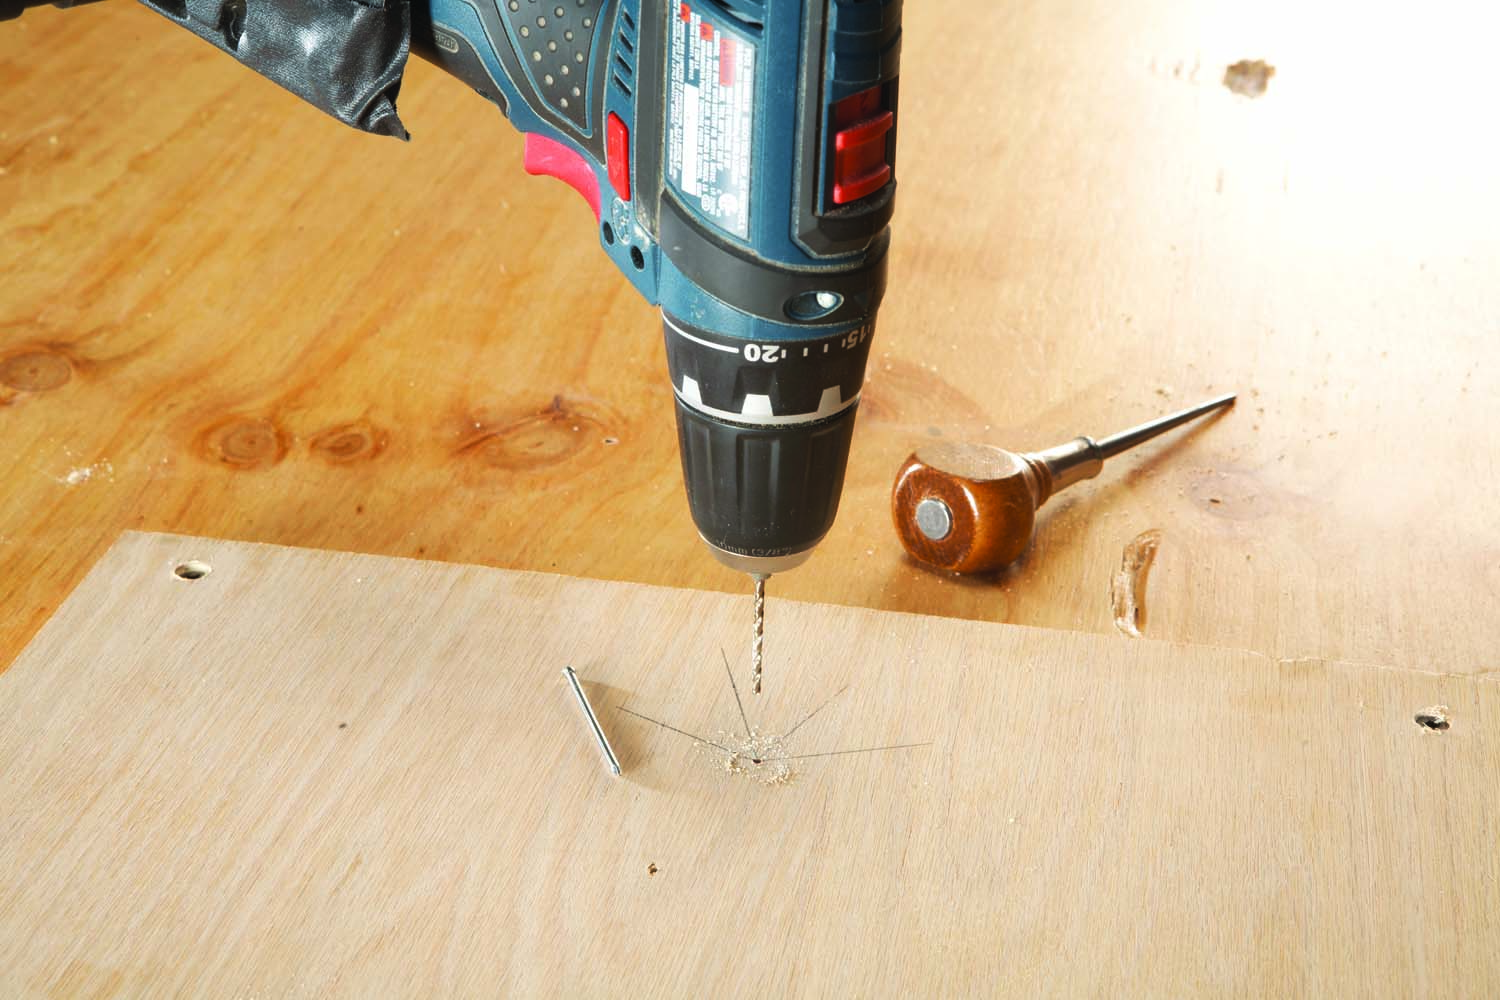
11. Drill a small hole at the intersection of the lines. This is the exact center of the arc.
Insert the pivot pin through the arm and two washers, then into the pivot block (Photo 12). Next, make a support stick that’s about the same length as your workpiece. Its role is to keep the router level, so its thickness is important: It should be the same as the pivot block plus the two washers. See Fig. 02 for a cross section of the whole setup.
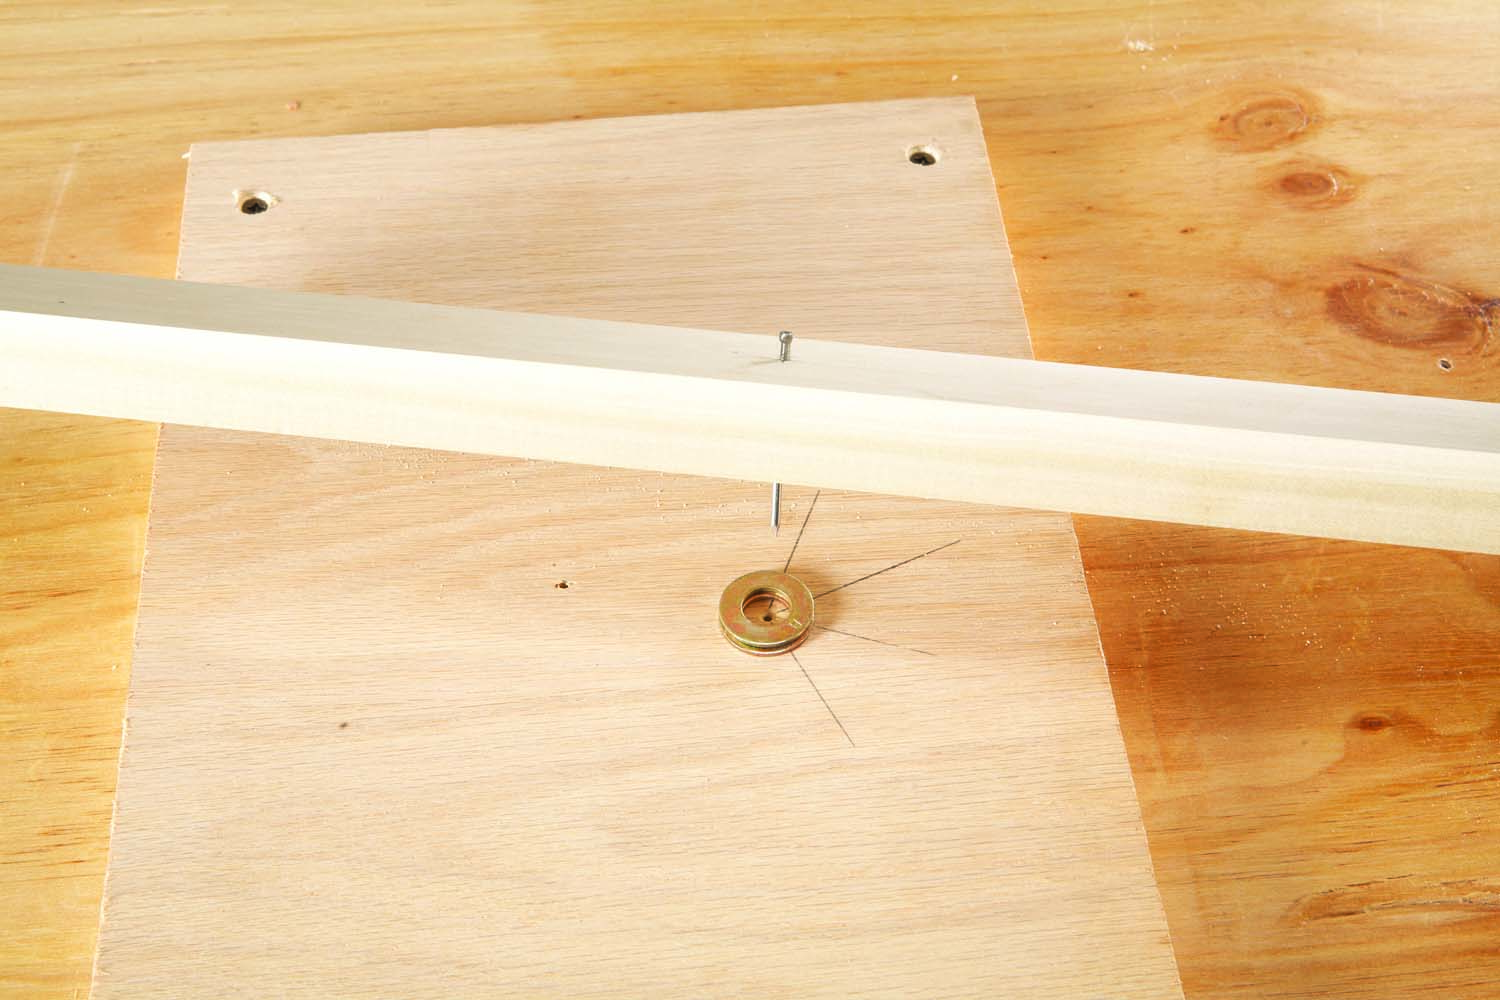
12. Insert a nail through the arm that’s attached to the clamping blocks. Place some washers on top of the pivot block, then insert the nail into the block’s hole.
Install a straight bit in your router (I use a 3/8″). Adjust the bit’s height so that the end of the bit is flush with the router’s base. Slide the router onto the rods on the other end of the arm, then position the router so the edge of the bit touches the arc’s endpoint (Photo 13). Swing the router over to the other endpoint—the bit should touch that, too. If it doesn’t, you’ll have to go back a few steps and reposition the pivot block in order to make a new hole.
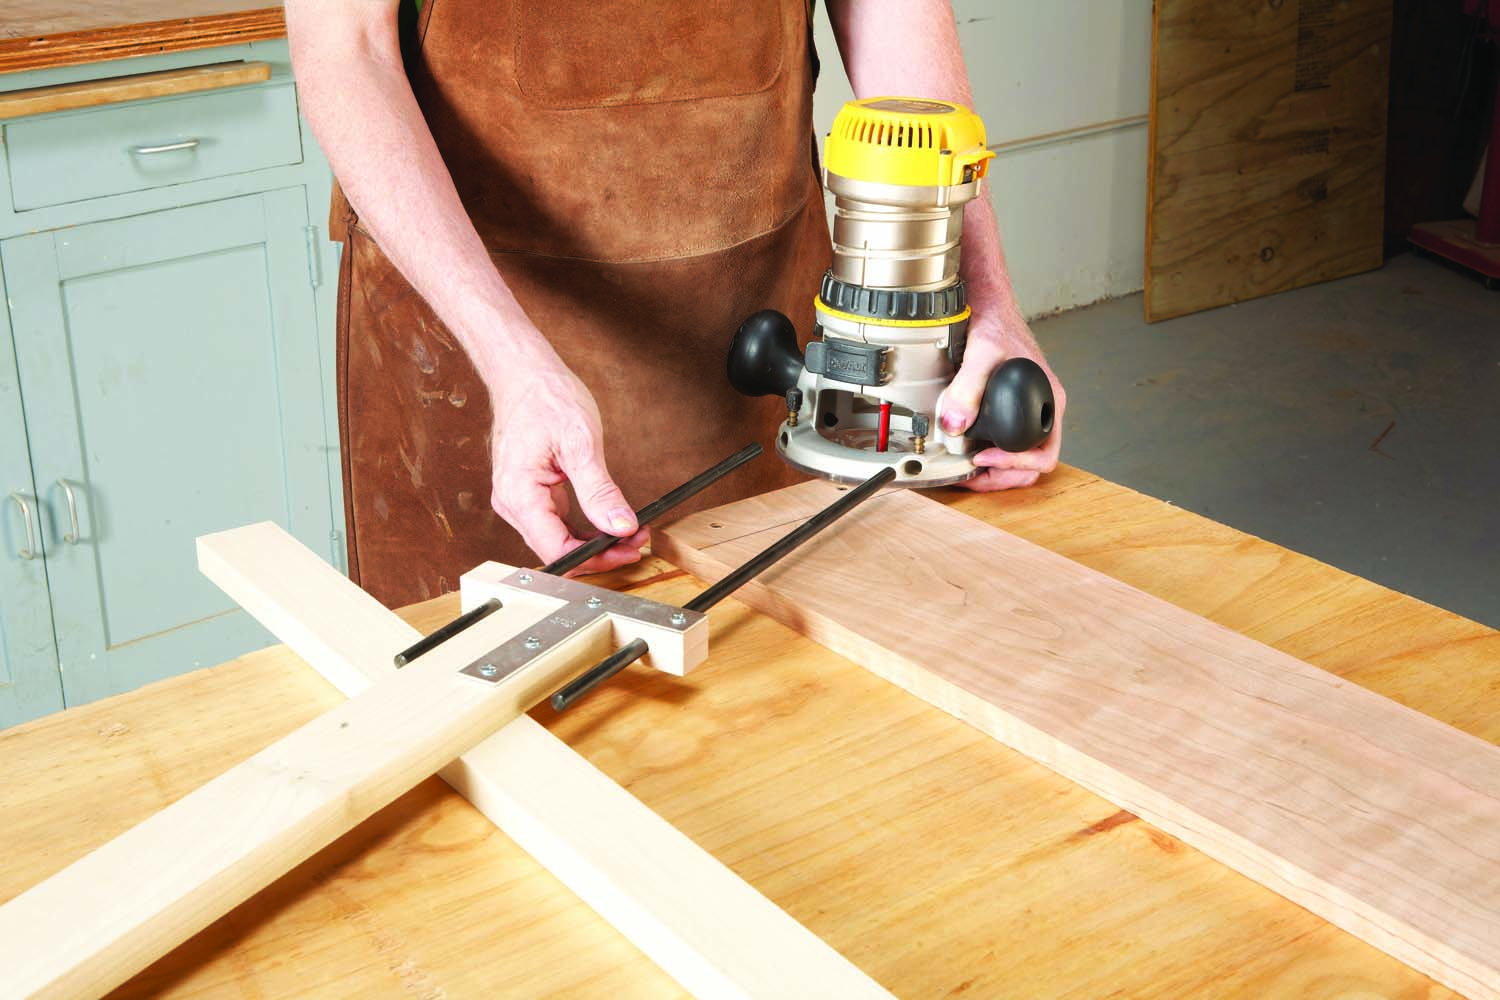
13. Adjust the position of the router by sliding its base along the rods. The outside edge of the bit should touch one of the arc’s endpoints—it will automatically touch the other endpoint, too.
Lower the bit to cut about 1/4″ deep, then turn on the router and swing it through the entire arc (Photo 14).
14. Swing the arm to rout the arc. Support the arm with a long stick, to keep the router level. The first pass should only be 1/4″ deep or so.
Repeat this process a few times—the last pass should cut 1/16″ or so deep into the plywood so that you can cleanly separate the waste from the arc (Photo 15).
15. Reset the depth of cut a few more times until you cut all the way through your workpiece. The result is a perfectly smooth, true arc.
Here are some supplies and tools we find essential in our everyday work around the shop. We may receive a commission from sales referred by our links; however, we have carefully selected these products for their usefulness and quality.