

Aaand we’re printing!
This page is currently incomplete but being improved constantly : Last update May 5, 2023
This page is a resource for dyers interested in exploring the use of mordants as a print medium. Mordants are an incredible tool that allows for development of more than one color at a time from a single dye pot! Confused? Read on and hopefully you’ll be as excited as I was when I first learned about the awesome potential!
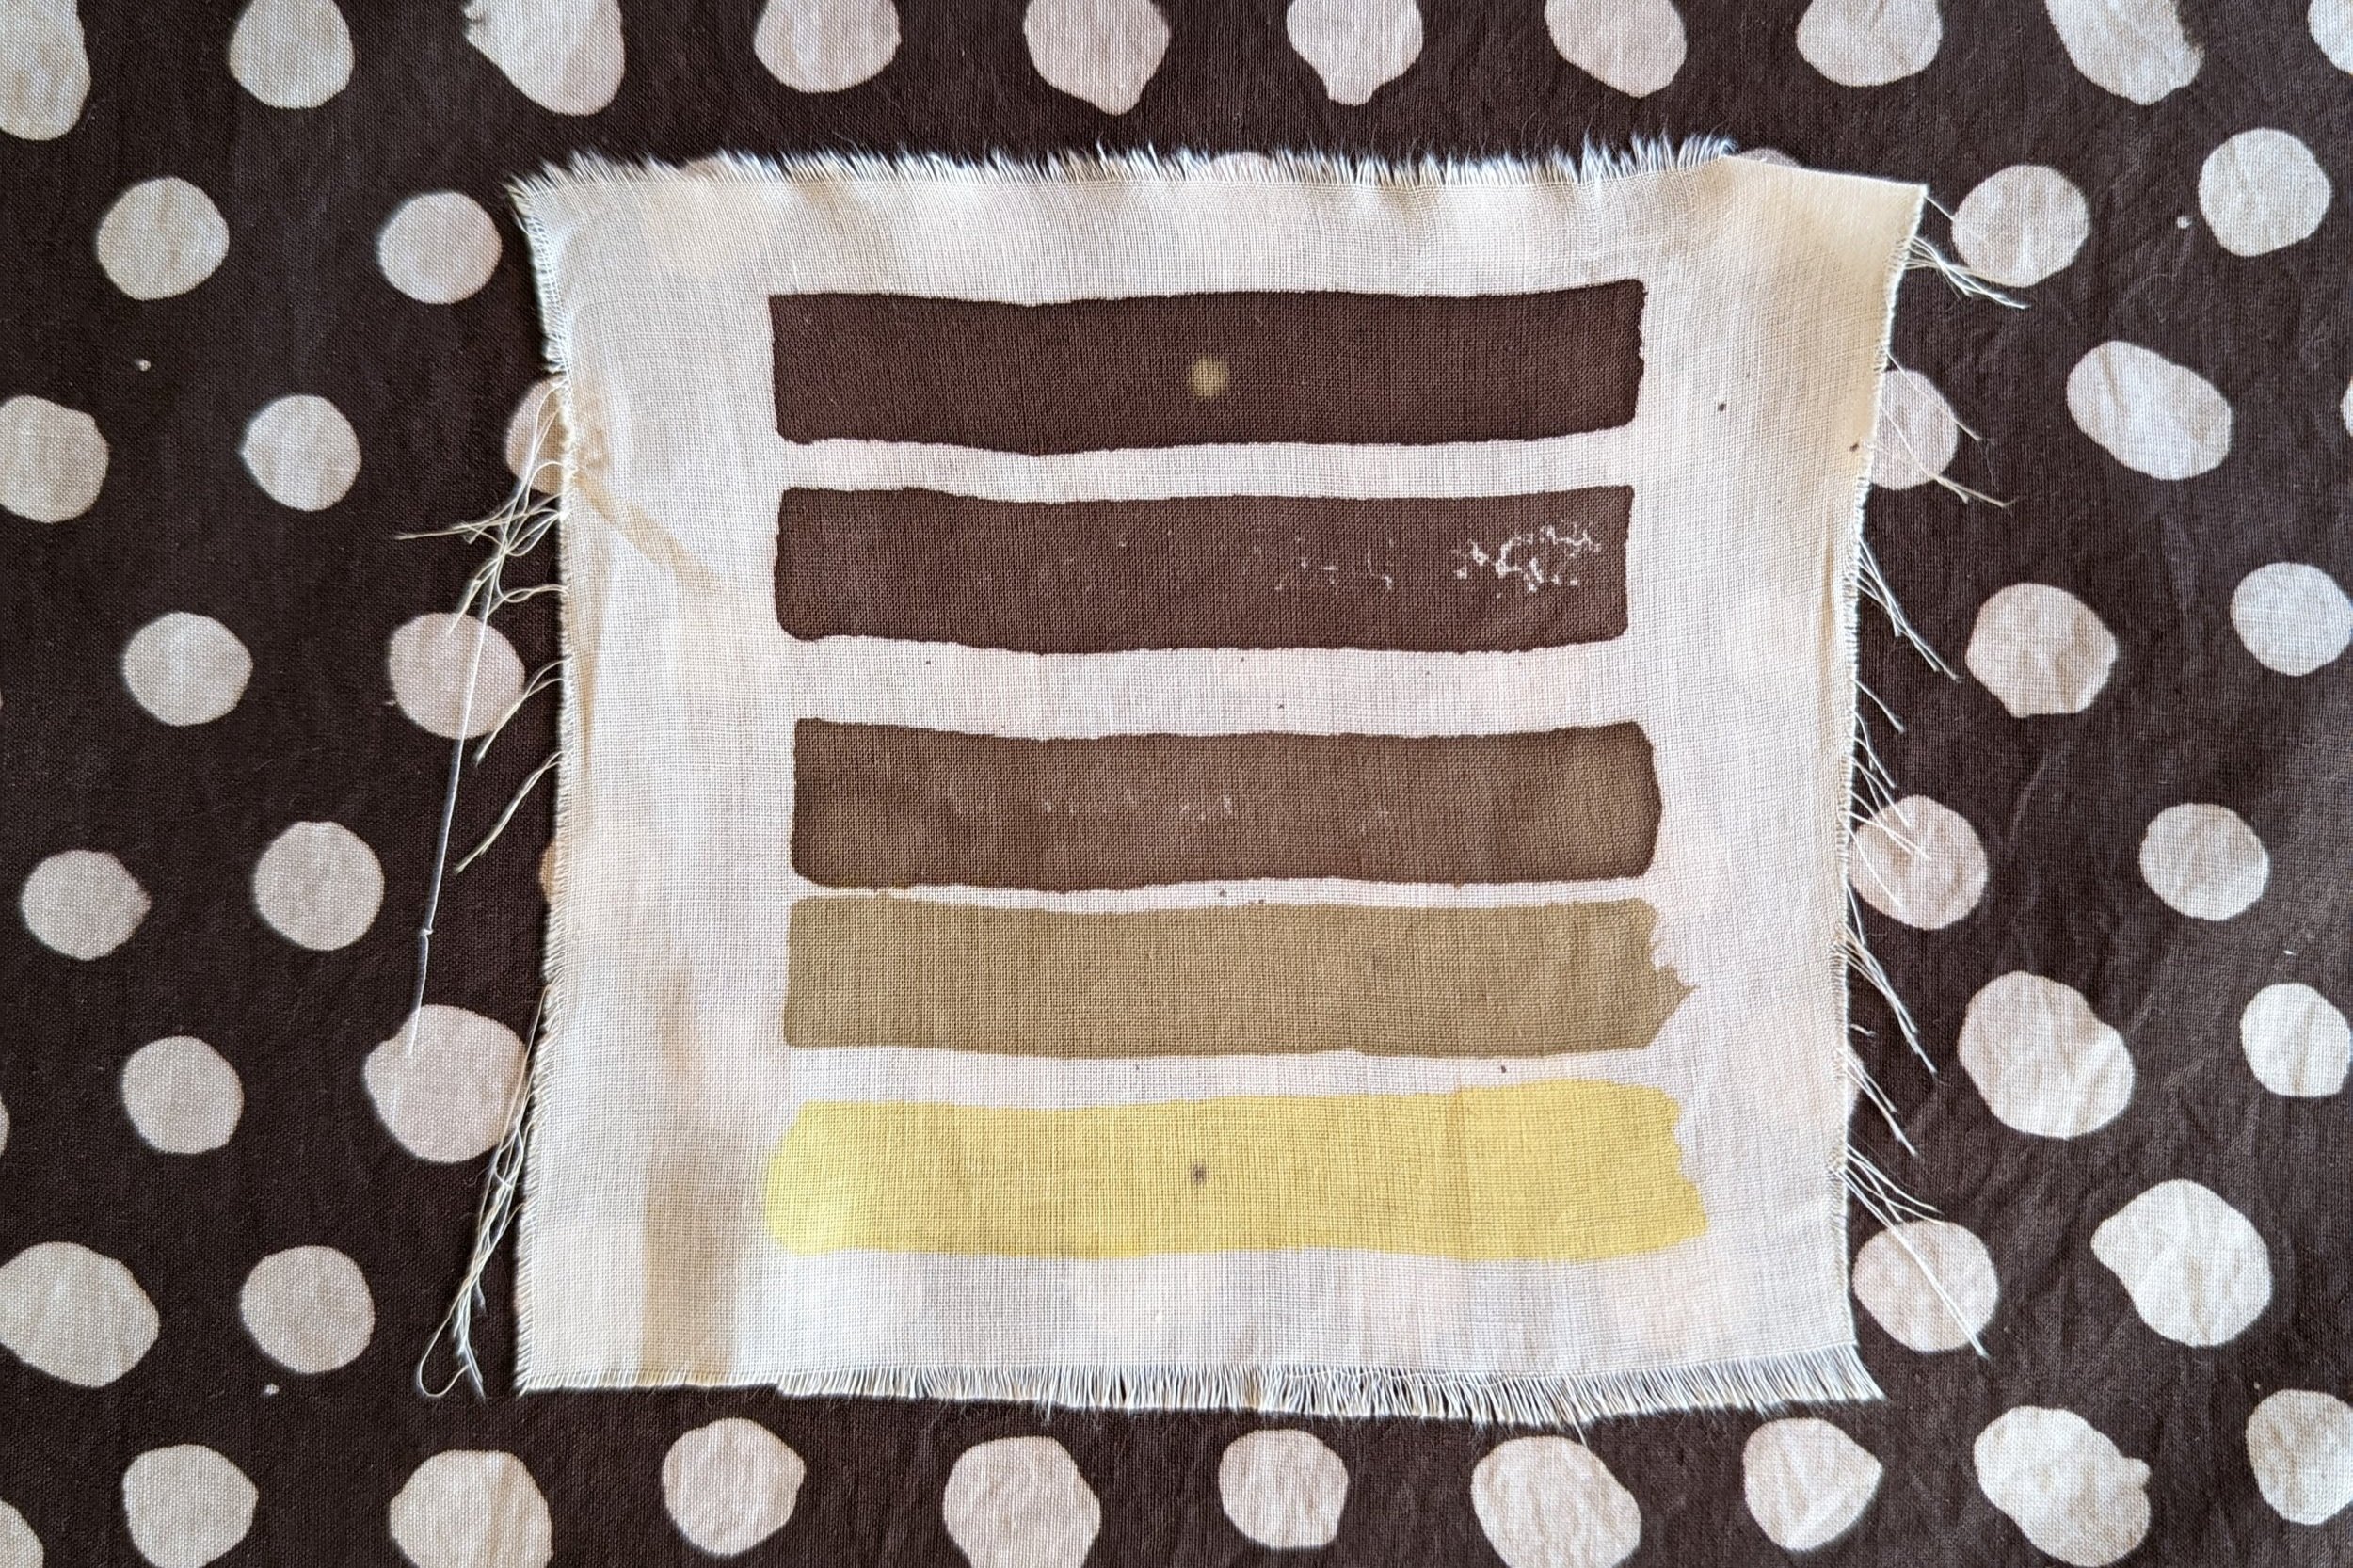
The swatch above was printed with 5 different recipes of mordant, then dried and rinsed. FINALLY it was placed into a dye pot - some simmering water with a bunch of tree bark in it. The color from the plant was attracted to the areas that were mordanted and the portions of fabric that did not have any mordant on them did not pick up any color from the dye pot. Each bar on the fabric is a different color because it was printed with a different recipe of mordant.
Thickened mordants can be printed from any block AS WELL AS screen printing, hand-painting, engravings and any other way you can think of transferring goo onto a piece of fabric.
The practice and execution requires A LOT of experience to execute comfortably and reliably, so try not to be discouraged by early setbacks. Try to look at your problem and discover why it is occurring. I'll keeping the FAQ section up to date as questions arrive via email. If you're stumped on anything, feel free to reach out and ask about it and I will do my best to answer, promptly-ish.

INTRODUCTION
I've linked to products below through Amazon but many of them are available generally at grocery and hardware stores and I recommend you use whatever is easiest for you to obtain. There are certainly other options out there, some may be more affordable or available locally where you are. Definitely do a little research before to make sure you are working apples to apples.
So, here's the basic concept : there are a class of natural dyes that require bonding to fabric via intermediary molecules called mordants. Each mordant reacts with the dye molecule to create a different visible color. There is much information on the internet and in print regarding the use of mordants for yarns, and even some good information about mordanting fabric yardage. Here, I'll be discussing the specific application of mordants to fabric via blocks. This will give printers the ability to create a world of patterns from very simple tools and relatively simple ingredients. These recipes are specifically for cellulose based fibers : cotton, hemp, linen, rayon, etc. The mordant print paste recipes below call for the use of Alum and Ferrous Sulfate, both are metallic salts which can be absorbed by our bodies, use all appropriate protections when working with these ingredients and avoid direct contact.
SCOURING
Quick notes on pre-treating your fabric: For best results SCOUR! Cotton and other cellulose fibers naturally contain pectins, waxes and fatty substances as a product of their growth cycle. These will deflect, mottle and interrupt your mordant print, yielding inconsistent results and a cloudy background print. Remove them! I've been using a two-part scouring method recently, because I have a washing machine and it is pretty easy. I actually need to dig in and do some side-by-side dye tests to be able to compare a load of scouring results so as to recommend the best/easiest/most efficient methods. Hope I can get around to it soon! If anyone reading this is interested in working through this with me, get in touch! Anyway, my current method of choice is this, excuse my imprecision :
For a single (light) laundry load of cotton goods to be dyed :
Warm cycle, excess water.
1/4 Cup Diastatic Malt extract.
Diastatic malt extract is a powder made from sprouted, dried, crushed barley, dextrose and flour. The powder is enzyme rich. These enzymes begin to digest the pectins and waxes in the fiber.
Run the laundry cycle and then walk away, allowing the goods to spin and drain, leaving the damp laundry in the basket for at least 12 hours. Over this time, the enzymes will begin doing their thing!
Next, follow up with a second laundry cycle using 1 cup Soda Ash and HOTTTTT water. If you have the luxury, this is where you can take out your goods and proceed to boil them for four hours and really scour the stuff. I've gotten consistently adequate results with just the second wash cycle.
Once this cycle is complete, remove and dry your laundry. Goods must be bone dry for this process to proceed. Any moisture will cause your print to wick out from where you've applied it and create a hazy-fuzz of color.
CREATING YOUR BLOCKS
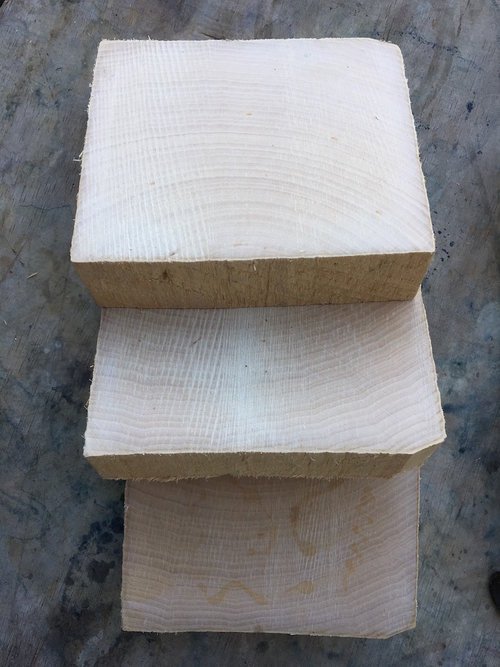
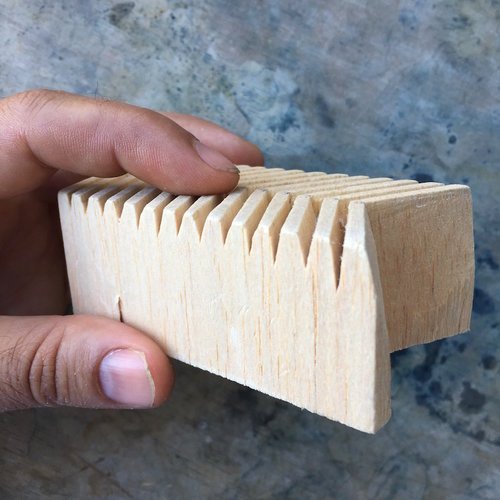
BALSA / BASSWOOD BLOCKS :
My recent go-to method to create a printing block has been to use balsa, but basswood will also work. I have a chop saw so I'm able to buy this lightweight, easy to carve, wood in blocks that are about 4"x 4" x 18" and trim them down to about 2" thick slabs. When carving I always work my image into the end grain (where you can see the rings of the growth of the tree). This is the most stable surface to carve into and also, it holds the print medium better rhan the smooth length-of-the-grain sides. Balsa is easy enough to carve with an xacto and can also be trimmed and joined together using glue to make larger blocks. In truth, any end grain wood will work! I’ve seen pear and apple rounds available for sale on Etsy and other places. These would work great but would be challenging to carve into as the wood is much closer and denser grained.

FOAM BLOCKS :
I haven't found a good online source for the proper foam to use for creating a quick and easy form of block. Find a dense foam! You do NOT want to use a lightweight white styrofoam that is composed of the little balls. For the best results find a foam that is at least 1 inch thick (2" is preferable because it is stronger and holds up to use for a longer amount of time. The sources I've used in the past are almost always hardware stores where these sheets of dense insulation foam can be purchased in 2'x2' sections. Sometimes it is available in 2" thickness as a 4'x8' sheet which is handy if you're making a LOT of blocks.
The surface of this material is actually quite smooth and won't hold much mordant print paste when you go to print with it. I've solved this problem a couple different ways. First, I just sanded the foam down (before carving) with a 60 grit sandpaper to "rough it up" this creates a bunch of nooks and crannies where print paste can be stored. The other option for making this material hold more mordant is to coat it with a fabric. I recommend a synthetic suede. The type that i linked to above actually has an adhesive backing, but it won't hold up over repeated use. So, before carving your blocks, I recommend coating the top of your foam block in a thin, even layer of gorilla glue (spread it on in one, even, thin coat with an old credit card, no bumps, no ripples, no spots with no glue), then lay down the suede on top of that and press it down so it adheres evenly. Gorilla glue expands as it cures, so you'll often have to re-flatten your suede every 5-10 minutes in the first hour as the glue cures. Once it is adhered, you can cut through both the suede and foam at the same time.
All this work to adhere the flocking properly to the foam is fiddly and can be frustrating if it goes awry so you can also just consider getting a block 3D printed and avoid carving altogether.
Please feel free to contact me if you have any questions about making blocks.
TOOLS TO GET THE JOB DONE
A good little .1g Accurate Scale
Immersion Blender
Cheesecloth
Gloves, Spatulas, Mixing containers, Sheet pans, Frames for the stamp pads : available at the dollar store usually.
MORDANT PRINT MEDIUMS
INGREDIENTS:
Distilled white vinegar (Vinegar) 5% Acidity. Buy a big one, you’ll go through it! Smart and Final has good deals in the LA area!
Soda Ash AKA Sodium Carbonate AKA Washing Soda.
Aluminum Potassium Sulfate (Alum).
Ferrous Sulfate Heptahydrate (Iron).
Guar Gum.
Wheat Bran.
DARK MORDANT
Vinegar - 600g
Iron - 30g
Soda Ash - 15g
Guar - 7.2g
RECIPES:
BRIGHT MORDANT
Vinegar - 600g
Alum - 60g
Soda Ash - 30g
Guar - 5.7g
(These two mordants can be blended to create any tone between them on the spectrum. For a good middle-blend use one part by weight each.)
Measure vinegar into a tall jar or container with at least a few inches of clearance above your liquid. I’ll often mix my mordant batches in large open bowls or VERY deep containers. The addition of the soda ash to the vinegar and dissolved metallic salt causes an energetic release of carbon dioxide bubbles (FOAM) which has the tendency to bubble up, over, and out of any undersized or constrictive container. Once all the bubbling is done and the soda ash is fully dissolved, the mordant mix will reduce in volume back to its original dimensions. Decant the liquid into a deeper jar before adding the guar gum, as that is easier to blend in deep liquids instead of shallow.
Add each ingredient in order, mixing thoroughly with an immersion blender until it is fully dissolved (there's really no other way to do it properly that I've found).
For additional saturation or dilution, adjust amounts of alum and iron (try doubling, halving, quartering, etc)
These mordant mixes work best when used immediately! I recommend making and using them on the same day. As they age, the contents will oxidize in their containers and the active ingredients will deplete. Used even a day later, the ferrous acetate will be bright orange and have considerably less strength, leaving your final colors much more pale than they would be if the medium is used immediately upon mixture.
PREPARING FOR PRINTING
For first time, and novice printers, I recommend using a very lightweight cellulose fabric (cotton, linen, etc). Work small, perhaps 24" x 24". Heavier weight materials and larger pieces of fabric present their own challenges (mordant crocking, difficulty maneuvering, bunching in the vat) which can be very discouraging as a beginner.
Create a printing table for yourself. This process works well when there is a bit of batting or soft surface underneath your cloth. I've created a print table by layering foam sheeting and canvas, topped with muslin, stretched tightly around plywood. Though you can probably just layer them on top of eachother. This surface provides a nice bit of push-back into your work and you can also pin your fabric down into it.
The mordant printing process pushes some mineral rich material all the way through your fabric. Lay down newsprint (I use a big roll of the stuff but old newspapers work fine) on top of your print table before securing your fabric. If you skip this step, you will get a bunch of mordant on your print table that will contaminate the back of the next piece that you print. You can just recycle the print paper after one use. If you're printing on a garment, make sure to place some of this blotter paper inside to absorb any mordant so it doesn't bleed through to the opposite side of the piece.
Use T pins to pin down one side of your fabric, then proceed around the sides in clockwise order (don't jump across). This will give you the smoothest possible lay of fabric.
CREATING YOUR PRINTING PAD
In order to get a clean, neat, repeatable print onto your fabric, you need to create a printing pad. Mine are simply made by taking a piece of plywood (about 6" x 9" x 3/4", though they can be made larger if you are working with a larger block) and trimming a sponge cloth to sit neatly on top of it. The pad provides a bit of push-back against your block which makes it easier to get the whole print surface of your block coated. I wet thoroughly, then wring dry as much a possible the sponge then wrap the block and sponge together in cheesecloth, neatly, so there are no thick spots where the fabric is bunched up. Cheesecloth has lots of space between the weave which allows for a lot of mordant to sit in the fabric. This wrap is idea if you are printing with big, bold shapes. However, if you want to print finer lines of less than 1/8", wrap the cheesecloth in a layer of open weave muslin. This will not hold as much mordant and will let you coat your block for printing without transferring so much mordant that the crevices get clogged with print medium.
Tuck the tail of the fabric neatly underneath the block and set it down onto a tray. Old lunch trays work great, as do cookie sheets. You want the print surface of your pad to sit above the top lip of the tray so that you can easily use all of the pad without running into the lip of the tray.
Pour your mordant onto the print pad liberally. The excess mordant will pool on the tray and you can transfer it back up onto the pad between impressions with the use of some sort of scraper. Make sure that your scraper is at least as wide as the narrowest dimension of the top of your pad. This will allow you to distribute the mordant evenly with a single swipe between prints. If you use a scraper that is too narrow, you'll often create ridges and pools of mordant on the pad which will transfer to your block and ultimately the fabric, these areas where the print medium is applied to thickly can cause bleeding, slow drying and clouding on the piece when it is dyed.
Before inking up your block, make sure that the pad surface is completely saturated. Then, scrape any excess mordant off the pad. The best print surface is clean, even and has a lot of mordant tucked down and in between the threads of the weave of the cheesecloth. To ink up a block, firmly but gently dab the block onto the pad. Do not push hard otherwise the mordant will squeeze out from under the block and deposit itself onto the sides of the block, thickly. Dab multiple times until your block face is completely coated with the mordant. The first time you use a block, it is often challenging to get the whole surface of the block coated with mordant. After a couple impressions, the block gets hydrated and will more easily pick up mordant from the block.
Re-coat and smooth the pad surface with mordant from the pool in the tray between each and every print of the block for the most consistent results.
AFTER YOU PRINT, BEFORE YOU DYE.
Yes, if you can believe it, this is a step! The mordants are on your fabric, hopefully they did not bleed all over the place or into eachother. You MUST Let your pieces dry FULLY before dyeing. Wait a couple days if you can find the patience. I now officially do not recommend any drying technologies - steam irons, steamers, hair driers, etc. They tend to give the final mordant an inconsistent look that I don’t find pleasant. Time is a tool! Air drying is best.

THE RINSE
Once your piece has been mordanted and dried (ideally for 24 hours if you have the luxury of time), remove any unbonded mordant on the surface. Rinse and wash your pieces thoroughly in excess flowing water. The classic and thorough method is to actually secure your fabric in a swiftly flowing river or stream and allow the water to run over it!
As my experience with this process has grown, I’ve found that this rinsing step is VITALLY important to the overall finished quality and contrast of the print. A well rinsed print, following the mordant fully drying on the cloth, hardly needs a fix bath immersion. However, this requires a large volume of water compared to what the indoor - home dyer has access to. I’ve been teaching this workshop in Vermont during the summer and have found that there is a small stream running by the school that is a perfect place to rinse the goods. Even a small, trickling stream has much more water passing through it than a home bathtub on full blast so I now officially advocate for rinsing out in the wild if you can. If not, try to do this step in quickly flowing and draining water : like a shower or bathtub with the drain open. Start with cold water then work your way up in temperature.
Otherwise mordant will flow from the printed parts of your fabric onto the background and create cloudy areas. You can even throw the pieces through a load of laundry (hot) to make sure this is done well.
THE FIX
Then make a hot bath of water 150 degrees-ish and dissolve a cup of the wheat bran in it as well as 1/4 cup of chalk. Then, rinse your pieces in that fix water and let them stew for about 5 minutes (hey science people, I'm interested in learning about HOW LONG it is actually necessary to perform this step, what we're aiming to do is chelation of the metallic ions with the calcium and phosphates naturally present in the chalk and wheat bran. My impression is that this reaction occurs almost instantly, true?) This will both bond the extant mordant and clear off any of the mordant that may crock during dyeing, the hotter temp liquid also helps to dissolve the excess guar that is still on the piece.
Rinse, then you're ready to dye!
THE DYE BATH
Follow individual instructions for extracting the pigment from whatever dyestuff you're planning to use. I've used this method with Catechu, Oak Gall, Sumac, Goldenrod, Tree Tobacco, California Pepper, Eucalyptus, Madder, Lady's Bedstraw, and Alkanet with good results. Use a non-reactive vessel (stainless steel or enamel) that is large enough for your goods to flow around freely. Wet your piece prior to immersion into the dye, over time you will see the areas where you've printed begin to attract more and more color. Each dyestuff is different! You'll have to experiment to find proper concentrations of dyestuff and the amount of time that each of them takes to properly dye the fabric
If you've made it this far and are totally overwhelmed, I can help! I teach all this information (and more) in a single-day crash course from my workshop in Los Angeles. Check out www.grahamkeegan.com/workshops for listings.