PromoURL2:/gallery/id--b31321/best-sellers-posters.htm###PromoURL:/gallery/id--b31321/best-sellers-posters.htm###PromoID:465347###Brand:APC###Zone:US###Channel:SITEWIDE###Sub-channel:###AID:NULL###Coupon:NULL###Offer:Sitewide###MSG:SITEWIDE###CMS:banner_no_end
[Channel]
How to Hang Art in 5 Simple Steps - A Beginner's Guide!
Congrats on your new art! Whether it'll go in your new house or rental apartment, the big question is: how to hang wall art so it's level and even and looks good?
Don't panic! We'll walk you through it. Instead of just eyeballing it and guessing (though that's not bad either) we've got you with this easy, 5-step guide on how to hang your art securely and evenly on a wall. If you're wondering not just how to hang wall art, but also how to hang framed art or even canvas art, we've got you there too. Spoiler alert: it's all the same process!
Getting Started: Where to Hang Your Art
First, decide where you want to hang your art! Sometimes you know exactly where you want to arrange an art piece on the wall, but other times you just fall in love with the art and need to find the right space in your home, so this might be the hardest part! Get ideas from our shop by room experience or Instagram and Pinterest pages.
Art Hanging Hardware: Sawtooth vs Wire Hangers
Next, take inventory of what hanging hardware your art has. This will determine how you should approach hanging it. If you bought your art from Art.com you're in luck! All serviced Art.com art comes ready to hang with the type of hanging hardware that's appropriate for the size and weight of your art piece. We use either a sawtooth hanger—great for lighter art—or a wire hanger for heavier pieces.
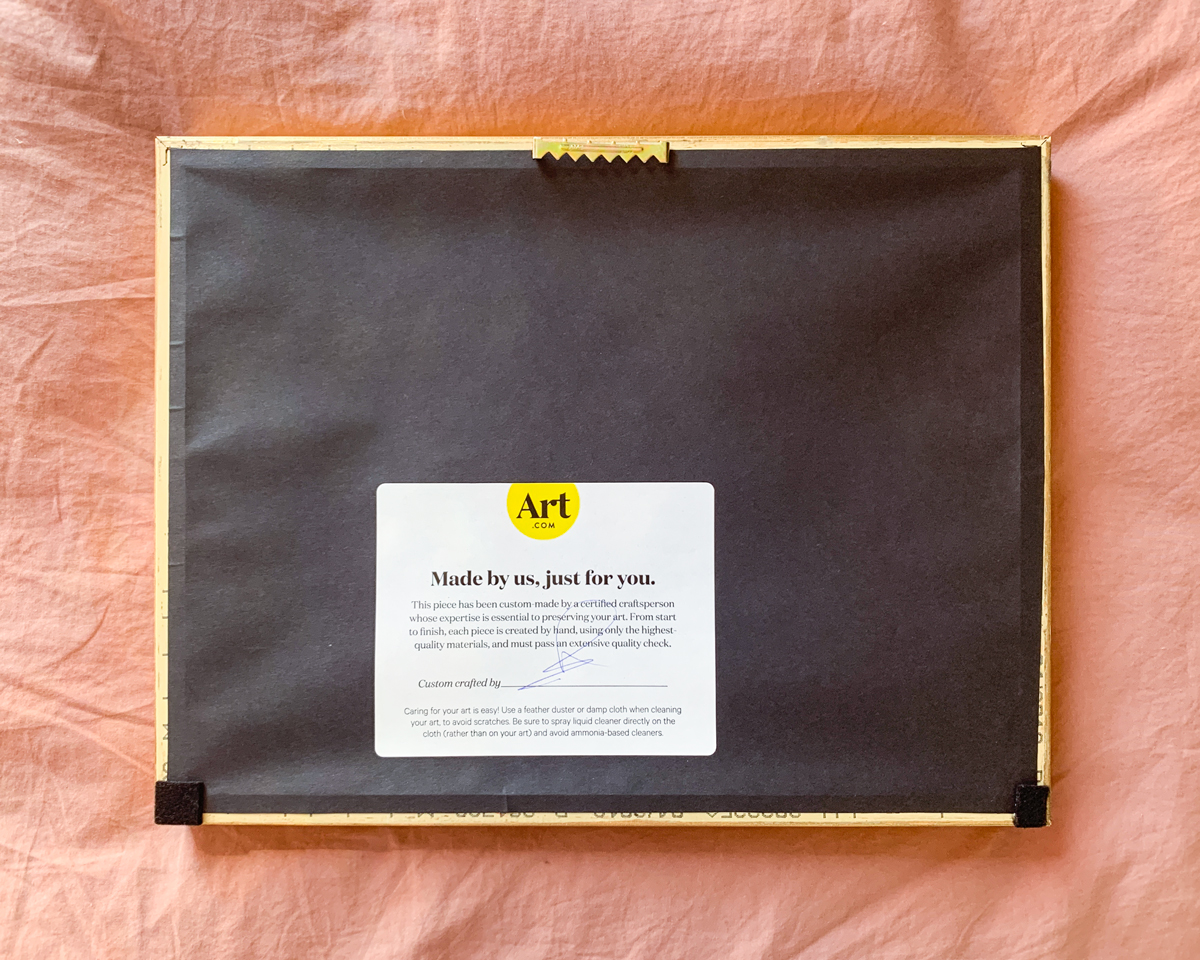
Sawtooth Hangers
These are small metal strips with a flat edge on top and teeth like a saw at the bottom. They're great for hanging smaller, lightweight art pieces securely on your wall. The sawtooth design makes it super easy to hang art so it's straight and even. If your art has a sawtooth hanger, you'll just need a nail to hang it (no matter if it's a canvas, gallery wall, or multi-panel set).
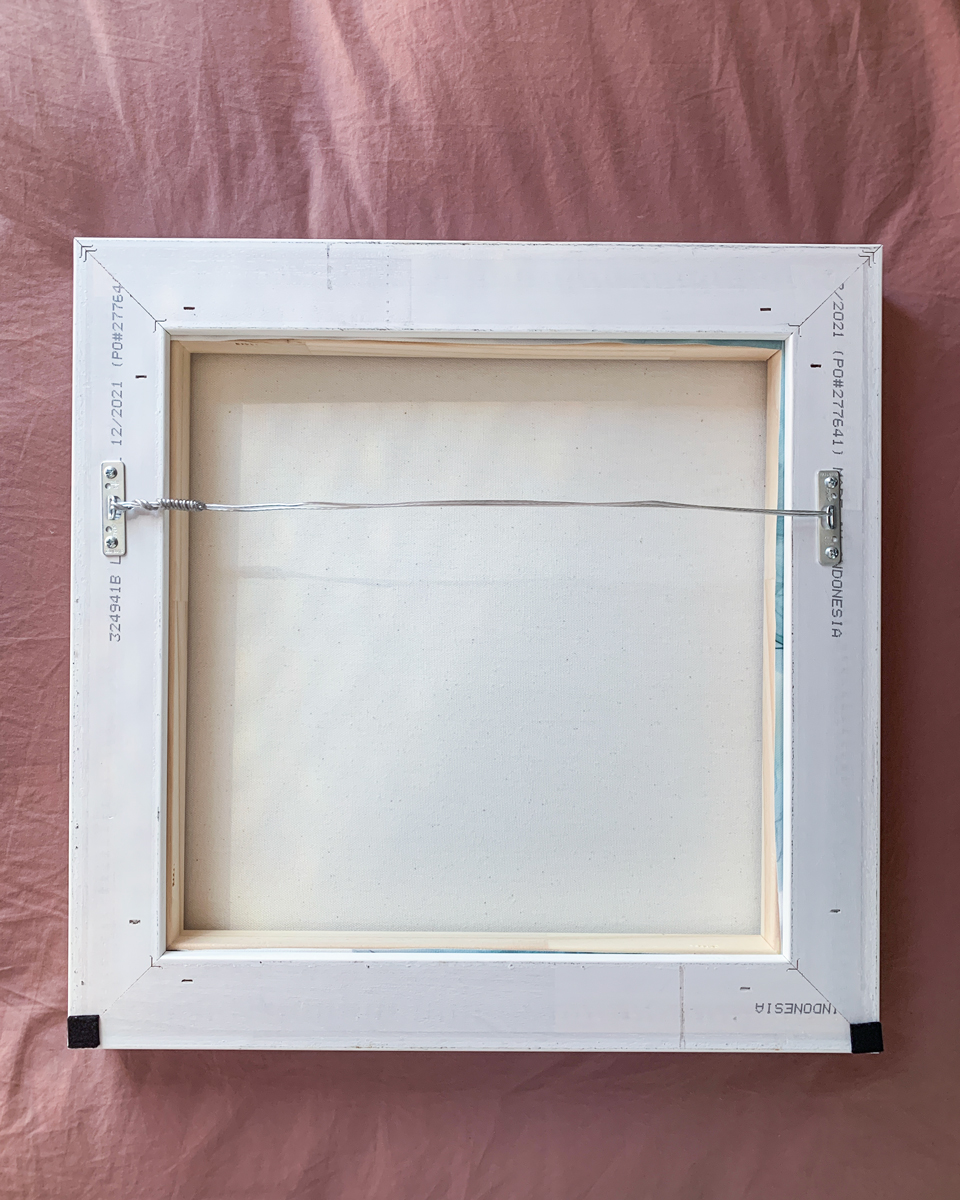
Wire Mount Hangers
For art with a wire mount hanger, instead of a hook at the top, you'll find a hanging wire suspended across the back of the frame or canvas stretcher bars. This adds stability and makes the art more balanced. It's great for securely hanging larger and heavier pieces. All of our art with wire hangers comes with hanging hardware (nails and hooks) included!
5 Easy & Simple Steps to Hanging Art
Now that you know where you're going to hang your art and the hardware decided, let's get to it. Time to hang some art!
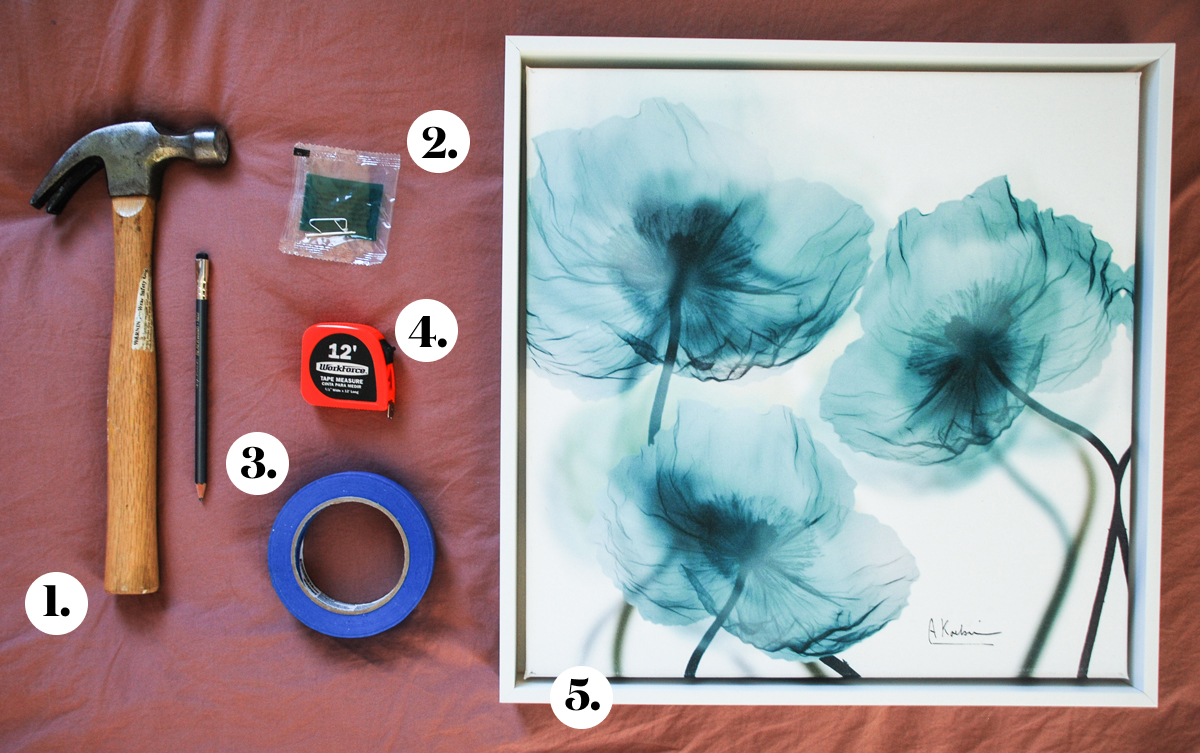
Step 1: Gather Your Materials
Things you'll need:
- Hammer
- Hanging hardware (nail and a hanger) - Heads up! If you purchased your art with Art.com, you'll receive the necessary hanging hardware with your art. We're here to make it easy!
- Pencil and/or masking tape - To mark where your art will go on the wall
- Measuring tape or ruler
- Your art!
Optional:
- Level - To help ensure your art is straight!
- A partner - If your art is on the heavy side, it can help to have an extra set of hands.

Step 2: Mark the Position of Your Art on the Wall
Once you know where you want your art to hang, you'll need to mark its position on the wall. In pencil, lightly mark the top as well as left and right sides of your art.
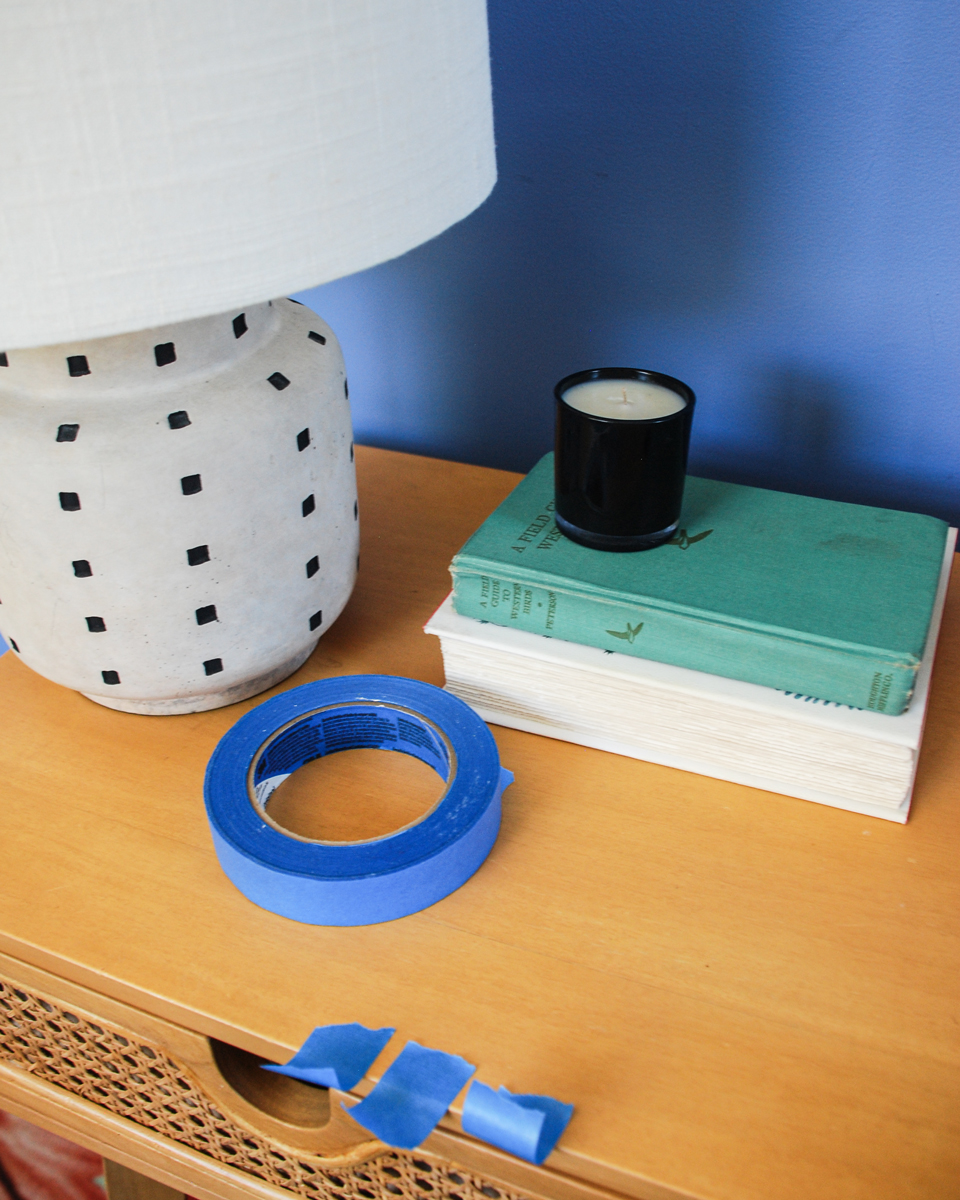
- To save your walls from marks, you can use a few small pieces of masking tape instead!
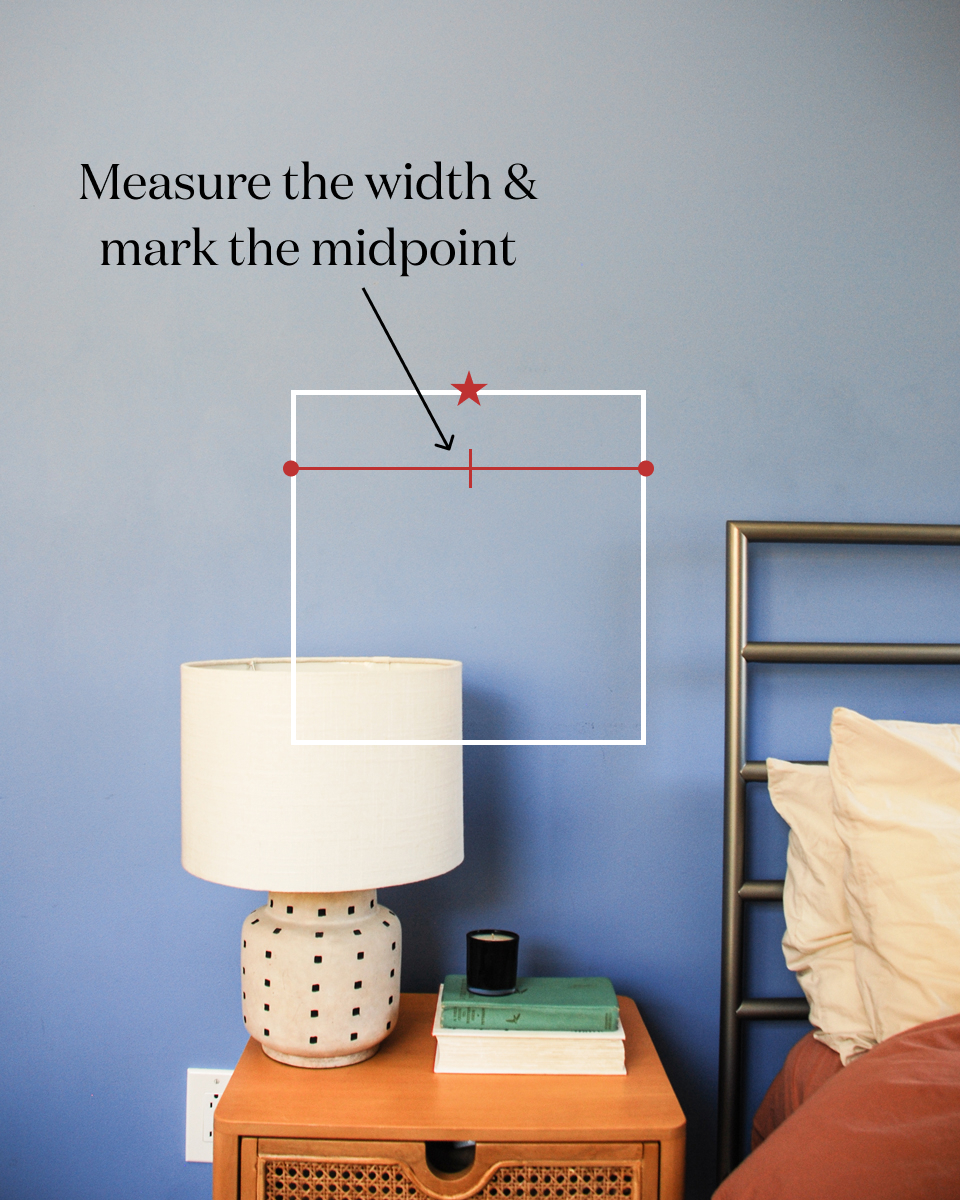
Step 3: Find the Midpoint of Your Art
So now you can set your art down in a safe place and work with the outlines you have taped or penciled on the wall. Our next task is to find the midpoint of your art, as this is where we'll want to affix the hanging hardware.
- Measure the distance between the two sides of your art.
- Mark the halfway point along the top (in pencil or with another piece of masking tape.
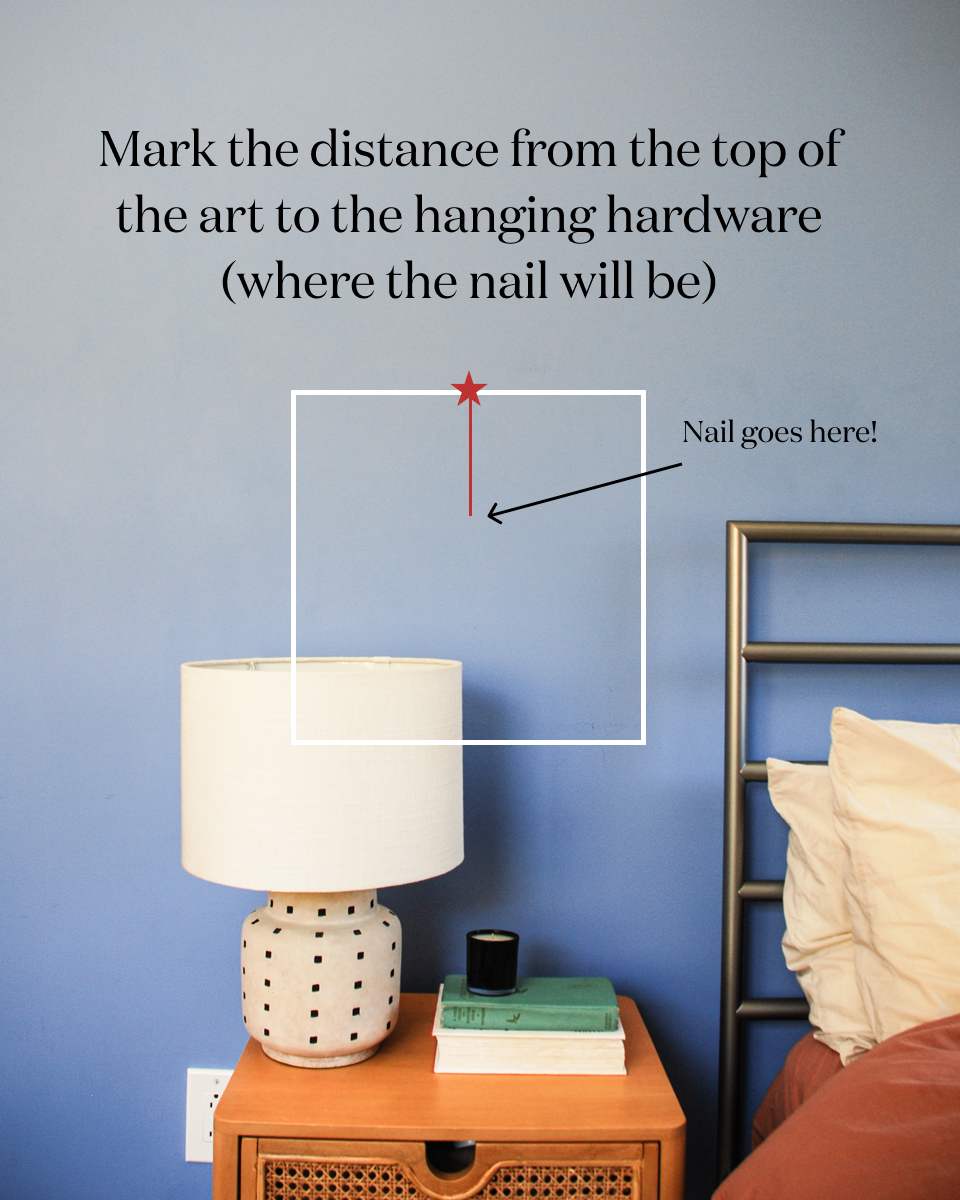
Step 4: Mark Where to Put the Nail
This is the part where your sawtooth or wire hangers come into play!
For sawtooth hangers:
- Since the sawtooth hanger is positioned at the very top of the frame, this part is easy!
- Find your midpoint that you marked in step 3, and measure down about ½ an inch (the distance from the top of your art's frame to the bottom of the sawtooth hanger).
- Mark this point on your wall (or on your masking tape if you're using that).
For wire hangers:
- The wire hanger usually sits about one-third of the way down the canvas, so we'll need to measure and mark this so we know where to place our nail!
- Measure the distance from the top of the art to the wire when it's taught.
- Measure that same distance down from the top midpoint marker you made in step 3 and make a mark!
Step 5: Nail It!
Now comes the fun part—hammer your nail into the wall!
For sawtooth hangers:
- Place your nail where you marked and go for it!
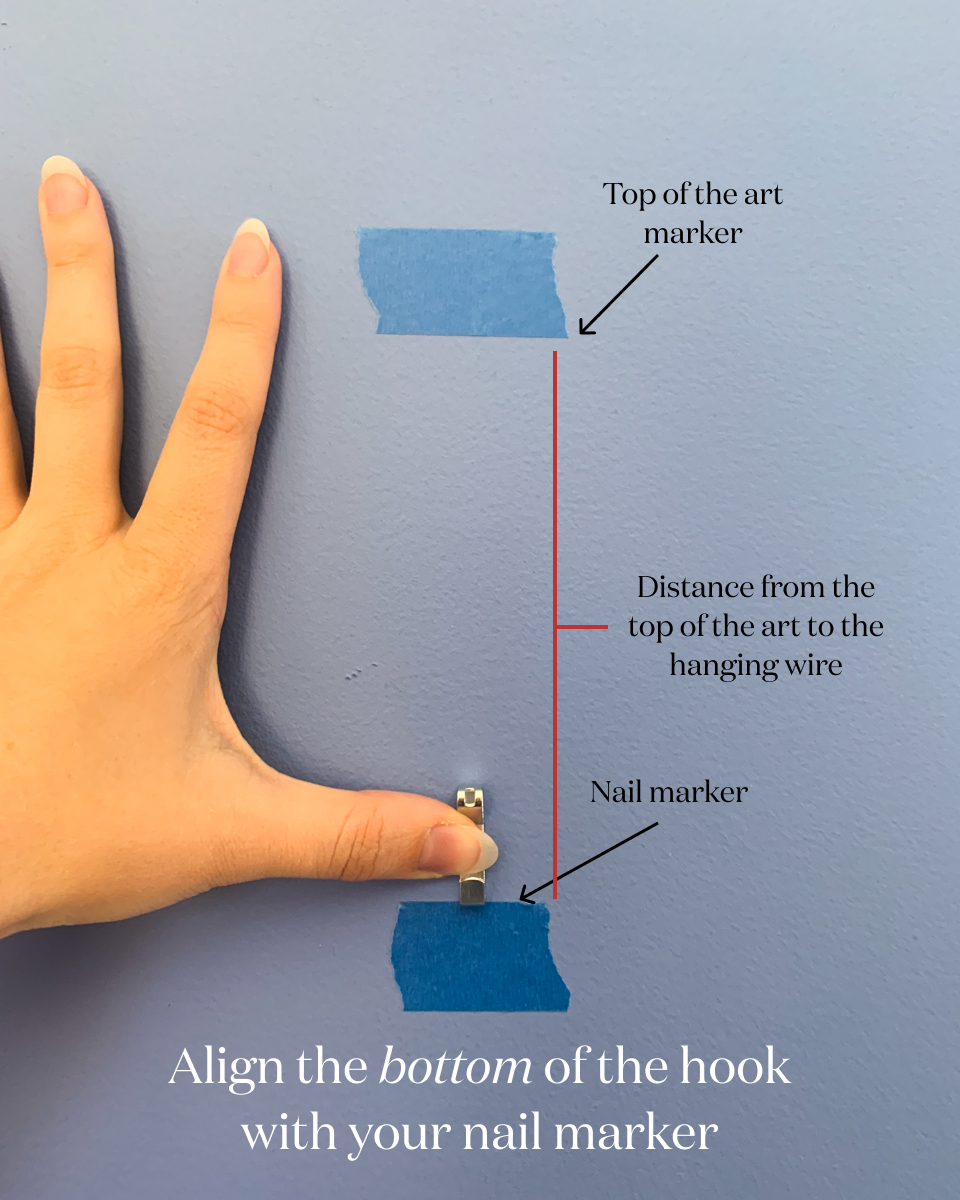
For wire hangers, there's one more step:
- Because this art is a bit heavier, you'll want to hang it on a hook, not just on the nail.
- Find your hook (included with Art.com art!) and align the bottom of it with your nail marking (that you made in step 4).
- The hanger is about 1 inch tall so you want to line up the bottom with your dot, not the nail, or else your art will hang an inch lower than you intended.
- Nail it!
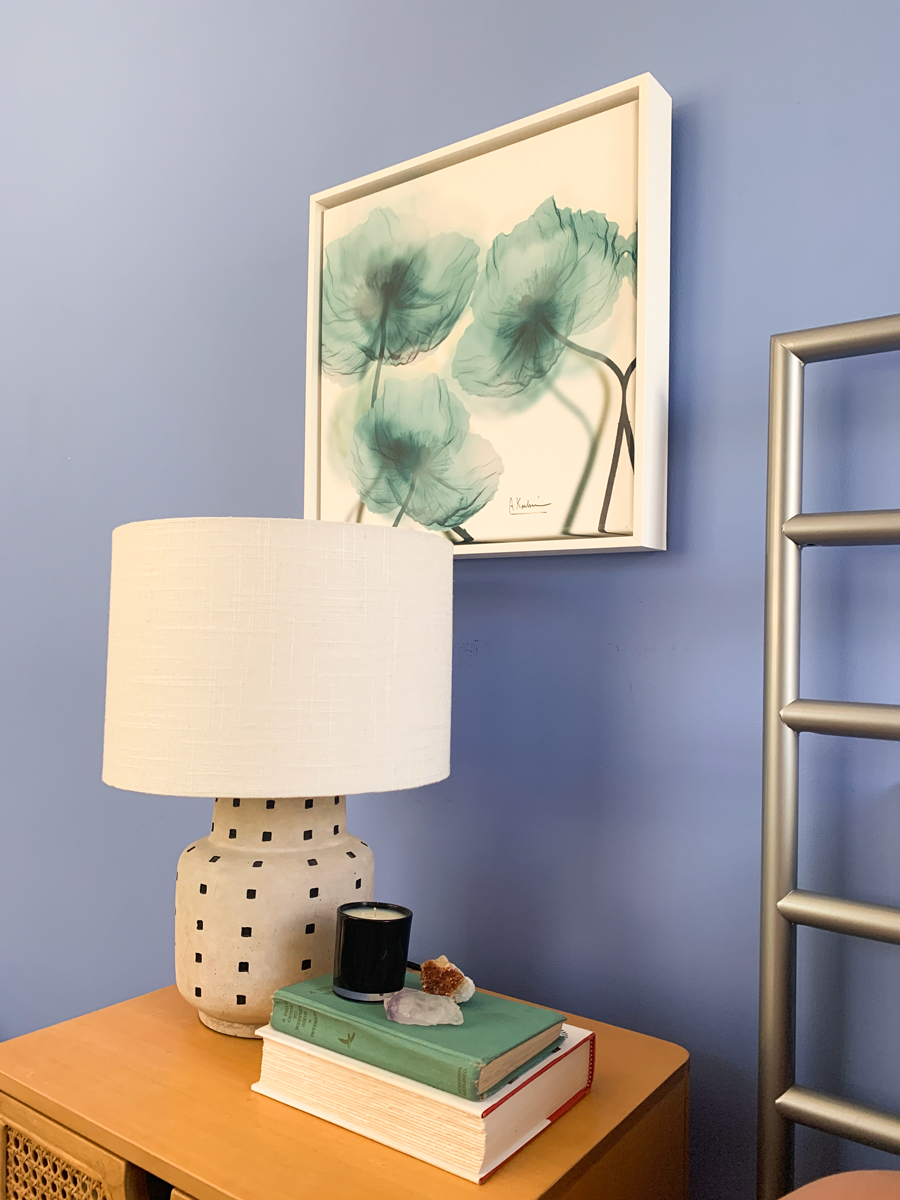
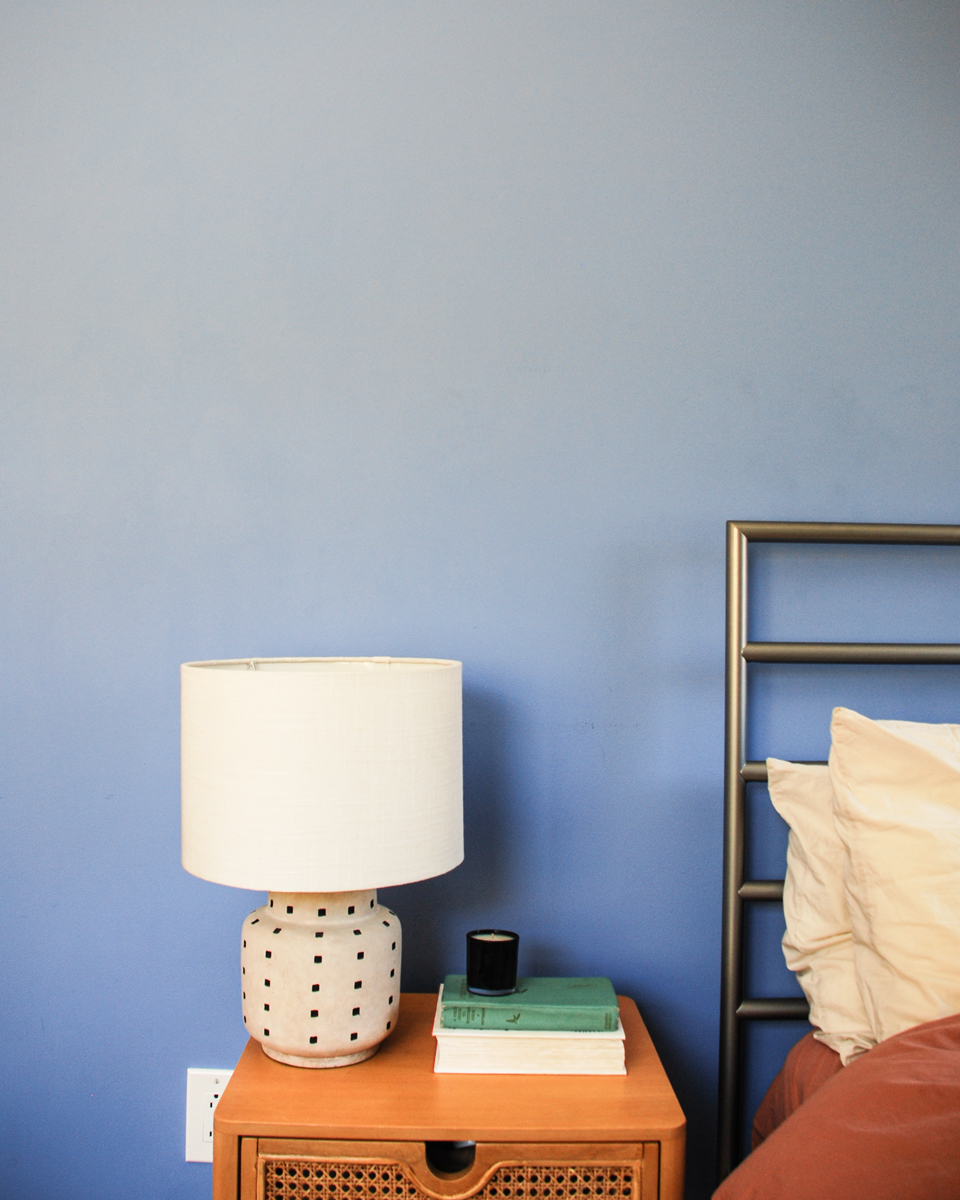
Harbor Blue Beauty by Albert Koetsier
Finally, Enjoy!
Now, simply hang your art and enjoy! You can double check with a level to ensure it's hanging straight and even, or just eyeball it and adjust as needed. Voila!
Are your other walls getting jealous?
Fill them up with amazing art! Explore our collections of museum-quality canvas and framed prints, handcrafted right here in the USA!