


How to Create a Bokeh Background to Make a Subject Stand Out
Want to create a glorious bokeh effect in your images? Then read on! This guide covers everything to know about creating bokeh backgrounds.
Learn | Photography Guides | By Greg Cromie
Shotkit may earn a commission on affiliate links. Learn more.
Today we’re going to take a look at how to create a bokeh background in your photography.
Achieving a pleasing bokeh effect will result in a creamy background that has an ethereal appeal.
Throw in a string of fairy lights and your bokeh game just got kicked into overdrive.

Great software for adding realistic bokeh to photos in just one click.
How to get a shallow depth of field look tends to be a hot topic in photography communities – especially those that shoot portraits.
So let’s jump in!
What is Bokeh?

The word bokeh (pronounced boh-kay) is a Japanese term with boke (ボケ) meaning blur, or boke-aji meaning blur quality.
In essence, bokeh is the creamy and soft out-of-focus areas, usually in the background of a composition.
As for what causes it, the effect happens when an image is shot with a wide aperture resulting in subject separation.
The blades that operate on a lens diaphragm determine the overall shape of the bokeh. Rounded blads will return softer rounder bokeh balls while straight blades deliver a more angular shape like a hexagon or enneagon.
But they can come in other shapes too, and if you check out this article on photography hacks, you’ll get some great tips on how to create unique bokeh effects.
What Is ‘Good’ Bokeh? (…And How to Get It)

There’s good bokeh – creamy, rounded, soft and circular. And then there’s the not-so-good – angular, distorted, sharp and elliptical.
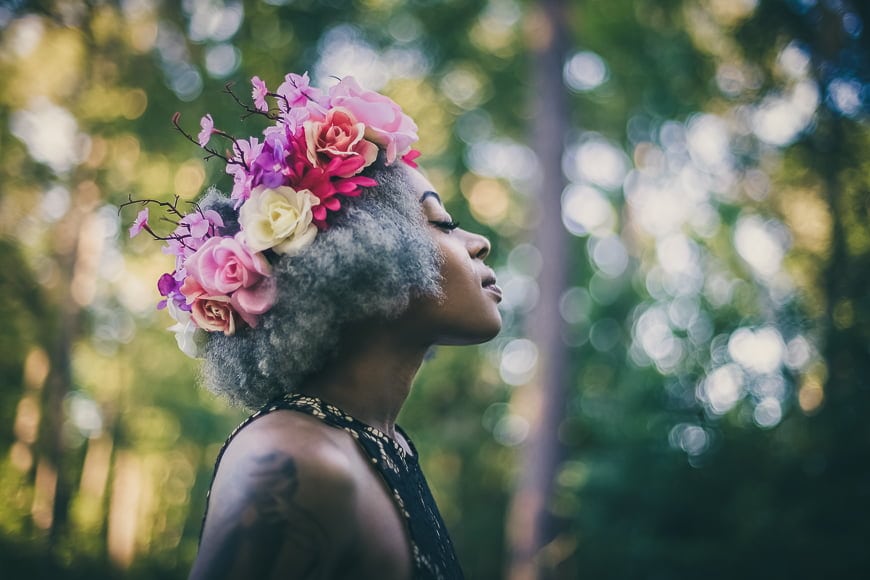
Good bokeh will take the form of soft and smooth-edged circles that appear to hang like fat fairies in the background. These shapes are highlighted areas such as lights or the dappled light that falls through a tree.
If you compose with background highlights, your bokeh is going to be amazing. The distance you are from those highlights will determine the look and feel of the image.
It’s the lens that creates the effect but all of them are good at it – a prime lens with a wide aperture is best.
What is ‘Bad’ Bokeh?

If you have ideal shooting conditions with adequate subject separation and background highlights, the rest is up to the lens.
The shape of the blades within a lens diaphragm can cause bad bokeh. If they’re angular or there’s not enough of them, your bokeh will appear jagged.
Harder edged bokeh balls – versus edges that fade away – can be distracting in a composition as the attention is drawn away from the subject. Some bokeh balls have what we call a ‘cat’s eye’ look as they appear as squinting eyes.
There’s not a lot you can do about bad bokeh other than do your research before you pick up a portrait lens.
4 Steps to Creating a Bokeh Background
1. Select the right lens

Your first step to success is ensuring that you have a suitable lens. If you’re considering buying a new portrait lens, there are lots of cost-effective options that can achieve beautiful bokeh.
Just do your research, look for sample photos and remember that the shape and number of diaphragm blades impacts the shape and look of the bokeh.
How Much Do You REALLY Know About Photography?! 🤔
Test your photography knowledge with this quick quiz!
See how much you really know about photography...

Prime lenses with a wide aperture are the best style of lenses to achieve a pleasing background effect.
A great example is the Fujifilm XF 56mm f/1.2 APD lens – arguably one of the best portrait lenses available. It has a built-in APD filter that produces smoother bokeh and more definite subject separation.
As for zoom lenses, they can achieve a nice effect – but again, ones with wider aperture are better, and wide aperture zooms are often more expensive.
2. Choose a wide aperture

The ability to throw the background out of focus is particularly useful for fashion photography.
When it comes to achieving bokeh, the wider the aperture, the better it is – so anything lower than f/2 is ideal.
You can achieve bokeh with slower apertures, but it depends on the build and quality of the lens. You get a double bonus for shooting with a fast aperture as they’re ideal for portraits too.
A wide aperture also ensures a good level of subject separation – the depth of field is shallow, so the subject is in sharp focus with creamy background blur.
See our guide to aperture to learn more.
3. Get close to your subject

If you only have a 35mm or 50mm lens but want a little tighter compositions and compression, the answer is simple – zoom with your feet.
Take a step closer to your subject to gain a shallow depth of field and ultimately lovely bokeh in the background.
Remember that just because you step closer doesn’t mean your subject should step back too.
Learn more in our article: what factors affect depth of field?
4. Increase the distance between your subject and the background
Another tip is keeping some distance between your subject and the background. Having the subject too close to the background results in smooshy bokeh.
Subject separation is essential in achieving great portraits and maximising the appearance of bokeh. If you’re not getting the desired look, move your subject further away from the background.
Bokeh Background FAQs
How do you get bokeh background?
Achieving bokeh is a combination of the right lens, a shallow depth of field, and the distance between you, your subject, and the background. For the best bokeh background, use a wide aperture (i.e., a low f-number) and leave plenty of separation between your subject and the background.
What f-stop blurs background?
The lower the f-stop, the wider the aperture – leading to more blur or bokeh in the background. Thus, you can start with an f-stop of around f/1.2 – f/2.8 depending on your subject and what your lens allows. Remember that a very low f-stop (e.g. f/1.2) may leave some of your subject out of focus.
How do I blur the background on my phone camera?
If your phone has a “portrait” mode, simply turn this on and the camera will automatically add blur into the background.
Final Words

Ready to create beautiful bokeh in your photos? Hopefully this guide has given you a good starting point.
Just remember that, ultimately, the effect happens when your backdrop is out of focus – which means you should aim for a wide aperture and plenty of subject separation.
For an extra-pleasing result, get some highlights or light sources behind your subject.
Keep these things in mind, and you’ll be well on your way to achieving that much-desired blurred effect.
…and, if you’re wanting to ‘fake’ the out-of-focus look, check out our article on how to blur the background with Lightroom.)

Check out these 8 essential tools to help you succeed as a professional photographer.
Includes limited-time discounts.
 Guide to Shallow Depth of Field Photography
 Beginner’s Guide to Depth of Field in Photography
 How to Use Frequency Separation in Photoshop (Pro Tips)
 What is Aperture in Photography? (Beginners Guide)
 How to Blur the Background of a Photo (In-Camera or Software)

I’m a Melbourne-based street photographer and blogger. I love to travel to Japan to photograph and document its dynamic people and culture.

👋 WELCOME TO SHOTKIT!

🔥 Popular NOW:
