Bokeh Photography How to
Derived from the Japanese word boke (ボケ), which literally means “haze” or “blur,” the bokeh effect is used to create images wherein a subject is placed against a blurred background or foreground.
Hey Liam, how do you pronounce it?
…shush.
Seriously though I’ve heard it pronounced, Bor Ka, and like Okay but with a B in front; Bokay. If you say Bo Ke then people will know what you’re on about. But, it is worth noting, I’ve never actually been in a conversation with another human being about Bokeh. Probably because I know how to do it and that’s enough, getting into deep conversations or one lens vs another doesn’t interest me in the slightest.
Here’s someone having a go at it:
If used correctly, this stylistic technique can produce stunning portraits, product shots and even landscapes.
The bokeh effect helps draw attention to the most important parts of the photograph by isolating it against a blurred background.
This degree of separation is achieved by transforming unnecessary details in the background into a mix of soft shapes and uniform colours.
For beginners, shooting bokeh photography can seem confusing because it involves the aperture, which in my teaching experience, students struggle with the most.
However, once you understand how the aperture affects both the background blur and the exposure, you’ll crack this technique in no time.
Bokeh; what is it?
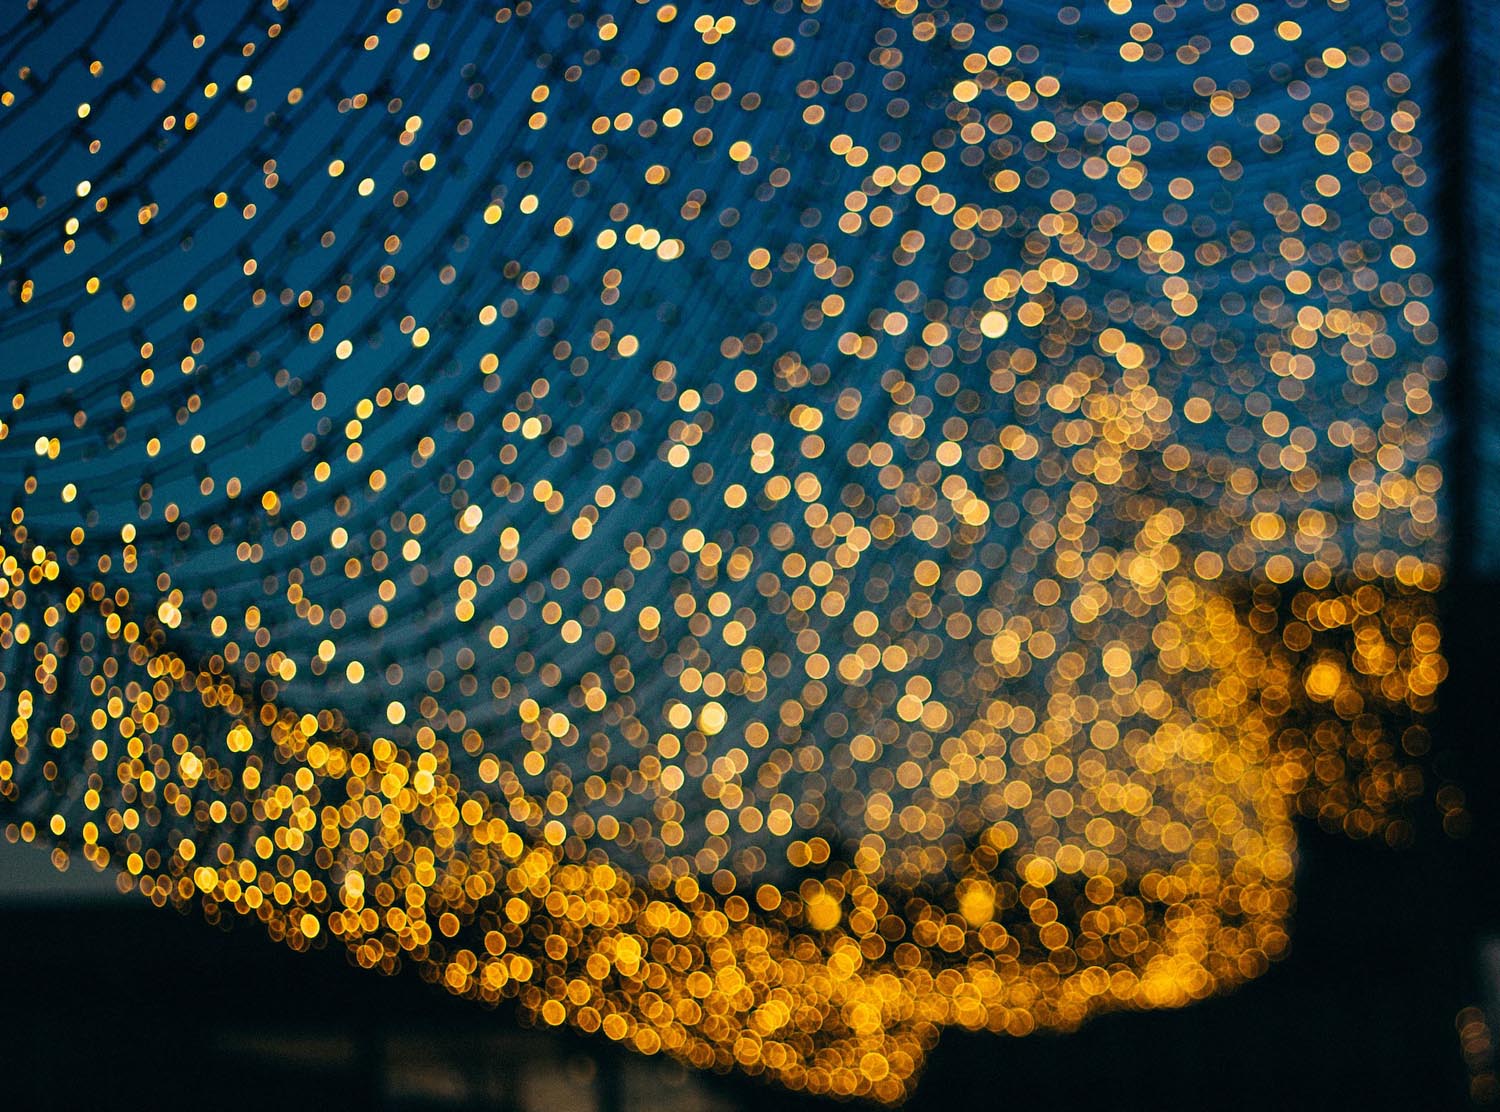
Here are some examples
I’m using lights as the example because they illustrate what is happening best.
It can be described as ‘how out of focus areas of the image are rendered’ – we’ll explore how the direction of the light effects how out of focus areas are rendered later in the article.


So what’s happening?
You can see in this next image how the lights are in focus on the left and shift to out of focus on the right. When the lights are in focus they are rendered as dots of light, you can see as they gradually shift more and more out of focus, the lights become increasingly larger and softer.

You can see that as an object becomes increasingly out of focus, it becomes so blurry that it eventually just looks like a dot.
Factors that Influence the Bokeh Effect in Photography
Here are some of the biggest factors that influence bokeh in photography:
Aperture Size
Know this – The wider the aperture, the more blurred the background.
In photography, aperture refers to the opening of a lens’s diaphragm which controls the amount of light allowed into the camera. Or more simply, look inside your lens, see the hole in it? That’s the aperture.

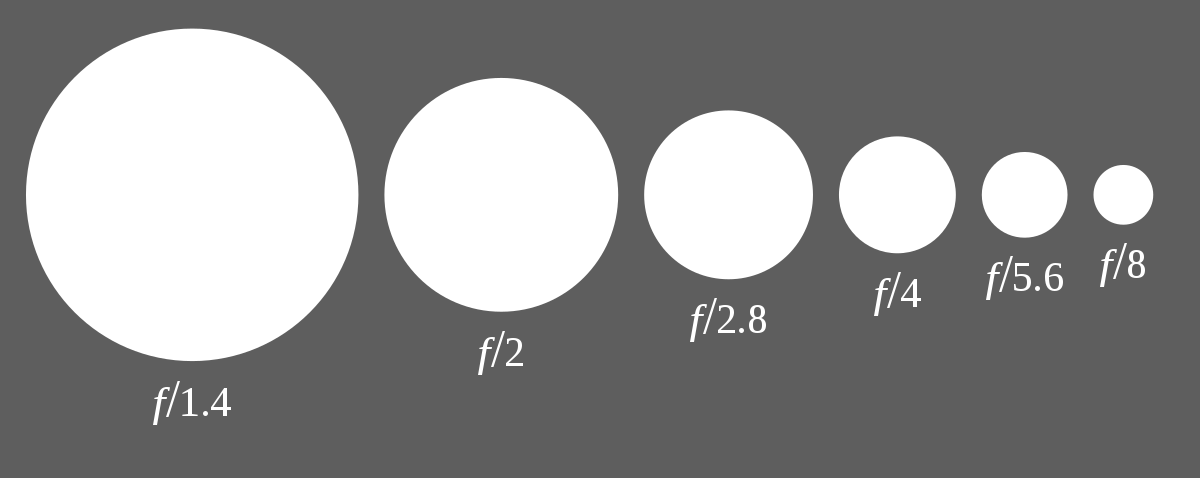
The size of the aperture is controlled by the f-number.
It’s called an f-number because it refers to a mathematical equation, but don’t worry, you don’t need to know the maths part. Just know that when referring to aperture you would say ‘f’ and then the number. If you set your aperture to 64, you would say that as ‘f64’.
All you really need to know here is:
- A high number means a small aperture hole.
- A low number means a big aperture hole.
- A big aperture hole means the background will be more out of focus.
- To create Bokeh, you need a big hole.
- Big hole
Also remember – the bigger the hole, the more light is let in, so you’ll have to adjust your overall exposure accordingly.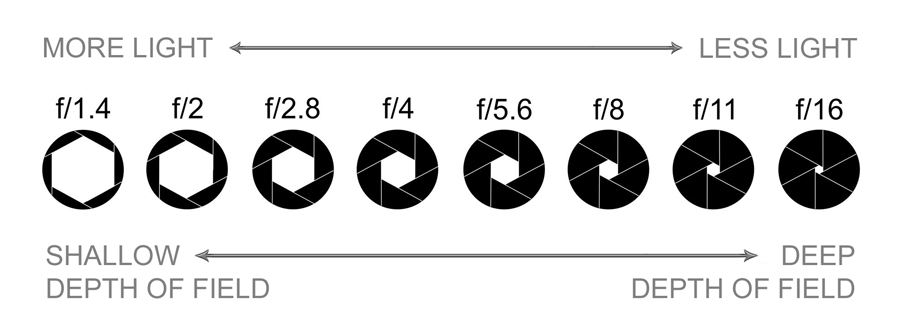
Basic lenses can be set to f4 or f5.6, really expensive lenses can be set to f1.4. Remember; the lower the number, the bigger the hole…and the more exaggerated the Bokeh.
You as the creative can decide how blurry you want your background, try experimenting with different apertures to see the change.
Test the setting by taking a shot and looking at the screen. If the subject is clear with a soft, round background, then you have a good bokeh setting. Experiment with different settings until you achieve the effect you’re most pleased with.
Lens Choice
Not all lenses produce the same bokeh effect.
The shape of the aperture blades inside the lens is what determines the shape of the Bokeh in the background of your image. Some lenses create hexagonal apertures, while others create circular, octagonal, or pentagonal apertures. The aperture in the bokeh effect is usually circular in nature, so the more circular the aperture, the smoother the effect.
The shape of the aperture, determines the shape of the Bokeh
- If your aperture is round, your Bokeh is round
- If you aperture is a Hexagon, your Bokeh will be a Hexagon

BUT
What about this sorcery?

Same rules apply, heart shaped aperture = heart shaped Bokeh
But how do you do it?
It’s really easy, just cut out the heart shape out of some black card and cover your lens. Done.
The focal length of the lens also affects the bokeh quality. Longer lenses create a more compressed background, resulting in a blurrier effect. As such, the longer the lens, and the greater the distance between the subject and the background will result in more dramatic bokeh.
Bokeh can be achieved with nearly any focal length lens which has a wide enough aperture. To see the effects in their most dramatic form, use a 200mm and a wide maximum aperture of f/2.8.
Direction of the light
Follow all of the steps in this article and you’ll get a scene with a lovely out of focus background. To achieve the best results, and true bokeh, you need to backlight your subject.
Backlighting simply means having the light behind your subject.
To achieve bokeh with artificial light, like fairylights, simply place the lights in the background and you’ll get a result like this:
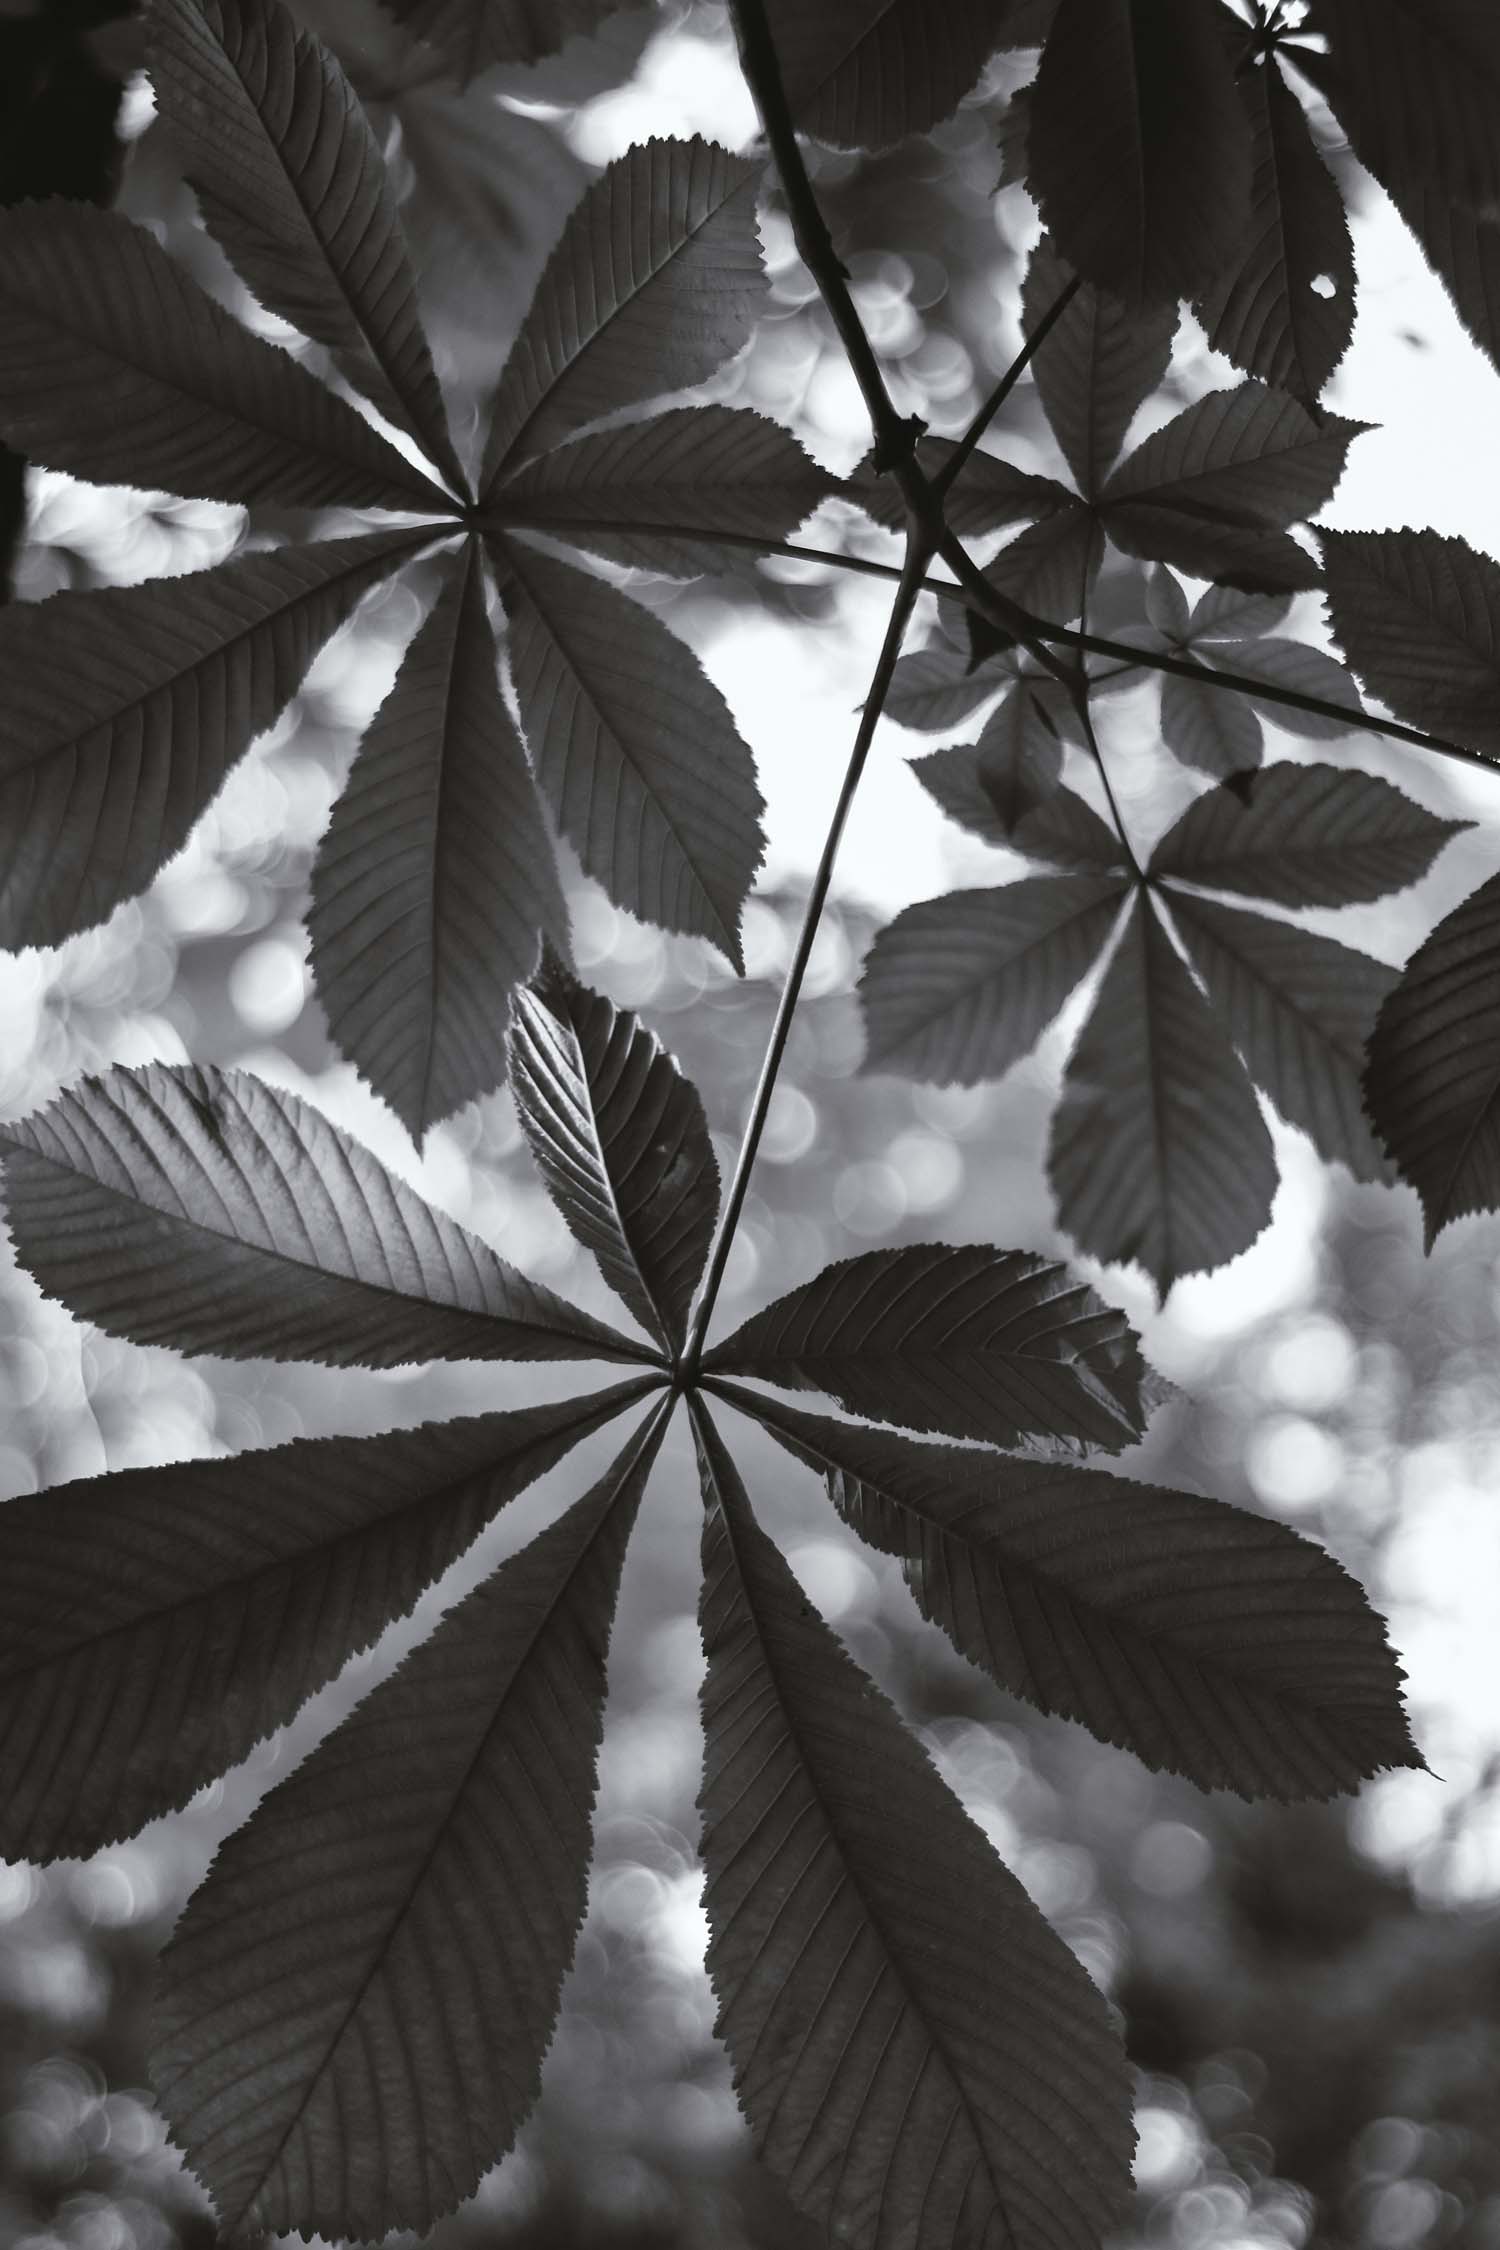
If you’re using daylight, the trick to making the effect it’s absolute best is to have the light filter through something, like leaves on a tree.
Why? The space in between the leaves creates it’s own aperture for light to pass through, and then when rendered out of focus, produces soft round bokeh, like this:
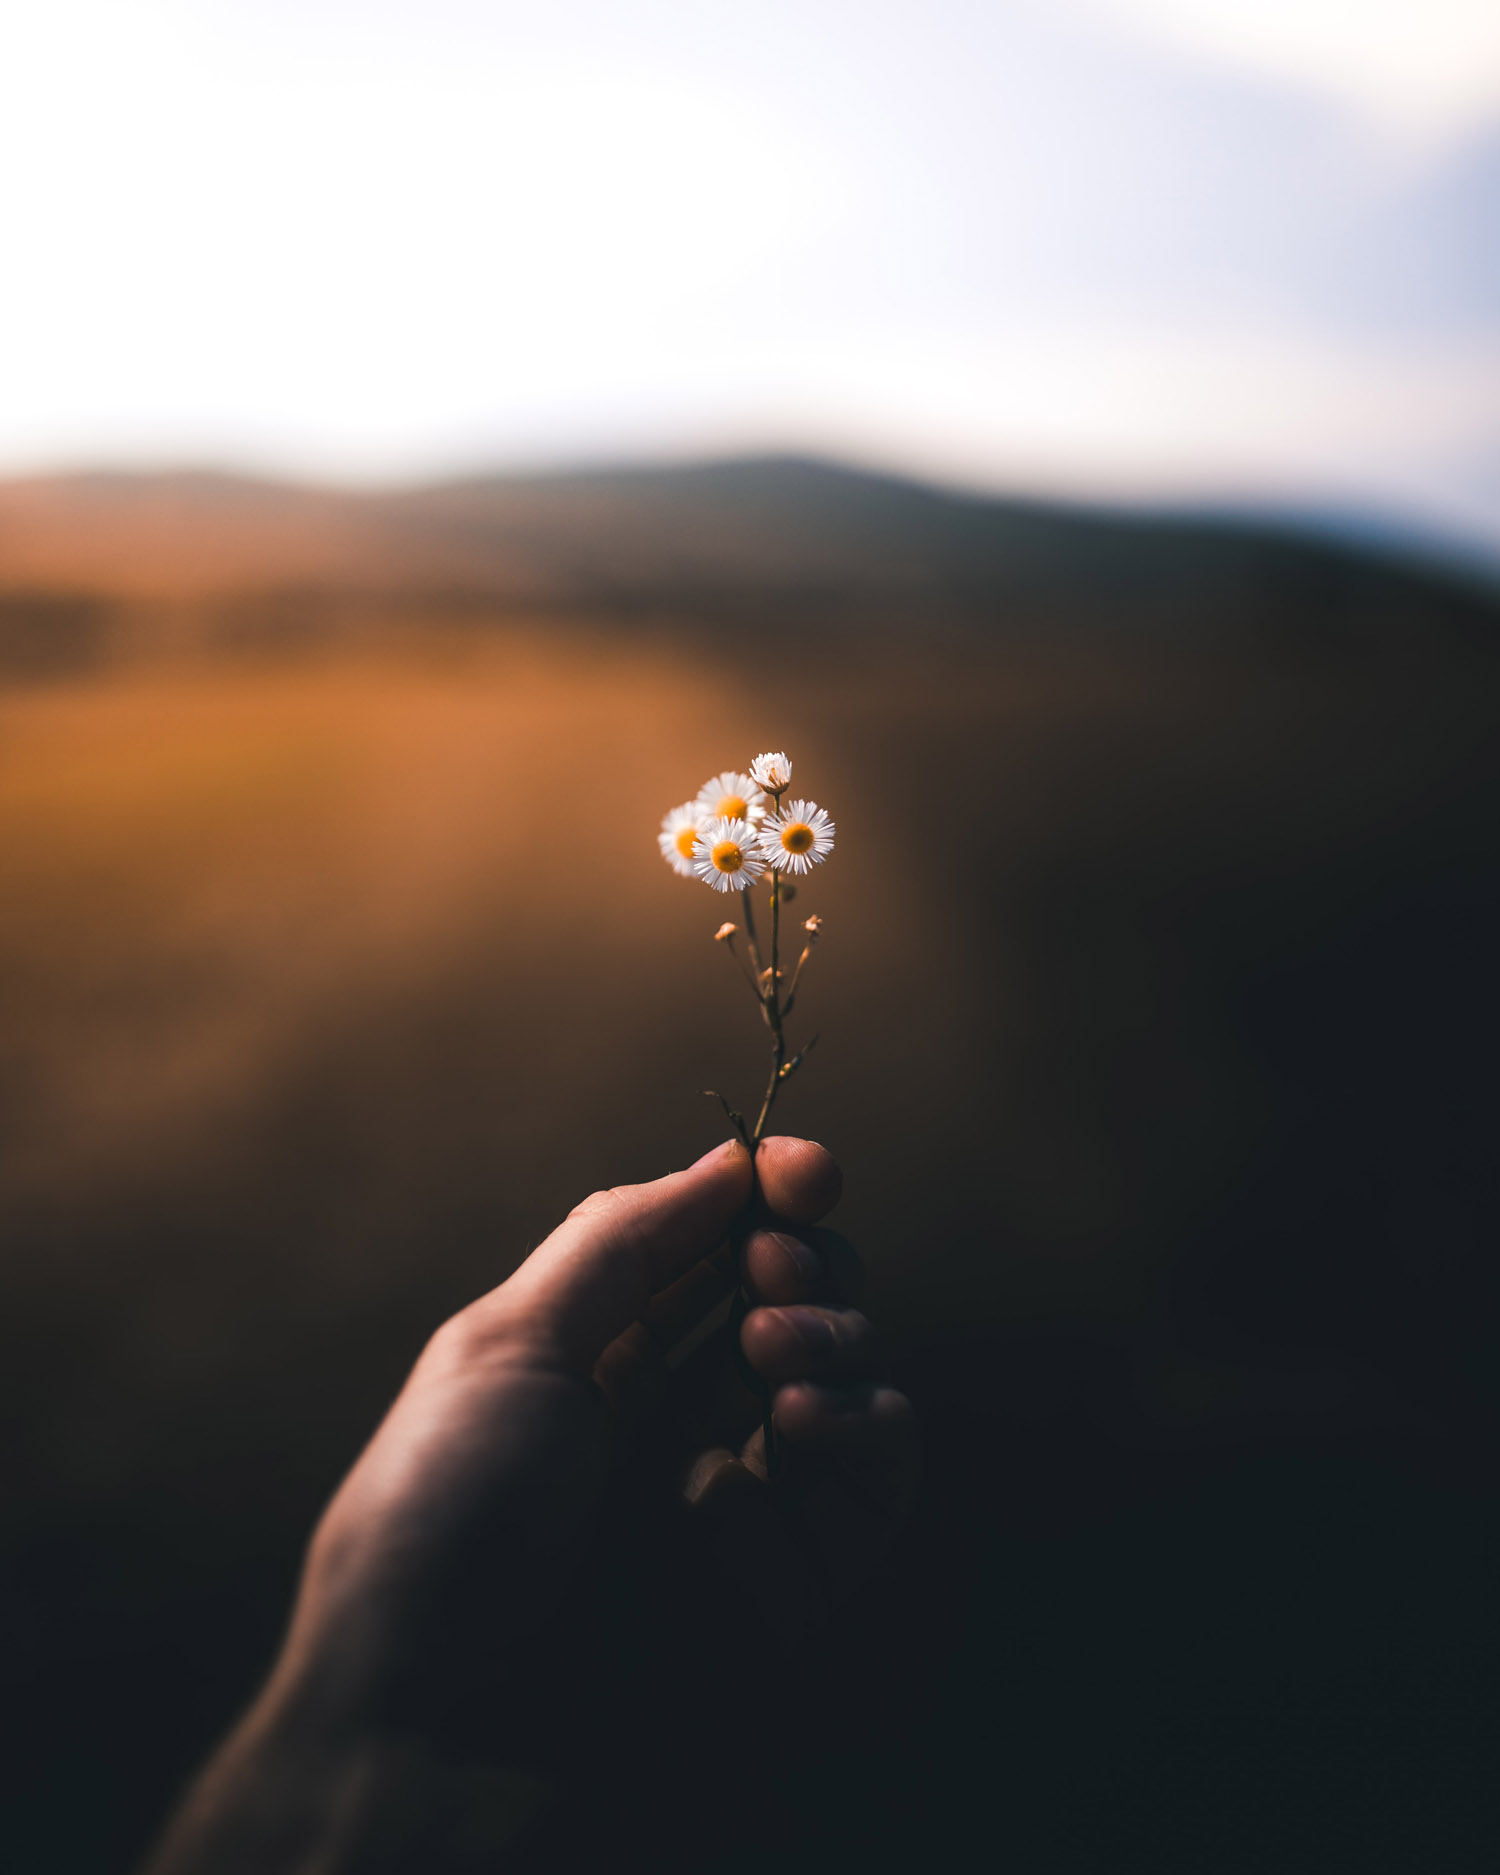
Distance Between the Background and the Subject
To achieve high-quality bokeh, the background should be far away from your subject. The farther the background, the more blurred it’ll be.
Consider this image, we can see that the grass is close to the camera and the background is far away. Note that the light is also coming from behind the leaves.

Background distance and direction of light combined
Now consider this picture.
The flower is very close to the lens, however the light is coming from the side.
The result? The background is blurry because of the difference in distance between the object and the background, but you don’t get the same soft orbs of light as the above image, because of the direction of the light.
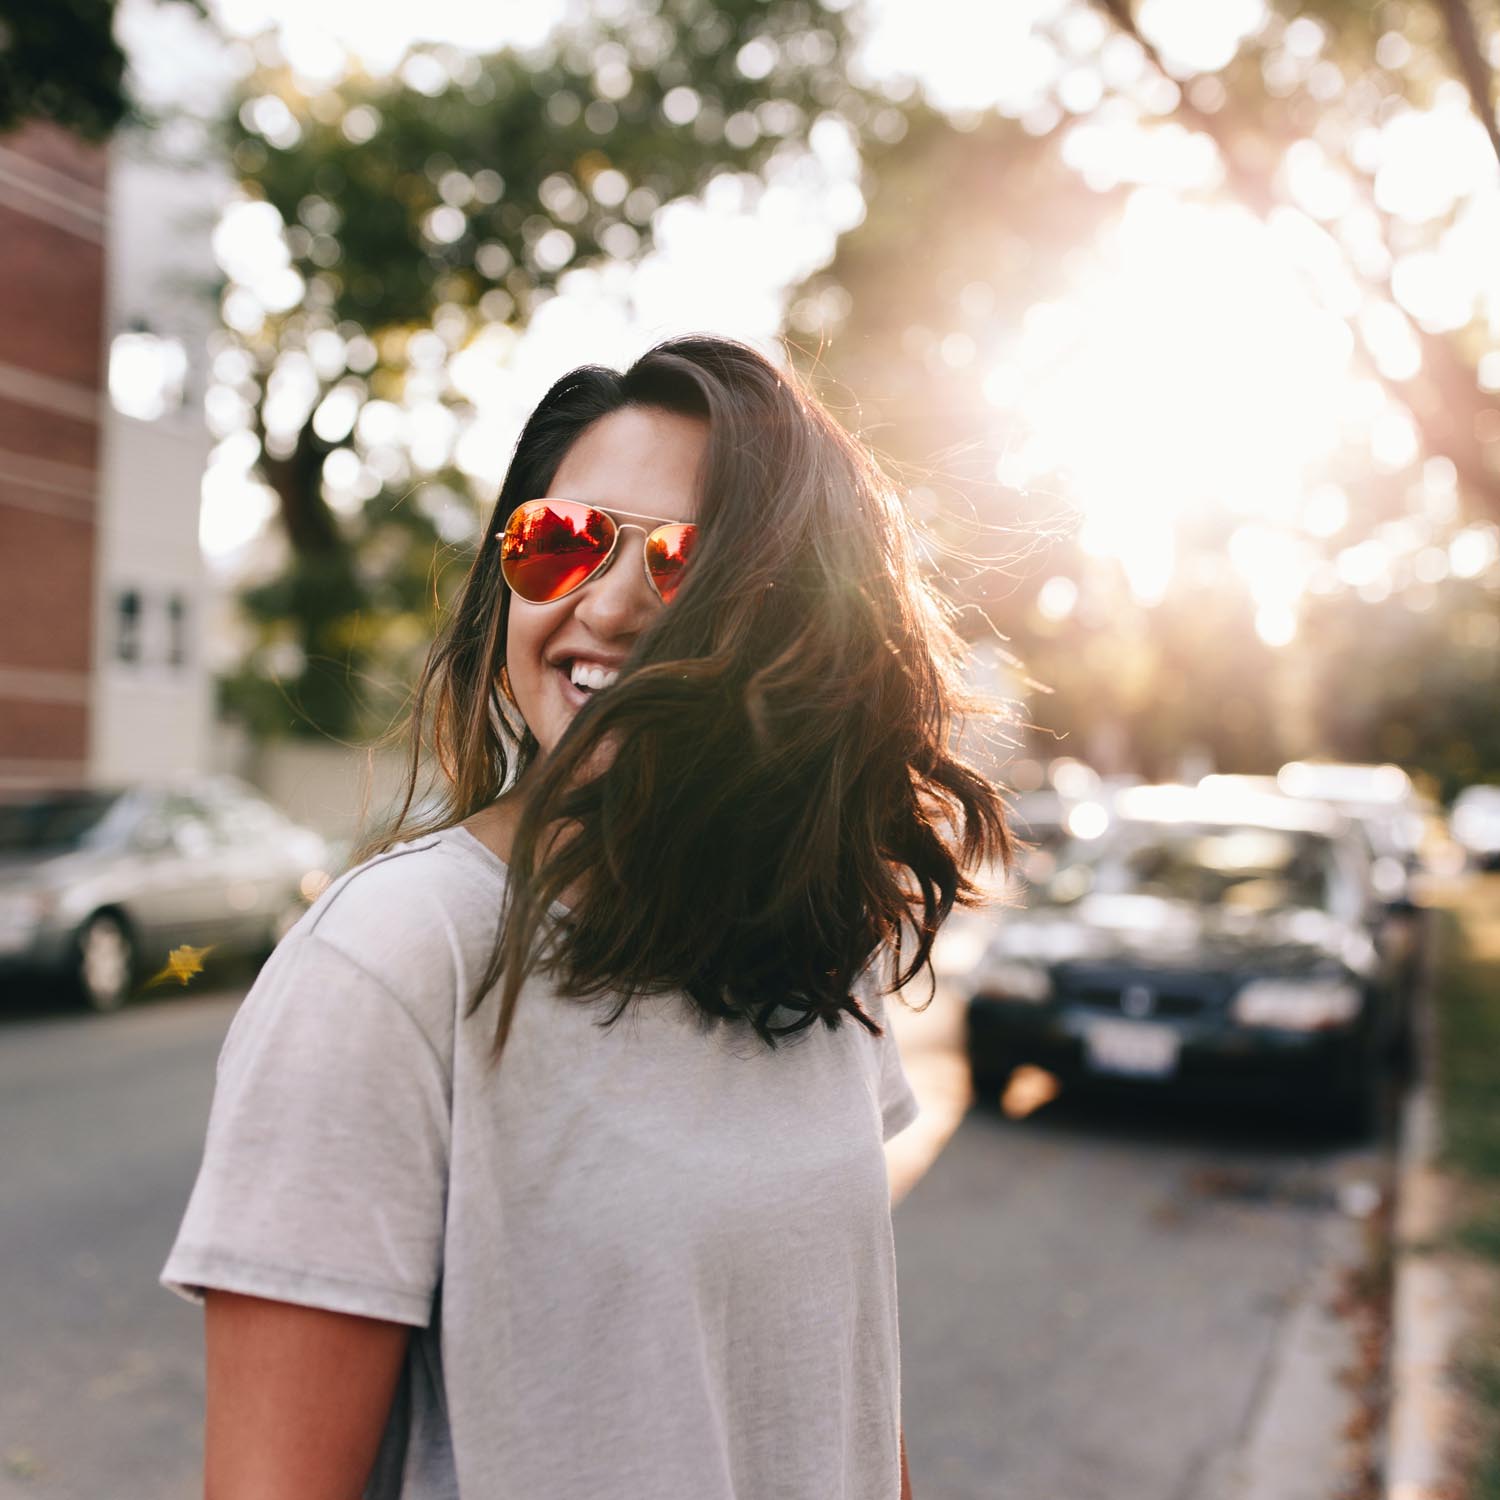
Distance Between the Subject and the Camera
In the same way as we described above, the relationship between distances of the subject and the camera also effects the outcome.
To get close to your subject, you can either physically move the camera closer or use a telephoto lens with a focal length of 80mm or above.
Consider the following two images.
The first is taken on a wide angle lens possibly 28mm, but the subject is close to the camera, the result is the background blur is much more pronounced.
In this image however, the subject is slightly farther away from the camera, you can clearly see that whilst there is some background blur it is nowhere near as significant.
Also note the direction of the light again!

Background Quality
The resulting quality of your bokeh image is greatly dependent on your background. If your background is a mess of jagged, busy elements and too-bright lights, the bokeh might appear as pure white blobs, which can distract the eye from the main subject. If it’s too plain, uniform in colour and the light is coming from the front or side, then the bokeh won’t be apparent.
Urban locations are great places to shoot when first experimenting with bokeh, street lights, car lights and lights from shops will help you understand how light renders in a photograph when shot out of focus.
Woodlands also work well, or anywhere with trees. Make sure you’re looking towards the light and have lots of leaves as your backdrop.
The same concept applies to bokeh photos with foregrounds. Like with backdrops, you can maximize the bokeh effect by filling the foreground with appealing patterns and lights.
Reflective surfaces, such as windows, mirrors, and water, create good foreground bokeh. The lights that reflect on these surfaces can fill the negative space in front of the subject.

What if I don’t own a wide aperture lens?
If you don’t own a wide-aperture lens, increasing the distance between the subject, the camera and the background, as well as using a telephoto lens is the easiest way to create a high-quality bokeh effect.
By shooting from a lower angle and isolating your subject against a background, without showing any other features in the frame. This exaggerates the overall effect.

How to Take the Best Bokeh Shots: A Step-by-Step Guide
Now that we’ve discussed the factors that affect the quality of bokeh photography, it’s time to combine them together to take the best bokeh shots for any given situation.
Step 1: Choose the Right Lens
Without the right lens, you won’t be able to create good bokeh photos. Go for a lens with a wide aperture, the basic canon 50mm f1.8 is a great example of a relatively inexpensive lens that can achieve a wide maximum aperture.
If you don’t have access to a wide aperture lens, don’t be disheartened. You can still achieve great results with apertures of f5.6 (I’m using 5.6 as the example as most kit lenses can achieve this aperture).
All you have to do is get clever with how you take the photograph (see above).
As for the lens type, 50mm is a good choice. It’s a good starting point for beginners because it’s not only cheap but also easy to find. Plus, it has a decently wide aperture of f/1.8 or f/1.4.
The telephoto lens works well, too, because it increases your depth of field without moving the distance of your camera or the subject. This happens because the longer the focal length of a lens, the more compressed the image becomes.
Step 2: Adjust the Aperture
To create a strong bokeh effect, adjust your camera’s aperture to the lowest setting. The lower the f-number, the wider the aperture and thus the stronger the blur.
If available, select Aperture Priority or Av mode.
Aperture Priority allows you to set a wide aperture for a shallower depth of field, which helps you create a more pronounced background bokeh.
For anyone just starting out, while in Av mode, set the ISO to auto for ease.
If your camera doesn’t have auto ISO setting, it’s easier to use M (manual mode).
Set your aperture to its lowest setting.
Set your shutter speed to 1/125 (so we know the subjet won’t be blurry).
Then increase your ISO until the photograph is the correct brightness – just take loads of test shots.
Step 3: Find a Suitable Background
Place your subject in front of a backlit backdrop. The background must be far from the subject to create a more pronounced bokeh effect. If you can’t move the subject, adjust the camera’s perspective.
To isolate your subject against the background, get lower and shoot up at them, like this.

Experiment with the choice of backdrop and test, test, test.
Just take loads of pictures!
If you don’t have a good background, create your own. Use a fabric with sequins, fairy lights, candles, or any material with a shiny finish.
Step 4: Get Close
The best bokeh effect is created by moving your camera closer to your subject. You can do this by either moving closer physically or using a telephoto lens to compress the perspective.
While planning the shot, ensure your subject is properly posed and lit. Remember: the whole point of bokeh photography is for it to compliment the main subject.
Step 5: Get the Proper Exposure
Adjust your shutter speed and ISO to get the ideal exposure for your photo. Analyse the light conditions and the scene limitations and choose the exposure mode that suits you best for your level of ability (Aperture Priority, Shutter Speed Priority, Manual, Auto, etc.). Remember, there’s no shame in using Auto modes, it’s all about getting the right picture. A camera is a tool, use it however you want.
Make sure that the bokeh isn’t completely white, otherwise it becomes too distracting for the eye as brightness draws our attention.
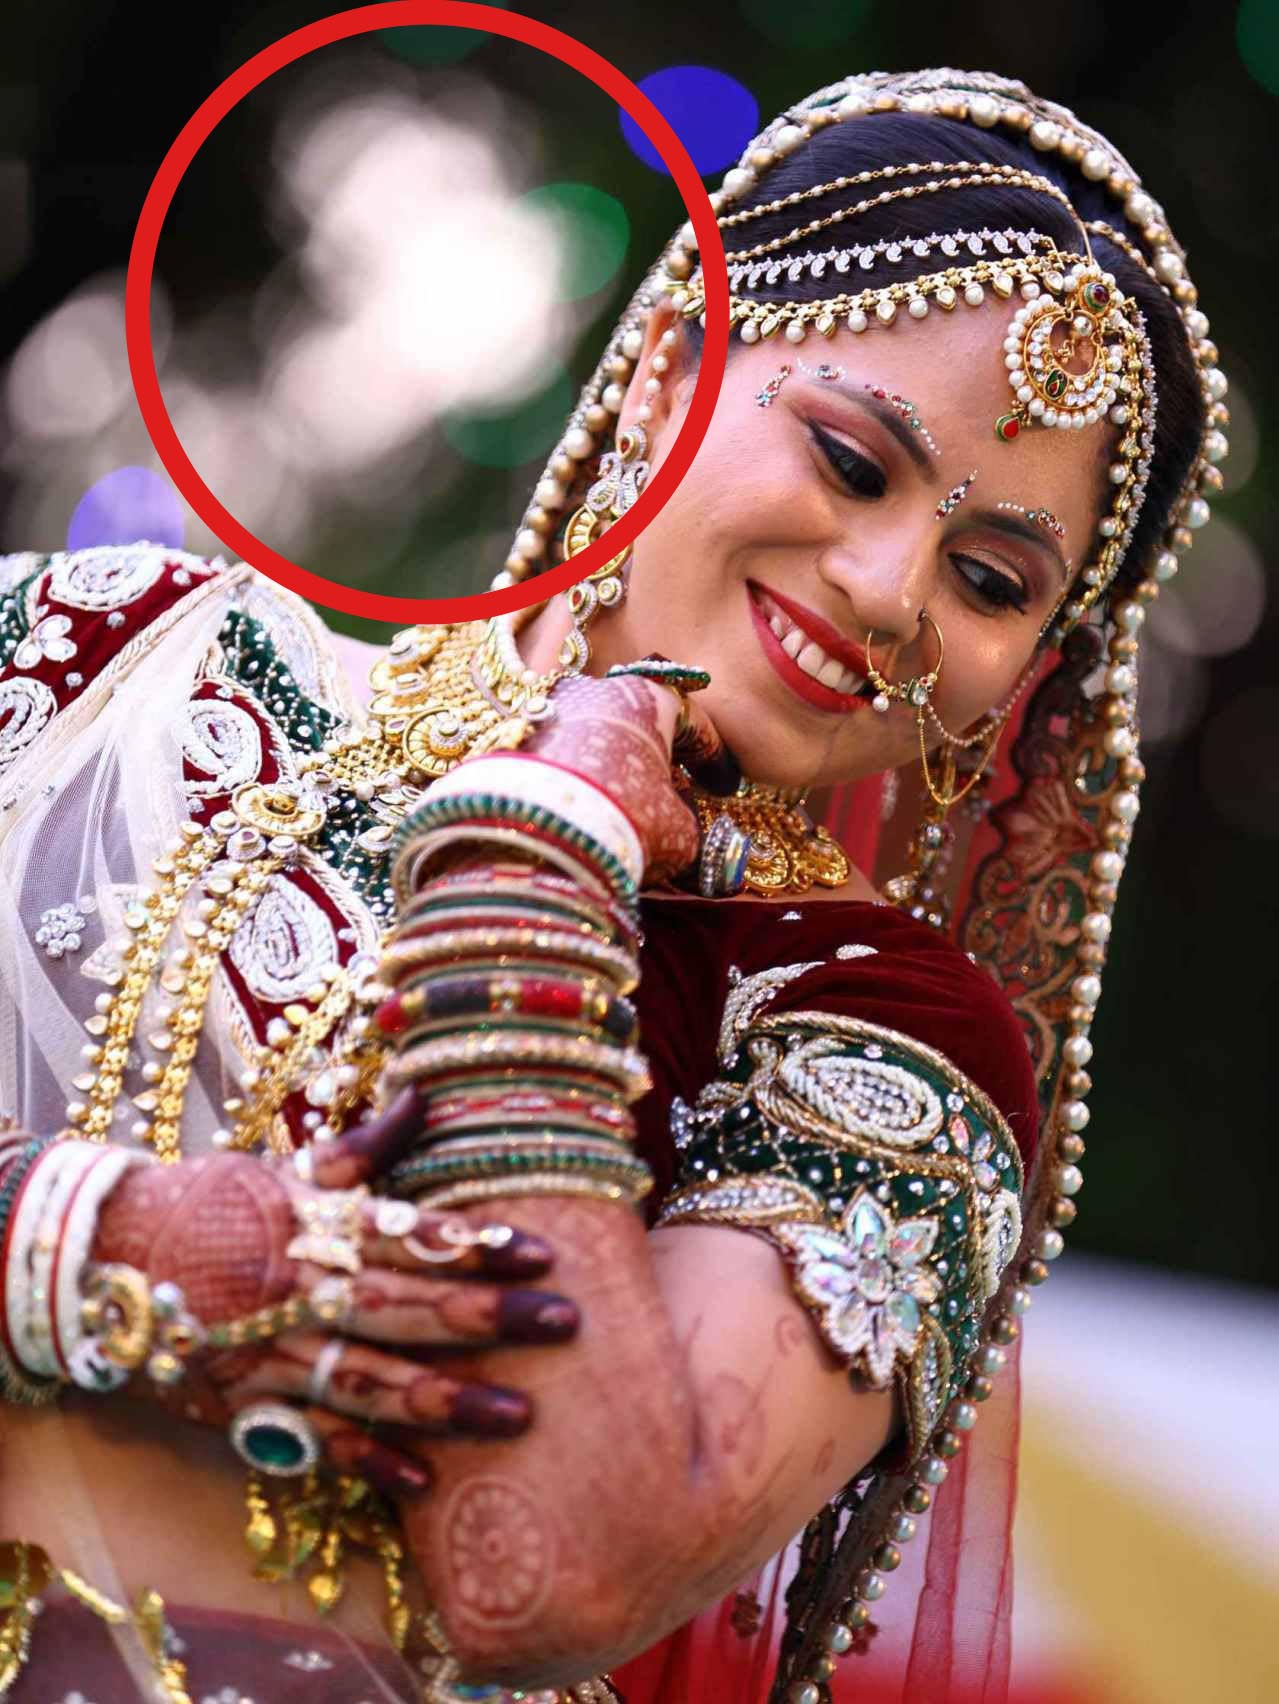
What Is “Bad” Bokeh, and How Do You Fix It?
There’s good bokeh, and bad bokeh. Good bokeh is pleasing to the eye, while bad bokeh is unpleasant, confusing, or distracting.
Bad bokeh takes the focus away from the subject. Typically when the background is overexposed and the bokeh is pure white, or when the blobs of out of focus light are too big and distracting.
Here’s an example of good bokeh. Subtle, flattering and creates a neutral, soft background for the subject to be set against.

Here’s an example of bad(ish) bokeh. It’s not terrible, but the large clump of white distracts the eye from the main subject of the photograph.
It’s in competition with the subjects face and the eye is drawn to the brightest part of the image.

If you’re struggling to achieve good bokeh, here are some tips to consider.
Crunchy Bokeh
A “crunchy” bokeh refers to a bokeh with angular instead of blurred edges. To solve this issue, make sure your aperture is wide enough. If your aperture is already at its widest setting, change the angle you’re shooting at and experiment with changing the distance between your subject, the camera and the background.
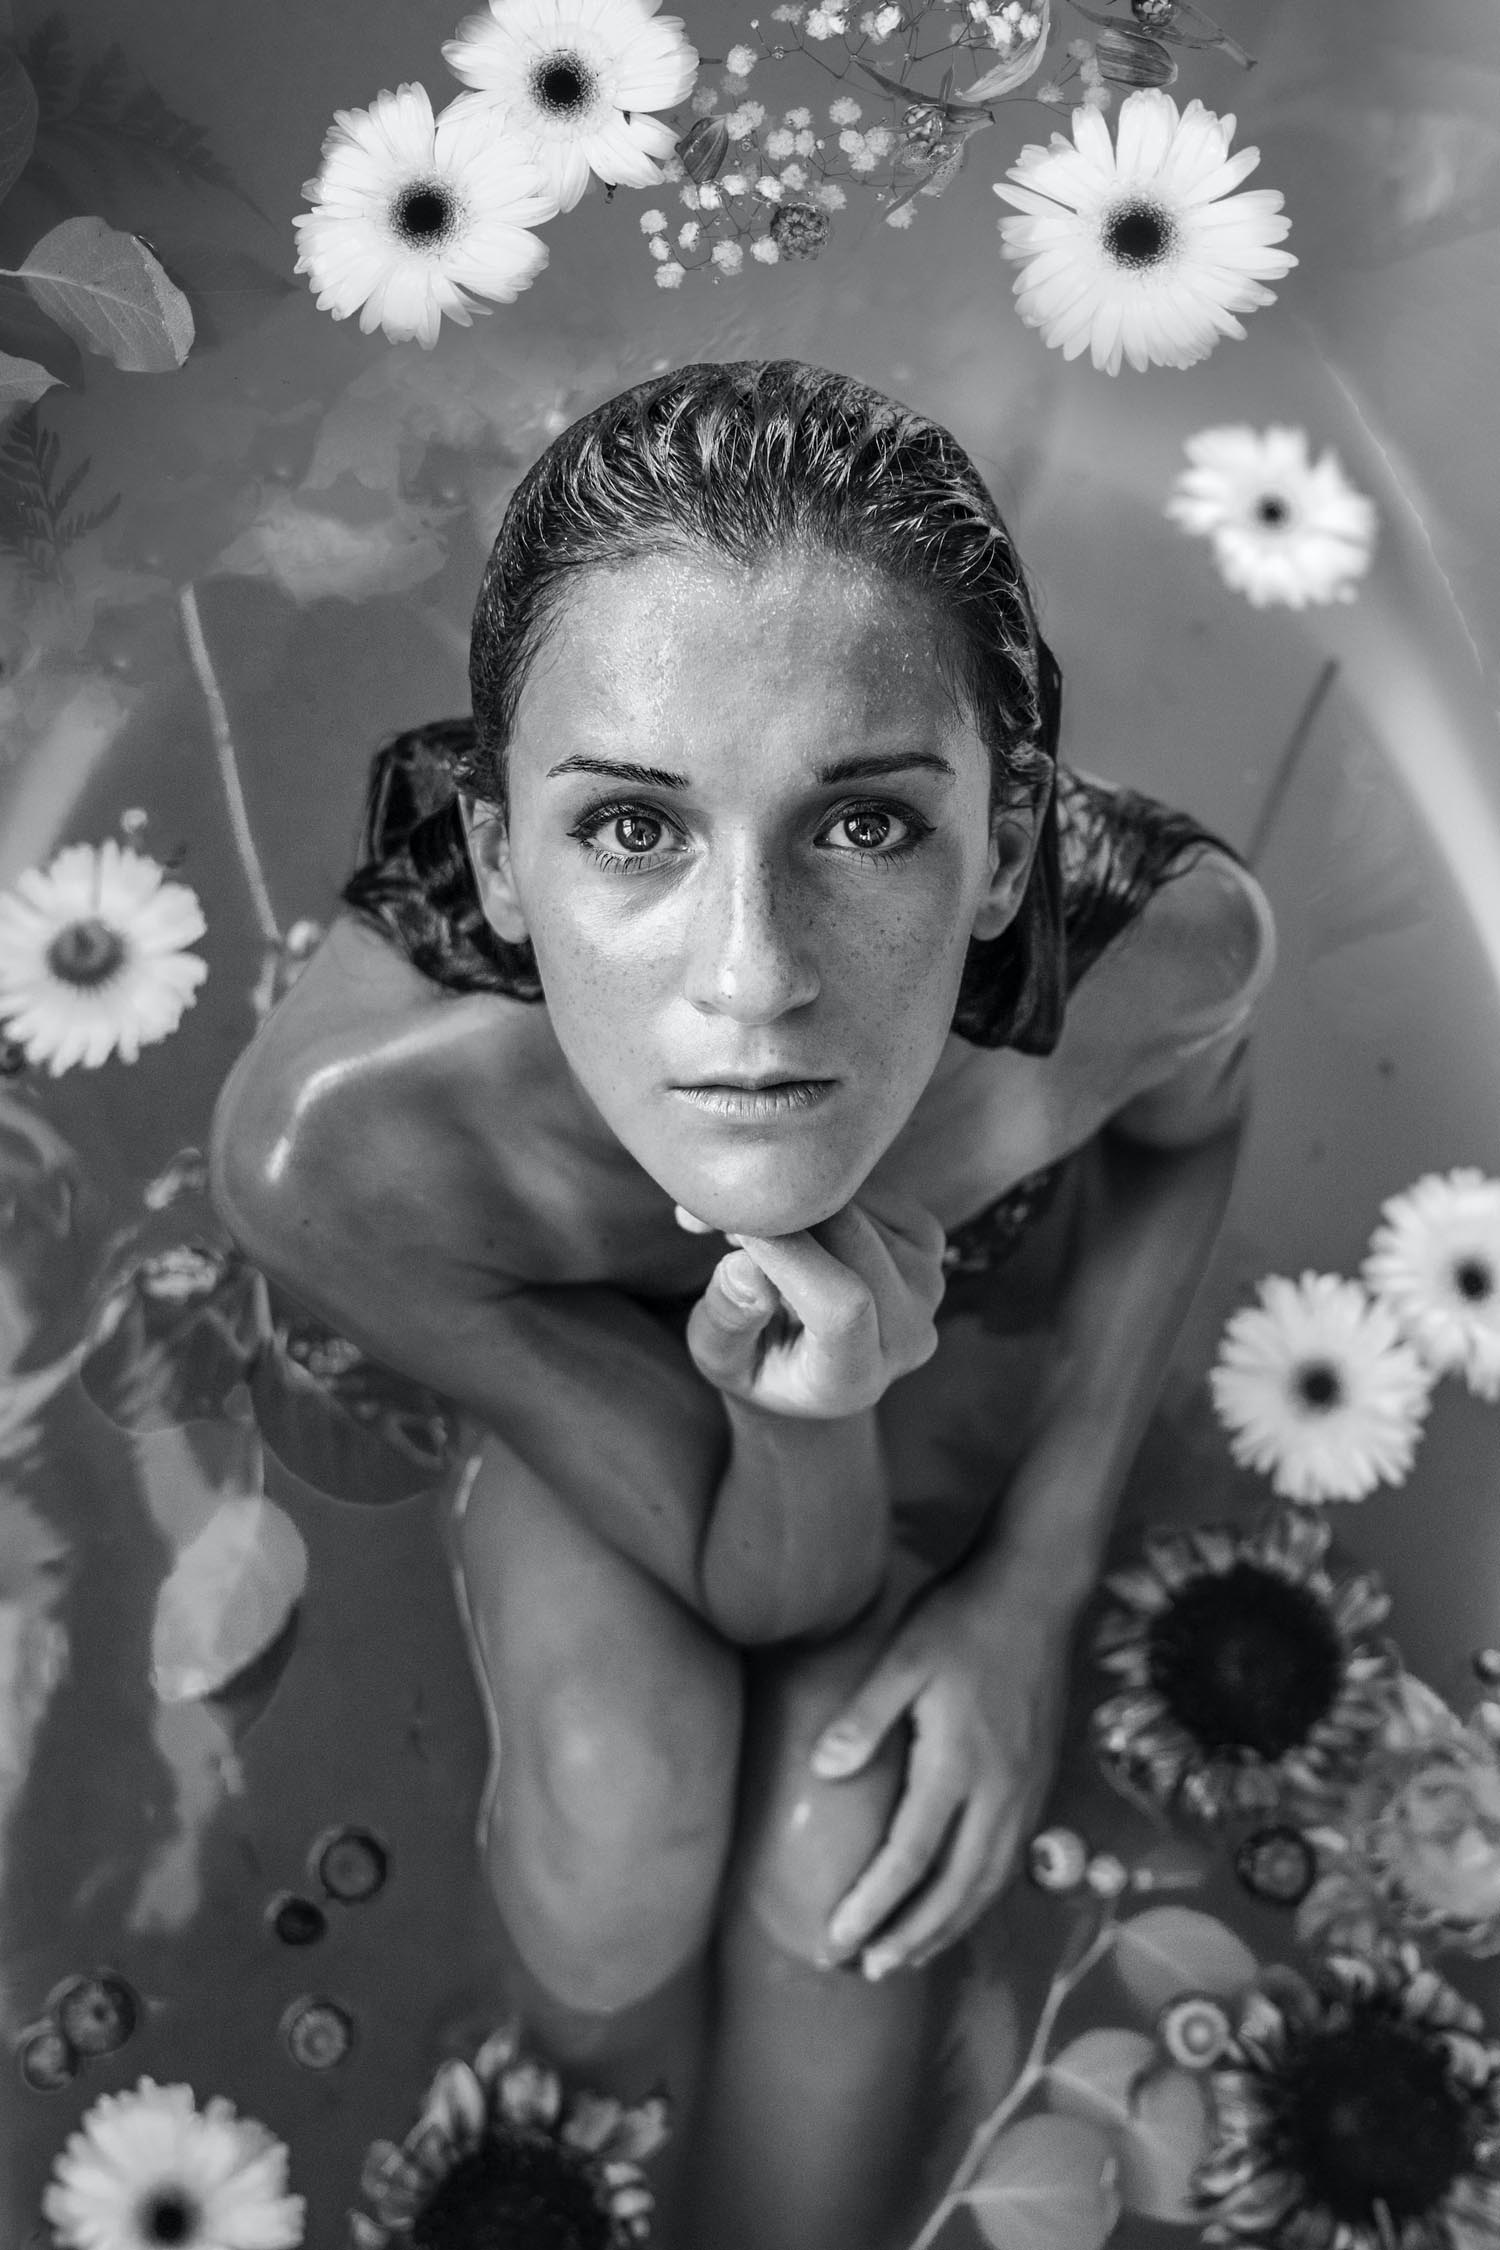
Non-blurry Background
If your background isn’t out of focus enough, you need to again change the distance between your camera, the subject and the background.
Look at this picture as an example. The background is the water, which is a maximum of two feet away. To make this background out of focus you’d need to use a lens with a wider maximum aperture. Changing the distance between the camera and the subject would alter the composition, as would changing the distance between the subject and the background.
Now consider this image by comparison.
It’s taken at eye level which places the background a great deal farther away, and thus, a much more dramatic out of focus background.

What Are the Qualities of Good Bokeh?
A bokeh image is considered “good” if the background is easy on the eyes and compliments the subject.
To create good bokeh, nothing in the background should distract the viewer.
Final Thoughts
The bokeh effect adds a pleasing out-of-focus blur to a photograph. When done properly, it not only highlights the subject but also compliments the image as a whole, whether it be in emphasising the a soft and romantic nature of a portrait, or encapsulating the spirit of Christmas. You should definitely learn how to achieve it as it’s a quick and easy way to make dull pictures interesting, but like all techniques, shouldn’t be used simply for the sake of it. Choose your shots wisely. Now go out and take pictures, you’re not going to learn photography just reading about it!