Picture Frame Molding Accent Wall
How to Install Picture Frame Molding
I shared with you over on Instagram how I was selected to compete in an Accent Wall Challenge recently for the Haven Conference. I decided my hallway could use a little makeover with a new accent wall and decided to go with picture frame molding, also called box trim.
In this blog post I will share how to install picture frame molding, how to install an accent wall on textured walls, what tools and materials I used for the picture frame molding accent wall, and the final look of the hallway makeover.
First, what is picture frame molding?
Picture frame molding may also be called box trim and is a decorative molding that is attached to your wall. It resembles the look of a picture frame, hence it’s name. I think it has a very classic and traditional look and can really elevate the look of a room.
What tools & materials are needed for picture frame molding?
The trim molding that is most commonly used for box trim molding is called finger-jointed base cap molding. It is typically sold at any hardware store that carries lumber and trim. Another molding that can be used which has a less decorative look is different styles of show moulding.
Tools & Materials Needed:
Can you install a picture frame molding accent wall on textured walls?
Every time I share an accent wall I am asked if it can be done on textured walls. First, you have to decide how you feel about the look of textured walls - this is a personal preference. All of my walls in my home have orange peel texture and it has never bothered me so I do my accent walls right on the textured walls. If your walls have a rougher texture, like a knockdown texture, then you may want to consider covering the texture first. You have a couple options for doing this.
You can choose to do a skim coat over the textured walls using a joint compound and then sand the walls down to a smooth texture. This option is going to be messy. Another option would be to install a very thin backer board on the walls first which will leave you with a completely smooth surface to then apply your accent walls to. This backer board is typically called ‘hardboard’ and is sold at all hardware stores.
How to install picture frame molding
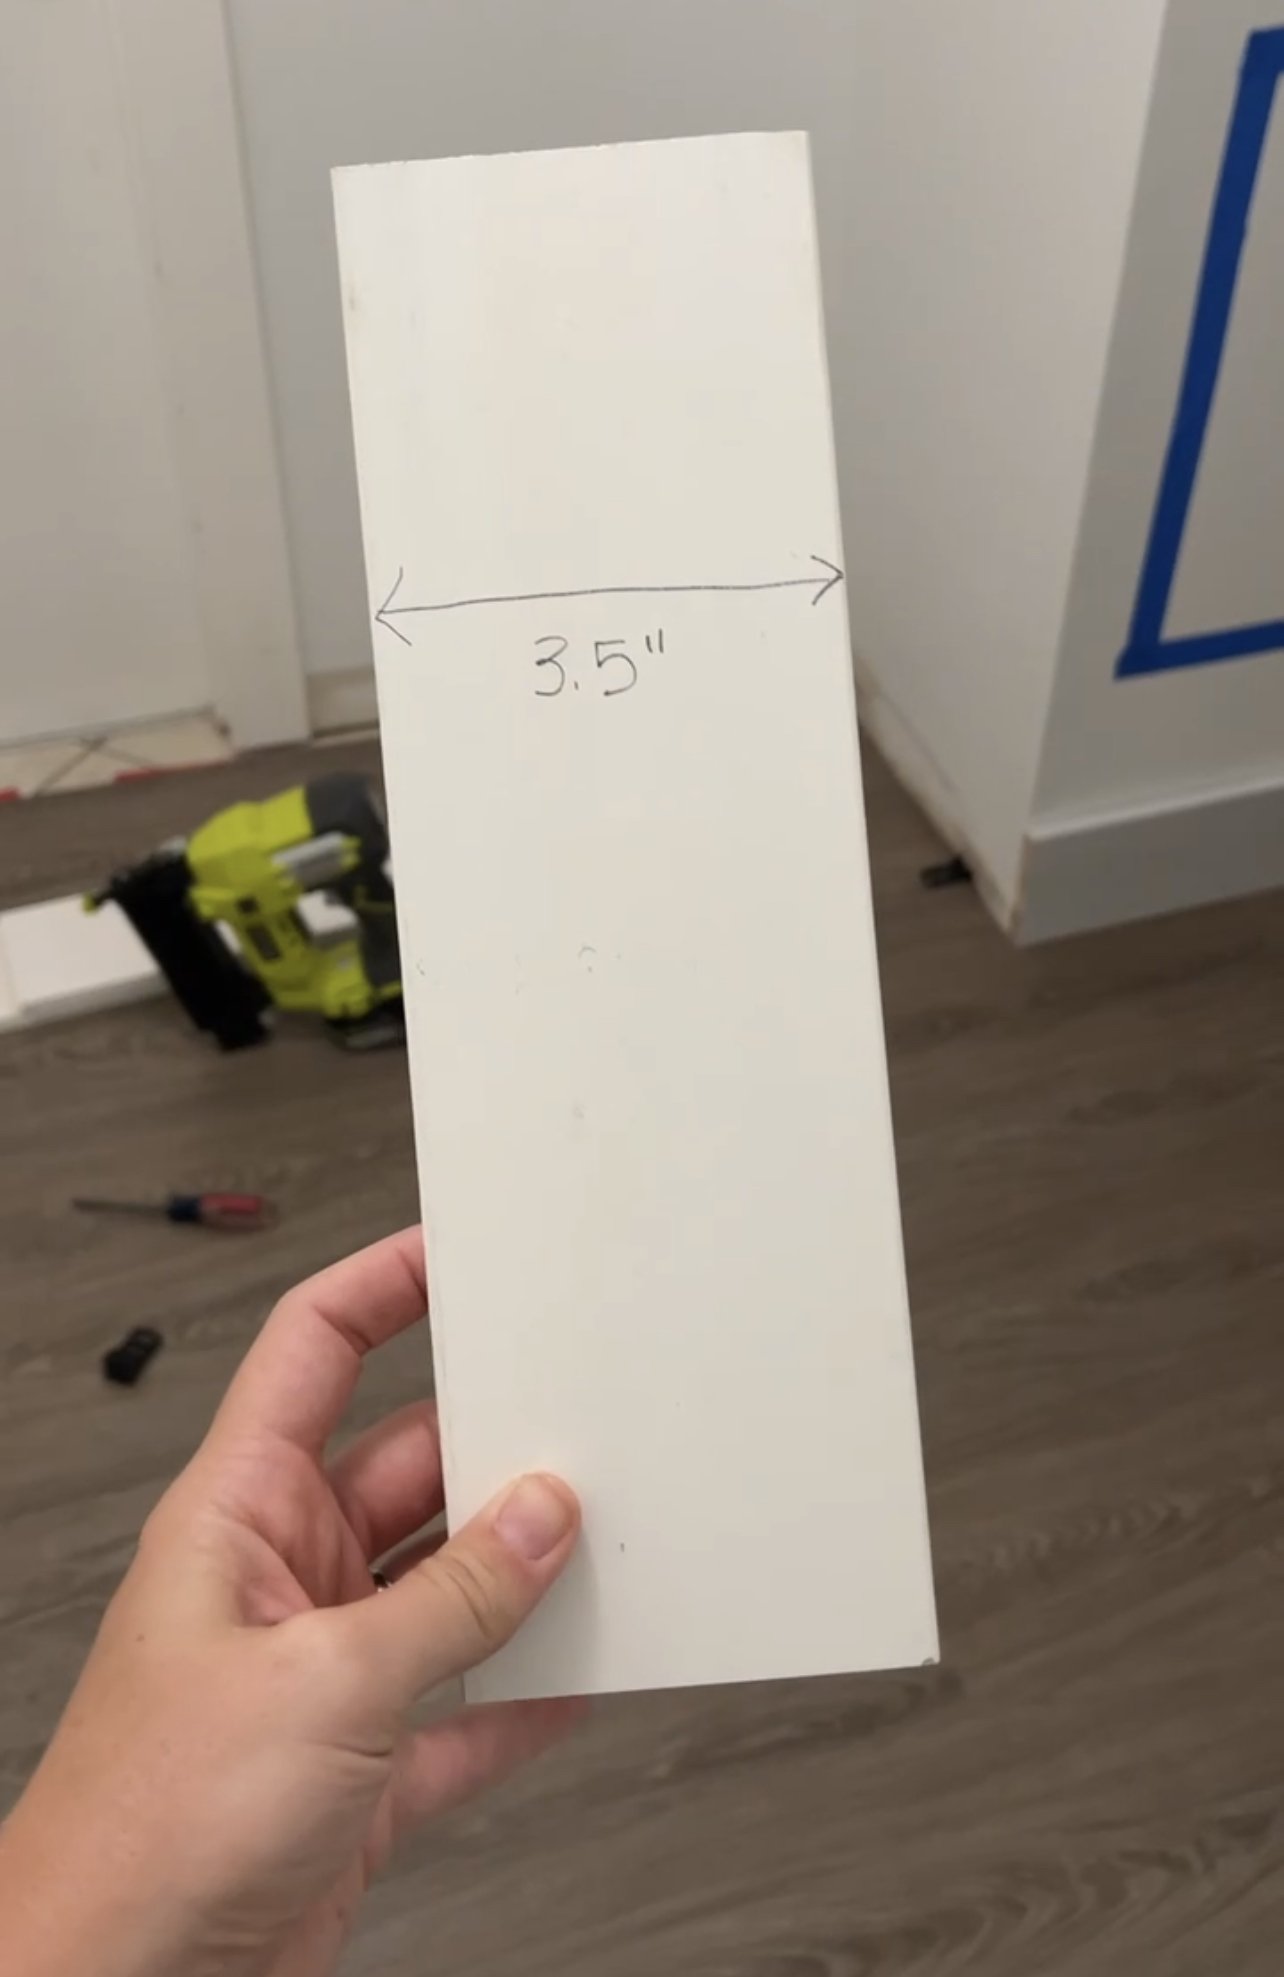
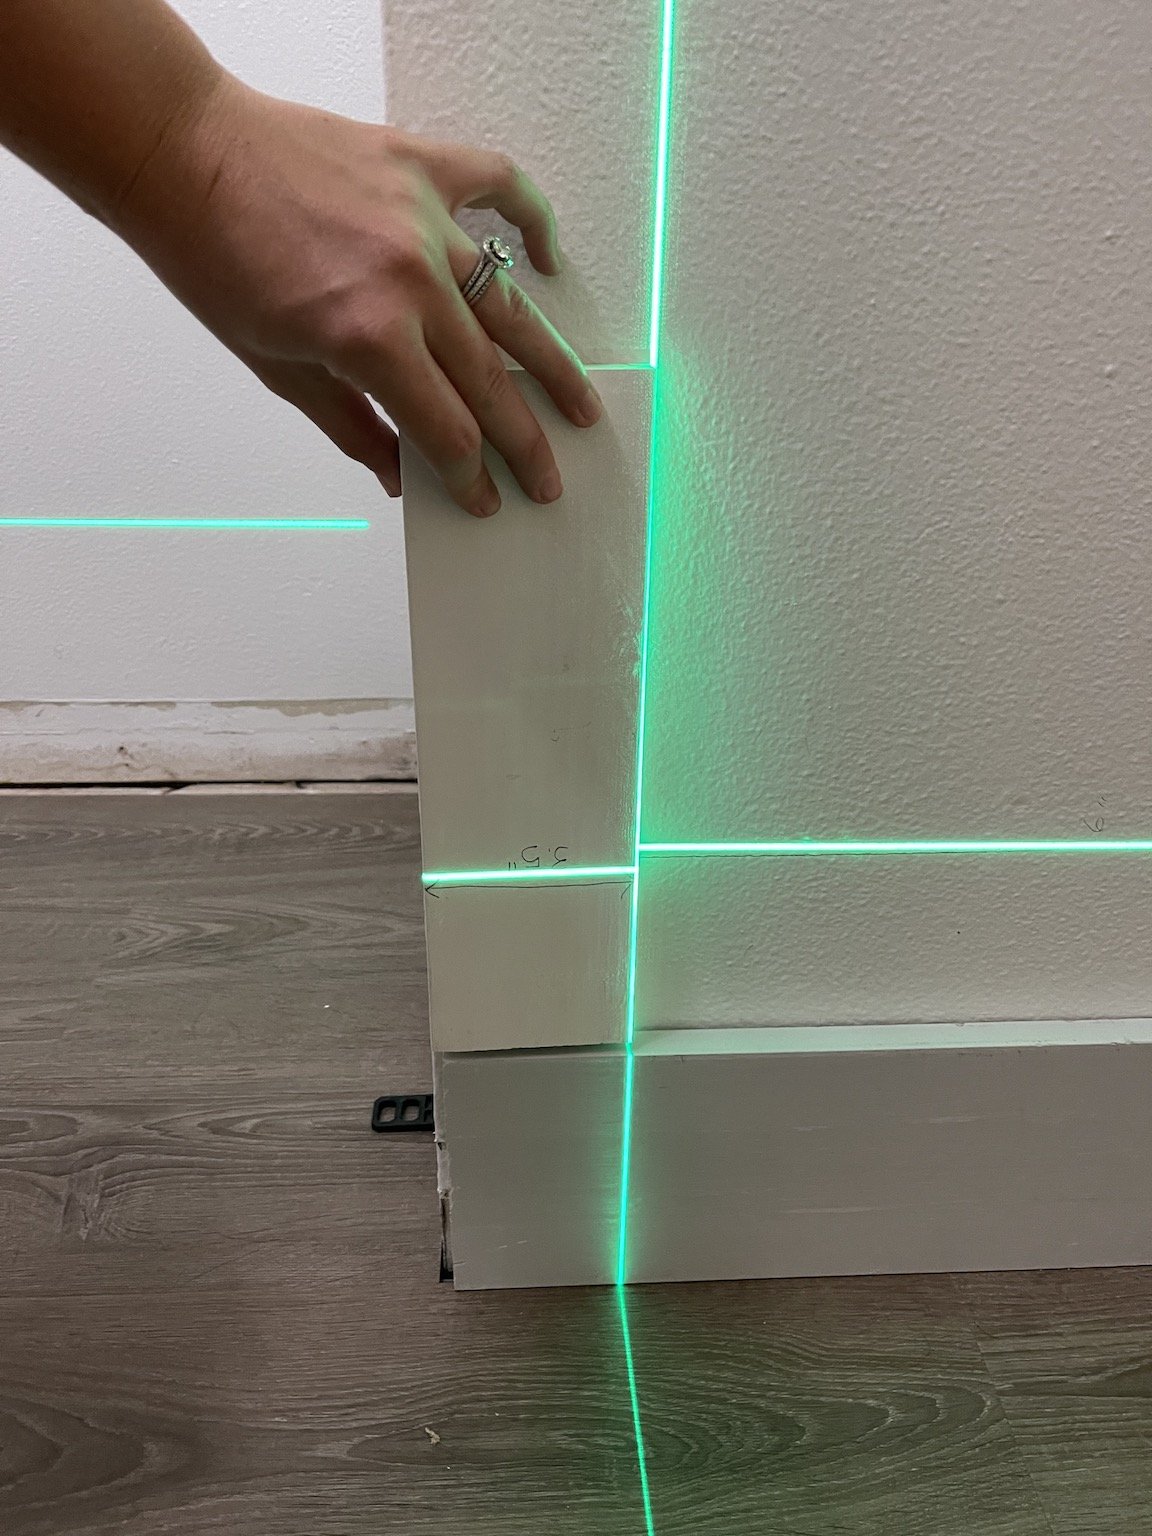
First you want to decide what your spacing is going to be from the edge or corner of your wall to the trim molding. I decided to go with 3.5” and used a piece of scrap wood as a spacer board that was exactly 3.5” wide. Starting at the bottom left corner of my wall, I placed my spacer horizontally onto my existing baseboard and then drew a pencil line on top of the spacer board. Staying at the bottom left corner of the wall, I turned my spacer board vertically, lined it up with the left corner of my wall and drew a pencil line on the right side of the spacer board. This left me with two intersecting lines which gives me my starting corner for my lower box of trim. I did this same process using my spacer and pencil on all four corners of my wall.
As far as determining the size of your upper box and lower box of trim, this is totally up to you. I highly recommend using painter’s tape on your wall and taping out a design prior to beginning the trim work so you can try different box sixes and choose the look you like best.

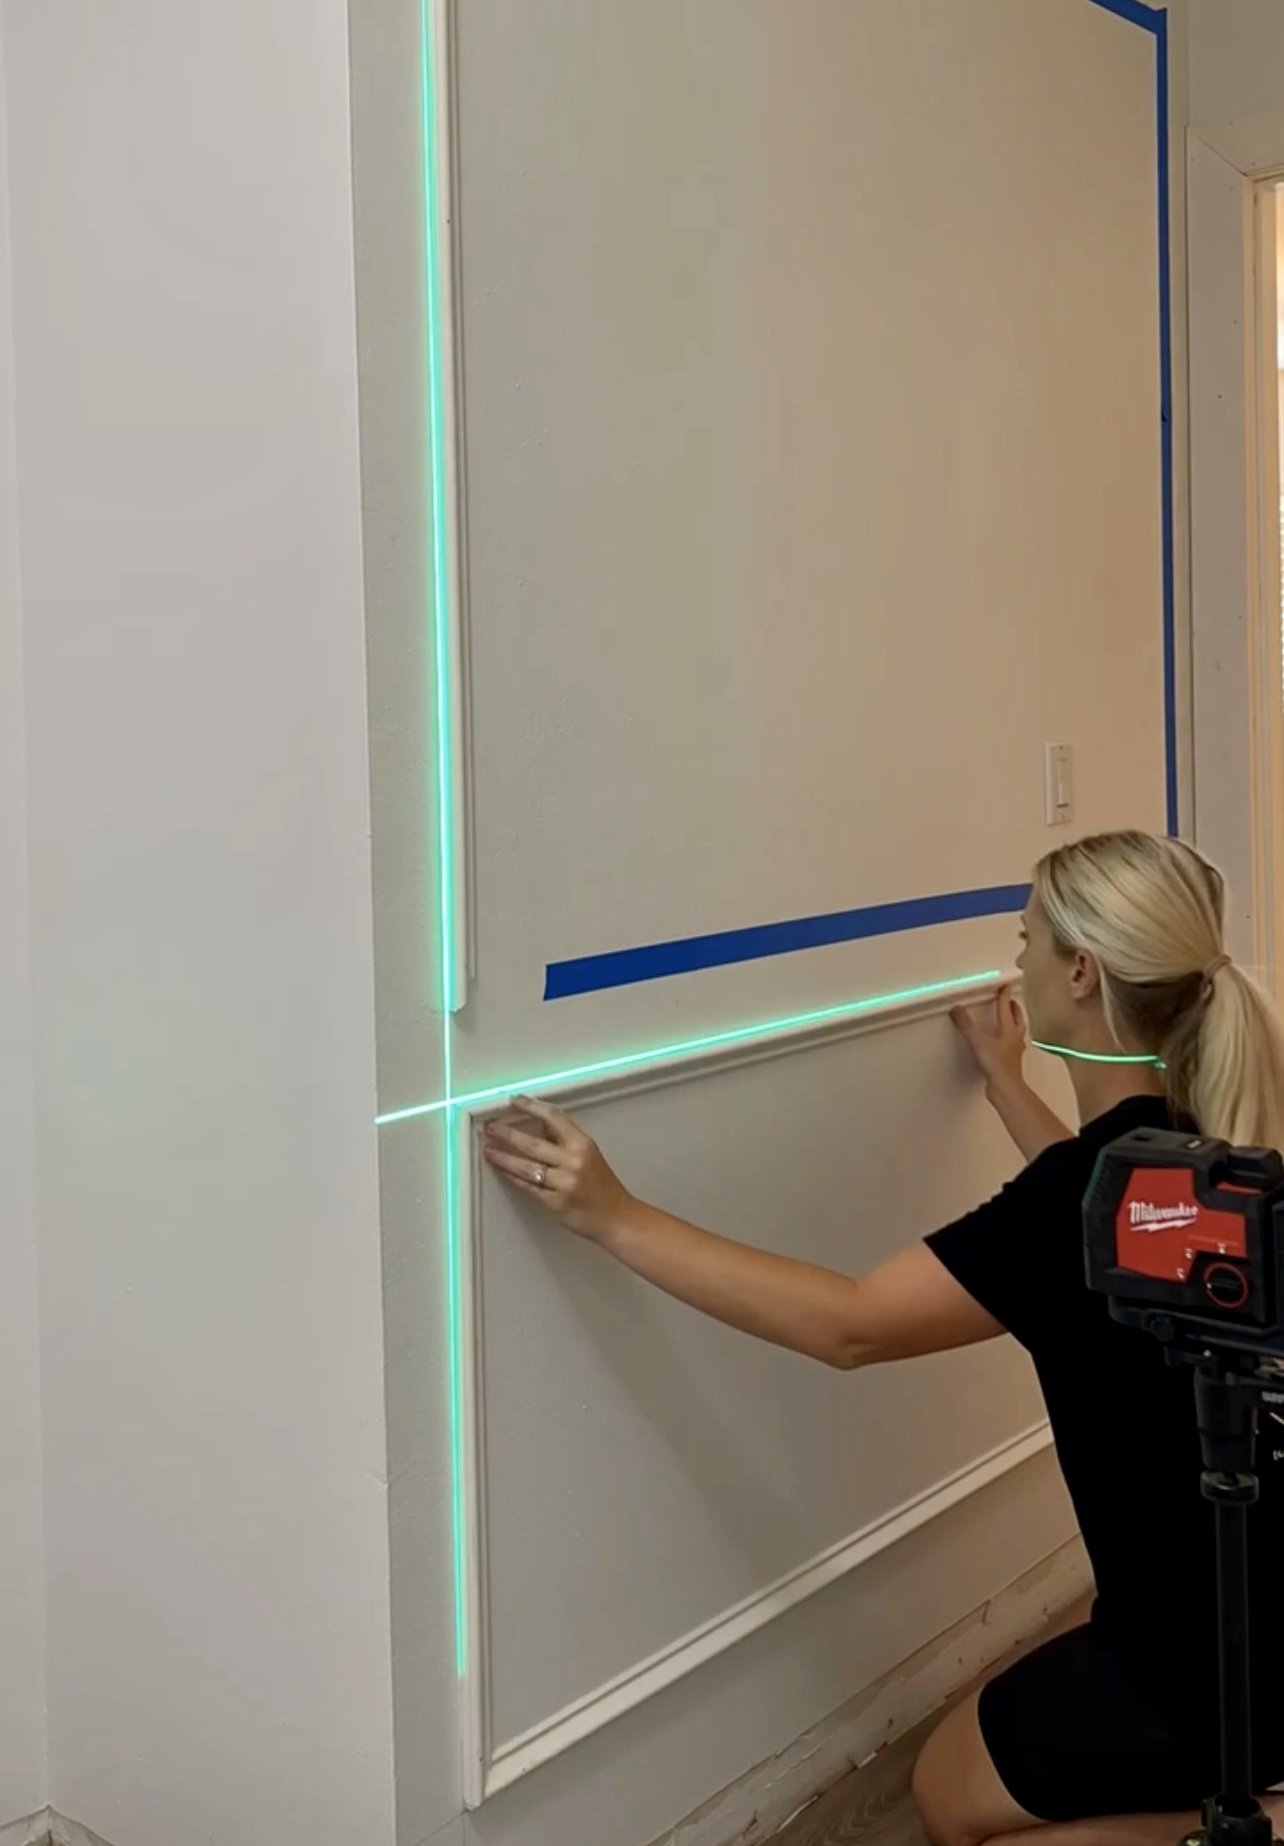
To begin, you want to line your laser level up with the lower left intersecting lines. Measure where your first piece will go, cut it using your miter saw and install it using your nail gun. All of your miter cuts will be a 45 degree angle. I found it easiest to start with my two left side vertical boards first for the upper and lower box. Then I completed the entire lower box installing the bottom horizontal board, then the top horizontal board, and finally the right side vertical board. Once I completed the lower box entirely, I moved on to the upper box.
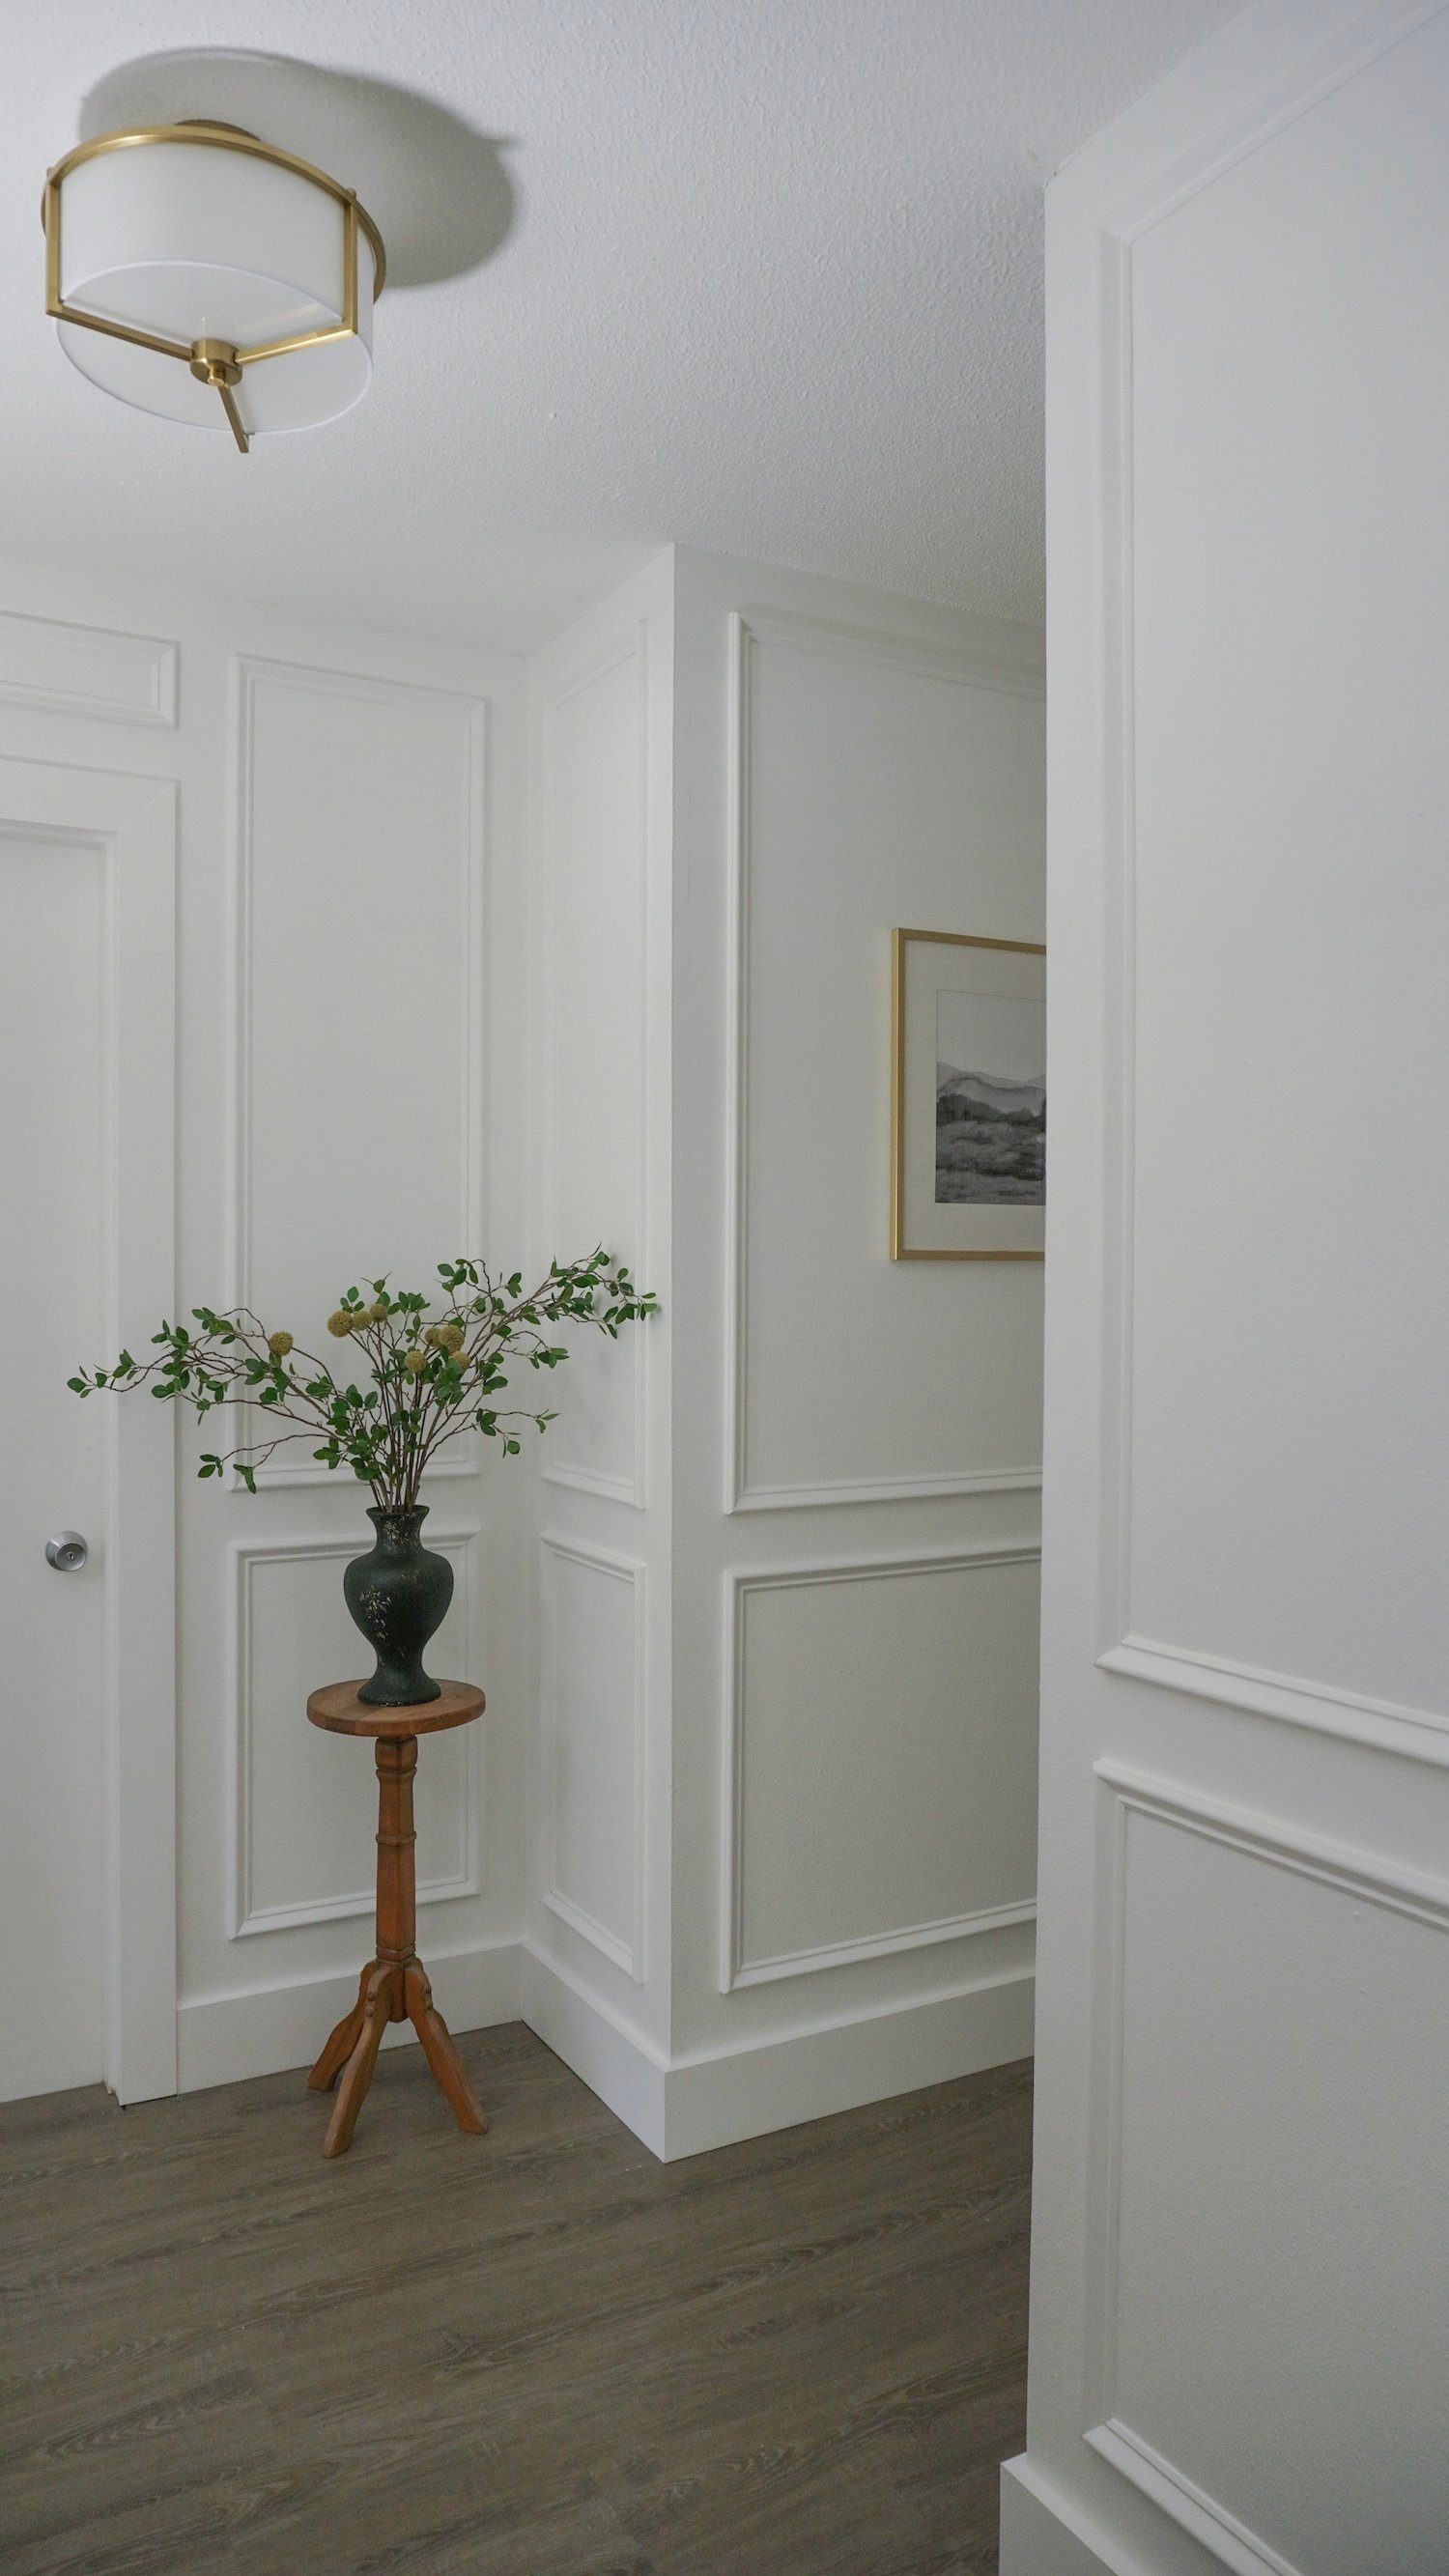
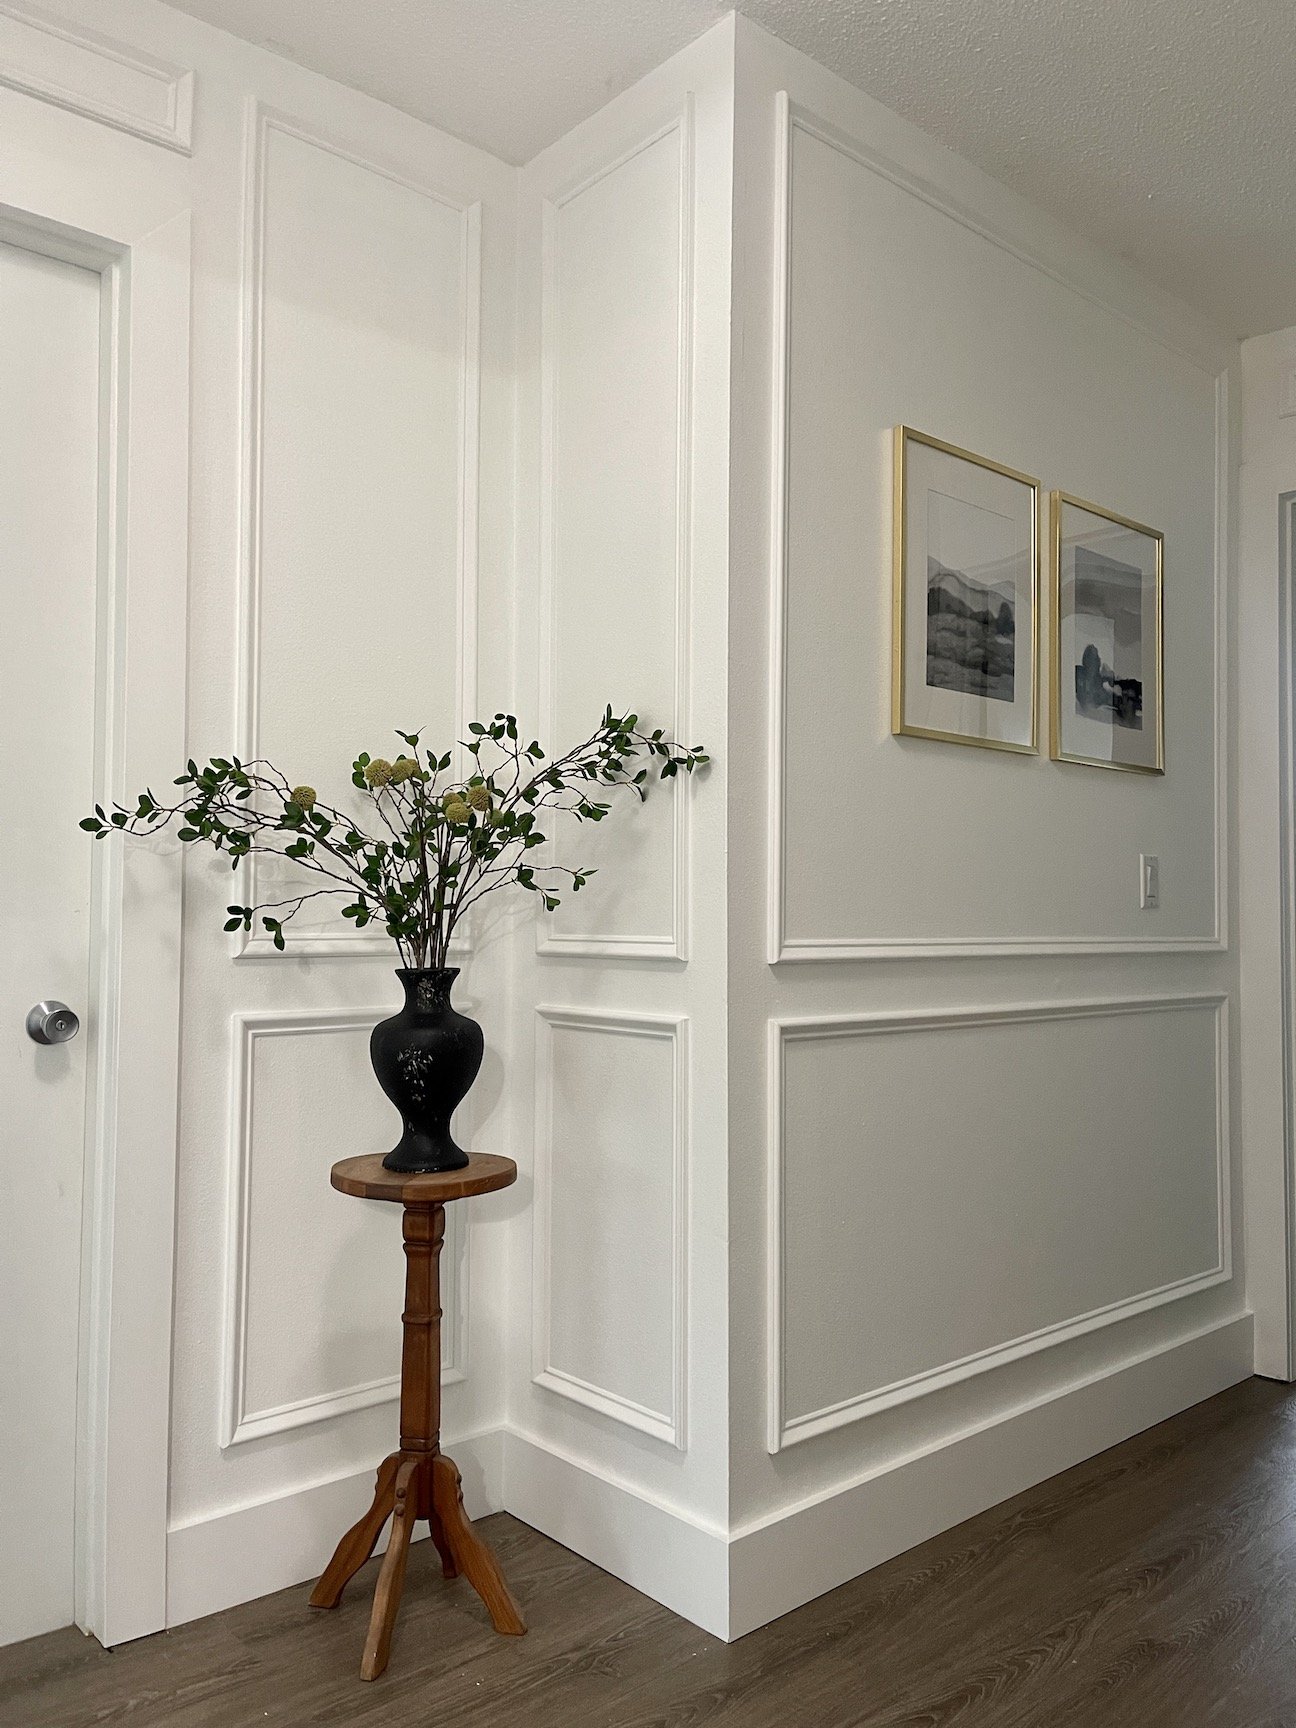
Once all the picture frame molding was installed, I filled the nail holes with nail hole filler/spackle, sanded them down, and then caluked all the edges where the trim molding touched the walls and gave the whole hallway a fresh coat of white paint.


I absolutely love the look of this molding in our hallway! I think it really elevated the space and gave it a high-end look. Now that the wall trim is done, I am wanting to do something with the hallway doors - either paint them a contrasting color or adding some sort of panel/trim and then paint them. Stay tuned for what I decide!