
Analogue photography processes for 2022
Written by Jo Howell photographic artist
If you want to know how to actually make a Polaroid emulsion you can watch my short video on YouTube. I’ll give a brief description of the process at the bottom of the article.
1. Polaroid emulsion lift straight onto watercolour paper
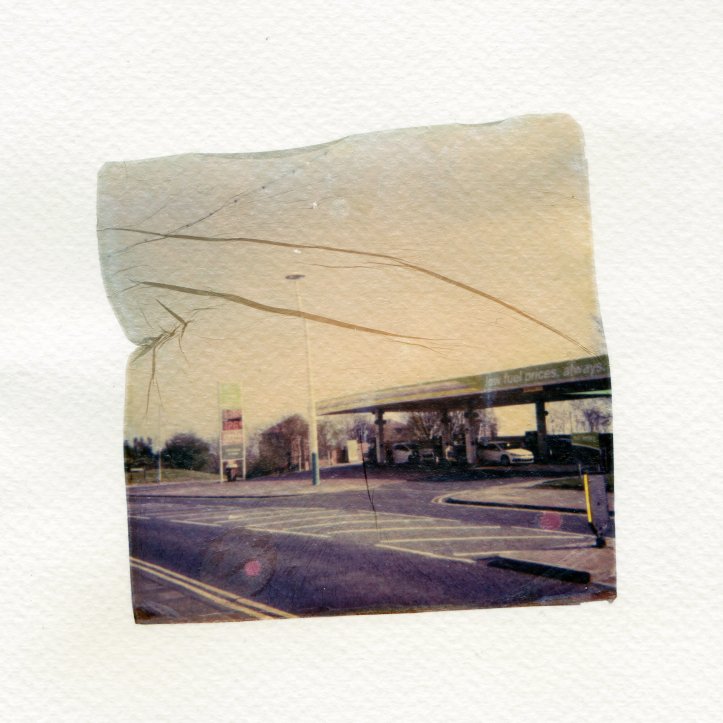
Simple but always effective! You can manipulate the emulsion to have different shapes, you can tear it, you can encourage folds. Each adding its own unique way to read the humble Polaroid.
This is a photograph taken on a classic Polaroid camera using Polaroid 600 colour film.
2. Double up on the same image

This is a little more fiddly than you might expect! I would advise trying a single image to learn the brushing technique, before launching in to multiple images or layers. But, once you feel comfortable, the sky is the limit!
This is a photograph taken on a classic Polaroid camera using Impossible film 600 colour film
3. Polaroid emulsion lifts on stone

The smoother the stone, the better the adhesion of the lift. Porous sandstone and limestone don’t work as well as more igneous rocks. In this case I placed the image first before poking a pencil though the holes.
This was a photograph created by a workshop participant using their smartphone, and was printed on Polaroid 600 i-type film using a Polaroid lab.
4. Emulsion lift on to ceramic

The smoother the ceramic the better, and glazed is even better. When creating an emulsion lift we are attempting to adhere by suction. This piece was found on Horden beach so was slightly sea worn but still usable.
This was a smartphone image printed on Polaroid i-type then lifted onto a found ceramic fragment.
5. Adding drawings or painting to emulsion lifts on paper


Once your Polaroid lift is dry then you can work into it with a variety of different mediums. This image was an Impossible film 600 shot on a classic Polaroid camera.
6. Polaroid emulsion lift on sea glass


These emulsion lifts on sea glass are a mix of impossible film, classic Polaroid film and i type film. Each piece of glass is different. The best part of using glass is the interplay you then get between the object and the light, offering great opportunities to rephotograph the object in different ways.
7. Polaroid on thick glass

Opting for thicker glass allows you to create freestanding objects that allow for layering and interplay with light.
8. Add gold leaf

Once your lift is dry you can consider adding gold leaf. This is a practical skill. One I have yet to perfect!
9. Polaroid emulsion lift on shells


The bigger the shell, the easier it is to work with. Go for lightly coloured shells for the best contrast.
10. Polaroid emulsion lift on leaf

This was a new test, and I used an under exposed Polaroid because I didn’t expect it to work. This could be better, but adhesion worked, so probably worth another go.

What is a Polaroid emulsion lift?
This is the process of removing the thin gelatinous layer that contains the image away from the plastic of the Polaroid, and floating it on to a new surface.
Is Polaroid the only instant film type you can do this with?
Yes. Stick with Polaroid 600, I-Type films, or Impossible Film for this process.
The chemistry of Instax films is not the same set up so it doesn’t work.

What do I need to create a Polaroid emulsion lift?
You will need the following things to create your emulsion lift:
- A Polaroid photo with good contrast on either classic 600 film or I-Type film. Fresher Polaroids work better, as the glue adheres too much over time.
- Vinyl gloves
- Scissors
- A big enough dish
- A soft flat edge paintbrush
- A kettle or source of boiling water
- Patience and practice
- Paper or other surface for the image to go on to
- A big enough dish for the paper or surface in cold water

Method for creating Polaroid emulsion lifts

- Cut out image to desired size and shape
- Place in recently boiled water
- Allow to sit for 10 min
- Carefully peel apart plastic sandwich.
- Dispose of top part
- Use a flat edge brush to gently tease the image away from the backing plastic.
- Place paper or surface into cold water
- Carefully transfer the gelatine using your brush, into the clean cold water
- Use brush to tease open image in the water, and place over the area you want to apply it
- Carefully lift from the cold water the image and the object or paper
- Refine and flatten to desired effect using water and your soft brush.