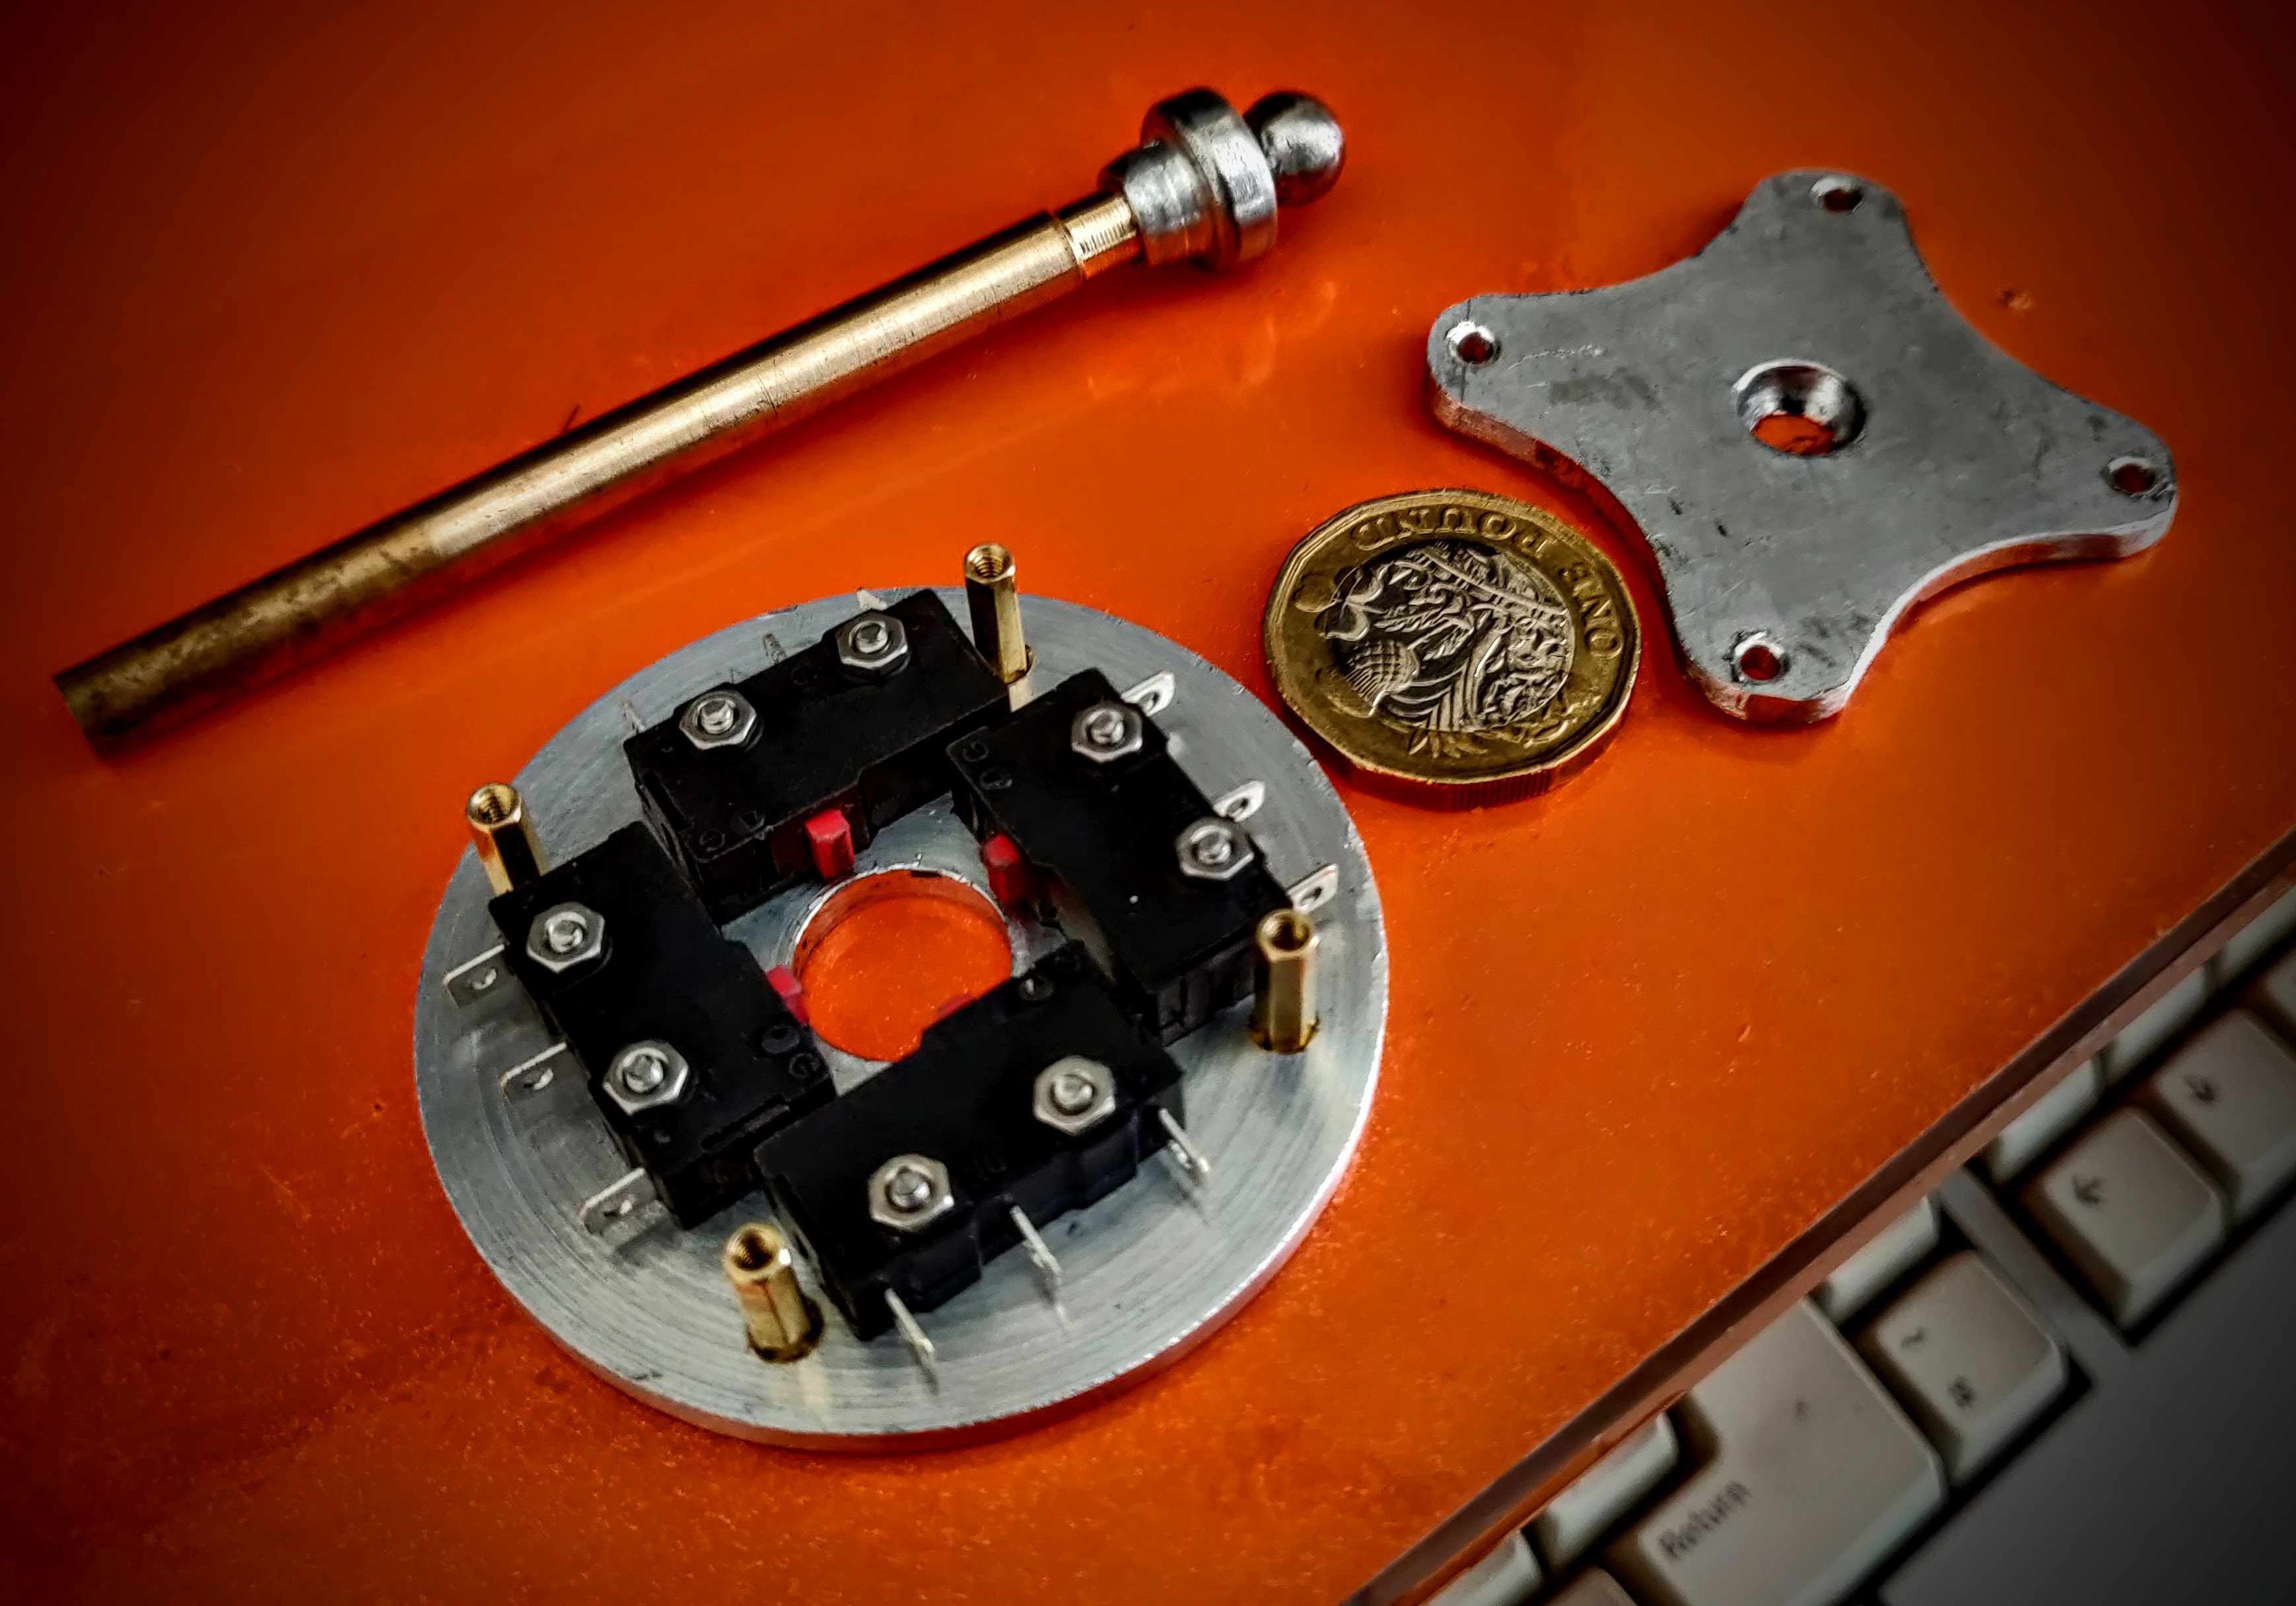
I have been playing around with making a joystick mech lately as traditional mechs are too large to put them where I want to. I started designing my own using smaller Microswitches.
After a few revisions I got a working prototype up and running and realised it would fit nicely into an Atari 2600 joystick, I had to give it a go…

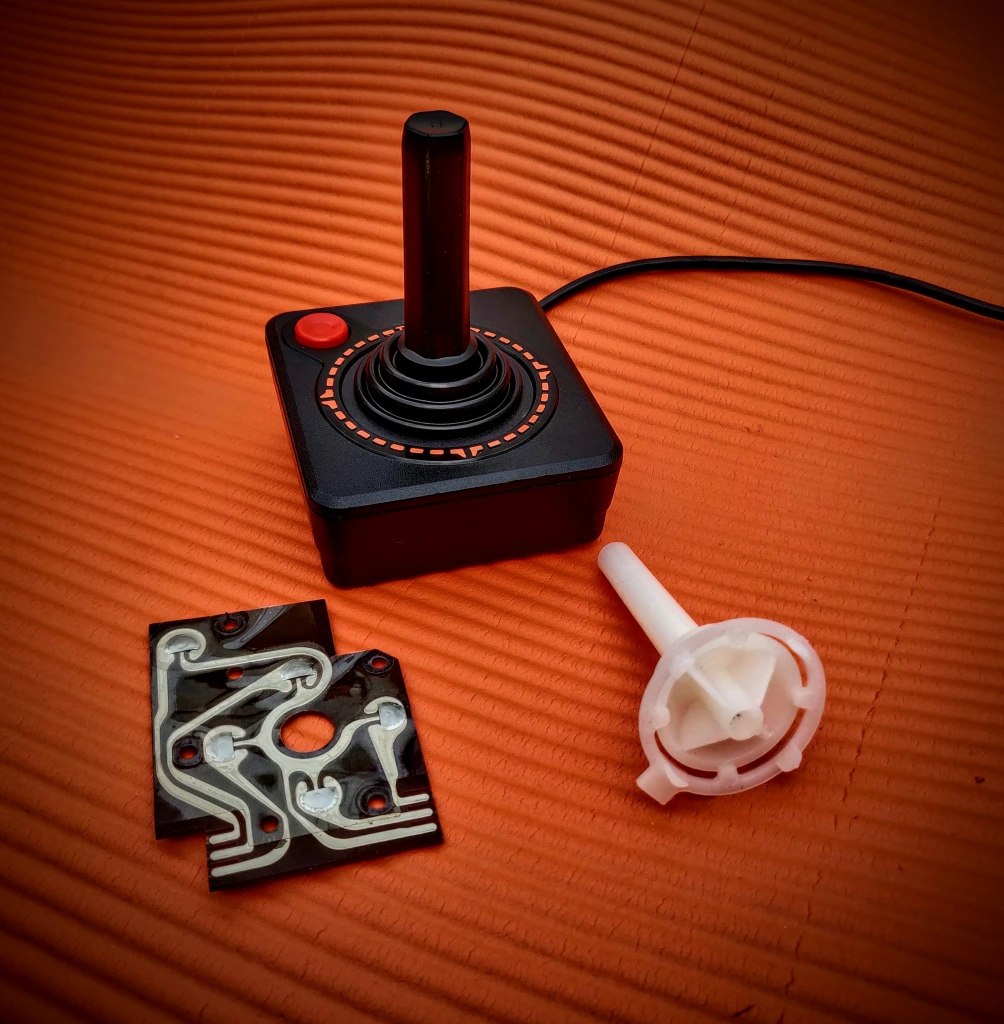
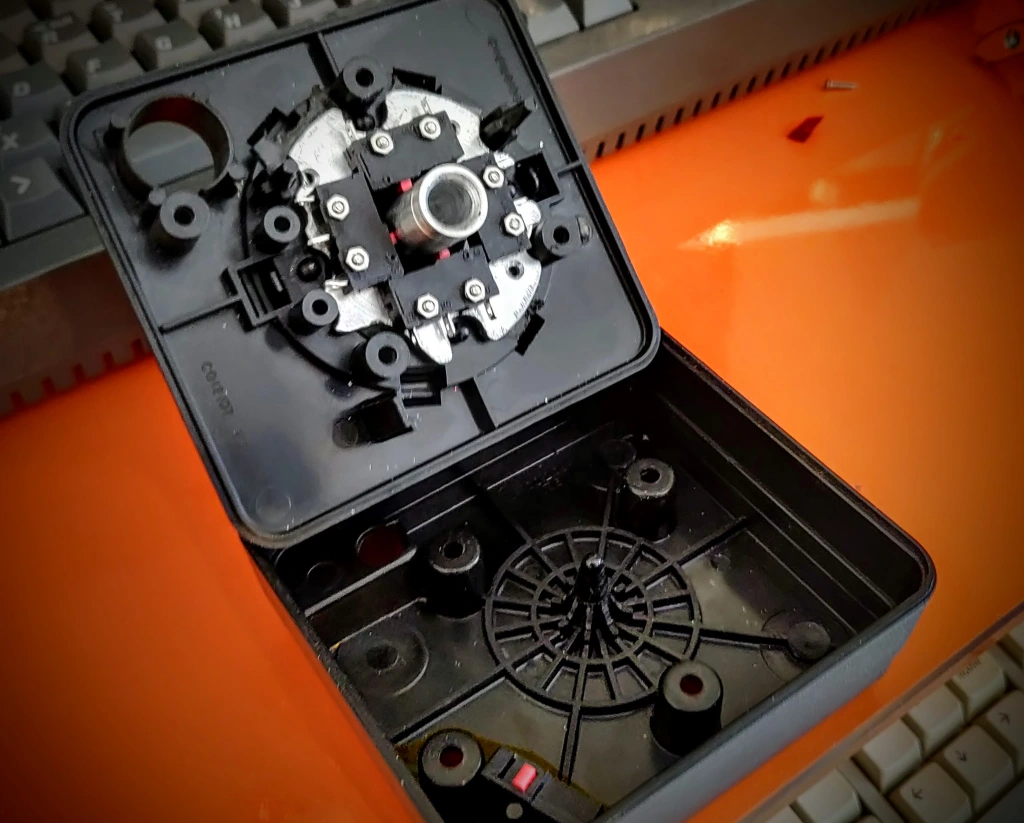
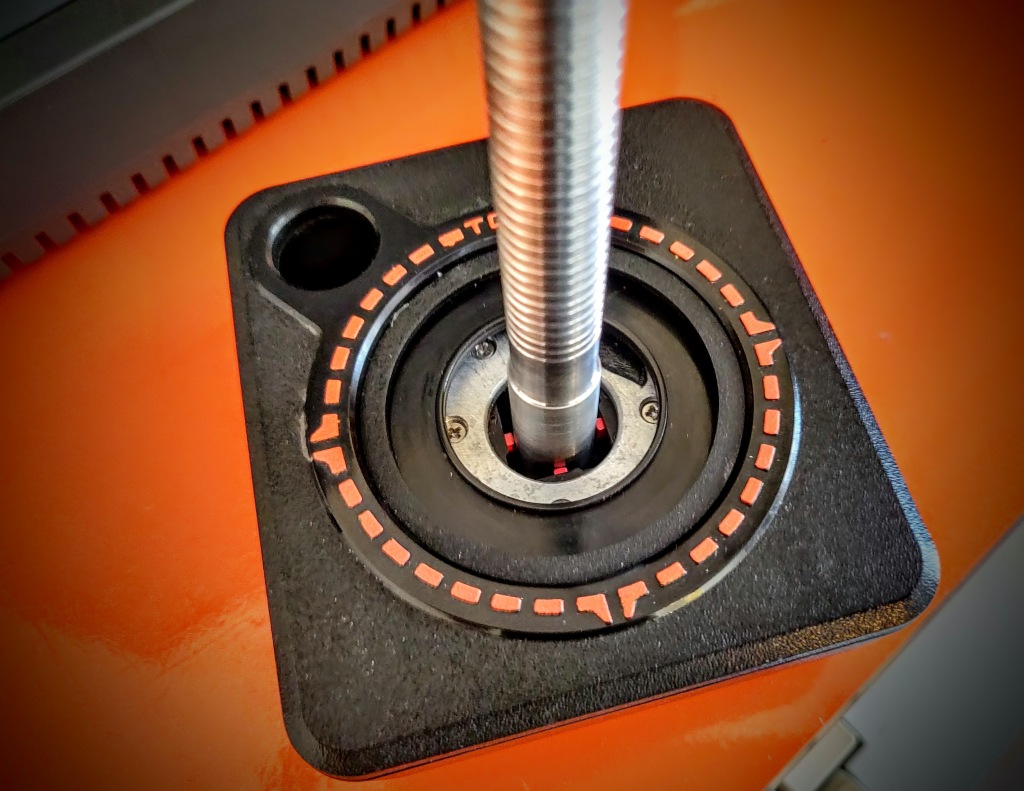
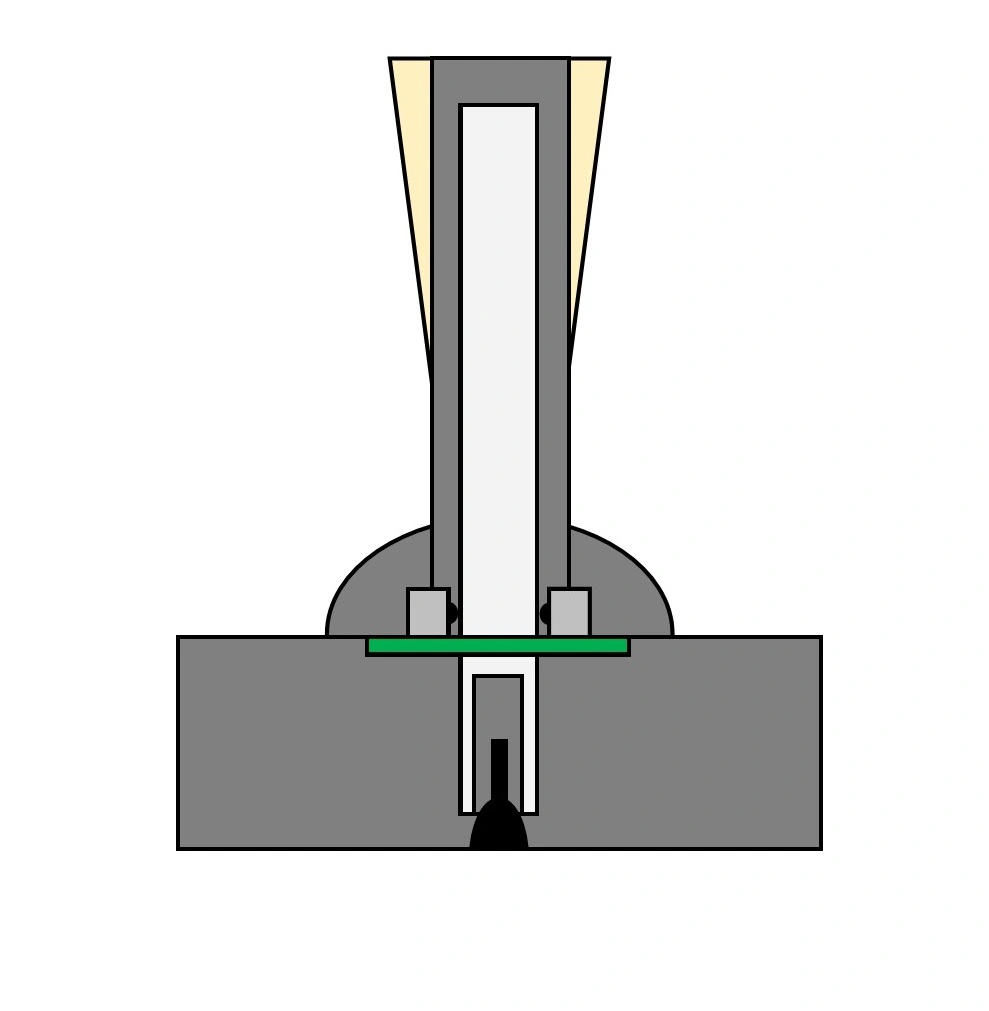
After a bunch of fettling, I got a mechanism fitted. There are loads of support struts in the Atari joystick so working round those was an issue. The idea is that a hollow tube acts as a pivot point at the bottom and the switches are directly in contact with the shaft of the joystick.
I got it assembled and gave it a go… It was AWFUL!!! Everything a joystick shouldn’t be. Too much travel, poor diagonals, sloppy, poor centering. Terrible.
I have 6 Atari sticks, and I upgraded 4 of them in the past, when tweaking them, I play them off against each other and see which ones are ‘best’. This stick was second worst. Despite being machined to fractions of a millimeter, it was entirely disappointing. My other refurbs worked great.
The main issue is the microswitches, the return spring force isn’t even across the range of travel, and only pushes back fully when it is past the halfway point. If the mechanism was made tighter it actually made it worse.
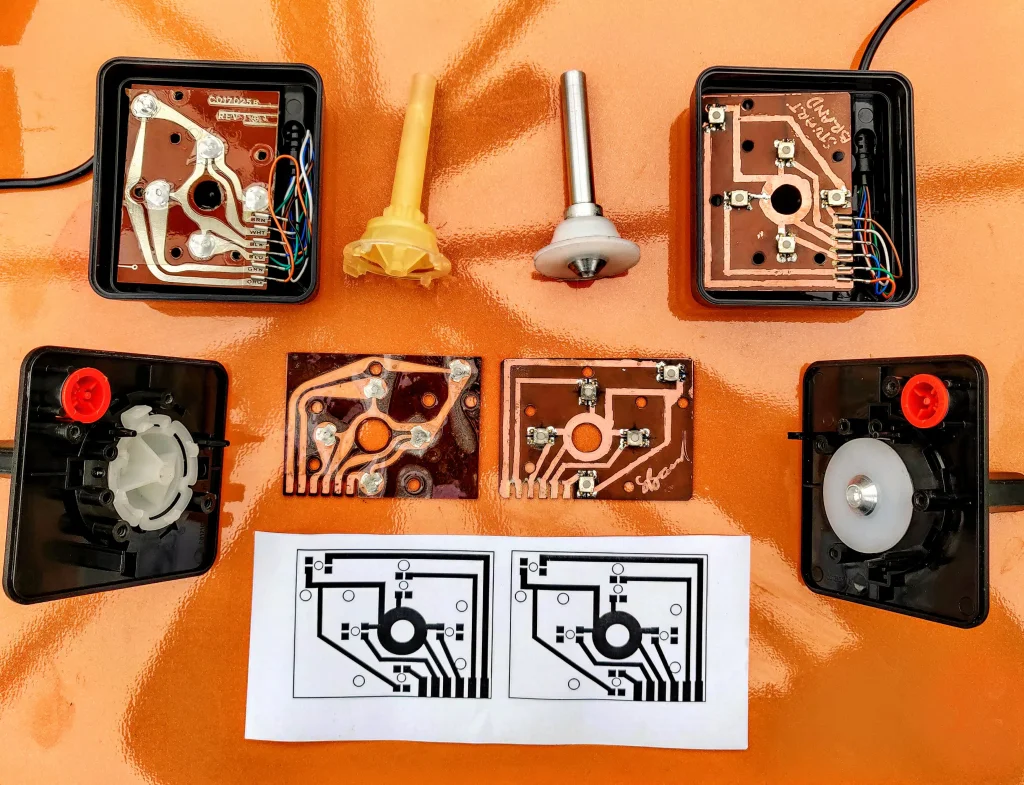
I decided to use a similar approach to the one I used when I built a bartop. It used a shrunken arcade mech using tact switches and works really well.
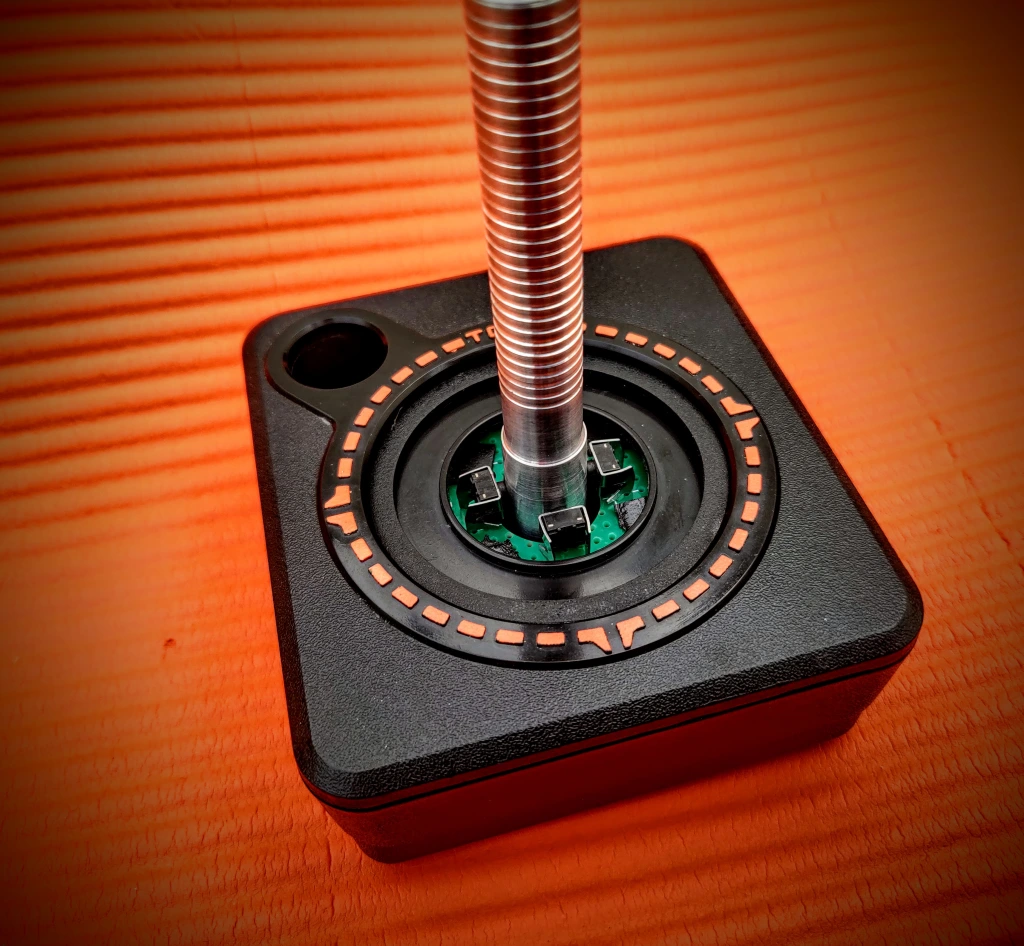
I used 4, right angled Microswitches and put them as high as I could, the further the distance between the switches and the pivots, the smaller the travel will need to be. I managed to get them to fit nicely inside the rubber boot.
I cut a PCB to fit in the very top of the joystick. I filed out sections of the PCB where the lugs are so that it located nicely and snapped in like lego.
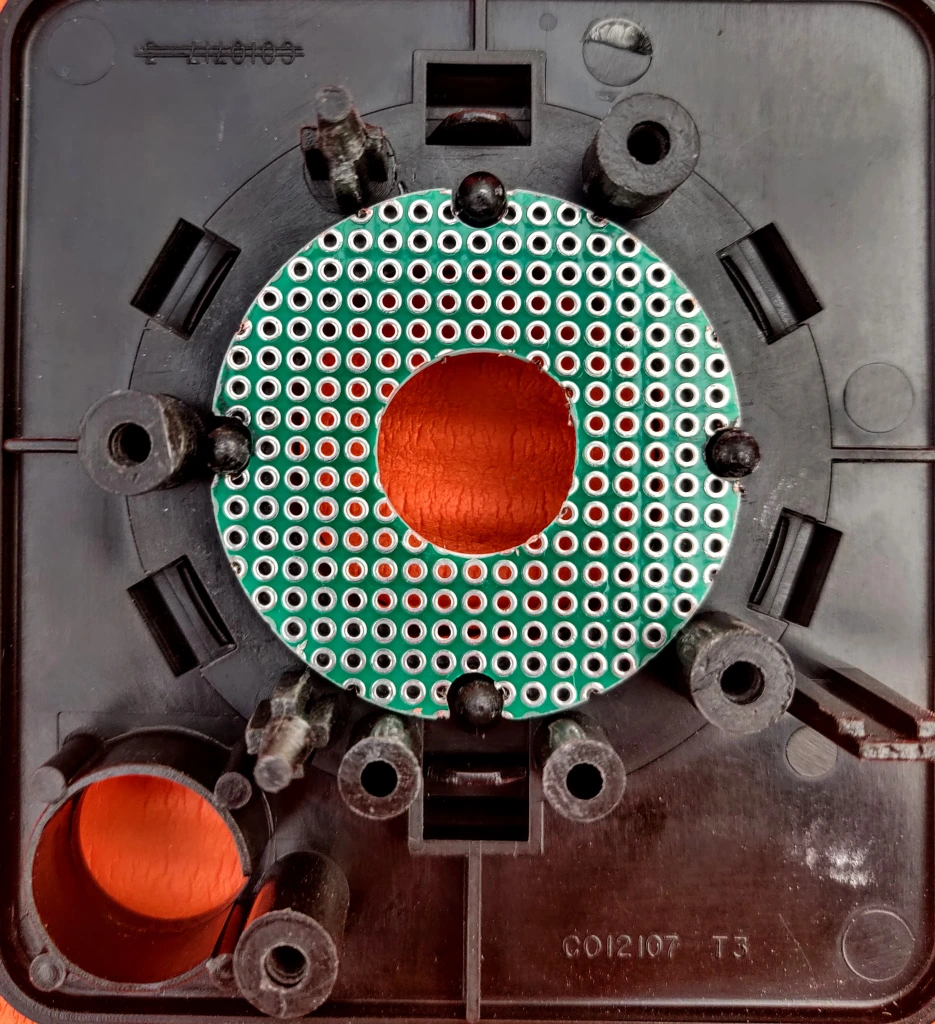
I then mounted 4, right angled switches in the board so that they line up exactly with the joystick shaft. The shaft is 12mm where it goes into the rubber boot and 13mm where it touches the actuator. There’s a little wiggle room in the switches so that adjustments can be made before soldering.
The connectors on my Atari joystick lead were really brittle so I had to solder them directly to the board which was disappointing as I was hoping to use spade connectors on the mechanism to attach them and not have to chop the cable. I’ll get some spade connectors and fix it later.

Once it was soldered, I fixed the PCB in place with some really strong double sided tape. The board is held in really securely by the lugs so it’s just to hold it in place.
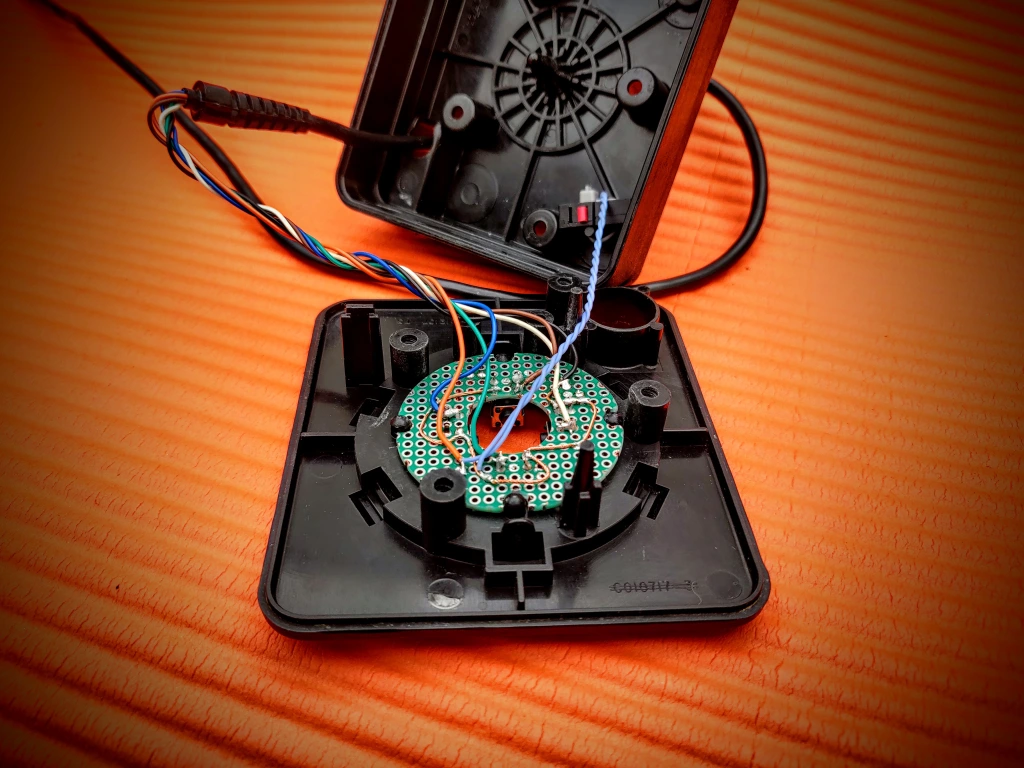
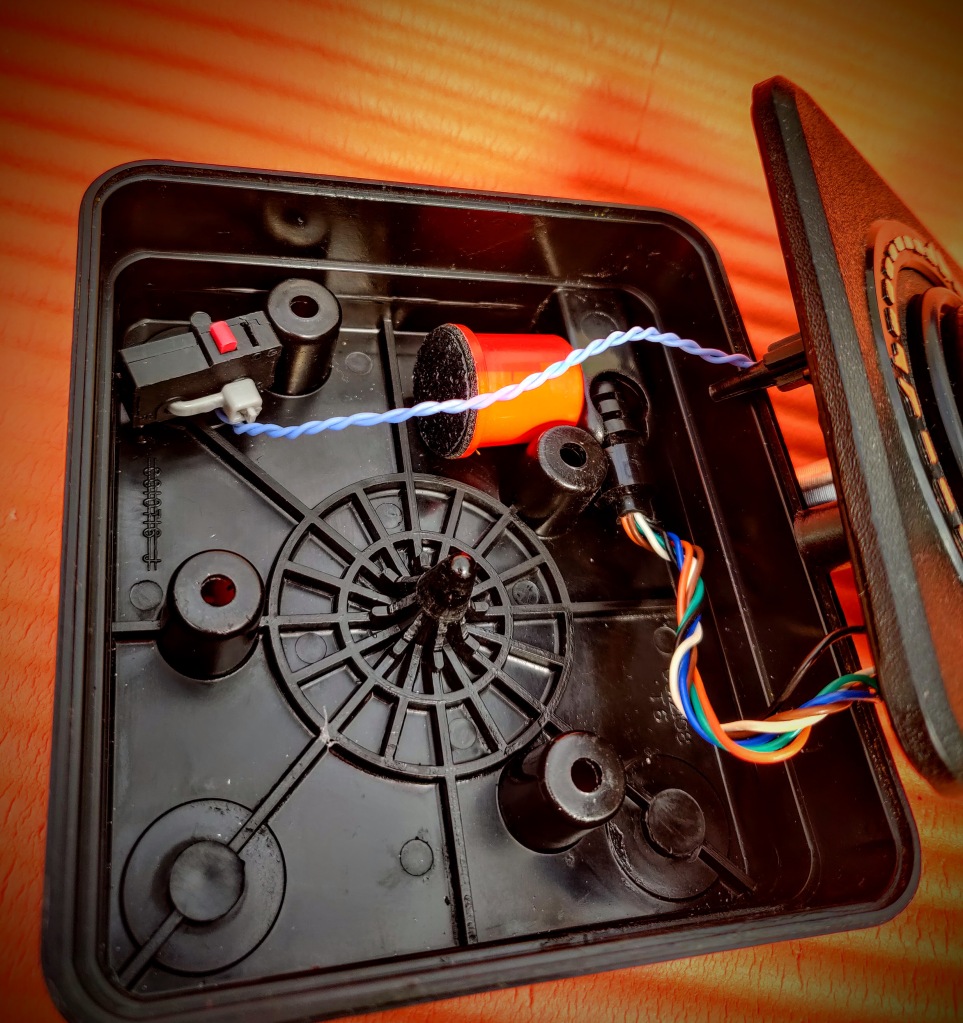
I added a fire button using a standard microswitch. The support post is slightly off center so I used this to cable tie the switch in place. I taped a piece of plastic over the bottom of the fire button so that it made good contact with the switches actuator and was at the right height.
I put it together and tested it without the boot fitted and WOW! What a difference! Minimal travel, no excess play, solid diagonals, perfect!! 😍
I re-fitted the rubber boot, this holds the joystick shaft down and in place, I also added a foam layer at the bottom for sound insulation as the shell is really empty.

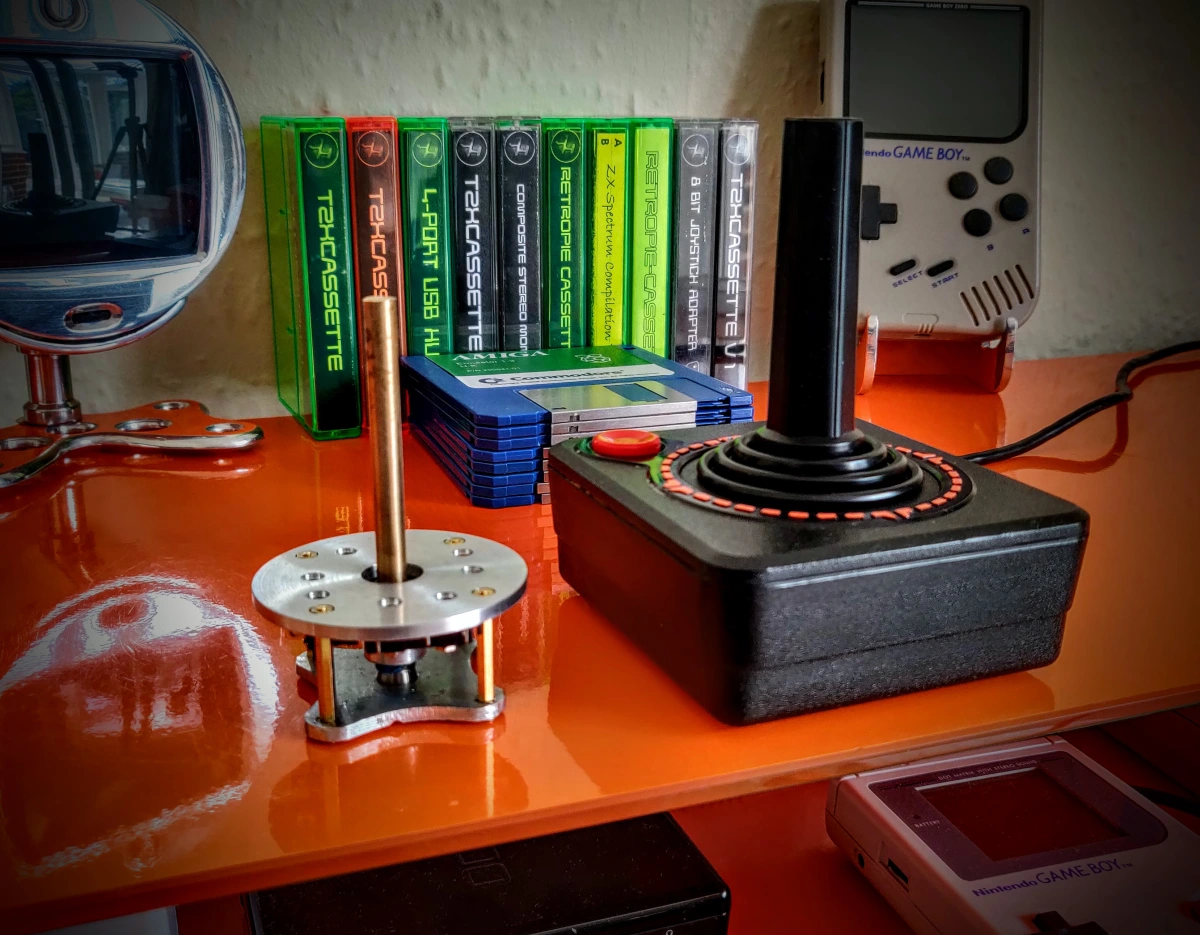
I screwed it back together and it works perfectly! It is way better than my other modded sticks and has now been promoted to my best stick! It it definitely worth doing and it is non destructive and completely reversible!