After having watched this interesting video of Arte… in pratica del canale circoloarci hm I proposed the activity with tessellations to the 6th-grade students. We followed the instructions in the video using a square post-it note or using a 7.5cm x 7.5cm square template cut out of squared paper.
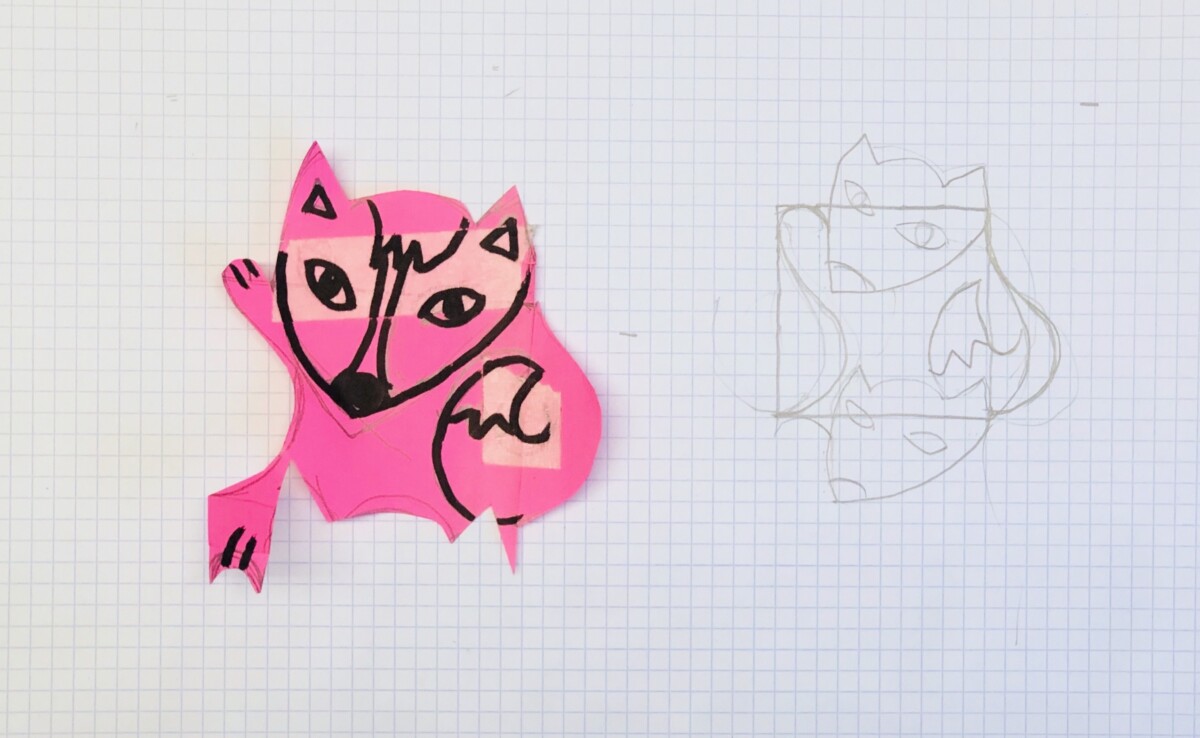
First, we cut out some shapes on one side of the sheet and stick them on the opposite side, translating the piece in the same position. My suggestion is to cut out random shapes, without worrying about identifying in advance the animal to represent.


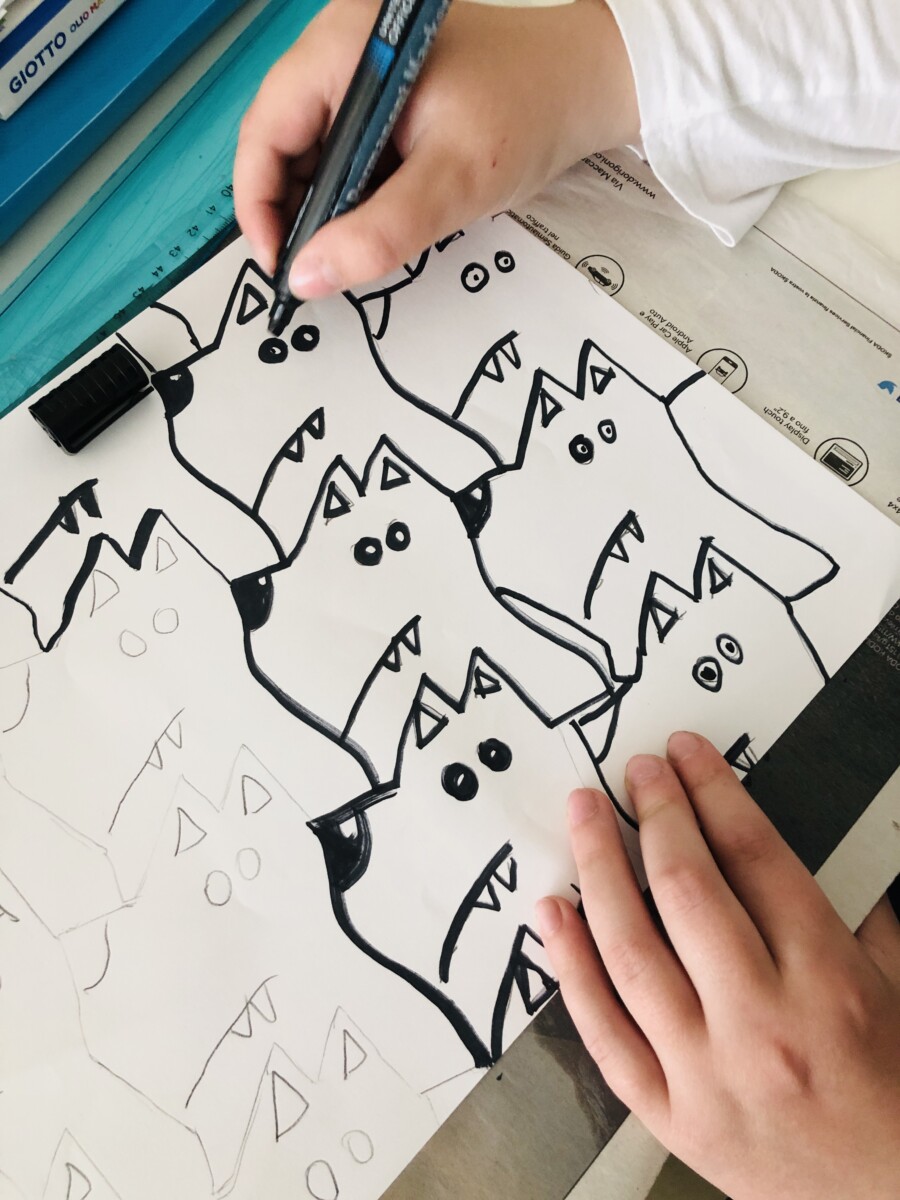
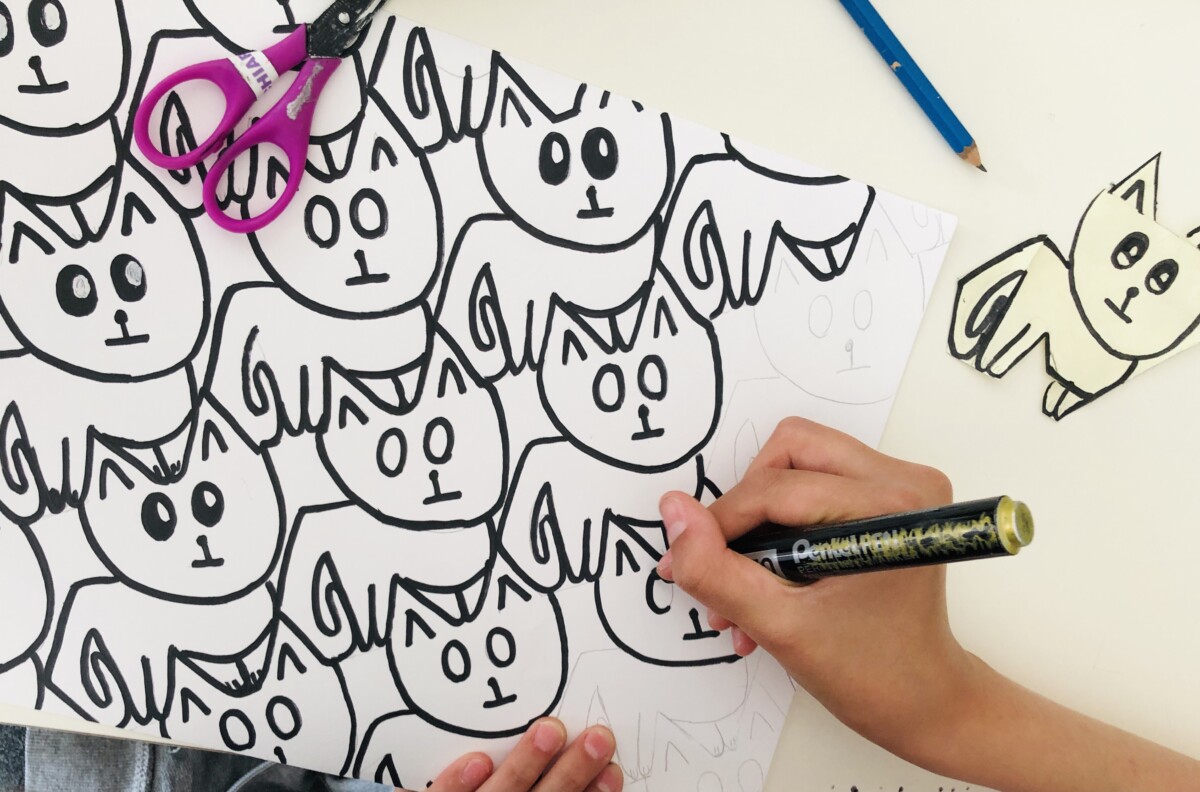
Then we observe the shape carefully and try to represent an animal, drawing eyes, nose, ears, paws, fins, wings, or tails on the sheet, depending on the animal most suited to our strange shape. I recommend kids NOT to seek perfection and verisimilitude, but rather to adapt the shape to an animal that will look a bit weird and asymmetrical but will allow us to build our perfect tessellation.

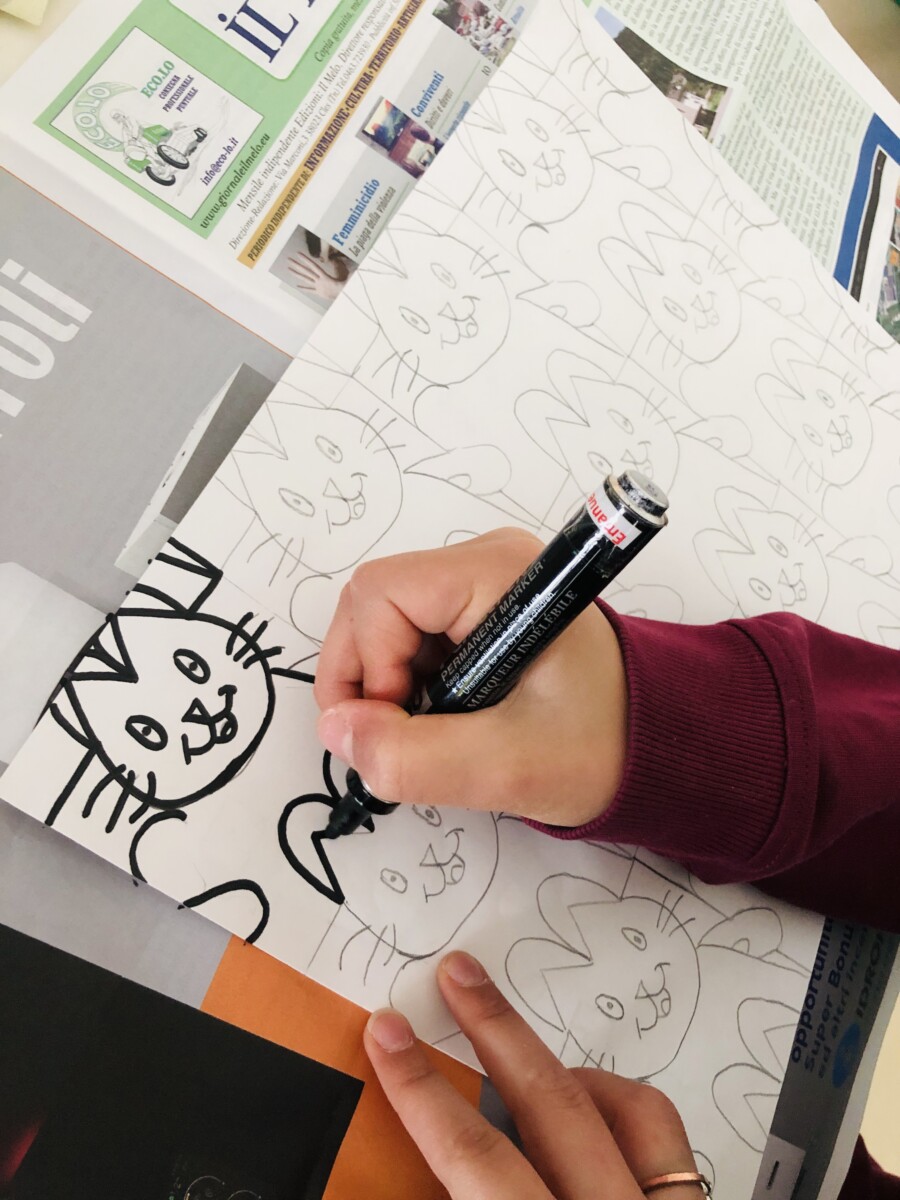
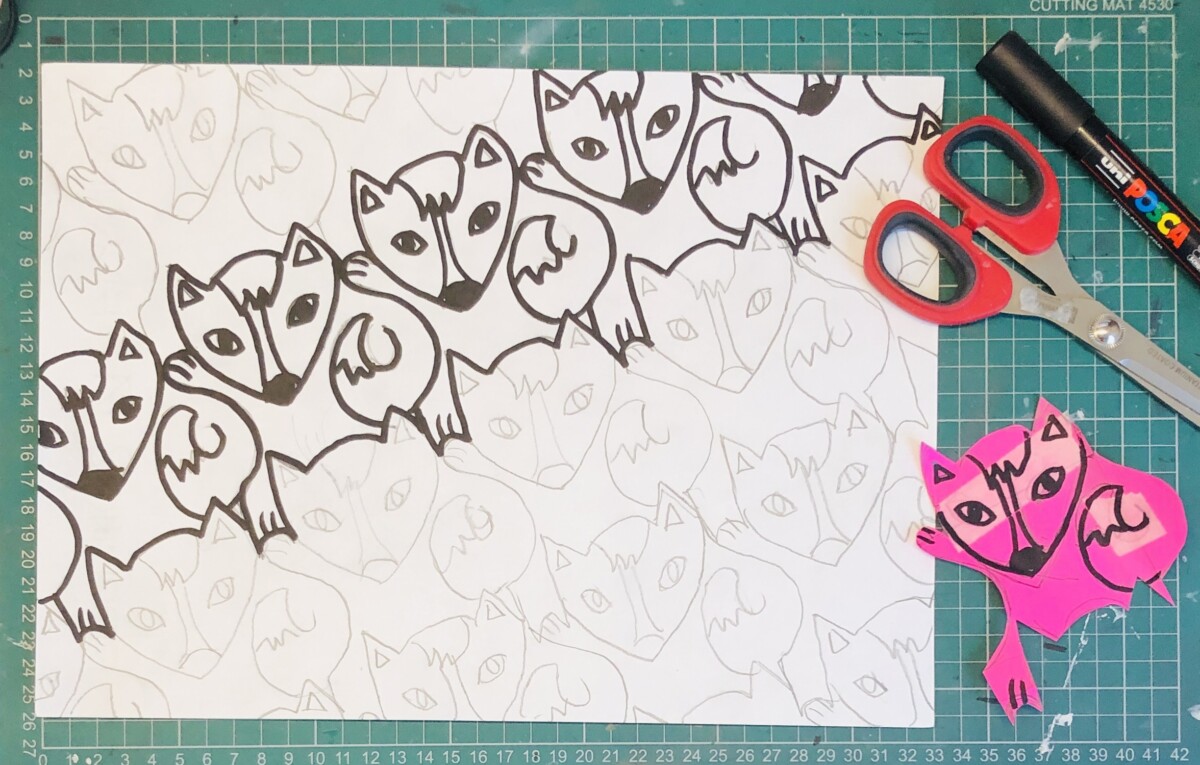
In the next phase, we trace the shape by placing the shapes subsequently side by side in order to completely fill a drawing sheet and then we go over the drawing with a black permanent marker.


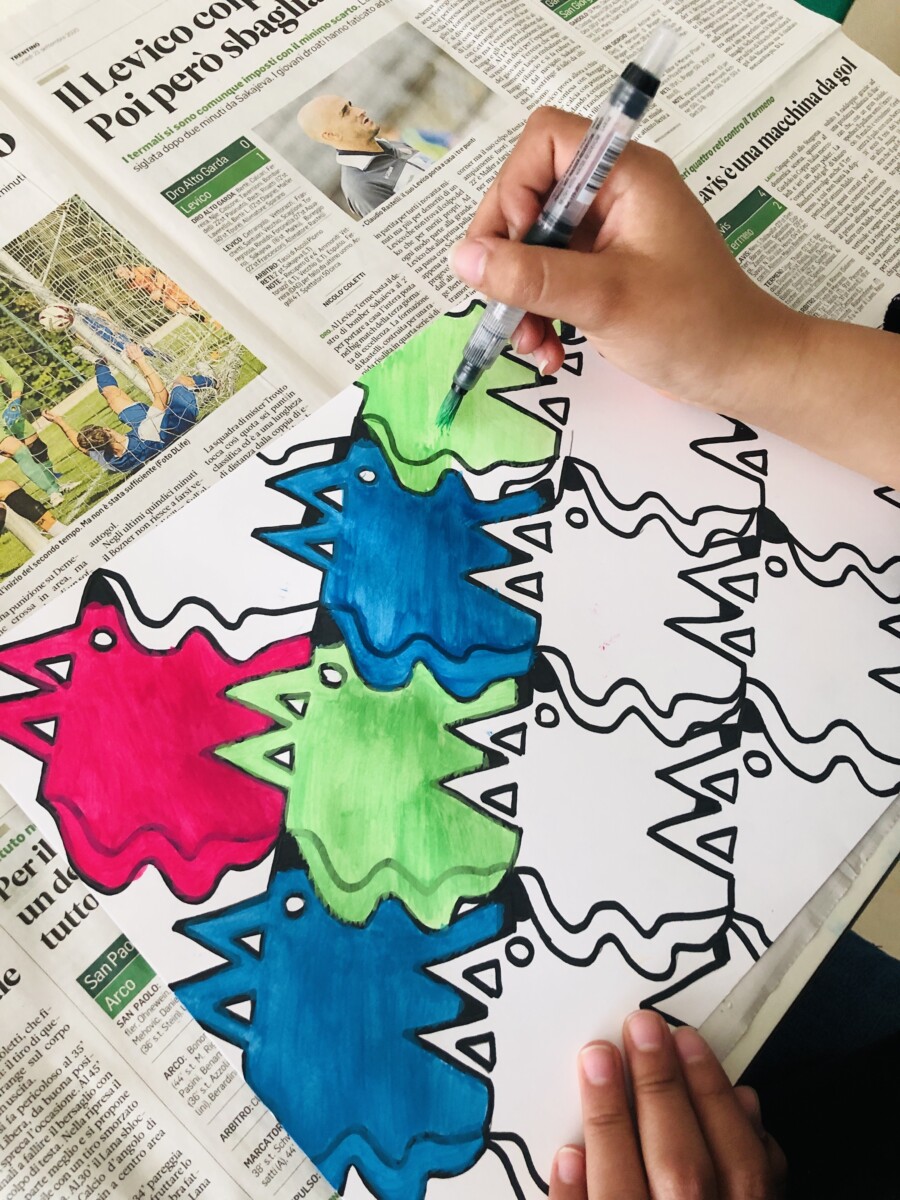
To finish the drawing, we paint the shapes with watercolors, using one, two, or three colors of our choice. The colors are alternated to create an ordered sequence.
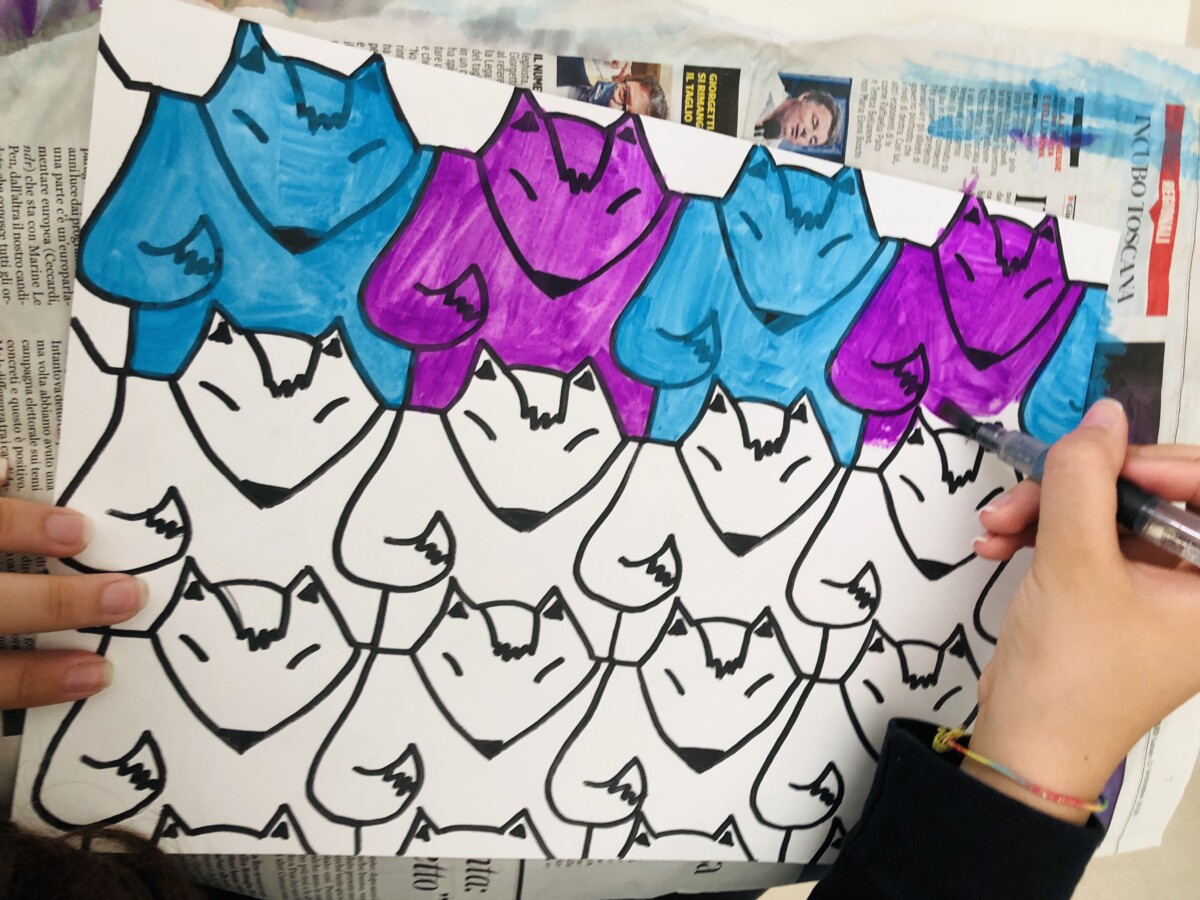

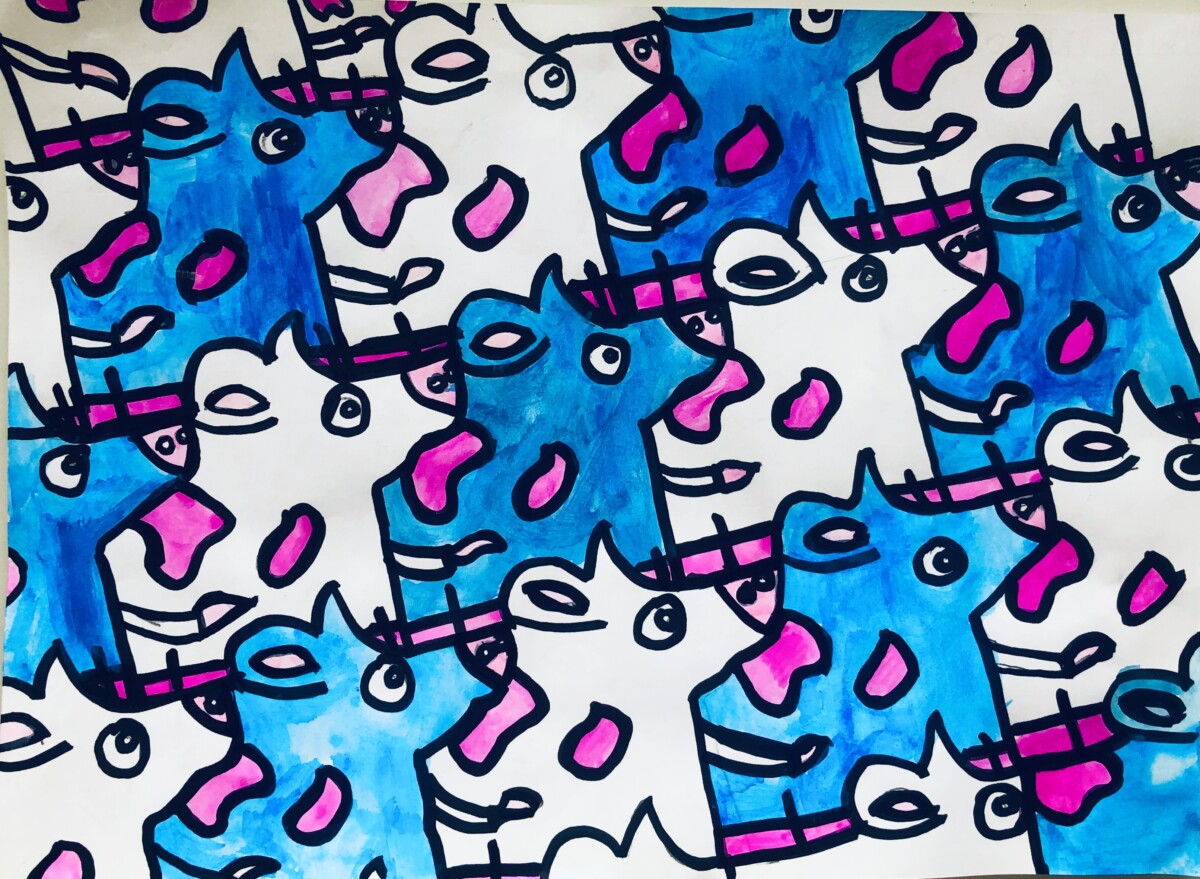
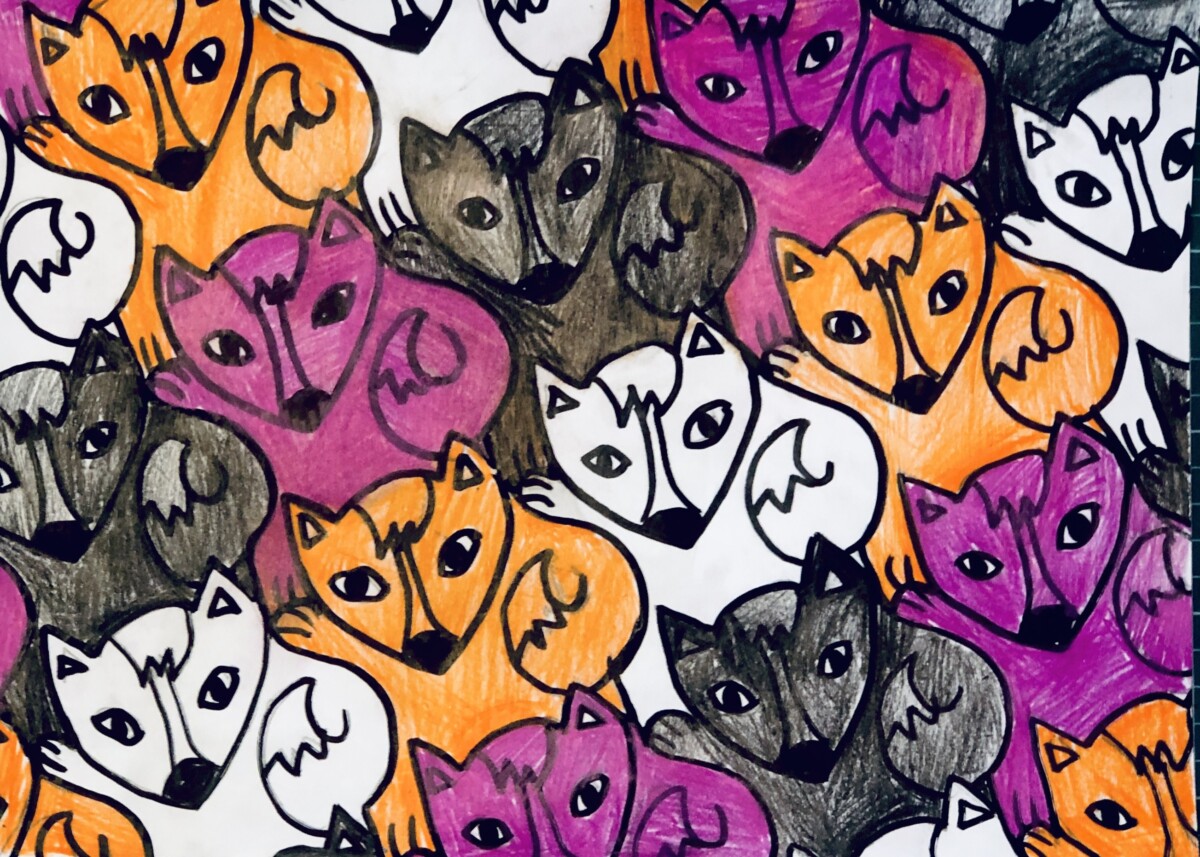
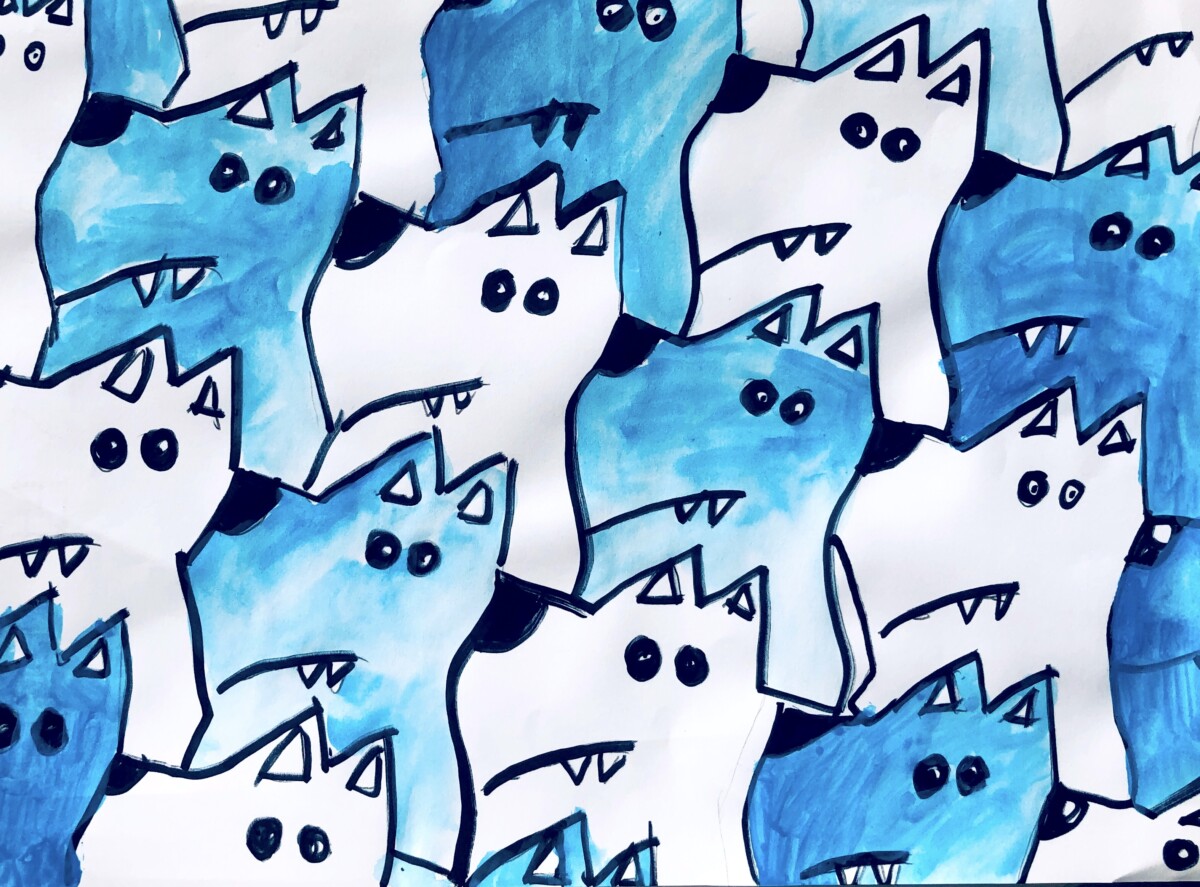
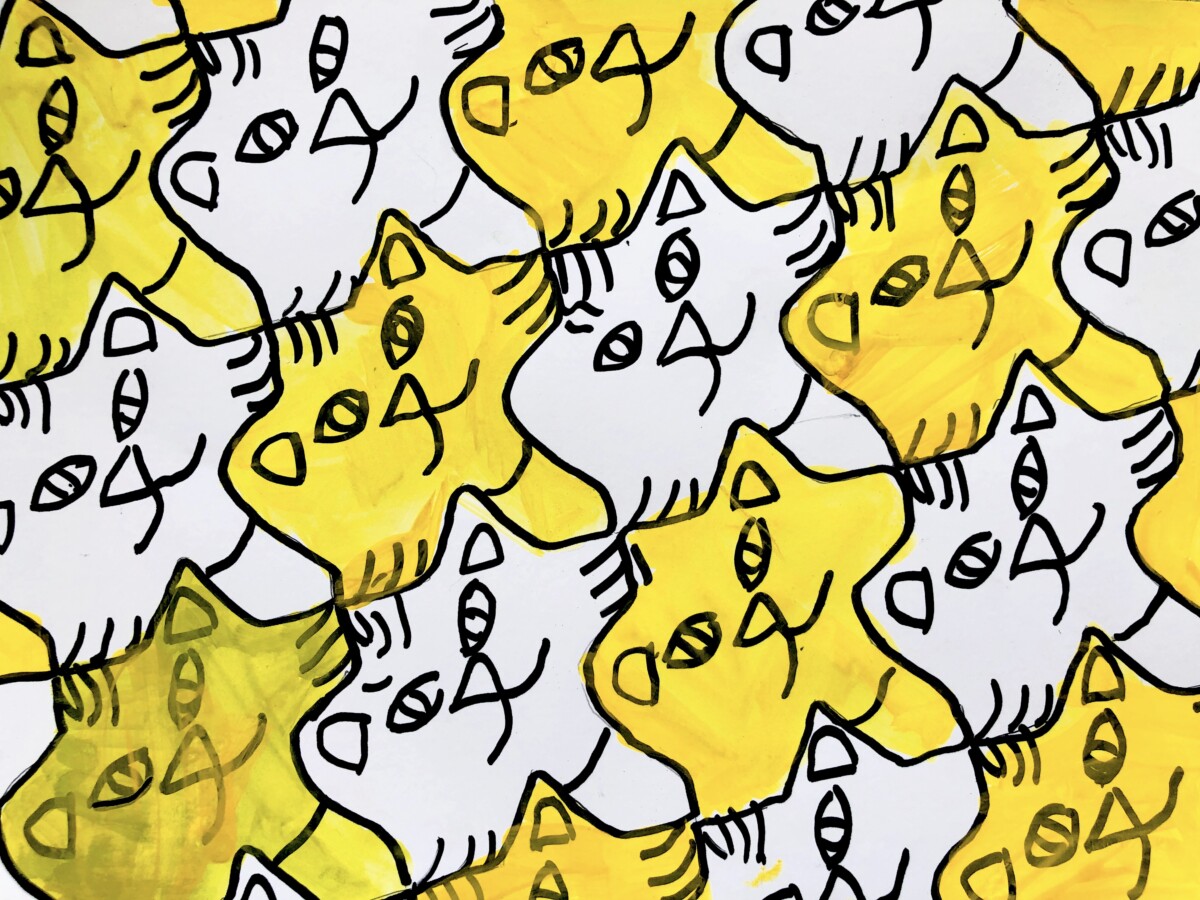
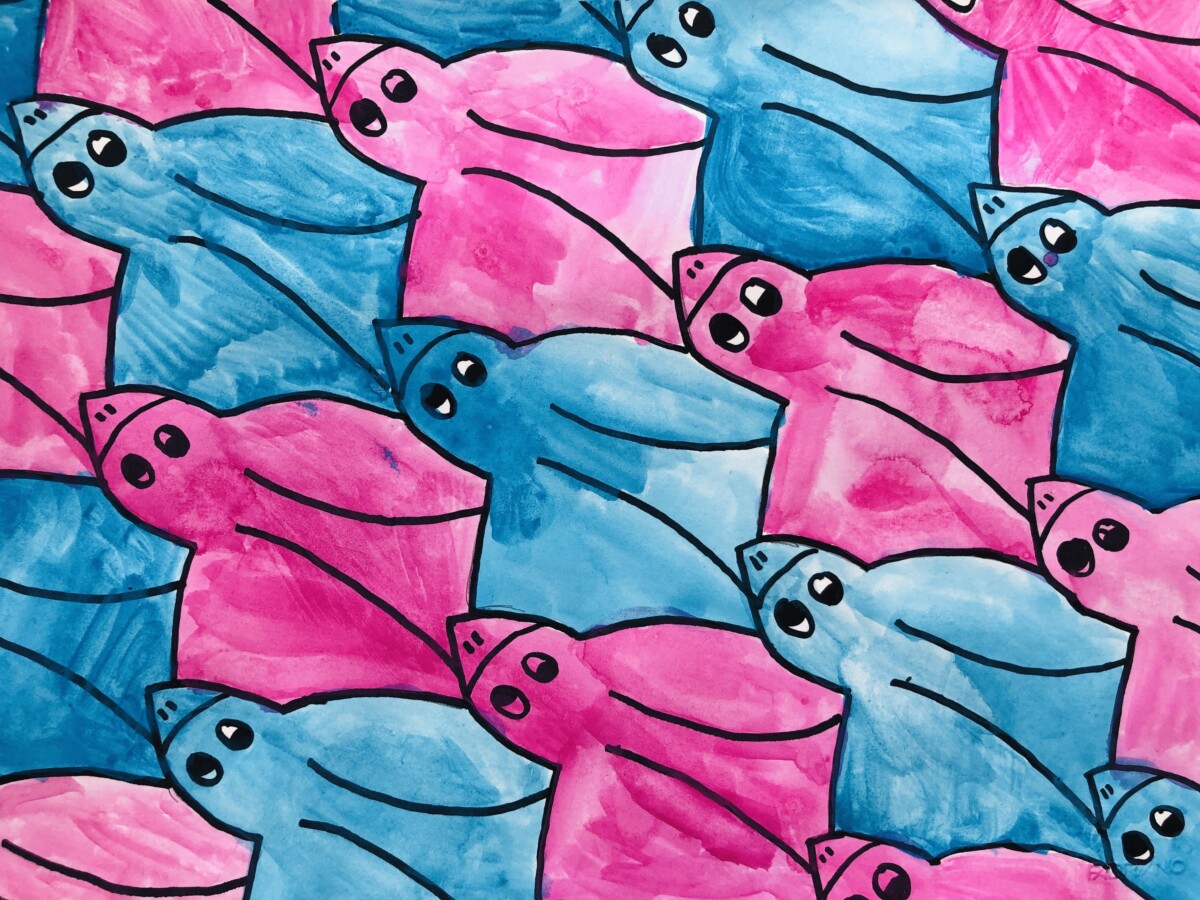
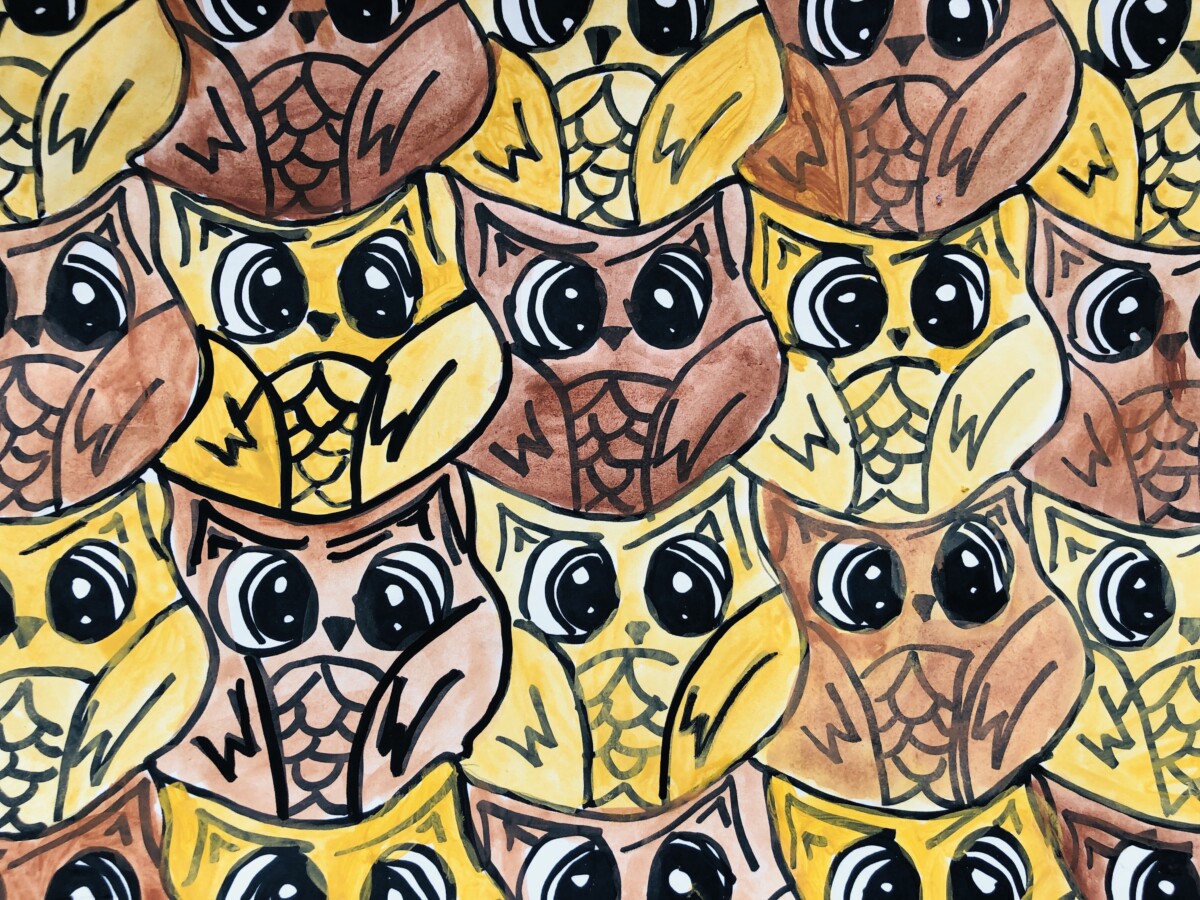
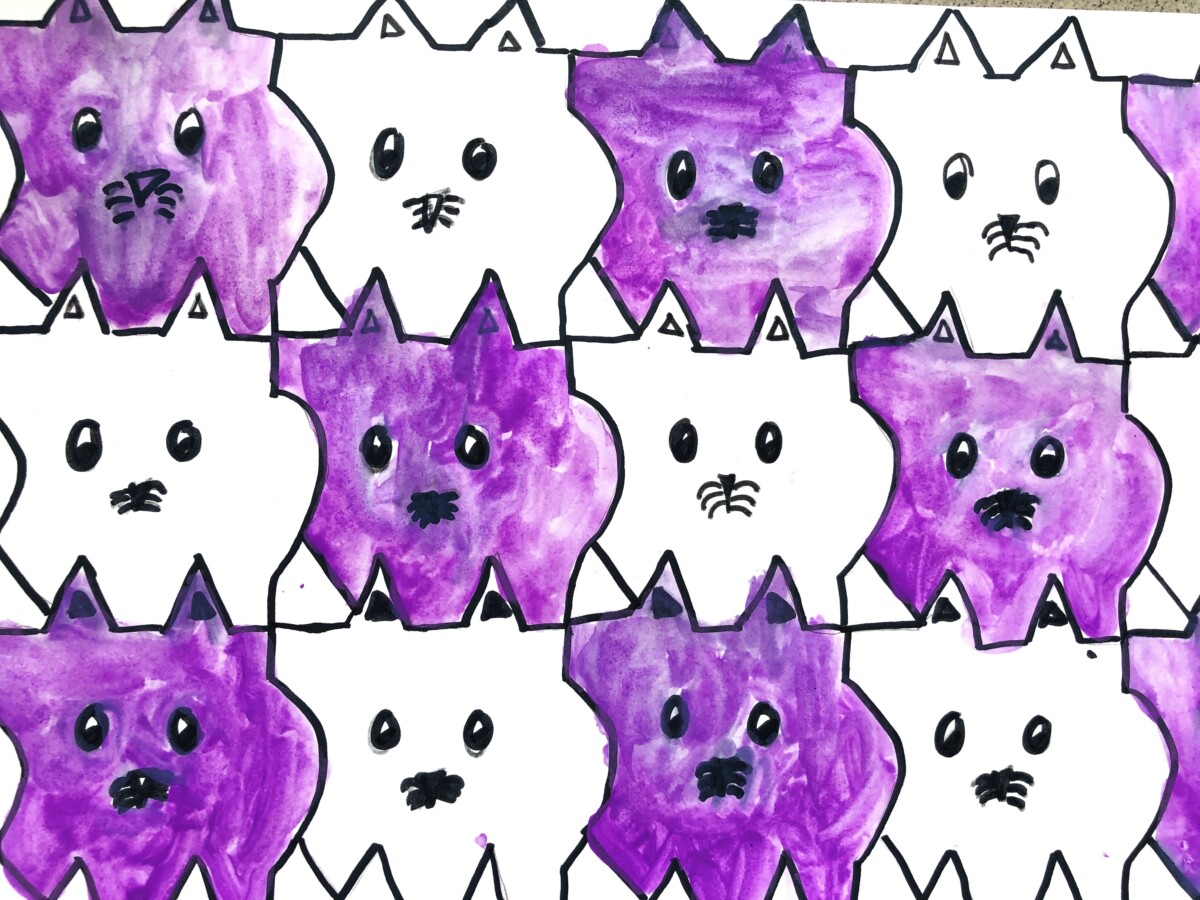
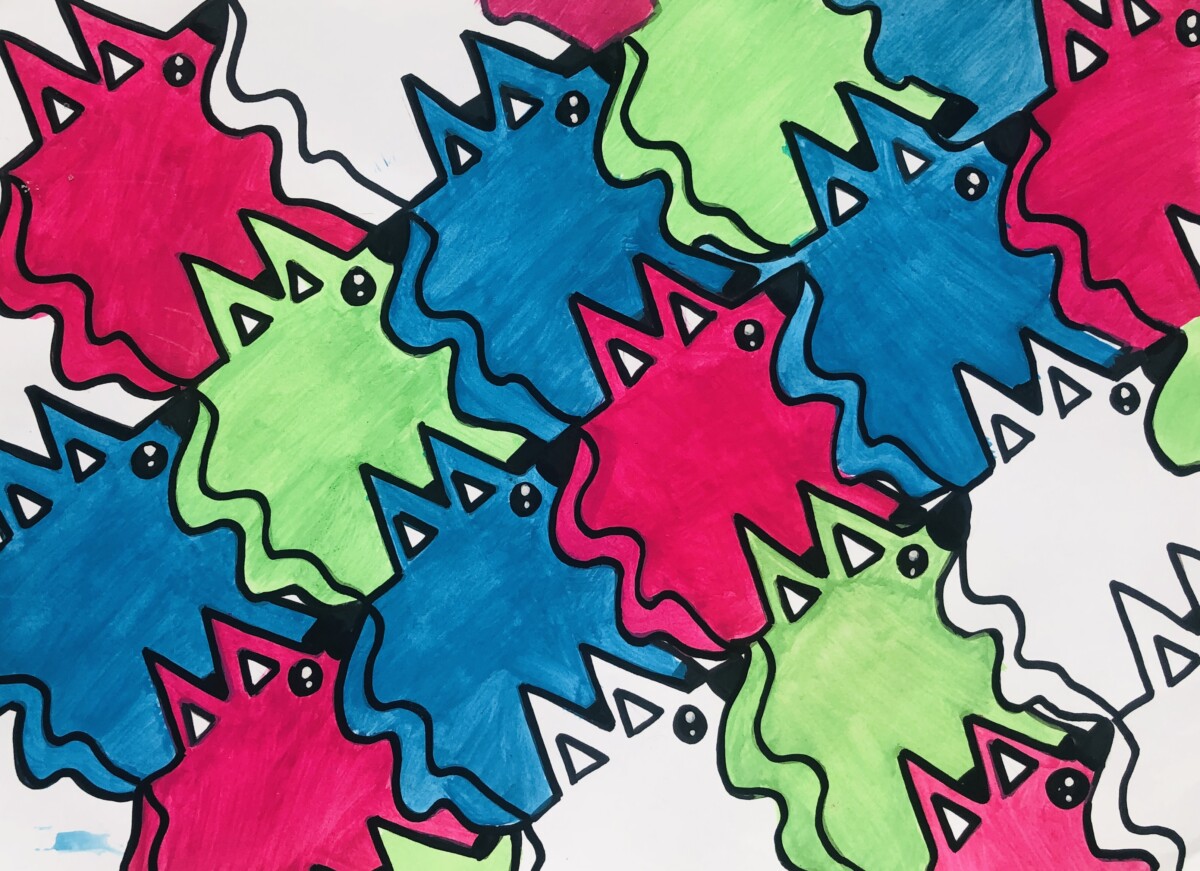
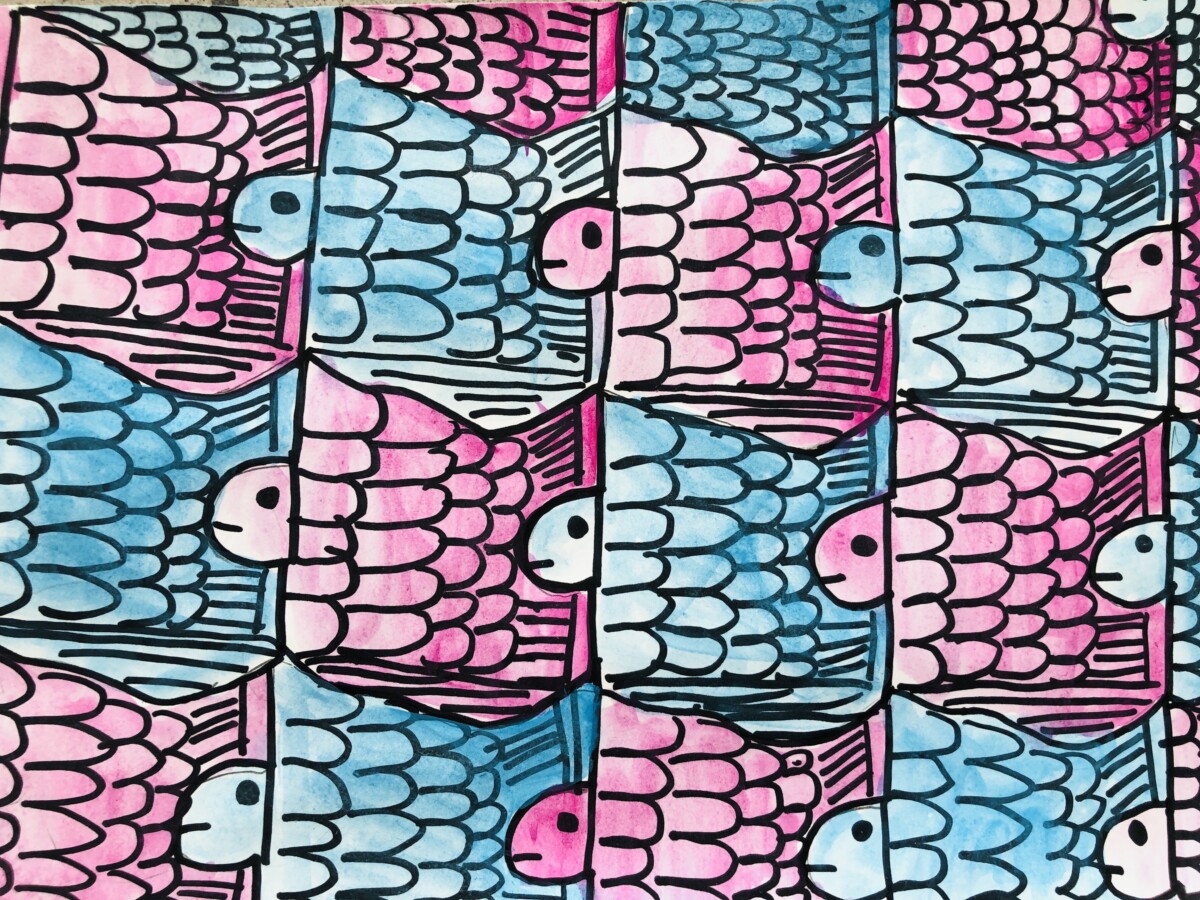
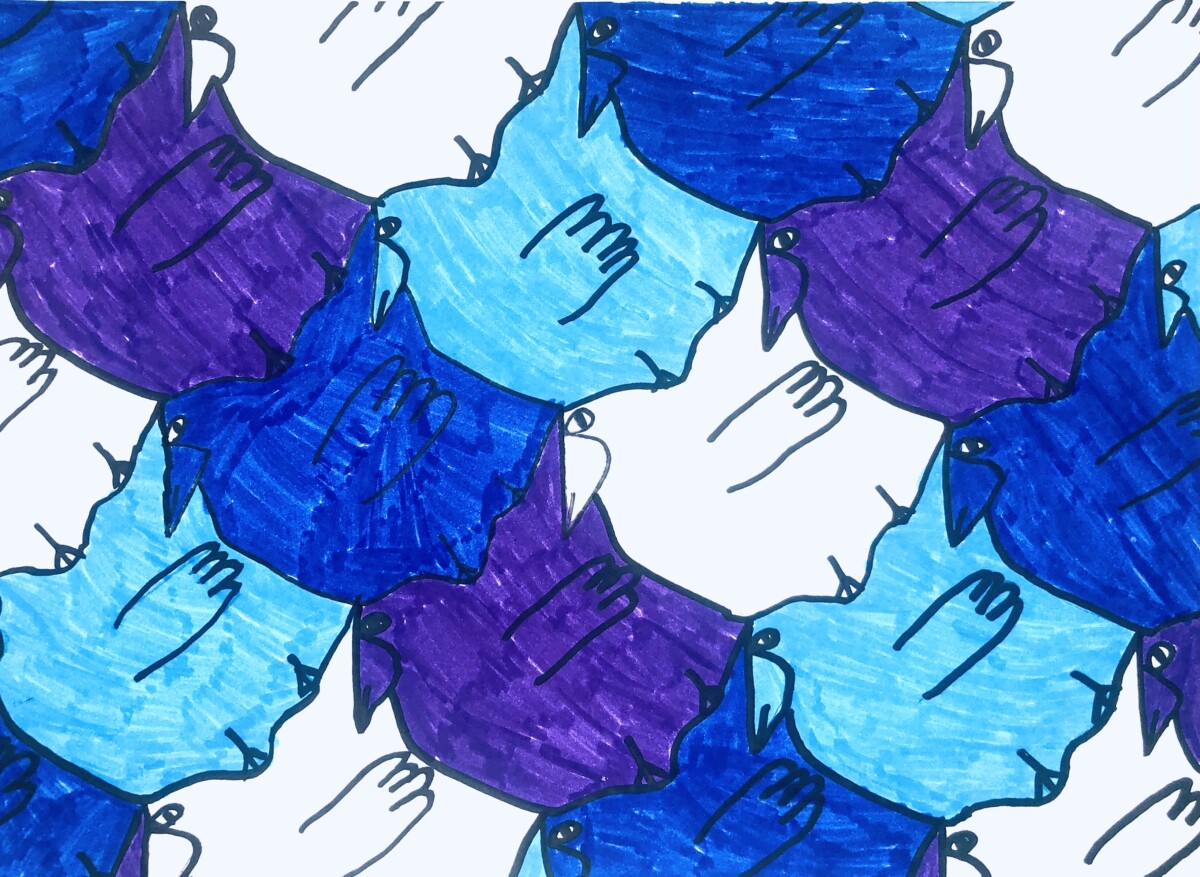
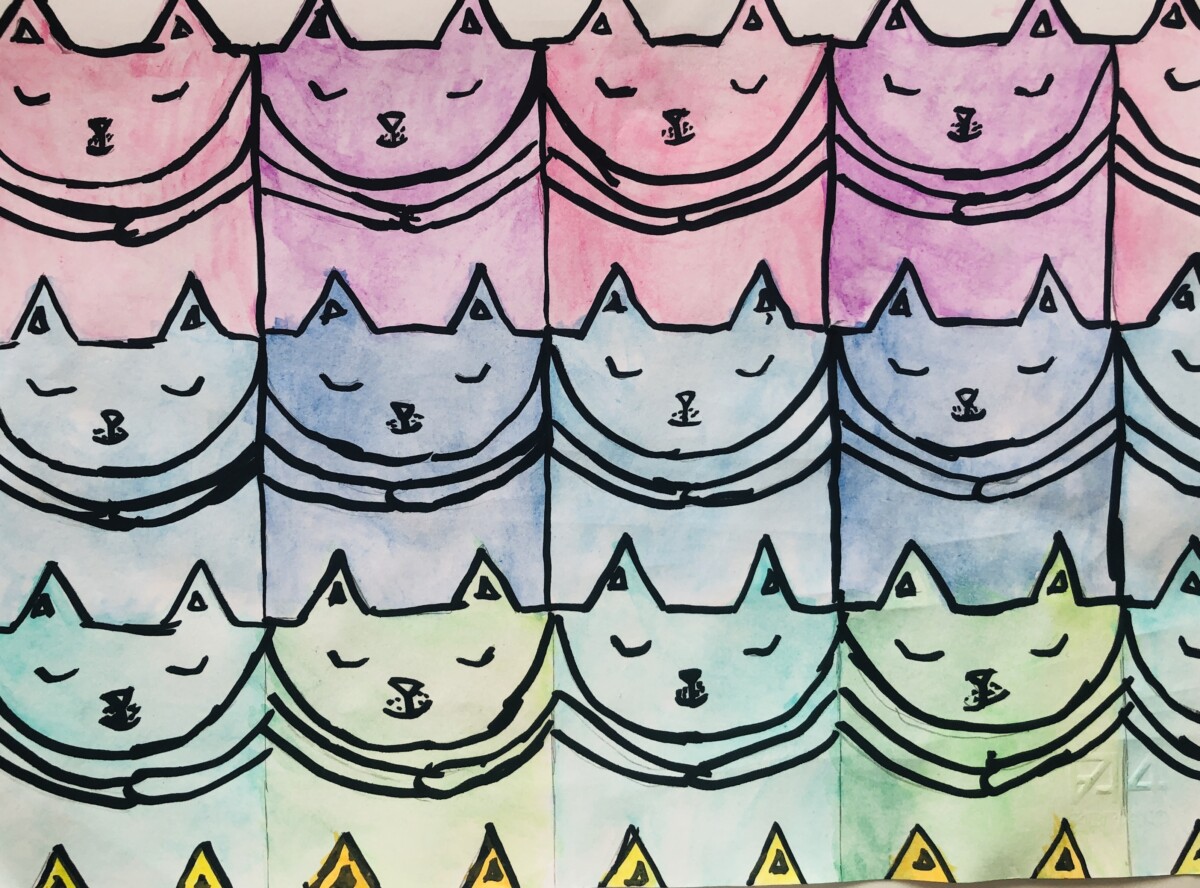
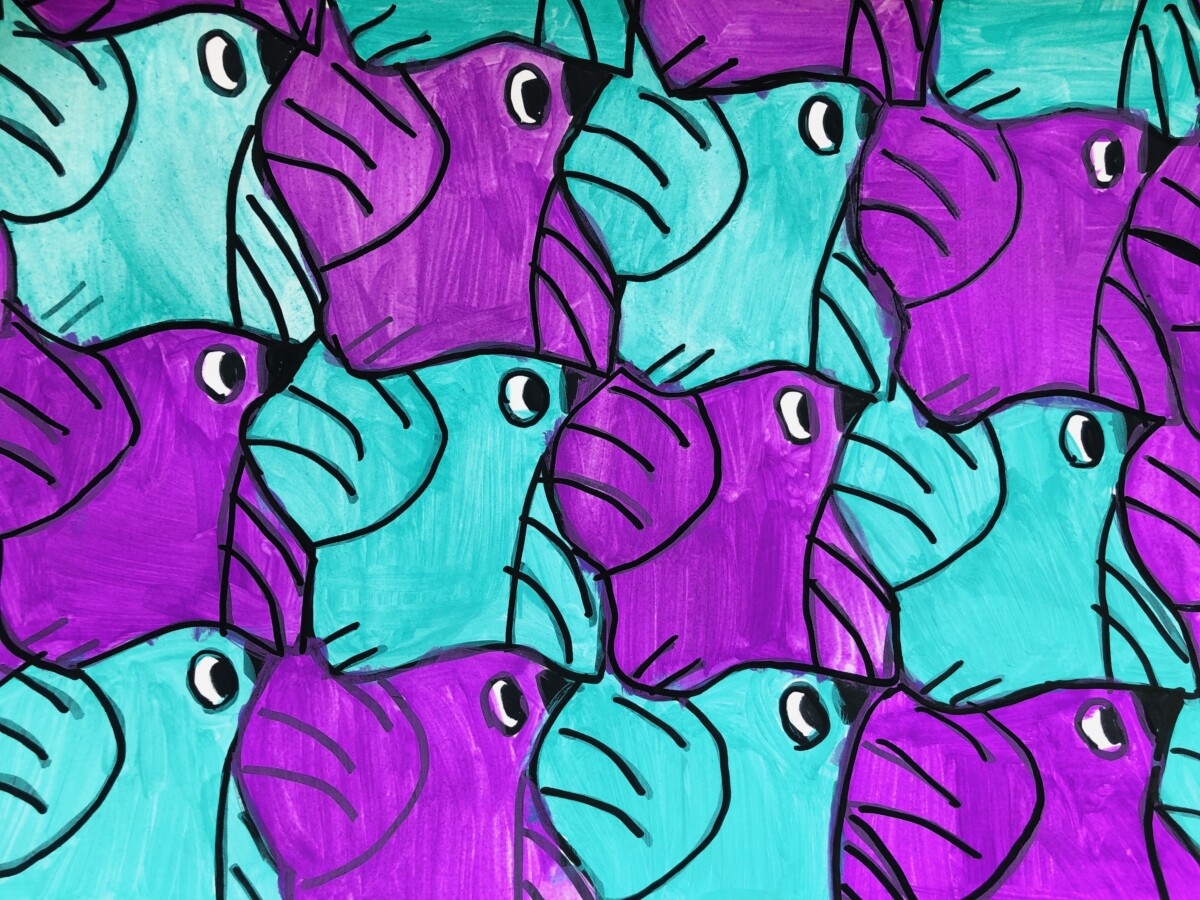
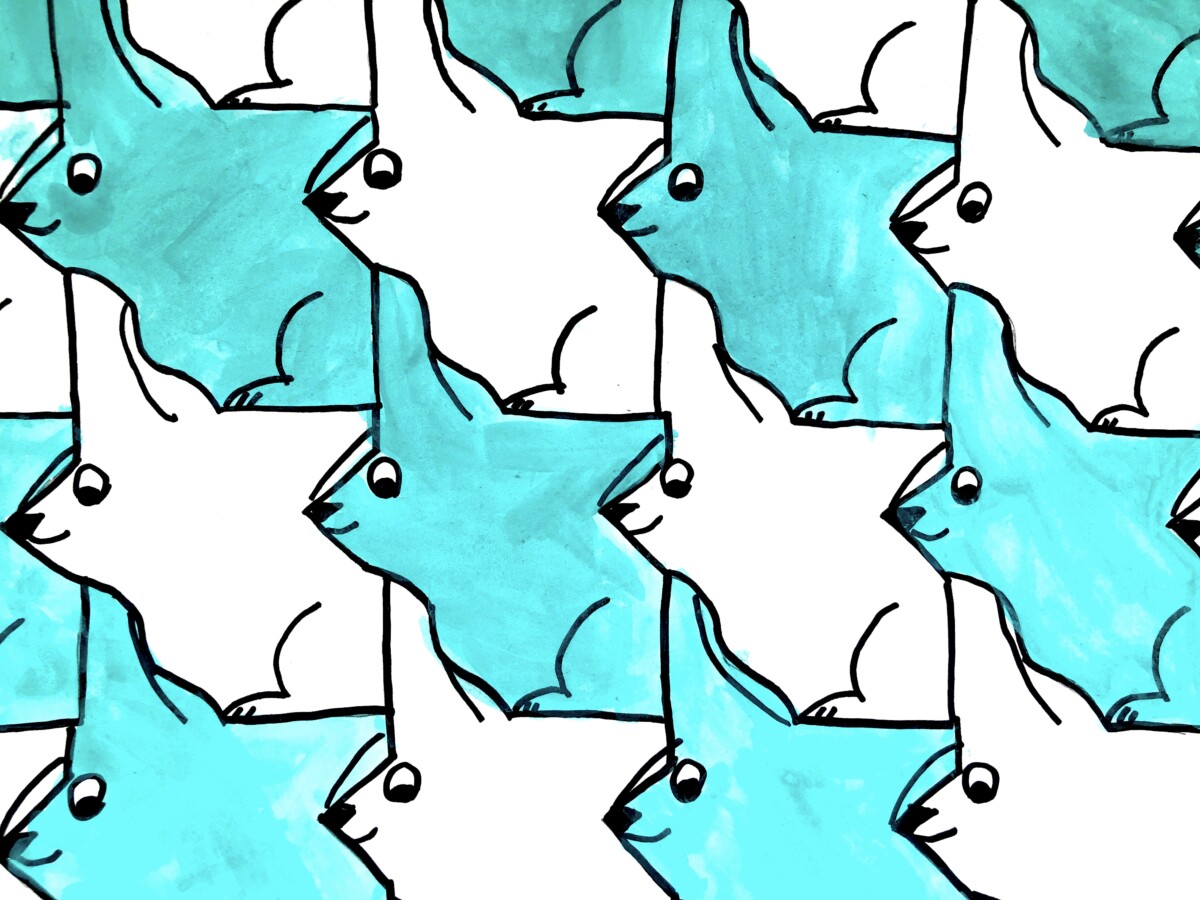
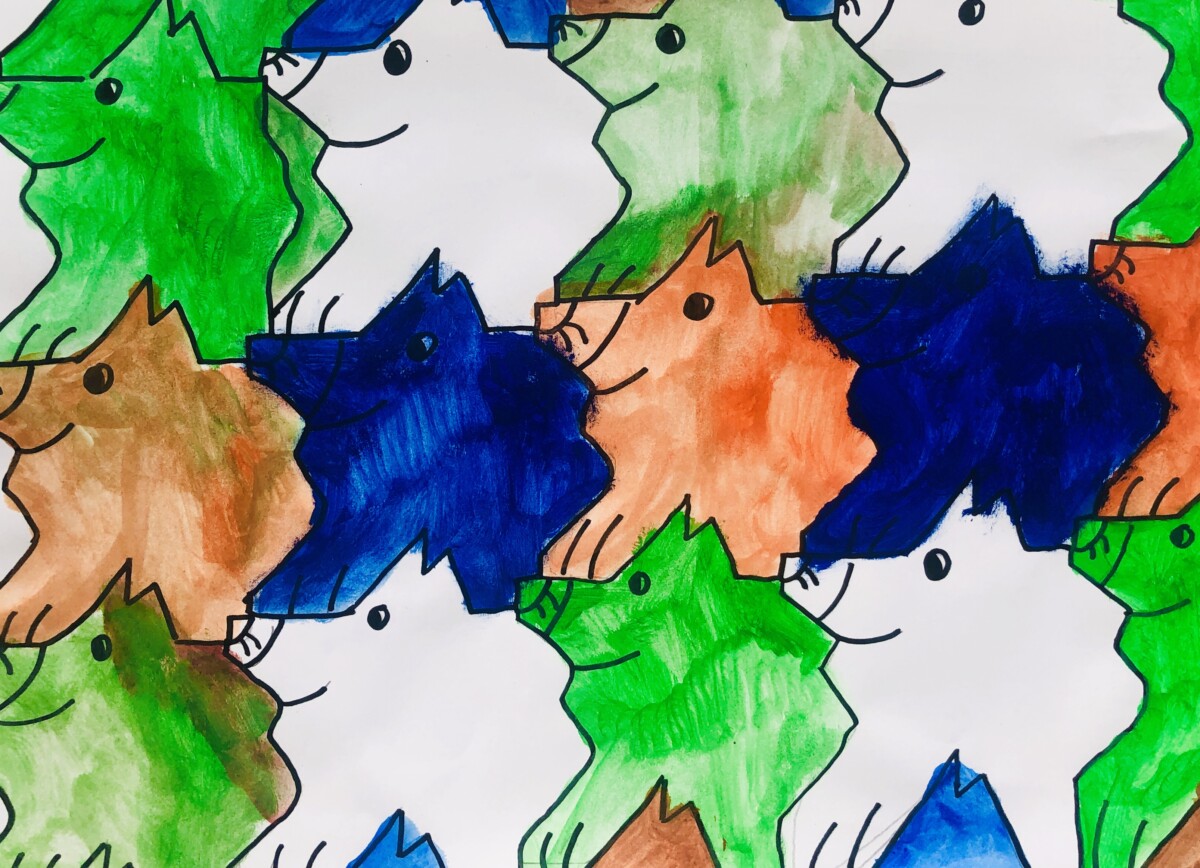
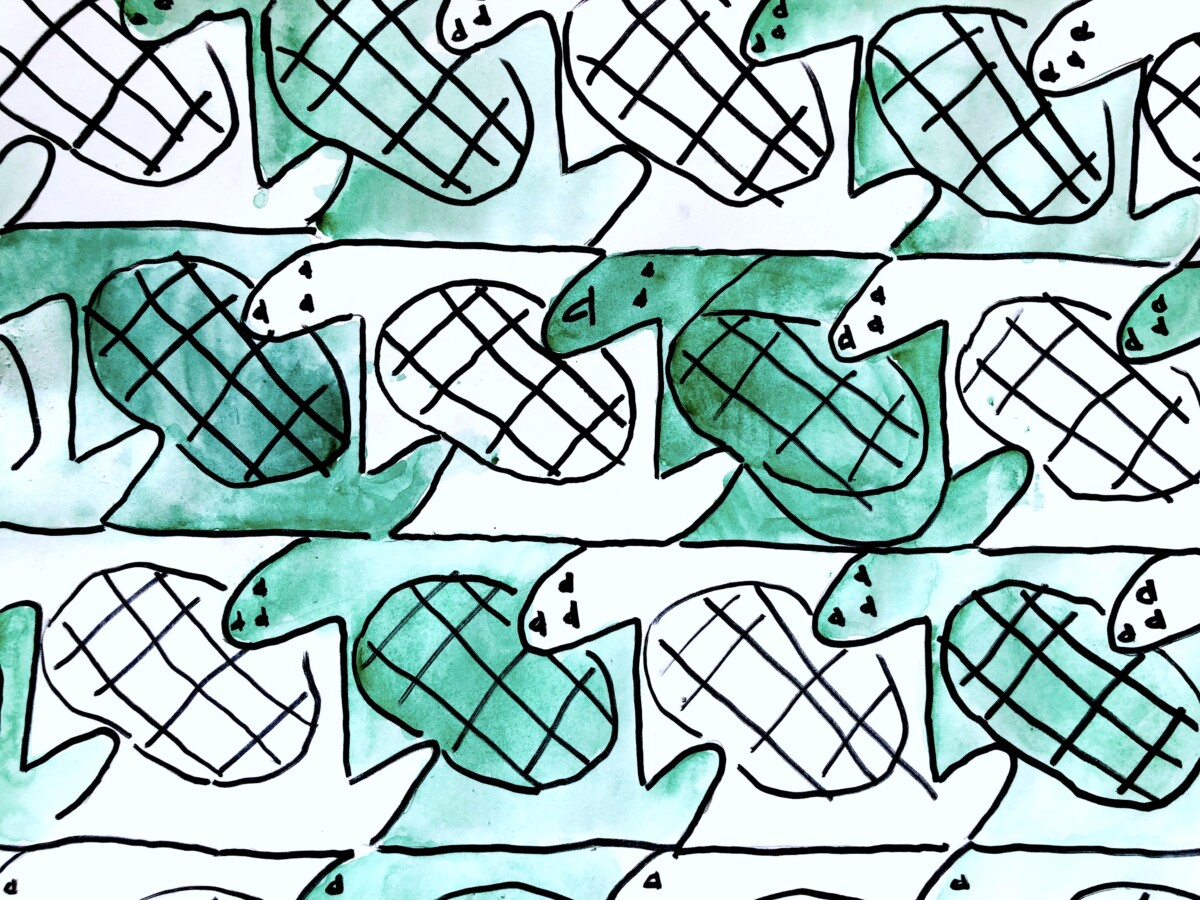
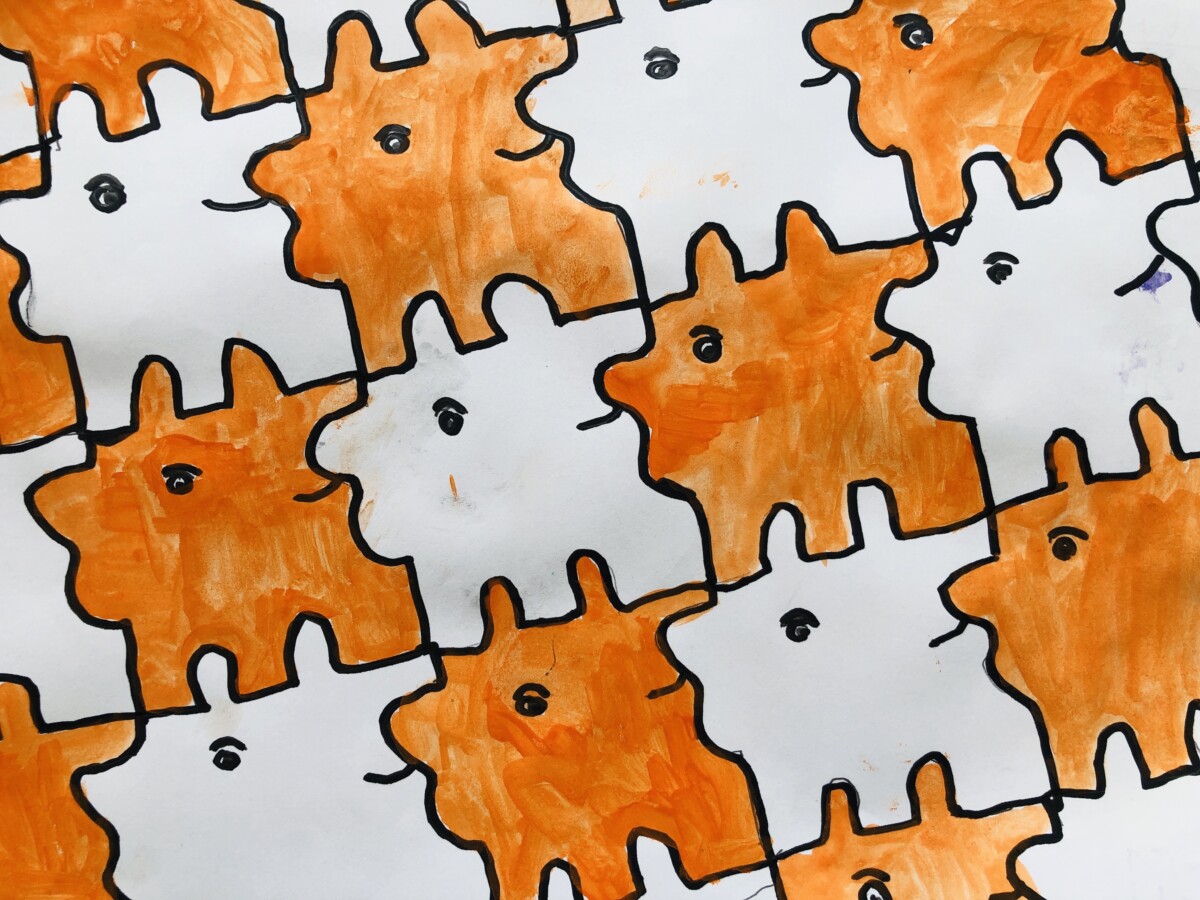
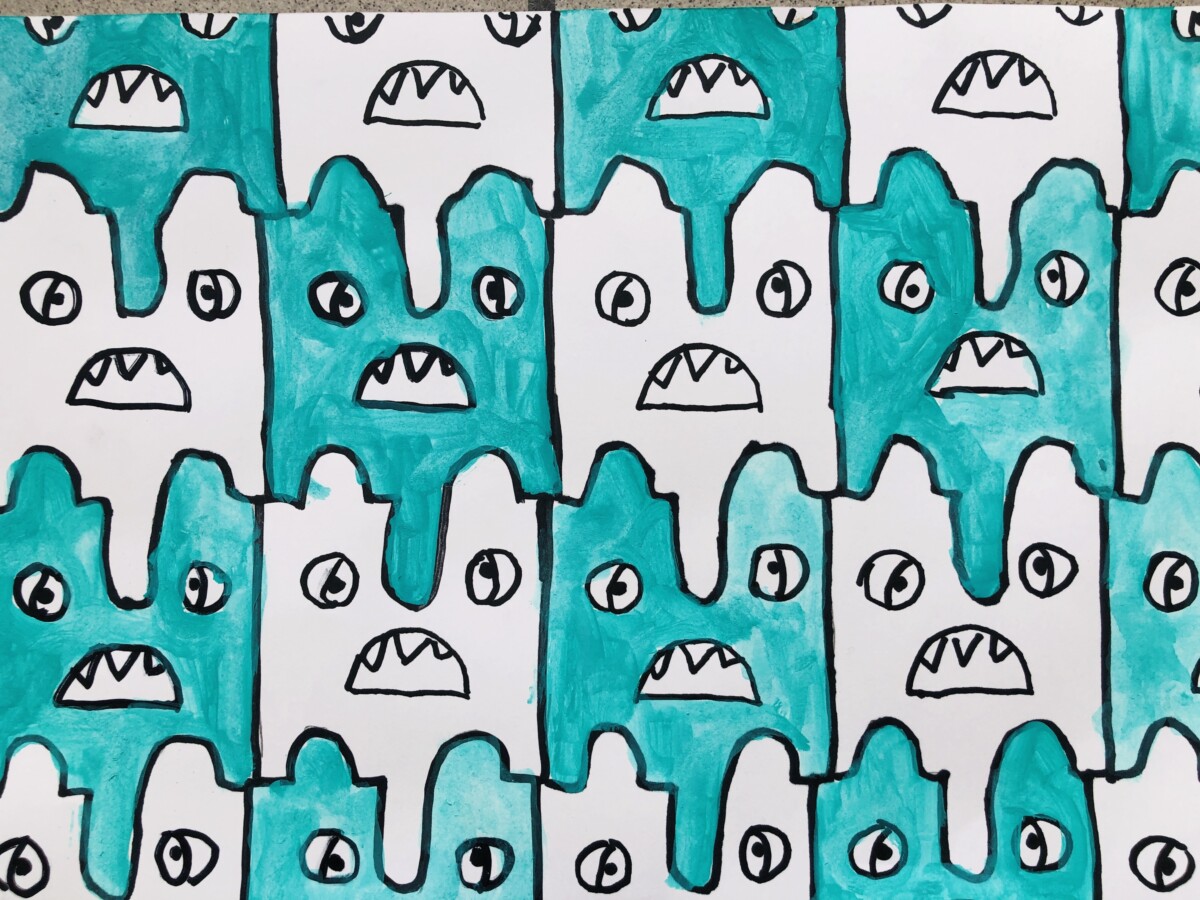
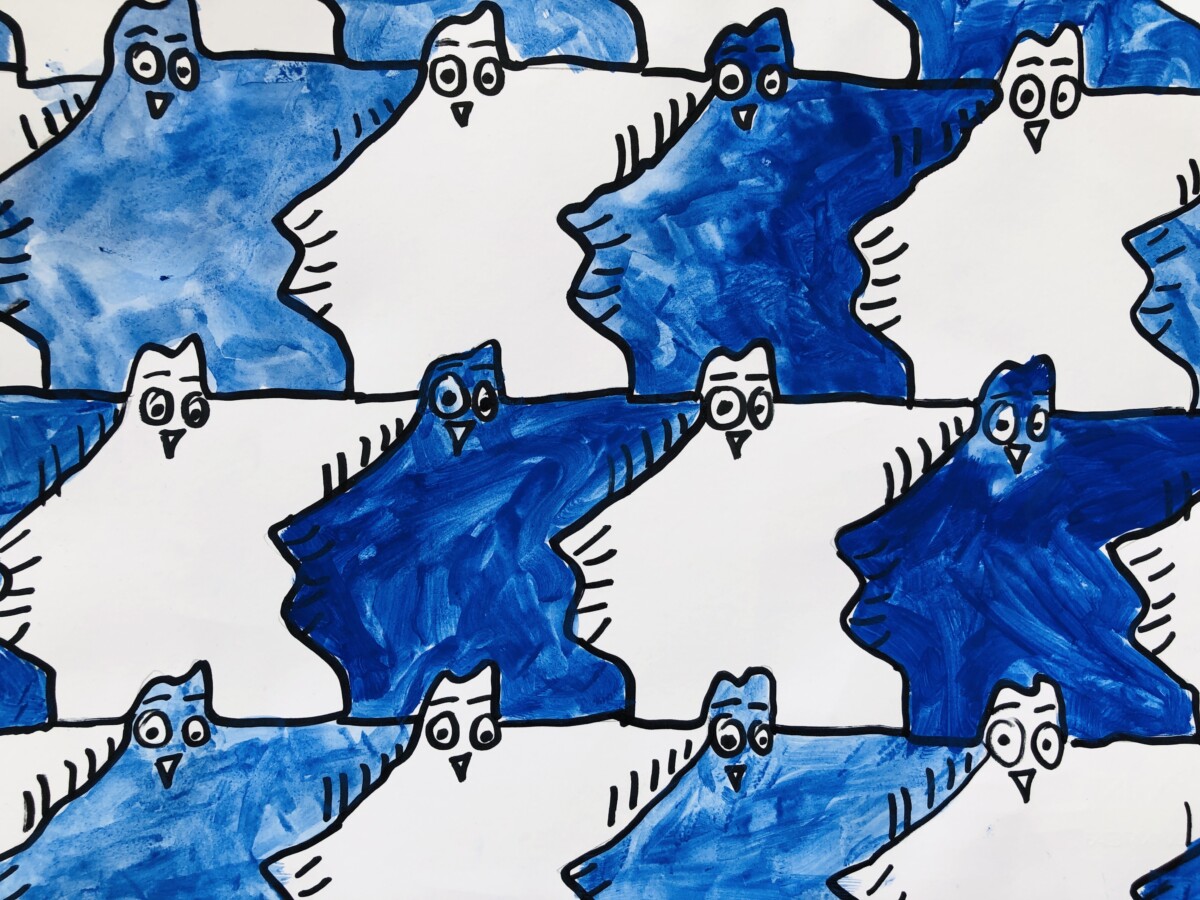
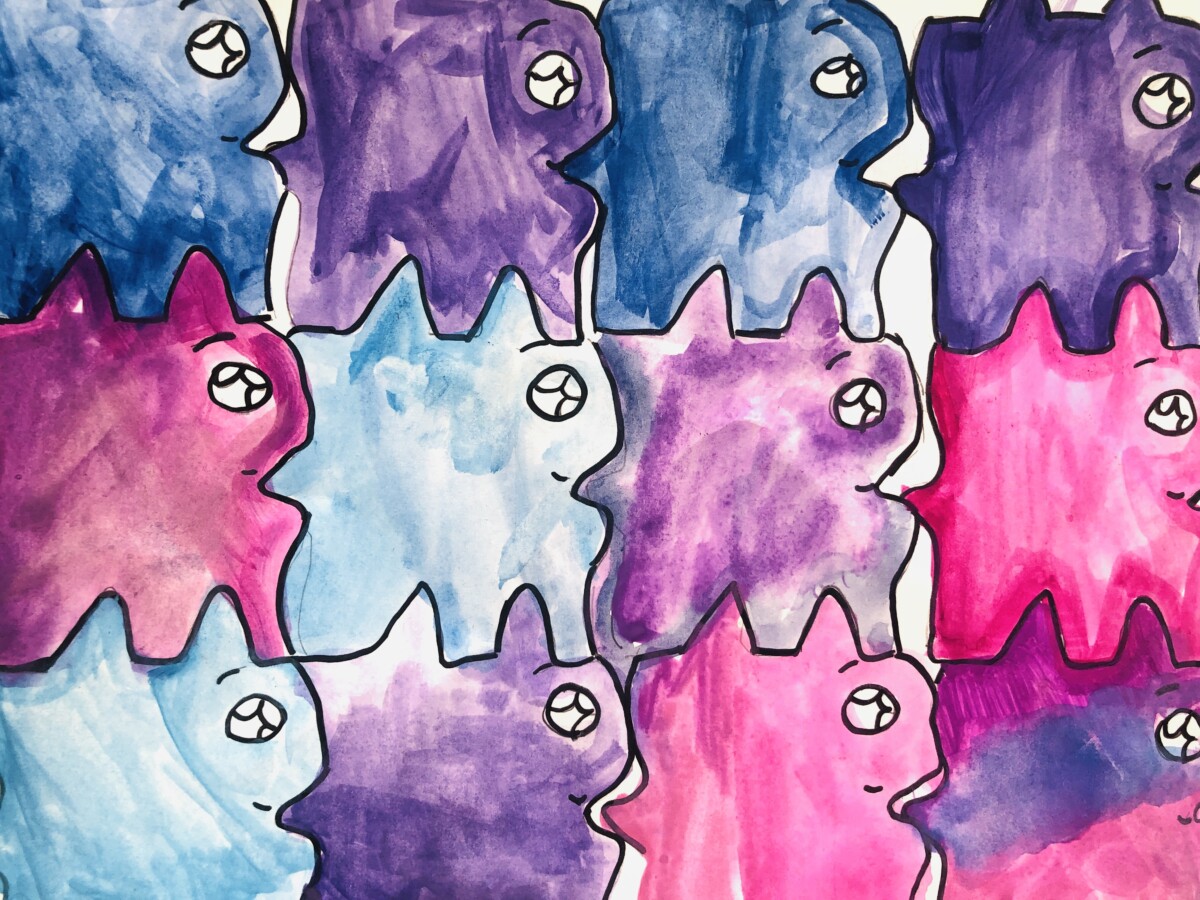
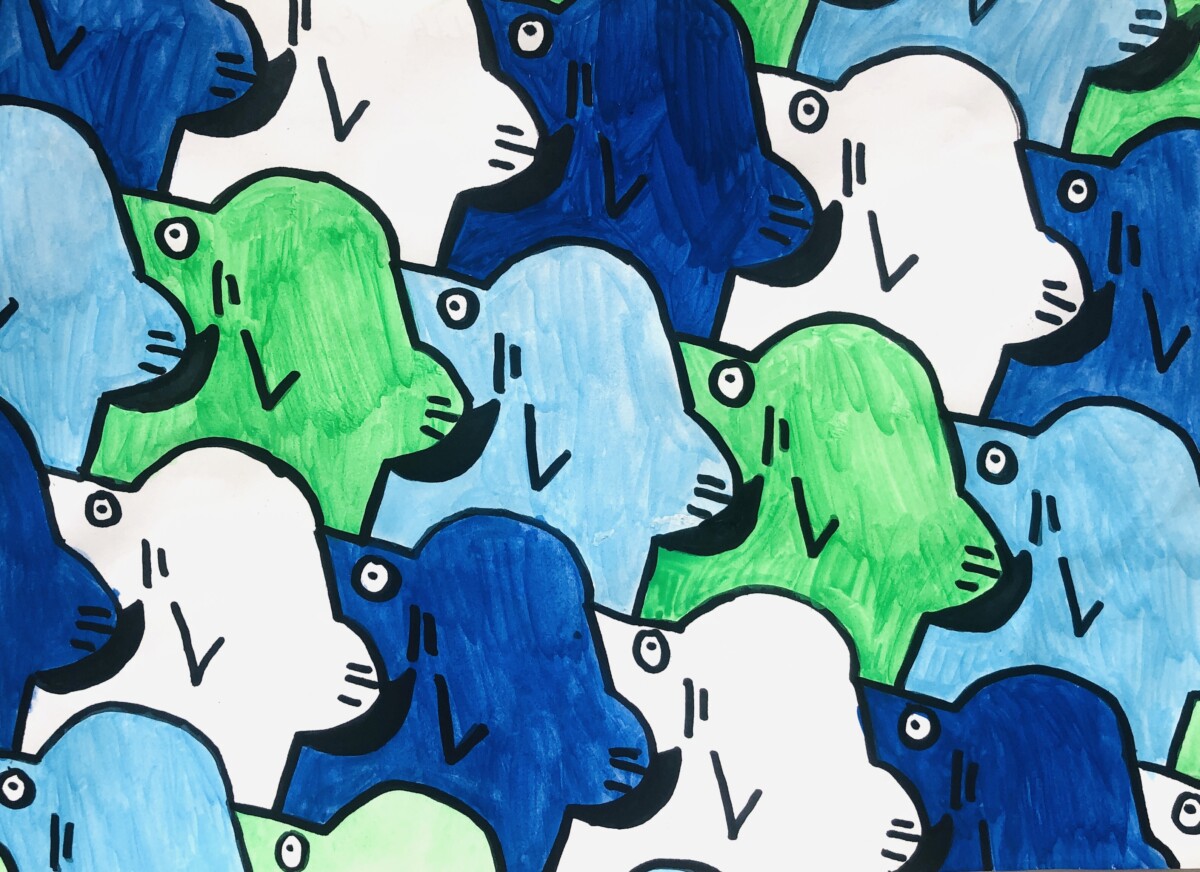
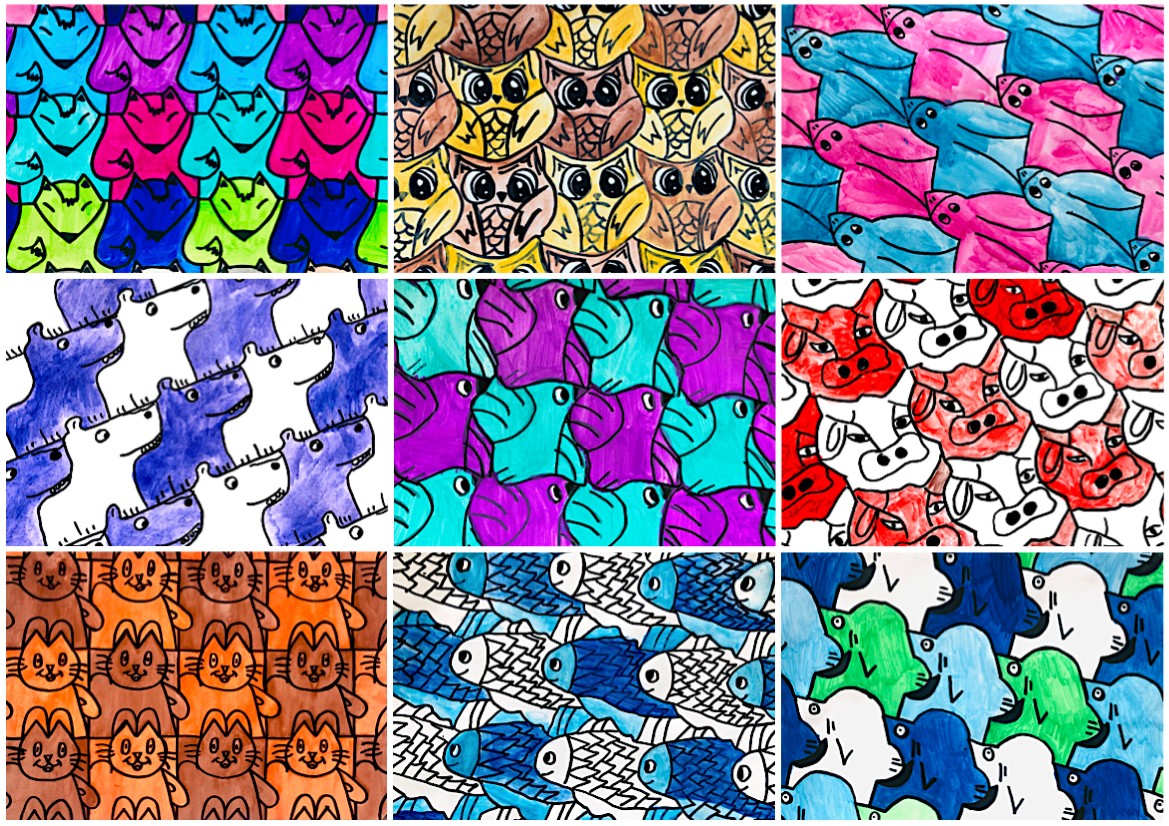
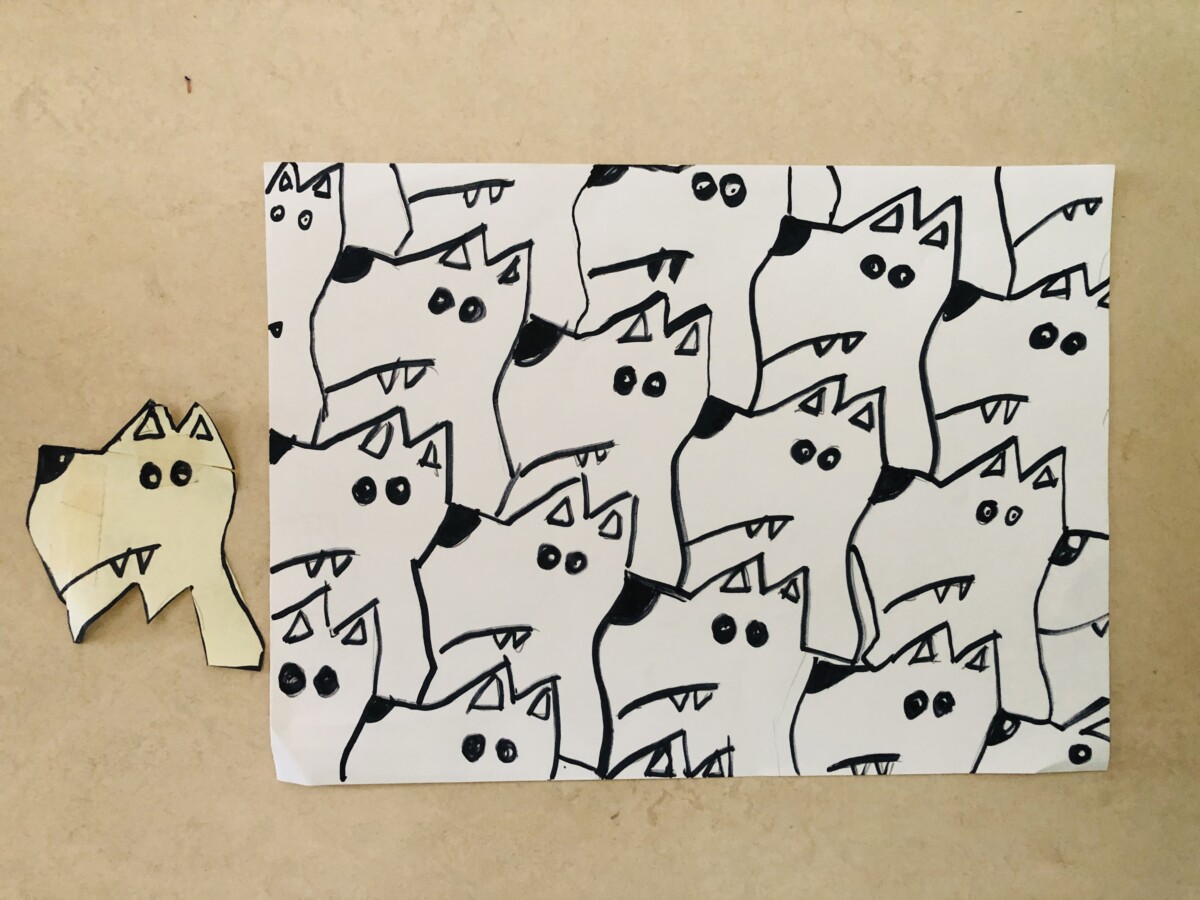
Here are the finished tessellations with funny animals, I like them all!