
Installing the heat sink onto a processor is probably easiest task you can partake in. At the same time, mistakes can occur that may results overheating processor that can cause irreversible damage.
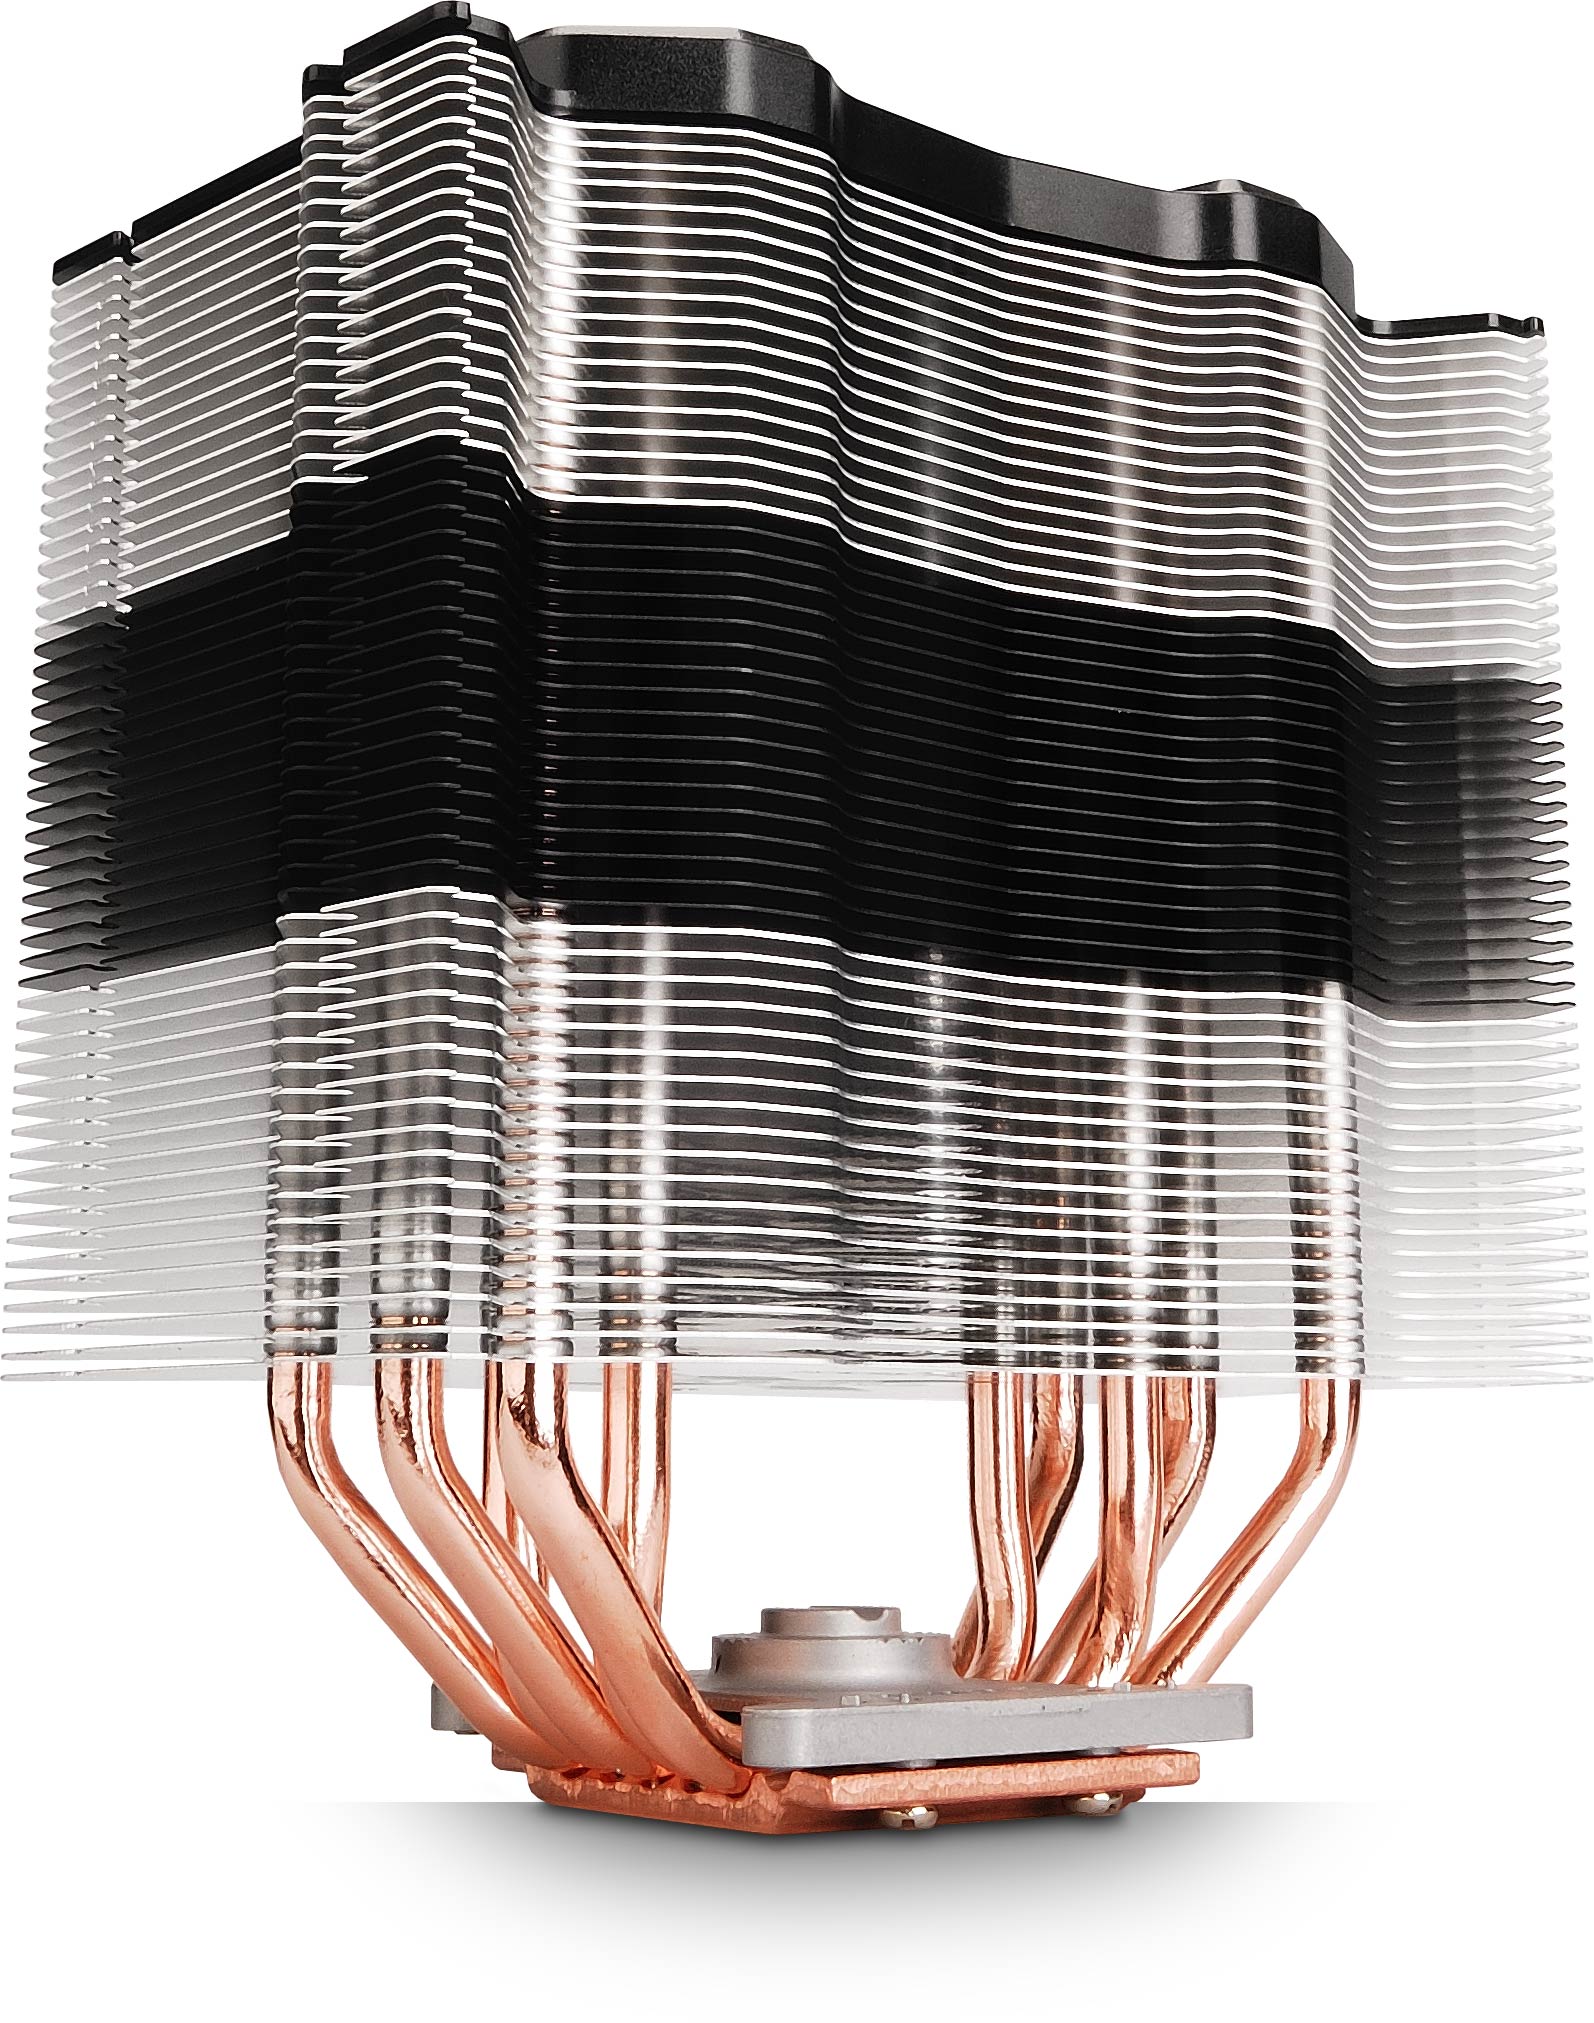
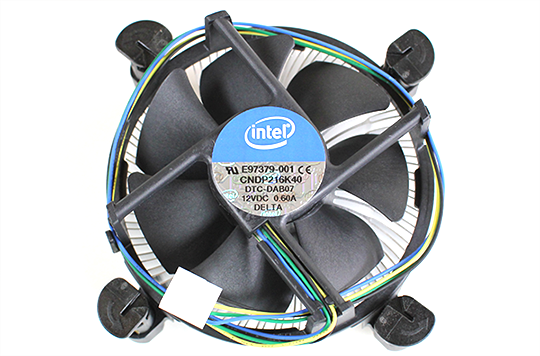
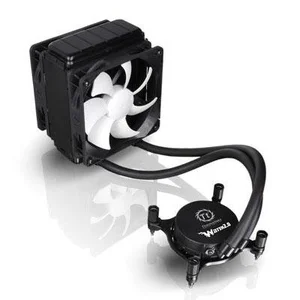
There are three types of Heat Sink, there are the stock heat sink that comes with your processor. The after market heat sink. And finally there is the close loop liquid cooler.
All three heat sinks follow the same step by step installation guideline. What type of computer you are building will determine what heat sink you'll end up purchasing. Usually the after market and close loop liquid coolers are geared toward those building a high end system with intent on overclocking processor,pushing it to the max requires that you have a real good heat sink that'll dissipate extreme heat from your processor.
Prior to Installation
Before placing your heat sink over the processor you have to apply a thermal (Thermal Grease) compound onto the processor. Thermal compound is a interface that goes between the heat sinks and processor or any other heated sources. This gives a strengthen bond between the heat sink and processor,eliminating any air gaps and spaces.
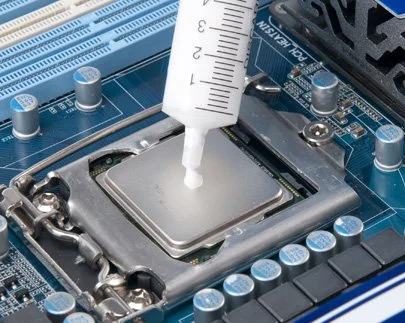
When you apply the Thermal Compound to the processor, you don't need to paste thermal compound all over the processor. Just apply a little bit that's the size of a small green pea. Applying too much will result in the paste leakage that can cause a mess on the motherboard. Too much Thermal compound will not allow proper transfer of heat between the top of the processor and bottom of the heat sink.
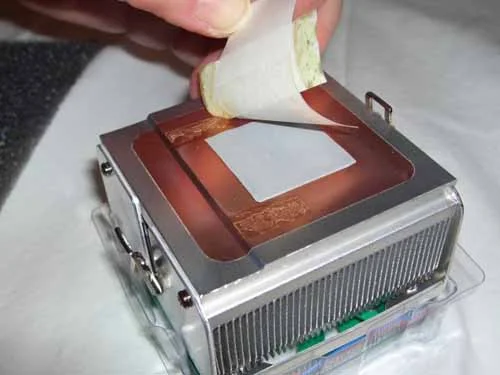
There some Heat Sinks by default have thermal compound that's pre-applied and will have a plastic covering on it that needs to be removed before you apply the heat sink onto the processor. Make sure you peal the plastic off,not doing so will effect processors temp, this will display higher than normal temp reading.
Time For Installation
Before you place the Heat Sink in top of the processor,make sure the processor doesn't have any dirt or dust. If it does take a clean paper towel,apply a little bit of alcohol and gently wipe off the processor.
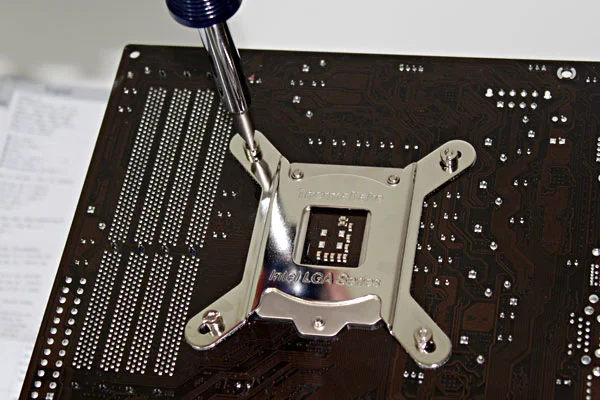
If your heat sink came with a back plate,attach it to the rear portion of your motherboard right where the CPU socket is, both AMD and Intel Heat Sinks should have a back plate.
Carefully attach the supplied bracket to the socket,try not to be so rough because the bracket can easily snap in half. If you by chance you purchased a Intel stock cooler just set the Heat Sink right on top of the CPU and here's the clincher: CAREFULLY PUSH THE PINS into the back plate hole with a twisting motion.
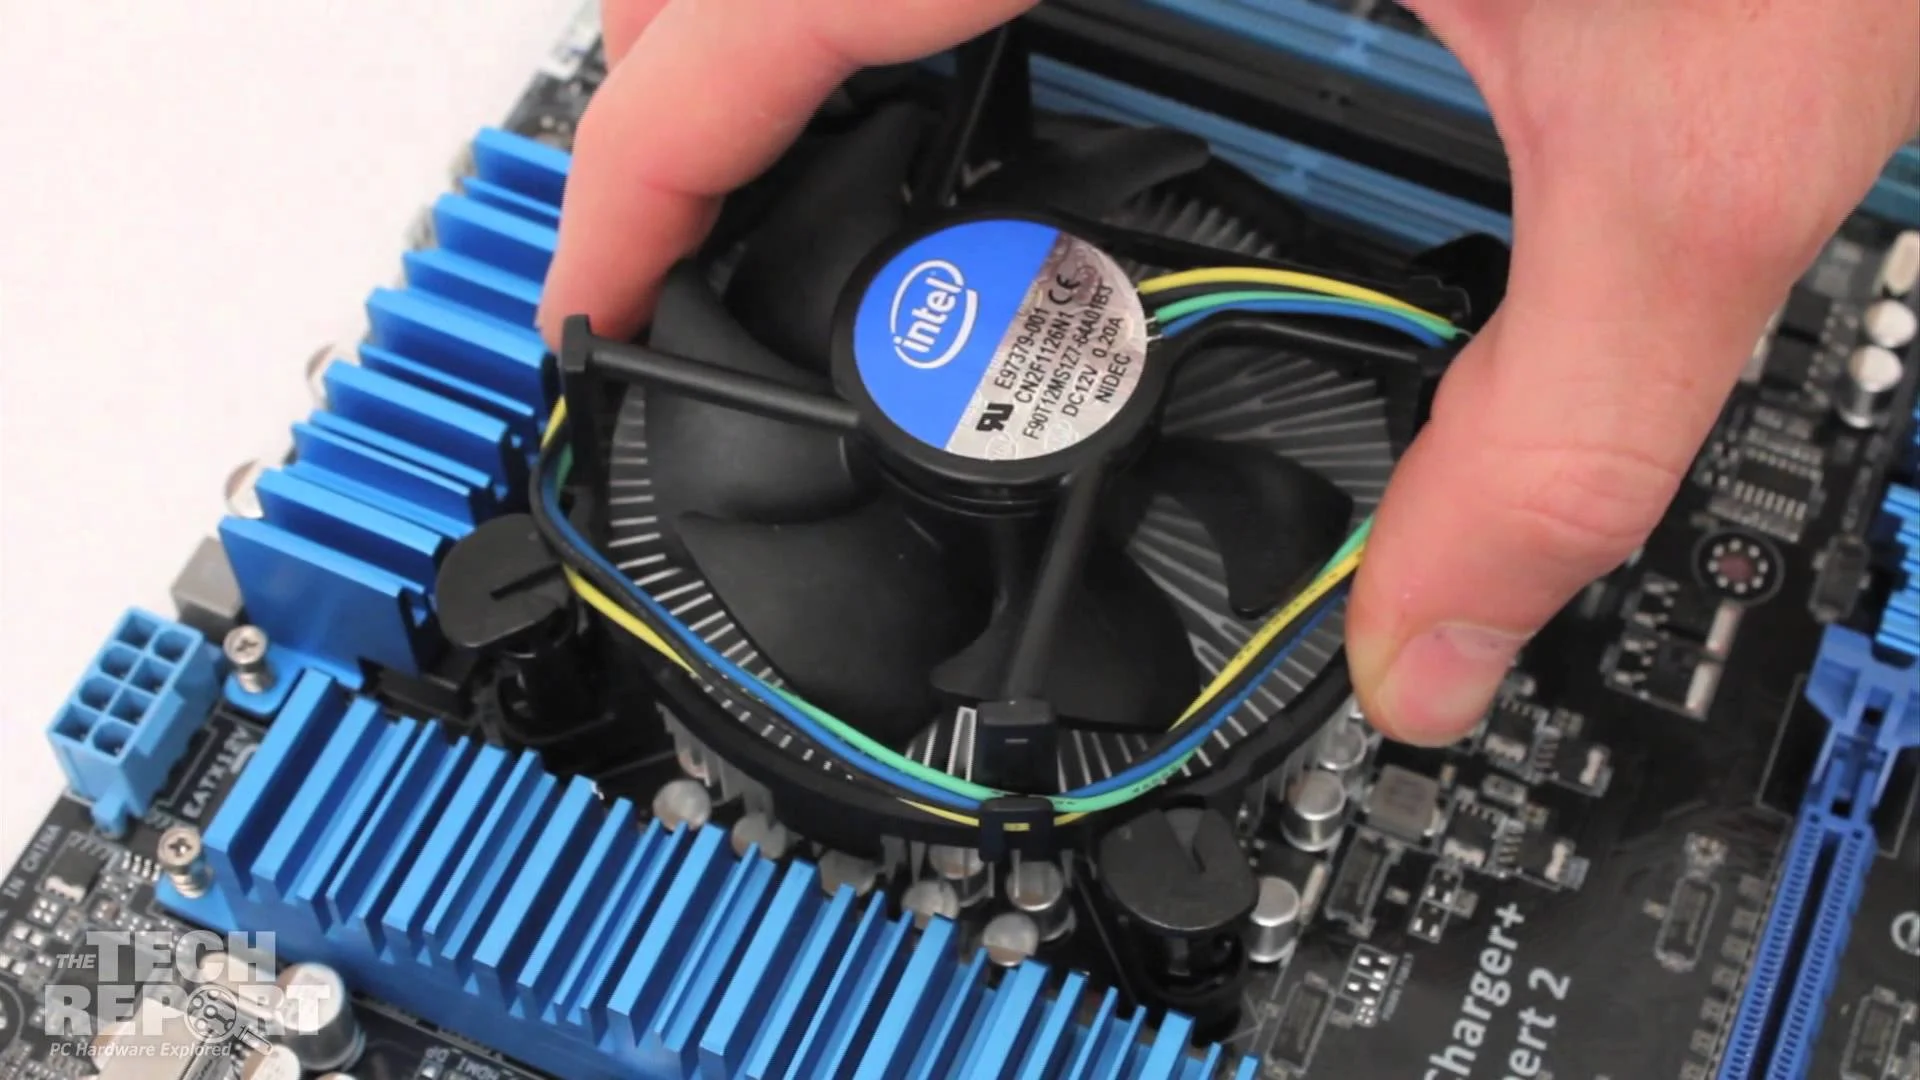
The brackets that I mention in the paragraph prior once its installed set the Heat Sink onto the CPU and attach the latches or screws needed to hold the Heat Sink in place.
Now you need to snugly attach the Heat Sink on top of the CPU with of course a nice gentle twist of hand resist movement, don't over tighten the screws,that can cause a crack on the motherboard. There's a power cord from the fan that needs to be connected to the CPU_FAN header which is located right next to the CPU socket. Its very important that the fan header is used correctly because it is controlled by the bios,if the bios does not sense the fan is connected it will display a error message when you boot up your computer.
What about close loop coolers?

Most system builders today are using closed loop liquid coolers which is very popular with high-end gaming system. You basically follow the instructions that came with your purchased cooler for the placement radiator. The attached cooler head goes right on top of the CPU, just like with the heat sink,Thermal Compound needs to be applied to the processor.