
Nintendo World Class Service

NES Test Station
Nintendo World Class Service Repair Centers used a tool called the NES Test Station to diagnose customers’ Nintendo Entertainment System hardware and software issues. The nearly 40-pound device tests various functions of controllers, Zappers, R.O.B.s, Power Pads, RF adapters, A/V cables, AC adapters, video outputs, audio outputs, and cartridges.

(Image used with permission from Darren Chase)
This specific model was found by Darren Chase, who graciously donated the pictures and information. He says a friend of his bought it from a Nintendo of America auction.

A blurb about Nintendo’s World Class Service Centers, including the Test Station. (Image source: Nintendo Power)
AC TEST

(Image used with permission from Darren Chase)
AV TEST

(Image used with permission from Darren Chase)
CONTROLLER TEST

(Image used with permission from Darren Chase)
RF SWITCH TEST

(Image used with permission from Darren Chase)
ADDITIONAL PICTURES

(Image used with permission from Darren Chase)

(Image used with permission from Darren Chase)

(Image used with permission from Darren Chase)

(Image used with permission from Darren Chase)

(Image used with permission from Darren Chase)
Nintendo Entertainment System Test Cartridges
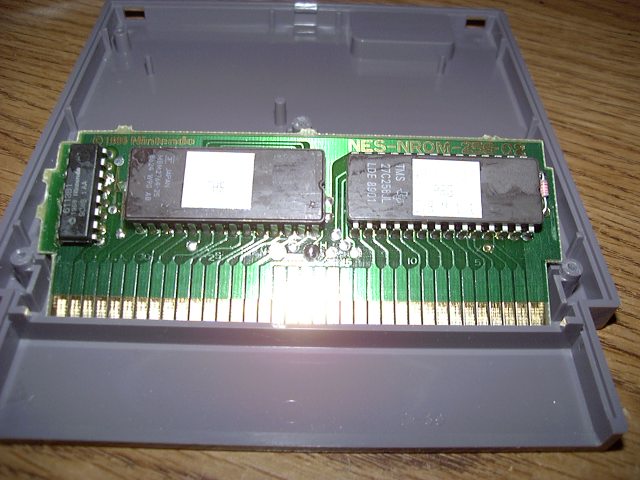
Nintendo shipped various special EPROM test cartridges to Nintendo World Class Service Repair Centers all over the country. They were used to run hardware tests to diagnose video RAM, colors, control ports, and joystick problems.
- NES Control Deck Test

(Image used with permission from Jason Hahn)

(Image used with permission from Jason Hahn)
The above pictures show the EPROM chips inside of two Nintendo Entertainment System Control Deck test cartridges.
Listed below are more pictures and information of some of the other test cartridges that were used by Nintendo World Class Service Repair Centers.

The NES Test goes through RAM, color, joystick, and control tests. An “OK” appears if the system passes the test.


- Power Pad Test

(Image used with permission from Jason Hahn)

(Image used with permission from Jason Hahn)

- NTF2 Test

(Image used with permission from Jason Hahn)
(Image used with permission from Jason Hahn)


- Port Test

(Image used with permission from Jason Hahn)

(Image used with permission from Jason Hahn)

- Joystick Test

(Image used with permission from Jason Hahn)

(Image used with permission from Jason Hahn)


Game Boy Test Cartridge


This gigantic Game Boy Test Cartridge (marked “VER 1.1” at the bottom of its DMG Start Test menu) tests the handheld system’s video RAM, work RAM, CPU RAM, and CPU functions.

Pressing Start fills the screen with different colors.

Then Raccoon Mario sprites from Super Mario Bros. 3 walk around a column counter-clockwise.

Next, the screen changes to show Japanese characters, English letters, and numbers.

The program ends with the title screens from Super Mario Land and Alleyway appearing. These tests loop over and over again as a timer runs in the background.

The internal ROM header name for this Test Cartridge is “DMG AGING TEST,” which corresponds to the ©1989 DMG-AGING-01 circuit board inside.

Super NES Control Deck Tester

The Super NES Control Deck Tester is inserted into the cartridge slot of a Super Nintendo and runs tests to ensure that the system is working properly. The attached cords plug into the controller ports so that the technician can use the Back and Next buttons, which are located on top of the Control Deck Tester, to cycle through the various tests.

The side of the unit contains a multi-out output, white and red audio outputs, a video output, and an RF output (labelled “CLOCK”).

The Super NES Control Deck Tester’s Part No. is 23240.
When starting up, the Control Deck Test first runs a self-check test to verify that everything is functioning as it should. If this test passes, the technician is instructed to push the Next button.
A sound function test then occurs.
After another Next prompt, a video test shows character sprites of Dr. Mario, Bullet Bill, and Big Boo moving around the screen. A second object test has Mario walking to the left and then stopping to give the peace sign. This test concludes with a large sprite of Princess Toadstool being flipped, twisted, and turned upside down.
Pressing Next again runs another video test that fills the screen with color-changing block patterns. After that, Super Mario All-Stars and Super Mario World elements scroll across the screen on an outdoors Mario level. The screen changes once more, displaying numerous Super Nintendo logos. Finally, a photo of a brunette woman appears as a 16-bit remix of the Zelda II: The Adventure of Link title screen music plays in the background. This unknown woman’s portrait is pixelated and changes colors.
Hitting Next triggers yet another video test. This time, the Japanese Family Computer’s Super Mario Bros. 3 box artwork rotates 360 degrees. Then Nintendo’s logo bounces sideways and is zoomed in and out against blue and white backgrounds as more music plays.
Afterwards, the technician is instructed to “Push RESET.” Doing so brings up a black screen with the words: “TEST END ©1991 Nintendo.”
Super Nintendo Burn-In Cartridge
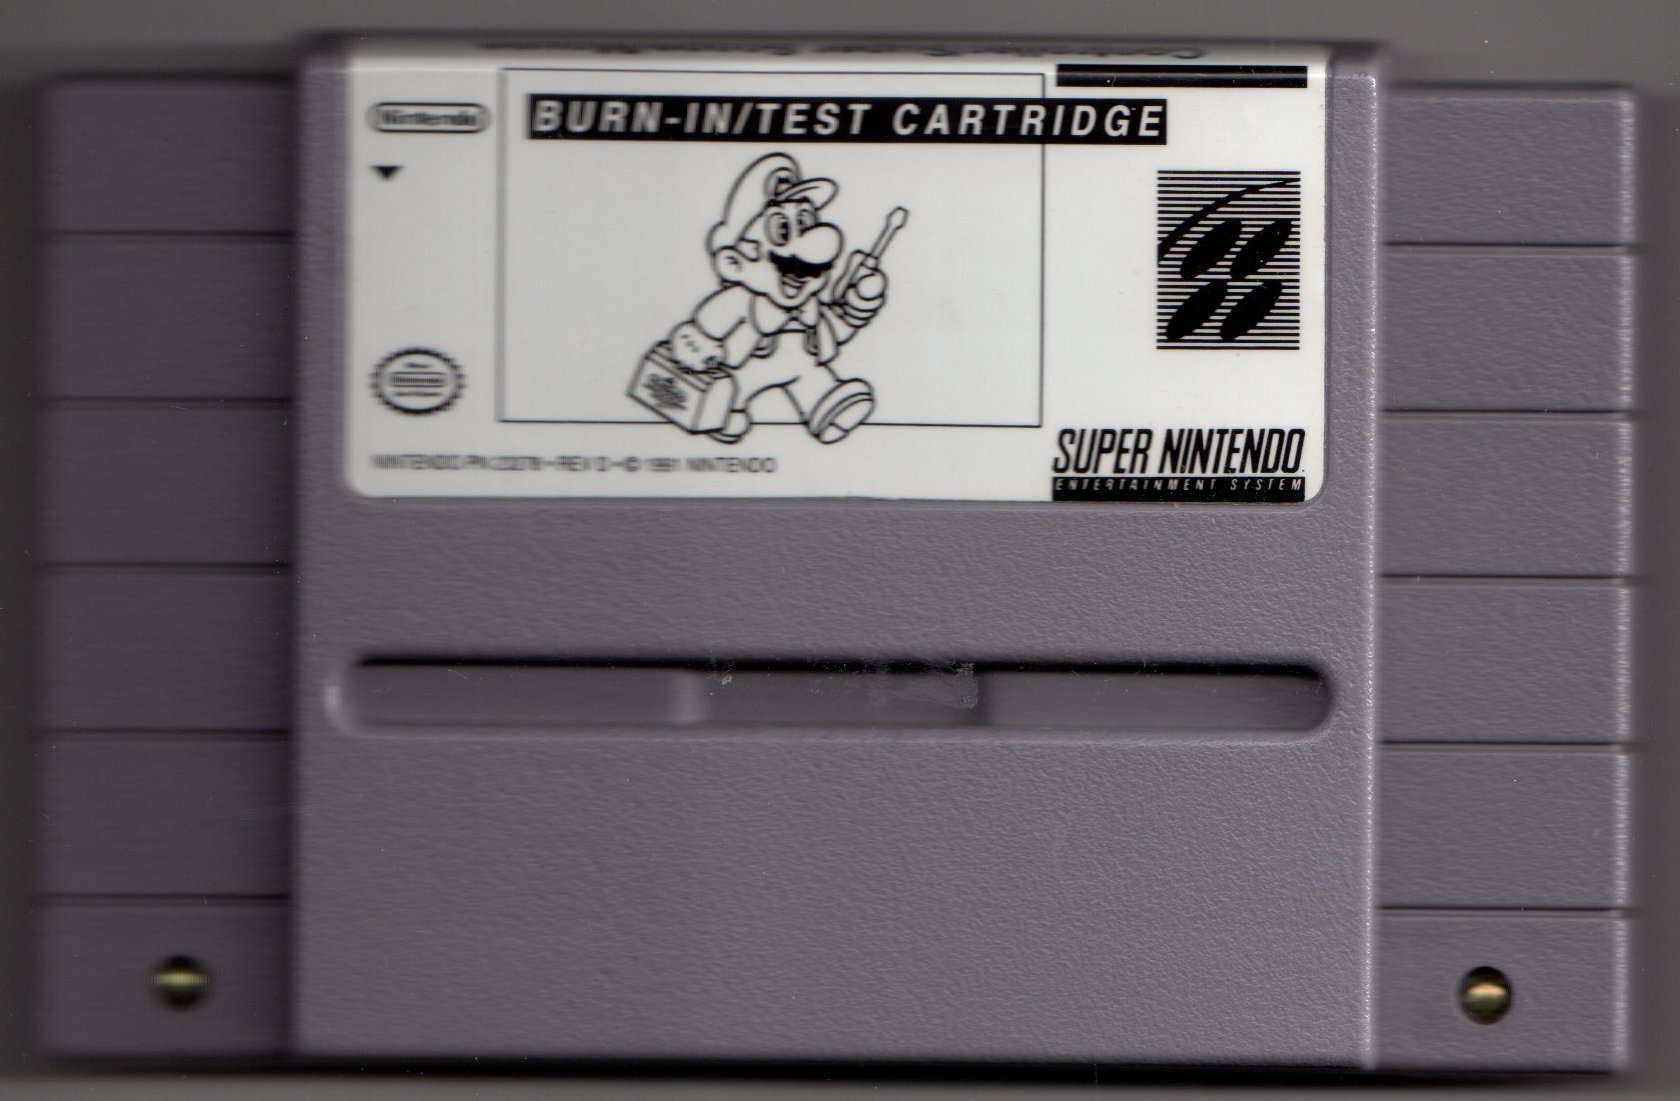
Nintendo World Class Service Repair Centers would insert the Super Nintendo Burn-In Cartridge into a Super Nintendo console to run five different diagnostic tests:

- Controller Test
- Sound Module Test
- Super Scope Test
- Super NES Test
- Burn-In Test


")
")
")